Table of Contents
This practical guide walks through how to change date and time on Windows 11, explains the main requirements, and highlights common issues that may appear along the way.
Set date and time manually in Windows 11
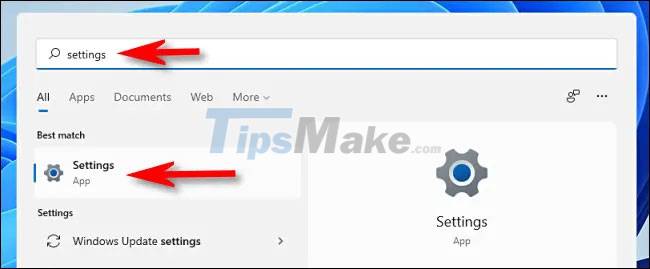
First, open the Windows Settings application by pressing the Windows + i key combination. Or you can also open the Start menu, search for the keyword 'Settings', then click the gear icon in the corresponding results.
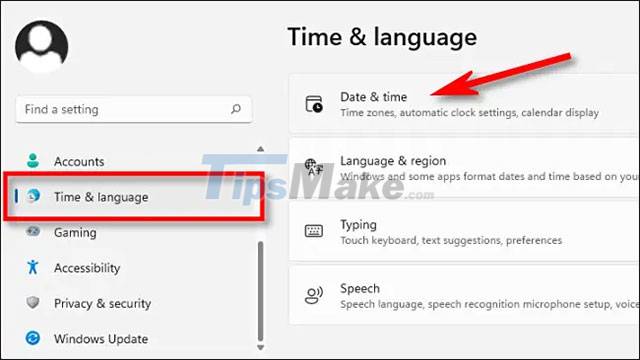
The Settings window will open. Click on 'Time & Language' in the list on the left, then select 'Date & Time'.
On the Date & Time settings screen, click the switch next to the 'Set Time Automatically' option to switch it to the 'Off' state.

Next, scroll down to find the 'Set the date and time manually' option and click 'Change'.

The 'Change Date and Time' window will appear. Here you use the drop-down menus to set the desired date and time, then click 'Change'.

Changes you make will take effect immediately. If you also need to change the time zone manually, just tap on the 'Time Zone' entry and choose an option you want.
Once the installation is complete, close Settings.
Set date and time automatically in Windows 11
As mentioned, by default, Windows 11 automatically gets the time from the Internet. But if you've previously disabled the feature, it can be easily re-enabled by doing the following:
First, make sure that your Windows 11 PC is connected to the Internet. Then open the Settings app.
Click 'Time & Language' in the list on the left, then select 'Date & Time'.
On the Date & Time settings screen, click the switch next to the 'Set Time Automatically' option to switch it back to the 'On' state.
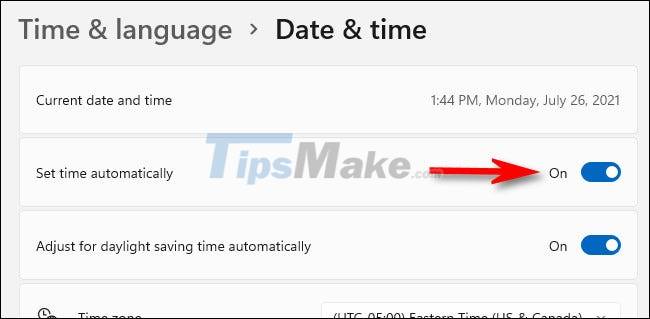
Now make sure your time zone is set to the right value using the 'Time Zone' drop-down menu.
Then scroll down to the 'Additional Settings' section and click 'Sync Now'. This will force your Windows 11 PC to update the date and time on its own to match the Windows time server.
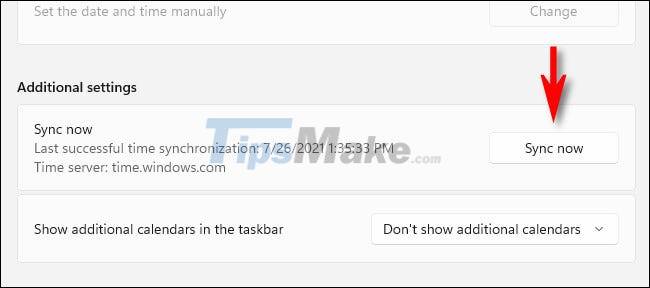
The date and time on your system will now be updated automatically. It's all as simple as that!
Key Takeaways
Use the information above as a practical reference for how to change date and time on Windows 11. Review each step carefully, confirm any requirements, and choose the option that best fits your situation.
FAQ
What does this guide explain about Change Date and Time on Windows 11?
It explains the main concepts, practical considerations, and useful steps related to change date and time on Windows 11 without requiring advanced knowledge.
Who can benefit from learning about Change Date and Time on Windows 11?
This information is useful for readers who want a clear overview, practical guidance, and reliable steps related to change date and time on Windows 11.
What should I check before applying this information?
Review the requirements, confirm that your device, software, or situation matches the instructions, and back up important data before making major changes.
Related Articles
 How to Change the Date and Time Format on Windows, Change the Slash to a Dot10 minutes read
 How to Change Time, Date and Month in Windows 10?5 minutes read
 How to Change Date and Time Manually in macOS4 minutes read
 How to Change the Date and Time Format on Windows?7 minutes read
 The Easiest Way to Adjust the Date and Time on Windows 115 minutes read
 How to Adjust Time on Windows 10, Change Day and Month Time4 minutes read
Reader Comments 0
Sign in with email or Google to join the discussion.