How to change time, date and month in Windows 10?
Windows 10 has just been sent by Microsoft for many expectations, as well as getting the user community's expectations for a new, safer, faster, smoother operating system . in short, 1 complete makeover compared to older Windows versions.
However, with the new interface, many users are still not familiar with the operation on Windows 10, such as changing the system date and time on Win 10. Below will guide you how to change the date and time on Windows 10 about the time you want and fix Windows 10 error showing wrong date and time.
Set the appropriate time zone on Windows 10
Step 1: You navigate to Settings> Time & language> Date & time.
Step 2: In the Time zone , select the correct time zone where you live (if you are in Vietnam, you change the Time zone section to UTC + 7 ).

When you change the time zone, the system will automatically change the corresponding display time, no need to press OK or any other buttons.It's convenient, isn't it?
Turn on the auto-time feature
If your computer is currently connected to the internet, you can allow Windows 10 to set the time automatically.Here are the steps to proceed:
Step 1: Open the Settings application. Navigate to Time & language> Date & time.
Step 2: Turn off the Set time automatically option if this option is enabled.Then turn this option on again immediately.

Check if the Windows Time service is running
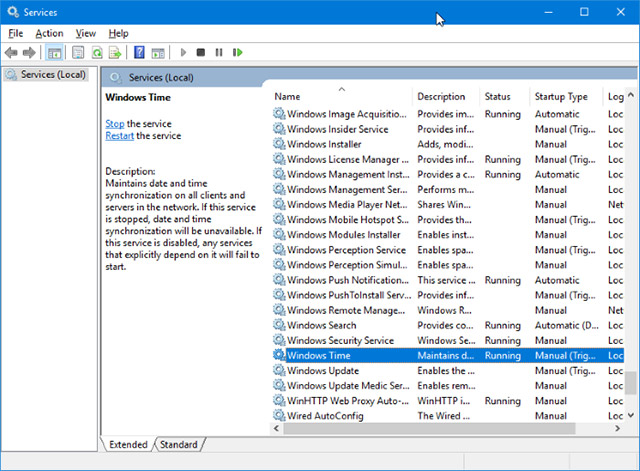
As you know, Windows 10 has a service running in the background called Windows Time to maintain the synchronization between the date and time.To check if this service is running, follow these steps:
Step 1: Open the Run search box, type keywords services.msc and then press Enter to open the Services window.
Step 2: In the Services window, find the Windows Time service and then double-click it to open the Windows Time Properties dialog box.

Step 3: Make sure the service's startup type is automatic and the service status is running . If the displayed service status is stopped , click on the Start button to restart the service.

Set the date and time manually
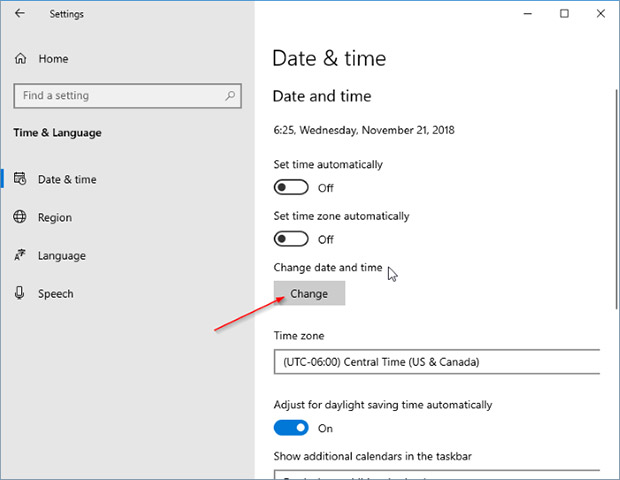
Step 1: Go to Settings> Time & language> Date & time.
Step 2: Turn off the option to set the automatic time ( Set time automatically ). In the Change date and time section , click the Change button directly below.

Step 3: Choose the right date and time.Then click the Change button to proceed to set a new date and time.

Check the CMOS battery
CMOS battery (CMOS battery) is the component responsible for maintaining the correct date and time on your computer even when the computer is turned off.If the CMOS battery is exhausted, your computer cannot maintain the correct date and time.
In this case, please contact your PC manufacturer to know how to replace the CMOS battery.However, replacing a CMOS battery on a desktop computer is also very easy and you can do it yourself.
See more:
- How to type Vietnamese on Windows 10
- How to fix an unreadable, inactive Search Windows 10 error
- Hidden features on Windows 10
Good luck!