Table of Contents
The sections below explain have you tried using the magnifying glass feature on iOS 10 in a clear and practical way. Review the key details, examples, and considerations before applying the information.
Not too much when it comes to iOS 10 is the update of the largest ever Apple feature. From the lock screen interface to the features are changed, upgraded with many other new features. Or come as Camera also added the feature of new magnifying glass.
In previous iOS versions, the brave people were used to the traditional features of the Camera that were taking pictures and filming. When it comes to iOS 10, we will experience the new use of the Camera when it becomes a magnifying glass. For those who want to enlarge small objects, or a certain document, the feature is very useful. The steps below explain how to activate and use the magnifying glass feature on iOS 10.
Step 1
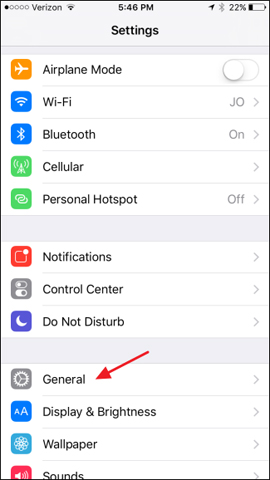
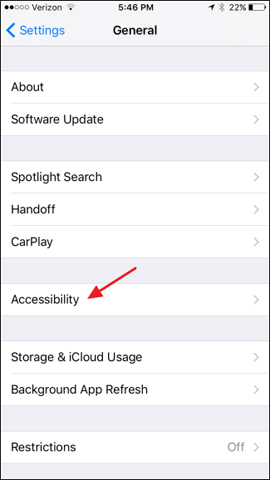
At the main interface, click Settings , then General . In the General interface, click the Accessibility Item.
Step 2
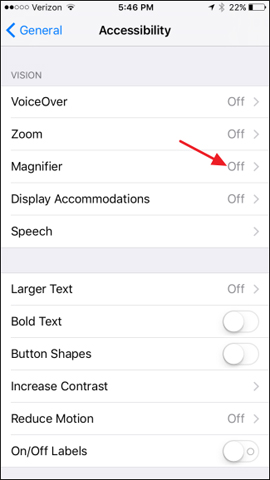
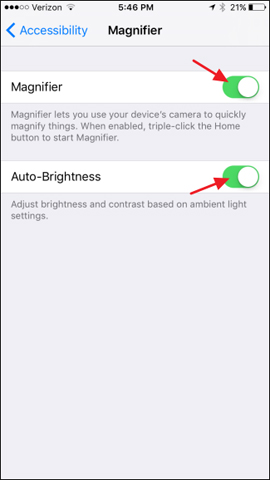
At the Accessibility interface, we will select Magnifier . Next, push the horizontal bar to the right to activate the Magnifier feature. If users needs to adjust the lighting mode, press Auto-Brightness mode (automatically adjust the light mode).
Step 3
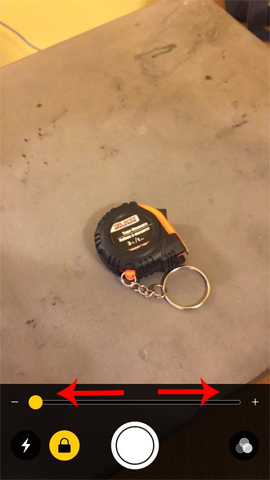
Next, we will Click the Home button 3 times To open the magnifying glass on the camera looking at the text or any object that wants to enlarge. The ability to zoom in on objects with a magnifying glass feature is higher than if you use a normal camera.
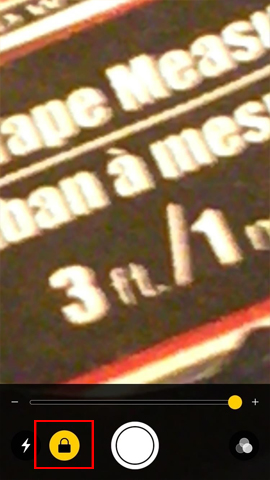
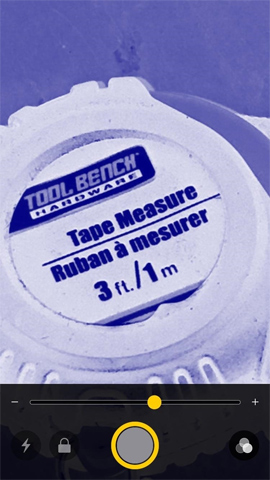
To change the zoom size, we click The zoom bar With The + and - icons At both ends. The Lock Icon is used to lock the zoom level of objects.
Step 4
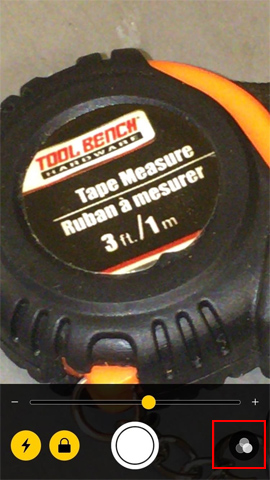
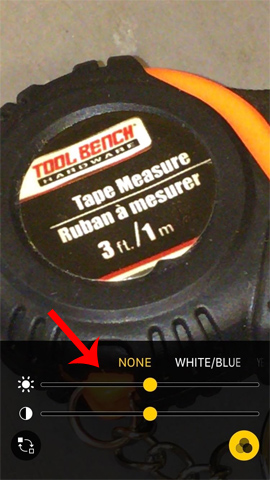
When you click the 3 white circles icon that is inserted to the right, we will have more options for color, light, contrast for the image,. When clicking on the yellow circle icon left, the effect in use will be reversed.
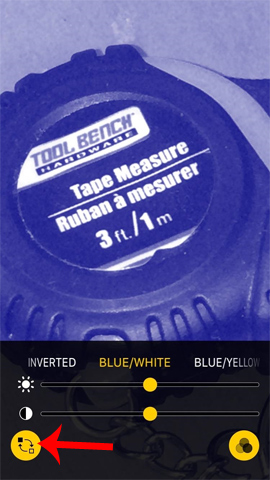
Step 5
When you click the middle capture button, we will see the image in the selected zoom mode. Photos will not be saved to the device as if we were taking regular photos. Click again to cancel viewing photos.
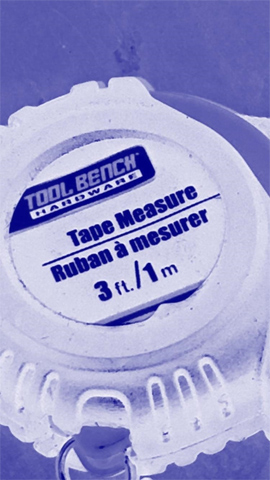
Above is how to activate as well as use the magnifying glass feature on iOS 10. In general, the feature is quite straightforward to use when the adjustment bar as well as the mode are displayed right on the screen. Try the magnifying glass experience on iOS 10 when you zoom in on objects, images or text.
Refer to the following articles
- How to style messages for iMessage iOS 10
- How to save 3G when sending photos via iMessage iOS 10
- 6 simple ways to speed up iOS 10 on old iPhones
I wish you all success!
FAQ
What is the main benefit of have you tried using the magnifying glass feature on iOS 10?
The main benefit is a clearer understanding of the topic and a practical way to apply the information covered in this guide.
What should I check before using have you tried using the magnifying glass feature on iOS 10?
Confirm compatibility, review the required settings, protect important data, and use the latest supported version whenever possible.
What should I do if the result is different?
Repeat the steps carefully, verify permissions and version differences, and consult the product's official support documentation for changes not shown in the article.
Related Articles
 How to Disable Liquid Glass in iOS 26 on iPhone6 minutes read
 Google Glass Has a New Boss: Google Glass Smart Glass3 minutes read
 What Does Toughened Glass Do That Hard: Tempered Glass4 minutes read
 Successfully Fabricated Flexible Glass, Which Can Only Be Bent3 minutes read
 Did You Know: What Do Auto Glass Do without Breaking When4 minutes read
 Rounded His Eyes to See the Bullet Shatter When Shot at the Glass3 minutes read
Reader Comments 0
Sign in with email or Google to join the discussion.