Table of Contents
This practical guide walks through how to round the Corners of a Selection in Photoshop Is. It organizes the required steps, settings, and checks so you can complete the task with fewer mistakes.
Photoshop Tools allow you to be flexible in using tools to make your working process easier and more convenient. Among them, Rounding selection corners in Photoshop Is a good tip that many people will probably use. pay no attention.
How to Round the 4 Corners of an Image in Photoshop
Step 1: Open the image with Photoshop . - Note: If the image is layer locked, you need to unlock it by clicking on the lock image in the Layer menu. Step 2: Select the key combination Ctrl + A To select the entire image.
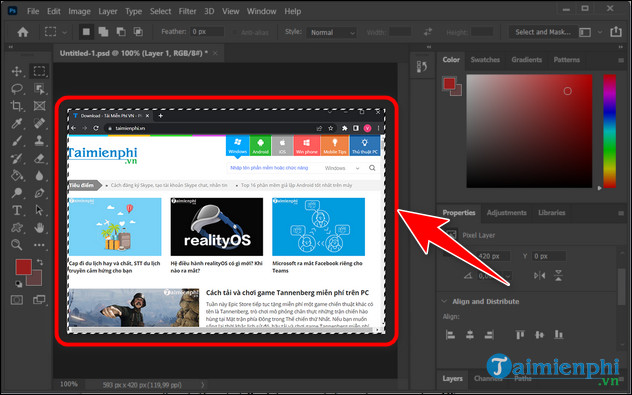
Step 3: Open Select , select Modify => Border .
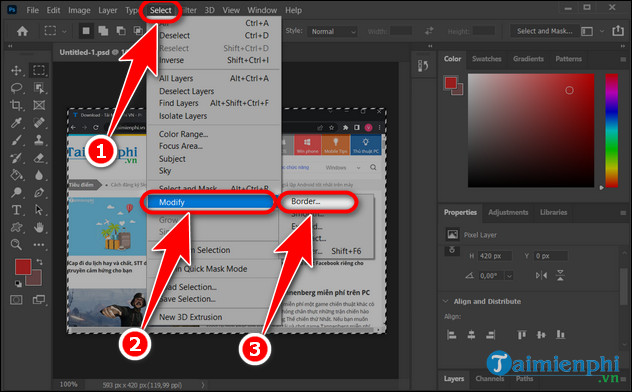
Step 4: Adjust Pixels , can default to 1.

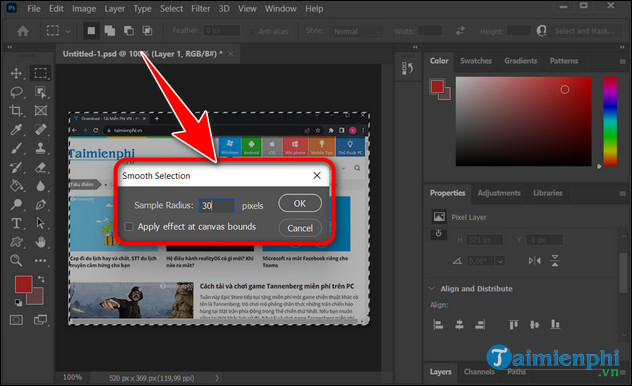
Step 5: Return to Select => Modify => Smooth To start rounding the selected area.

Step 6: Adjust The Pixels Corresponding to the rounded corners you want and select OK . - Note: The larger the pixels, the higher the rounded corners, you should adjust accordingly to have a beautiful photo.
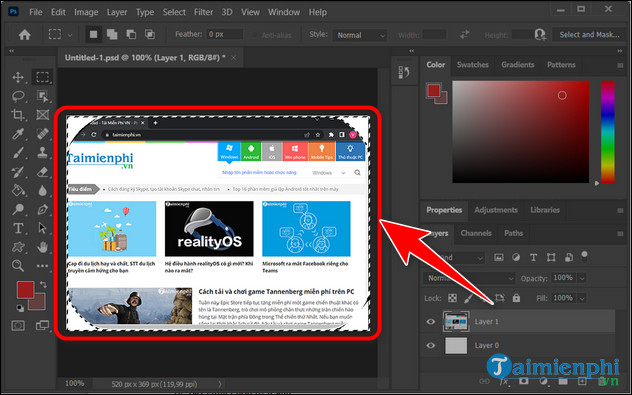
Step 7: Select the Delete Key to delete the excess outside the rounded corner. You will get the following result.
How to Create Rounded Image Areas in Photoshop
Step 1: Open the image in Photoshop . Step 2: Select the Rectangular Marquee Tool (shortcut key M), then use the mouse to create a selection on the image.
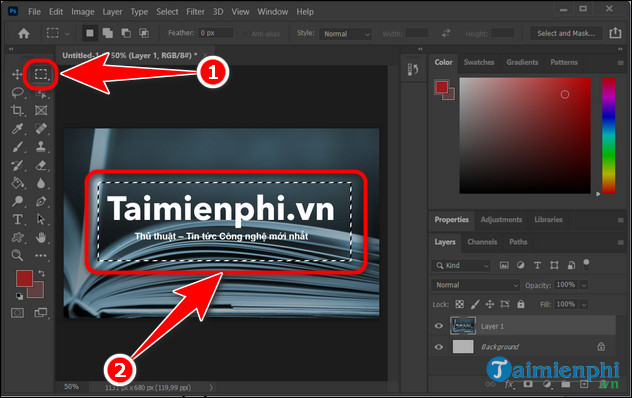
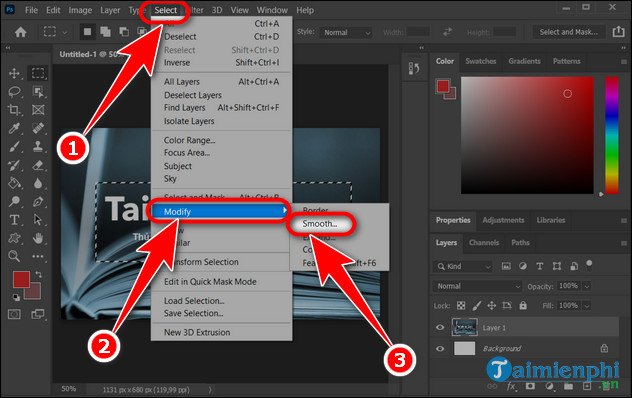
Step 3: Open Select => Modify => Smooth ..
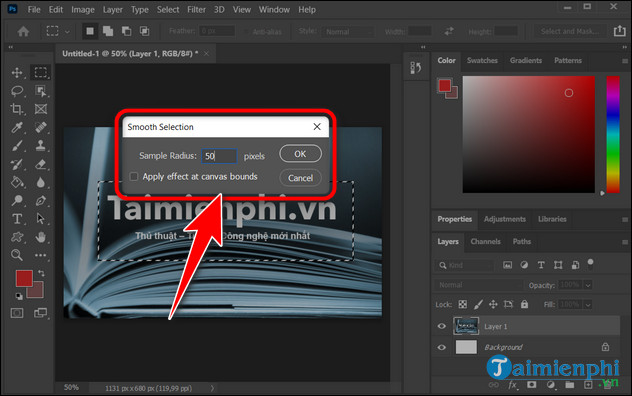
Step 4: Adjust Pixels => OK . - Note: The higher the pixels, the larger the rounded corners.
Step 5: Select the key combination Ctrl + Shift + I To select the entire image .
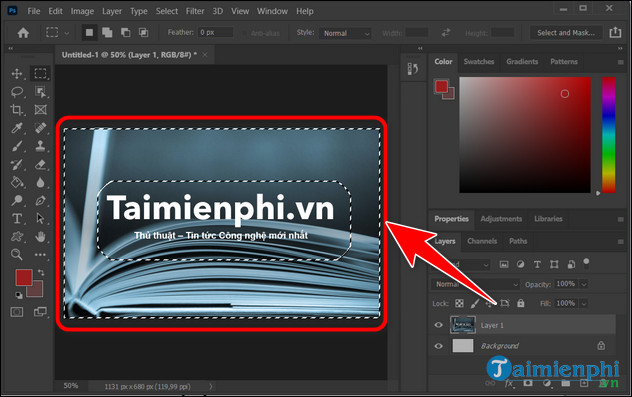
Step 6: Select Delete On the keyboard and select the Paint Bucket Tool (Shortcut G) and fill the outside with color to highlight the rounded part.
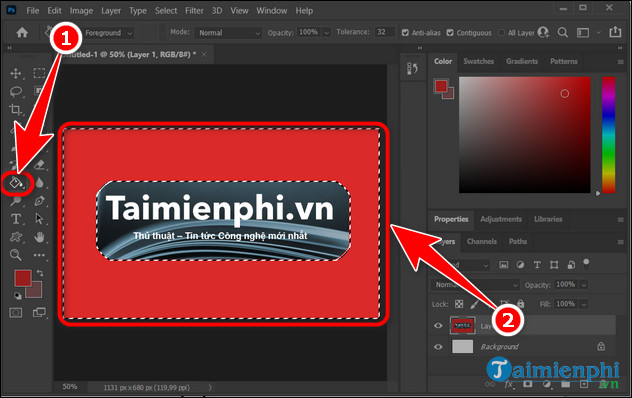
Once completed, the corner area of your door will be rounded as shown in the following image:
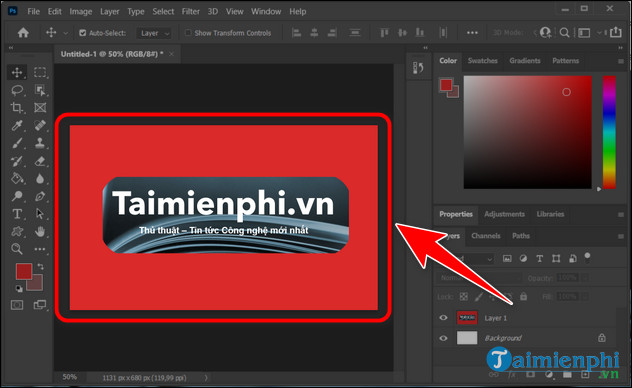
Rounding will make your round area less rough, you can flexibly change the pixel density accordingly for more flexibility during use. Also, if you want to Insert Symbols in Photoshop, Please refer here.
FAQ
What do I need before I round the Corners of a Selection in Photoshop Is?
Prepare the required device, software, account access, and any files mentioned in the steps. Back up important data before changing system settings.
Why does the process look different on my device?
Menus and options can vary by operating system, app version, device model, or region. Use the closest matching setting and check the official documentation when needed.
What should I do if a step does not work?
Restart the app or device, confirm permissions and connectivity, update the software, and repeat the step carefully. Avoid unofficial downloads or tools.
Related Articles
 How to Rounded Corners of Photos in Photoshop4 minutes read
 How to Invert a Selection in Photoshop2 minutes read
 How to Create a Rounded Image in Photoshop: Edit Photoshop Photos5 minutes read
 Photoshop Will Add a New Tool That Makes Selecting Objects in an3 minutes read
 4 Methods to Create the Best Selection in Photoshop7 minutes read
 Steps to Delete Selections in Photoshop Are Very Easy and6 minutes read
Reader Comments 0
Sign in with email or Google to join the discussion.