4 methods to create the best selection in Photoshop
Adobe Photoshop has a lot of tools that you can use to create different selections on the canvas..
Adobe Photoshop has a lot of tools that you can use to create different selections on the canvas. Options vary from the simplest, like the Marquee tool, to the advanced selection methods provided by the Select and Mask workspace.
Each tool offers its own advantages. Knowing which method will work best while creating the selection you want is essential for designers.
1. Make a Selection Using Photoshop's Marquee Tools
The simplest tools for making selections in Photoshop are the Marquee tools. All of these tools create a regular shaped area of the canvas. There are several different Marquee tools you can use, including the Rectangular and Elliptical Marquee tools.
The Rectangular Marquee Tool
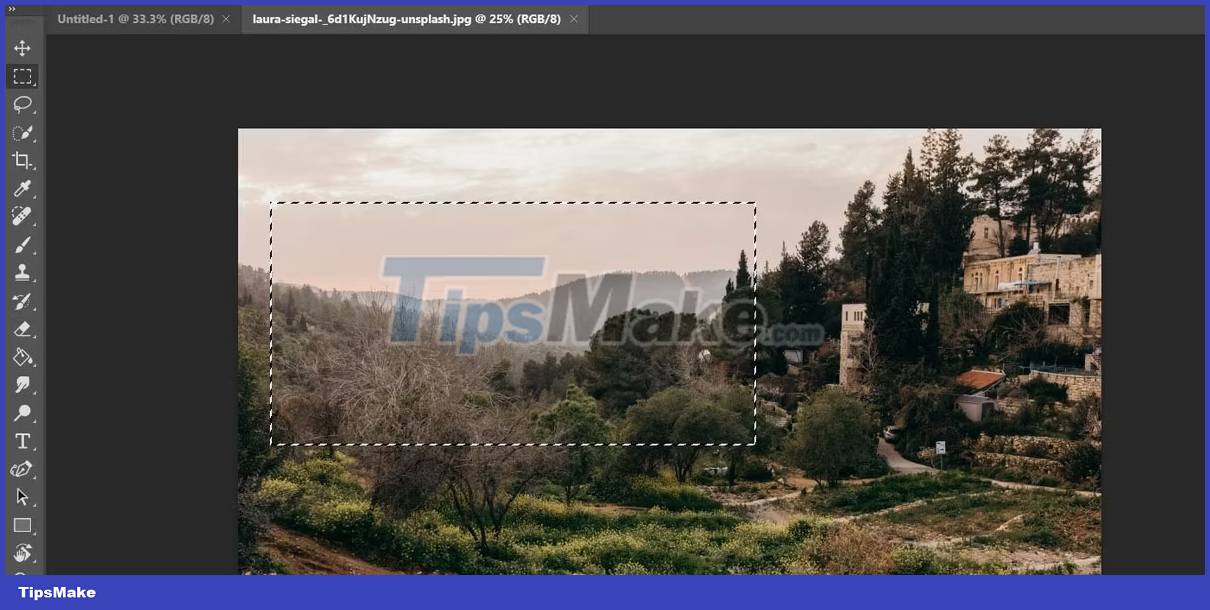
The Rectangular Marquee tool selects an area of the canvas that is square or rectangular. This is the simplest and most popular selection tool in Photoshop. By default, the Rectangular Marquee tool can be selected from the tools panel on the left side of the screen.
Elliptical Marquee Tool

The Elliptical Marquee tool works similarly to the Rectangular Marquee tool. The main difference between these two versions is that the Elliptical Marquee creates a circular or oval selection. The Elliptical Marquee tool is located in the Marquee tools section of the standard tools panel.
2. Select complex objects quickly and automatically
While the Marquee tools are useful for selecting large sections of the canvas arranged in regular shapes, selecting complex shapes can be more difficult. But there are some tools that let you quickly and easily select complex shapes and objects.
Photoshop's Select Subject Action
Photoshop may attempt to automatically select the subject of the image. To use the Select Subject action, click the Select menu option in the main menu bar, and then click the Subject button.
Photoshop will attempt to automatically determine the subject of the image and select it. Although the auto selection tool doesn't always get the perfect selection, you can tweak it further. The Select Subject operation makes it easy to quickly select the subject of an image for quick editing or masking.
Object Selection Tool
In addition to the Subject Select action, Photoshop also has an Object Selection tool. In case the Subject Select action has difficulty determining the subject of the image, the Object Selection tool will divide the image into several objects.
The Object Selection tool will allow you to select an entire object or set of objects at once. This tool can be found in the Quick Selection tools section of the standard tools panel.
Quick Select Tool

The Quick Select tool works similarly to a paintbrush tool that draws a selection onto the canvas. However, in addition to selecting the area that you drag the brush over, it will try to select adjacent parts of the same object in the image.
You can use the Quick Select tool to quickly select parts of an object or multiple objects at once. Switching the tool to Subtraction mode will also allow you to quickly remove parts of the selection.
The capabilities of this tool combine well with the Subject Select action and the Object Select tool. You can use the Quick Select tool to quickly clean up the results of those tools.
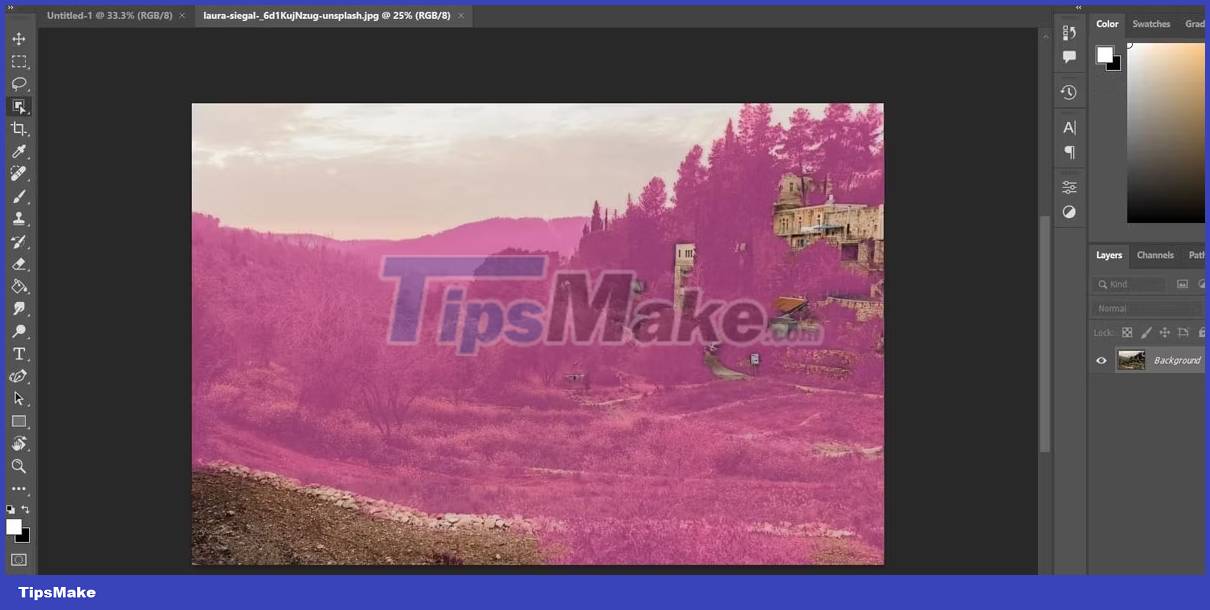
3. Photoshop's Magic Wand Tool
The Magic Wand tool is an extremely useful tool for quickly grabbing adjacent colored blocks. Magic Wand will check the pixel you click on and try to pick any neighboring pixels with similar color value.
When using the Magic Wand tool, the adjustable Tolerance setting at the top of the screen is extremely important. The higher the Tolerance, the wider the range of colors the Magic Wand can select. On the other hand, reducing the Tolerance setting will limit the selection to only colors closer to the original pixel.
In addition to the Tolerance setting, Flood mode is also an important consideration. Normally, Contiguous Flood mode is active, allowing you to select pixels adjacent to the original pixel. However, if you change the Flood mode to Global , the Magic Wand will attempt to select pixels from anywhere on the canvas that meet the Tolerance limits.
Magic Wand is an easy way to quickly adjust a specific color or color block. In particular, the Global Flood mode allows to select all a specific color on the image and change them all at once.
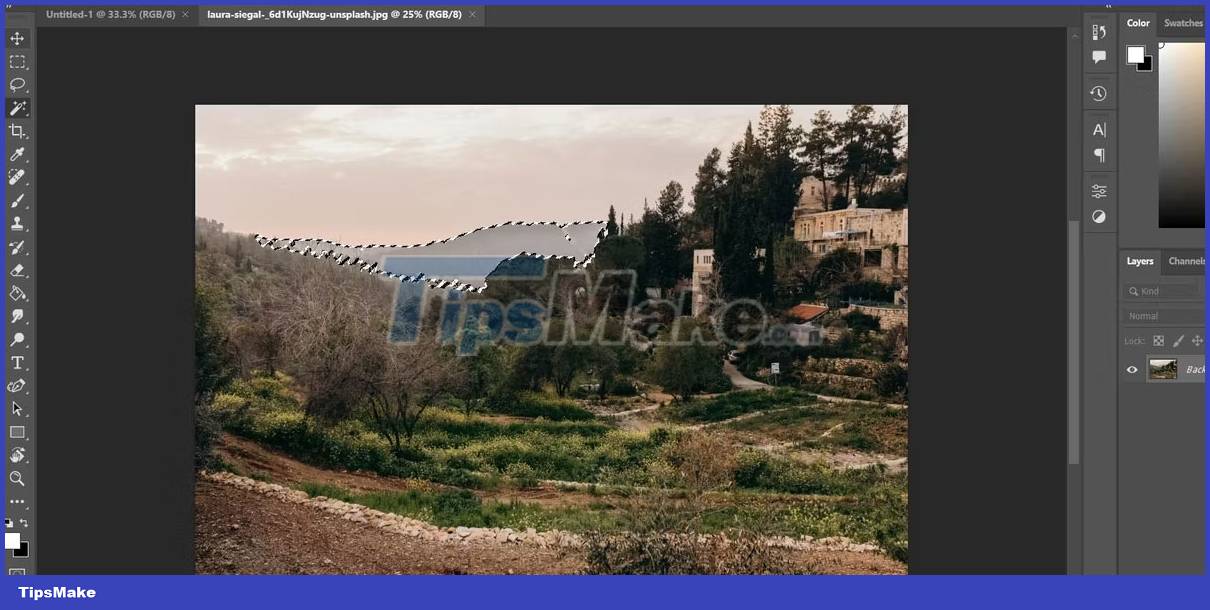
4. Refine selections with the Select and Mask workspace

Once you've selected an area in the canvas, the next step in the process is to refine your selection. In addition to the standard selection tools, the program has an entire workspace dedicated to selecting exactly the part of the canvas you want - specifically, Photoshop's Select and Mask workspace.
The Select and Mask workspace contains several tools that focus on quickly selecting additional parts of the canvas and fine-tuning the edges of the selection. It makes it easy to select extremely fine areas like hair, leaves or grass.