Table of Contents
Learning how to installing virtual drive doesn't have to be complicated. This updated guide presents a clear workflow, practical checks, and troubleshooting advice you can use while completing the process.
Key Takeaways
- Review system requirements when installing virtual drive.
- Explore installation instructions.
- Follow the recommended steps in order to avoid common mistakes with installing virtual drive.
System Requirements When Installing Virtual Drive
You need to make sure your computer meets the following requirements: before installing Virtual Drive.
- Operating system: Windows XP, Vista, 7, 8, 10, 11 - Free space: Minimum 50MB - Administrator rights: Required for installation and use.
Installation Instructions
Step 1: Download Virtual Drive.
Open the installation file when the file download is complete. A window will appear, asking the player to choose the installation language for the software. Click OK to open the next part.

After clicking OK > Click Next to open the next step.

Step 2: Select I Accept the Agreement.
Next, click Next to move to the next step.
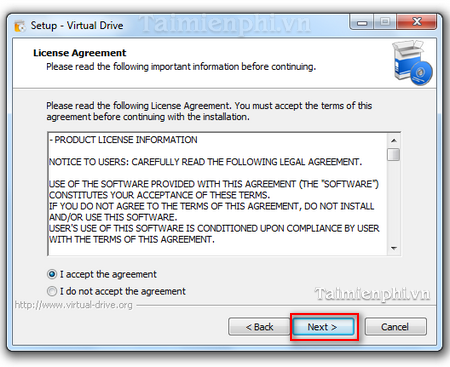
Step 3: Click Next to open the next customization section.
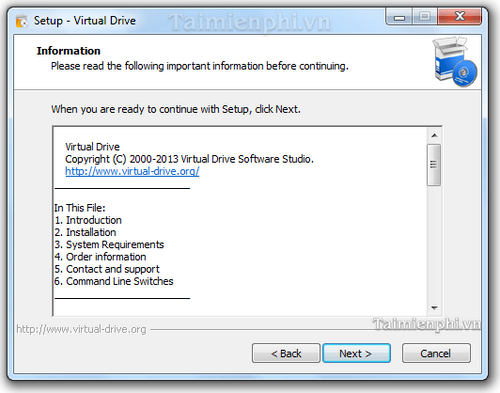
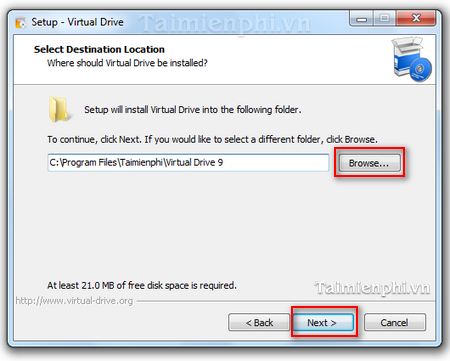
Step 4: After clicking Next, the system has moved to the customization section. This section will ask the user to set up the location to save the installation software folder. You can customize it by clicking Browse if you can set up the storage folder.
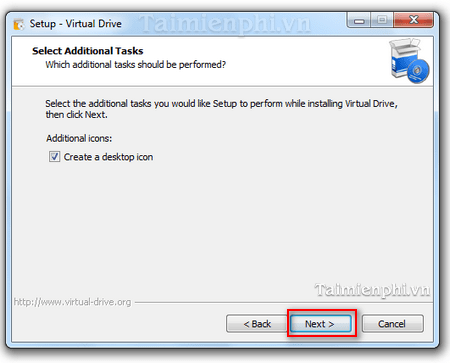
Click Next to open a new window after customizing. This window asks the user whether to create an icon on the Windows Desktop or not.
Click Next to move on to the installation process after customizing.
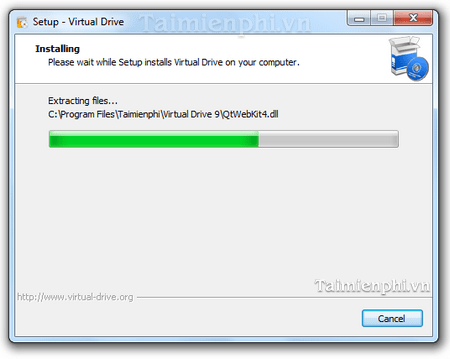
Next, the system will automatically extract and install the software on your computer.
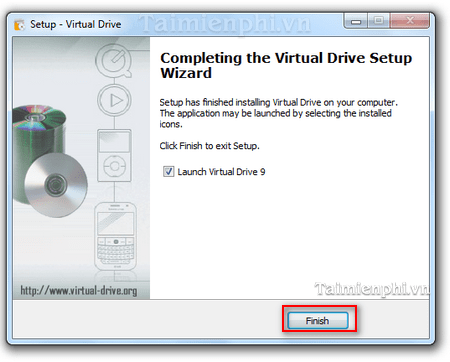
Step 5: Once the installation is complete, Virtual Drive will notify you with a new window. Click the Finish button. This helps you complete the installation.
So Virtual Drive has been installed on your computer.
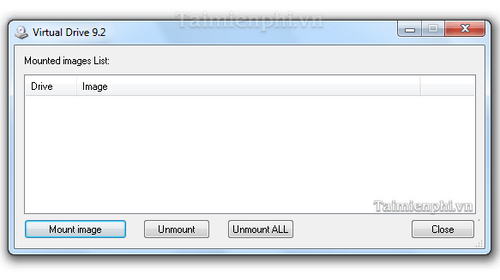
Virtual Drive helps users create virtual CD drives to run programs that require multiple CD drives without the need for physical discs. The software supports mounting popular formats such as ISO, CUE, NRG, MDS/MDF, CCD, IMG, allowing for quick and convenient data access. In addition, Virtual Drive can read Blu-ray, CD-ROM, music CD, data DVD and even copy-protected DVD, meeting the diverse needs of users.
Final Thoughts
The most reliable way to handle installing virtual drive is to follow the process in order, verify each important setting, and test the result before moving on. Use the guidance above as a practical reference, then adjust the details for your device, software version, or specific goal.
FAQ
What should I check before I installing virtual drive?
Use the latest available software, confirm that your device meets the requirements, and make sure you have the necessary permissions, account access, or backup before changing anything.
Why might I be unable to installing virtual drive?
Common causes include outdated software, missing permissions, incompatible settings, incomplete setup steps, or a temporary network problem. Recheck the process from the beginning and restart the app or device if needed.
Is it safe to installing virtual drive?
It is generally safe when you use official tools, review every permission, and back up important data before making system-level or account-level changes.
Related Articles
 How to Successfully Install Windows 7 on a Virtual Drive4 minutes read
 The Simplest Way to Create a Virtual Drive Using Virtual Drive5 minutes read
 How to Install UltraISO and Creating Virtual Drives Using UltraISO3 minutes read
 How to Create a Virtual Drive (Virtual Hard Disk) on Windows 10 Without4 minutes read
 Guide on How to Install an M.2 SSD in Your PC8 minutes read
 Instructions to Increase the Virtual Hard Drive Capacity on Virtualbox5 minutes read
Reader Comments 0
Sign in with email or Google to join the discussion.