Delete the virtual drive in Windows 7
Windows 7 has a simple feature that allows you to create a virtual drive and encrypt it. Today we will see how to delete it when not in use and regain space for the hard drive.
Windows 7 has a simple feature that allows you to create a virtual drive and encrypt it.Today we will see how to delete it when not in use and regain space for the hard drive.
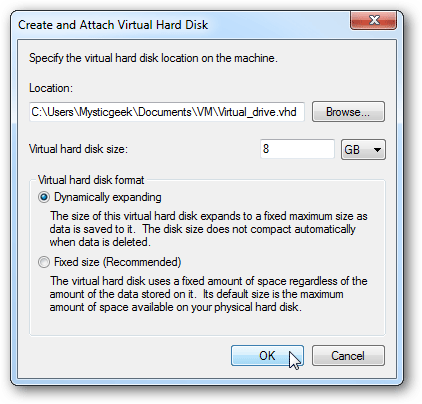
Virtual drive.
We know that when creating a virtual drive it will use the space in the drive you create.
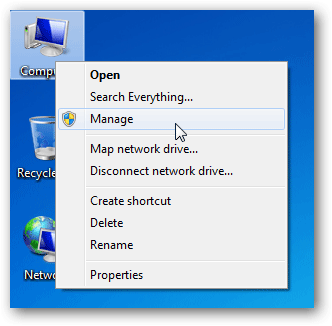
When you no longer want to use it, or need to reclaim disk space, delete it in a very simple way. First, go to Computer Management by right-clicking on My Computer and selecting Manage .
In Computer Management in the Disk Management section, right-click the virtual drive you want and select Delete Volume .
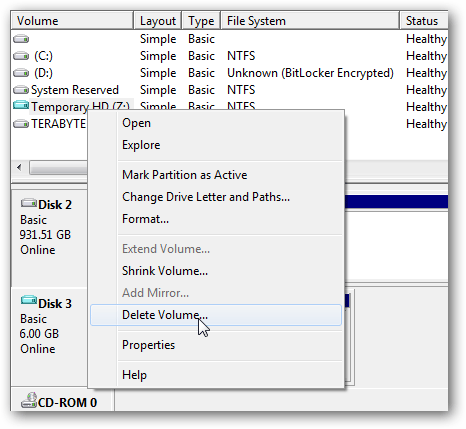
Agree with the warning message that appears. Make sure there is no data needed in it.

After the job is complete. You will get back free disk space.
Was this article helpful?
Your feedback helps us improve.
Related Articles
 How to delete virtual drives on Windows 10?3 minutes read
 How to mount a folder as a virtual drive on Windows6 minutes read
 Instructions on how to successfully install Windows 7 on a virtual drive.3 minutes read
 Instructions to increase the virtual hard drive capacity on Virtualbox5 minutes read
 How to remove a CD drive that no longer exists in Windows 103 minutes read
 How to create a virtual drive on Windows with Simple VHD Manager3 minutes read
Reader Comments 0
Sign in with email or Google to join the discussion.