How to mount a folder as a virtual drive on Windows
In Windows, you can mount any folder at any location as a virtual drive with a drive letter. This article will show you how to mount a folder as a virtual drive with a drive letter on Windows 7, Windows 8 and Windows 10..
In Windows, you can mount any folder at any location as a virtual drive with a drive letter.
When you attach a folder as a virtual drive, you can access it from there. The contents of the directory will remain within the directory. Anything saved to the virtual drive will be saved to the location of the folder.
Folders mounted as virtual drives will be discontinuous and only available in the current user session by default. If you log out, restart, or shut down your computer, all existing virtual drives will be erased (no longer attached).
This article will show you how to mount a folder as a virtual drive with a drive letter on Windows 7, Windows 8 and Windows 10.
- The software creates the best virtual drive on your computer
- Here's how to create a virtual hard disk (Virtual Hard Disk) on Windows 10
- Instructions on how to create a virtual drive with UltraISO in your computer
Below is a folder mounted as a virtual drive on Windows 10.

1. View all mounted virtual drives from the directory
Step 1 . Open Command Prompt.
Step 2 . Type subst in Command Prompt and press Enter .
Step 3 . You will see the list of current virtual drives.

2. Mount the folder as a virtual drive
Step 1 . On the Command Prompt type the following command and press Enter .
subst : "Full path of folder"
Note : Replace in the above command with the currently unused drive letter (for example, G) you want to mount to the virtual drive.
Replace the Full path of folder in the above command with the actual full path of the folder (for example, C: UsersBrinkDesktopAny Folder), which you want to mount as a virtual drive.
For example, the following command will look like the following when you replace the drive letter and the folder path:
subst G: "C:UsersBrinkDesktopAny Folder"

Step 3 . If you want, you can rename the virtual drive.
Note: The virtual drive will be the same as the root drive of the folder by default.
If the root drive of the directory has been renamed, you will not be able to rename the virtual drive.
If you rename the virtual drive, this name will exist every time you mount the same directory path using the same drive letter.
Step 4 . You can close the Command Prompt if you like.
3. Delete the mounted virtual drive from the directory
Note: This option is only convenient when you want to delete the virtual drive for the mounted folder without logging out, restarting or shutting down the computer.
Step 1 . Open Command Prompt.
Step 2 . Type the following command into the Command Prompt and press Enter .
subst : /d
Note: Replace in the above command with the drive letter of the virtual drive you want to delete.
Step 3 . You can close the Command Prompt if you like.

4. Always attach a folder as a virtual drive
Note: This option allows the folder to always be mounted as a virtual drive even when you log off, start or shut down.
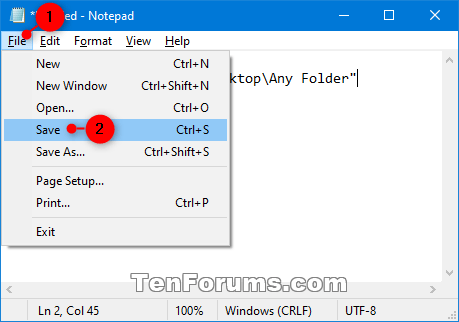
Step 1 . Open Notepad.
Step 2 . Type the following command into Notepad.
@echo off subst : "Full path of folder".
Note : Replace in the above command with the currently unused drive letter that you want to mount as a virtual drive.
Replace Full path of folder in the above command with the full path of the folder you want to mount as a virtual drive.

Step 3 . In Notepad, press Ctrl + S or click File (menu bar) and click Save to save it as a batch file (.bat).
Step 4. Perform the following actions in the Save As dialog box.
- Navigate to where you want to save the .bat file.
- Select All Files (*. *) In the Save as type drop-down menu.
- Type the file name included with the .bat file extension.
Note: You should name the .bat file as something to know this is the directory attached to the virtual drive.
4. Click Save .

Step 5 . You can close Notepad.
Step 6 . Open File Explorer by pressing Win + E
Step 7 . Save a copy of the .bat file in the Startup folder of the user you want to always have the folder mounted as a virtual drive.
Note : You need to be logged in as an administrator to copy the .bat file into the Startup folder of another user or all users.
To undo, delete its .bat file in the Startup folder. The Startup folder for the user is located at:
C:UsersAppDataRoamingMicrosoftWindowsStart MenuProgramsStartup
The Startup folder for all users is located at:
C:ProgramDataMicrosoftWindowsStart MenuProgramsStartup

Step 8 . Close File Explorer if desired.
I wish you successful implementation!