Here's how to create a Virtual Hard Disk on Windows 10
Basically, Virtual Hard Disk (VHD) is a file format that contains the structure of the 'complete' structure of a hard drive. It is understandable that a virtual hard disk is located on an original file system and is 'packaged' in a single file..
Basically, Virtual Hard Disk (VHD) is a file format that contains the structure of the "complete" structure of a hard drive. It is understandable that a virtual hard disk is located on an original file system and is "packaged" in a single file.
VHD is used to store virtual operating systems, related programs and works like a real hard drive.
Like Windows 7, on Windows 10 you can easily create virtual hard disks without installing or relying on the support of any tool.
Steps to create Virtual Hard Disk on Windows 10
To create a virtual hard drive on Windows 10, follow the steps below:
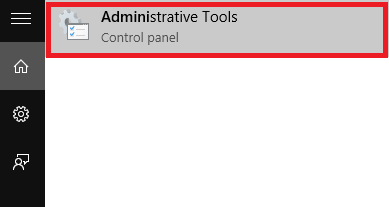
Step 1:
Open Administrative tools on your Windows 10 computer by entering Administrative tools into the Search box on the Start Menu.
Step 2:
Now the screen of the Administrative tools window appears. Here in the right pane you find and double-click the option called Computer Management.

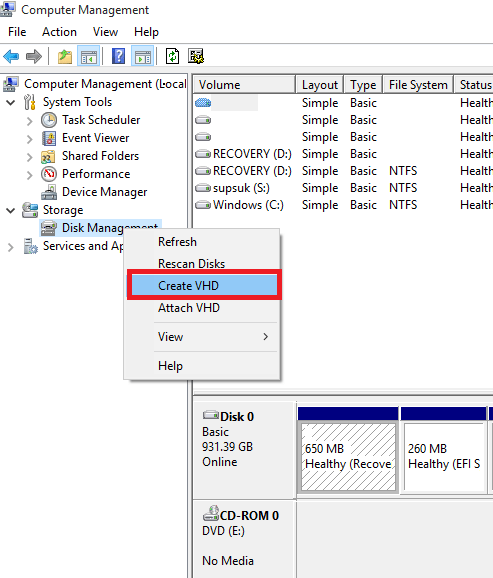
Step 3:
Next expand the option named Storage in the left pane. You should now see the option called Disk Management. Your task is to right click on Disk Management and choose Create VHD.
Step 4:
The Create and Attach VHD popup window appears. There you find the text box under the Location option, then browse to the path where you want to save the VHD file (virtual hard drive).
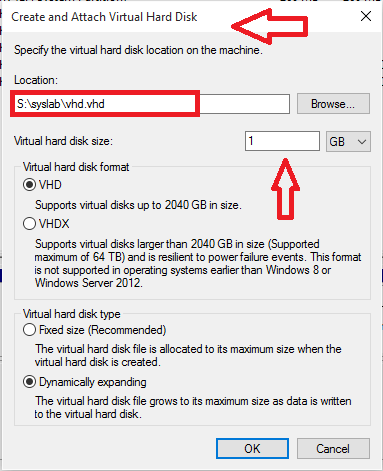
You can also select the size (size) for the VHD file by changing the value in the frame next to Virtual Hard disk size.
The size of the virtual hard drive is set to GB. You can change it to MB (megabytes) or TB (terabytes) if needed.
Step 5:
At the Virtual hard disk type section, select Dynamically expanding options and click OK.
Step 6:
After you have completed the above steps, you will see the virtual hard drive created in the right pane of the window. Right-click it and select Initialize to create a new Volume on the virtual hard drive.
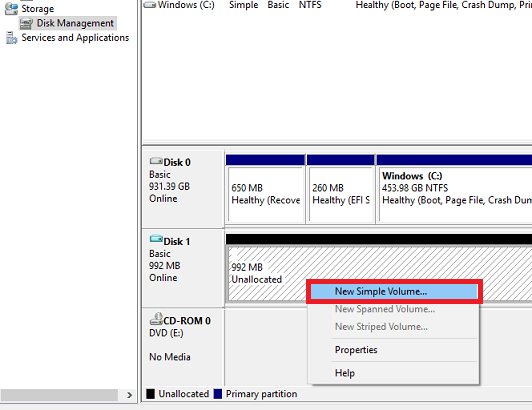
Step 7:
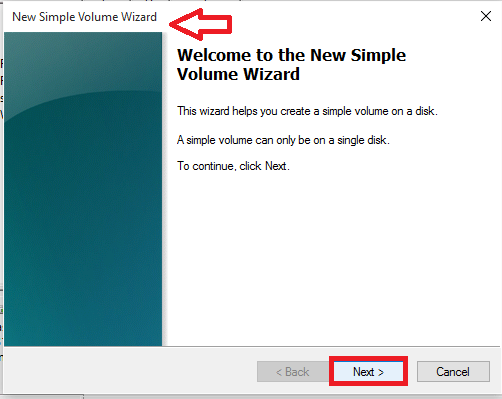
At this time the popup window appears, click OK . Go back to the virtual hard drive you created, right-click it and select New Simple Volume .
The Simple Volume wizard window appears, here you click Next to proceed to edit the settings.
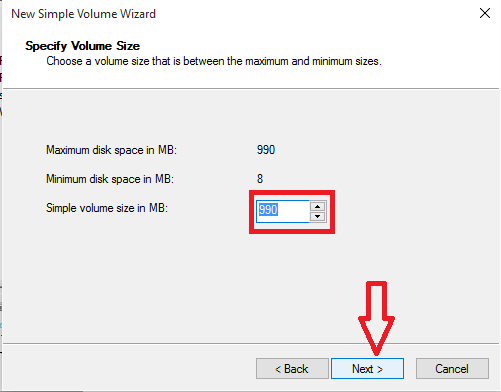
Step 8:
Select the size (size) for the volume you want, then click Next.
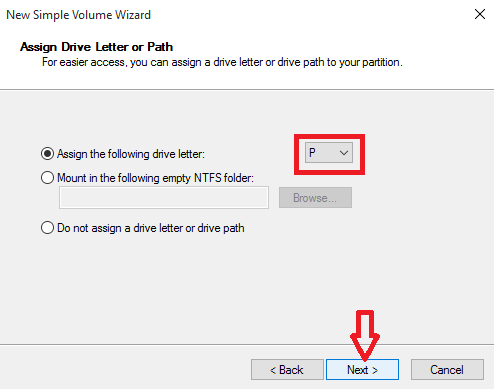
Step 9:
On the next window, select the drive letter name that you can name the Volume. Once completed, click Next.
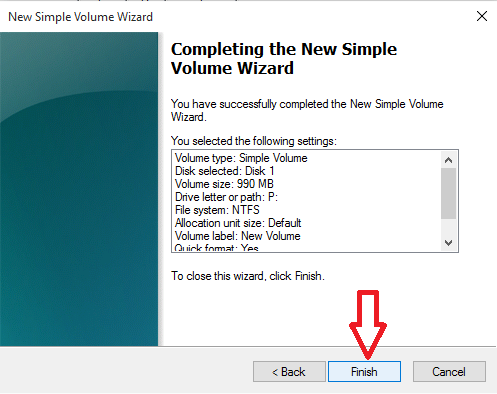
Step 10:
On the next window, click Next until the last Simple Volume wizard window appears, click Finish .
Step 11:
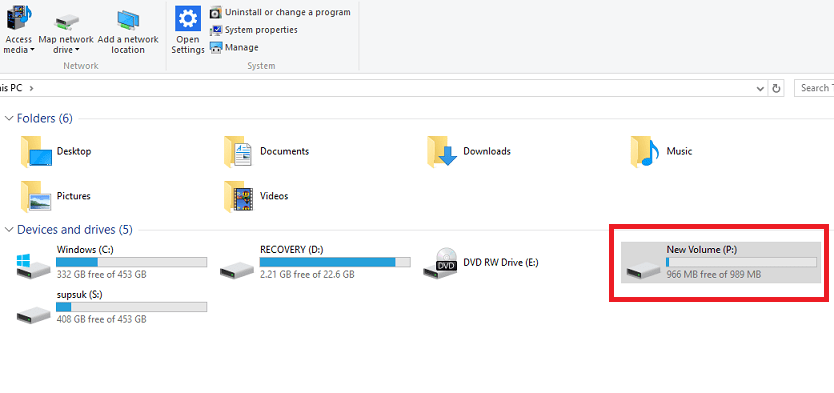
You should now see a new virtual hard drive appear in the File Explorer window. So you've completed the process of creating a virtual hard drive.
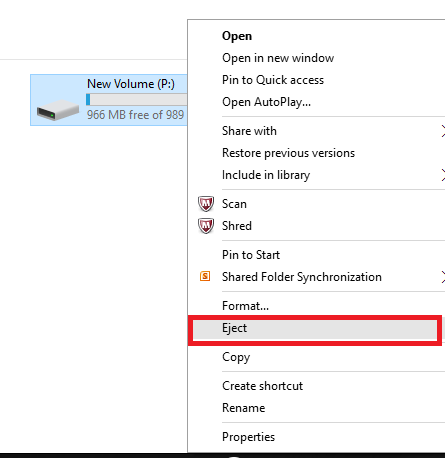
Step 12:
Whenever you want to unmount the drive or want to reclaim memory space, just right-click the virtual hard drive that you created and select Eject .
Refer to some of the following articles:
- This is how to delete Recovery partition and Recovery partition 450 MB on Windows 10
- How to disable Lock Screen lock screen on Windows 10 Anniversary Update
- Free memory space after updating Windows 10 Anniversary
Good luck!