Table of Contents
This article explores call recording Android with call recorder - acr with straightforward explanations and useful context. It also highlights common questions and important details to consider.
Some Android OS phones have a built-in recording feature, but some models do not. Due to the needs of the job you need to record the call, so how to do it? Currently, there are many applications with the main call recording feature that allows users to review any calls they have recorded. Call Recorder - ACR is an application on Android operating system with such features.
ACR will help users to select and record any call. Besides, the program also automatically arranges the recordings by date, making it easy to manage and find the call when needed. Especially the password setting feature for recordings, ensures absolute safety. Check with the Network Administrator to see how the ACR application performs call recording on Android.
Step 1
First of all, please download the Call Recorder app - the latest version ACR following the link below.
- Download the ACR app for Android
Step 2
Then, launch the app on the phone. You will see ACR notifying you of some warnings. You need to Tick all the alerts And click OK To proceed with the use.
Step 3
In the main interface, you will see ACR divided into Incoming calls , Outgoing calls , Important calls . Next, click The 3 dashes icon Above to access the ACR menu.

Step 4
In the setting of ACR, click Settings . In the settings interface you will see items such as Overview, Cloud sharing service, ARC version in use,.


Step 5
If you access the Recording Section, you will see the setting for the Recording section. Here, we can set the recording settings for the app as follows:
- Record recording : if you push the horizontal bar to the right, a message appears saying you want to delete or store the recording. Otherwise, it will automatically store the recording.
- Automatic recording deletion : select the time for the app to automatically delete recordings. Click Save To save the number of days to automatically delete the recording.


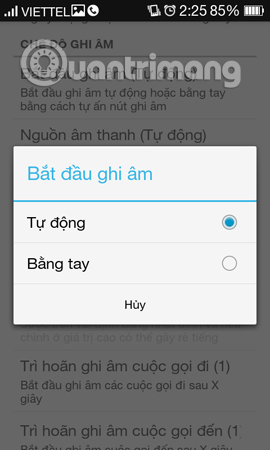
- Start recording : You can selectAuto To ARC recording or press theManual Recording button.
- Sound source To be in Auto mode.
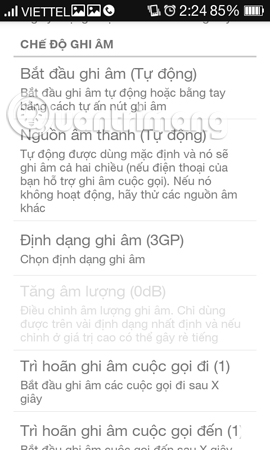
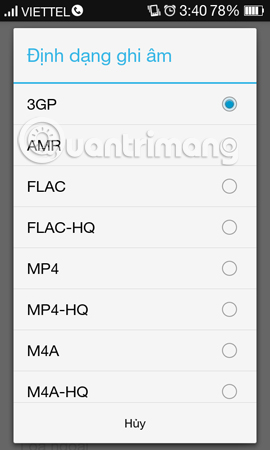
- Audio format : ARC allows you to select a variety of audio formats for recording. Default to 3GP.
- Bluetooth recording : you can turn recording mode on or off when using a Bluetooth headset.

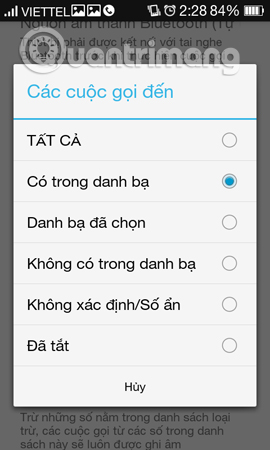
- Incoming calls : you can choose to record all incoming calls, Yes in list, Not in contacts,.
- Outgoing calls : select All recording, Available in contacts, Selected contacts,.
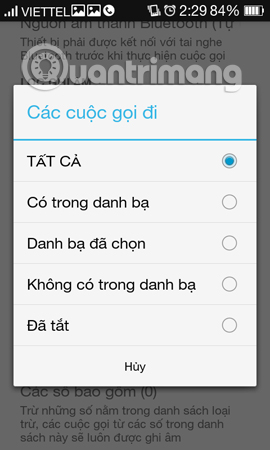
- Exclusion numbers : do not record calls from this number in this book. Press The + sign Above to add a number.
- Numbers include : except for numbers in the exclusion list, calls from numbers in this list are always recorded.


Step 6
Next, we will record the call with ACR. By default, the app will always be enabled in the phone to Automatically record calls . You will see The ACR icon Always appear on the screen.
When needed to Turn off ACR , access the app and click the 3 dashes icon. Push the switch to the left to Switch to the Off state . Soon, The app icon will be crossed out , meaning it is not working.
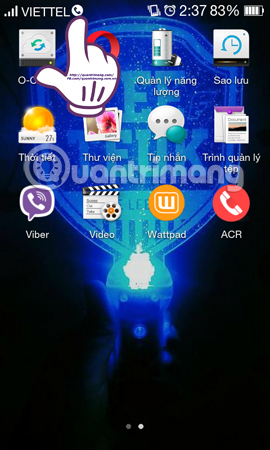
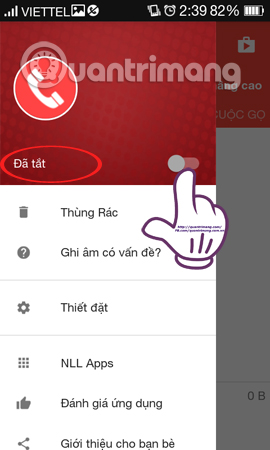
Now you just need to call or someone calls you, ARC will automatically save this voice call. To review the recordings, go to the main interface of the app to select Incoming calls, Outgoing calls, etc. is done.
Operation to set up and use Call Recorder application - ACR Android call recording is completed. Using ACR is not difficult, so we can do it easily.
Refer to the following articles
- 3 ways to uninstall apps for Android devices
- Decode the errors encountered on Google Play and how to fix them
- How to view saved Wi-Fi passwords on Android?
I wish you all success!
FAQ
What is the main benefit of call recording Android with call recorder - acr?
The main benefit is a clearer understanding of the topic and a practical way to apply the information covered in this guide.
What should I check before using call recording Android with call recorder - acr?
Confirm compatibility, review the required settings, protect important data, and use the latest supported version whenever possible.
What should I do if the result is different?
Repeat the steps carefully, verify permissions and version differences, and consult the product's official support documentation for changes not shown in the article.
Related Articles
 Effective Call Recording Applications on Smartphones6 minutes read
 How to Enable Automatic Call Recording on Android3 minutes read
 8 Free HD Recording Apps with Noise Reduction9 minutes read
 Top 5 Best Call Recording Apps on iPhone7 minutes read
 3 Easy Ways to Record Calls on iPhone8 minutes read
 Guide to Recording Android Screen Videos with AZ Screen Recorder7 minutes read
Reader Comments 0
Sign in with email or Google to join the discussion.