5 ways to turn off Windows 11 Update, stop updating Windows 11
Microsoft regularly releases updates to patch its operating system as well as its products and services. Windows 11 is no exception to this policy, so it will be regularly updated with patches.
However, Microsoft's tradition is that one error breeds another. Therefore, sometimes users who update Windows 11 encounter additional annoying errors that previously had no problems with the device.
Turning off updates will help you maintain a stable operating state of your computer and be proactive in choosing whether to update or not.
1. How to turn off Windows Update on Windows 11 for 1 week
In Windows Update settings, Microsoft has an option that allows you to pause Windows 11 updates for 7 days. This is an option for those who want to temporarily maintain the state of their computer and want to update in the near future.
Here's how:
Step 1 : Click Start then select Settings or press the keyboard shortcut Win + I to open Settings.
Step 2 : Click Windows Update . In the Windows Update window you can check information such as the latest update, update history.

Step 3 : Click the Pause for 1 week button to temporarily stop updating Windows 11 within the next week. You should note that after this deadline, Windows Update will automatically download and install previously suspended updates. Therefore, if you want to permanently disable updates you will need to follow the methods below.
2. How to turn off Windows Update by disabling the Service
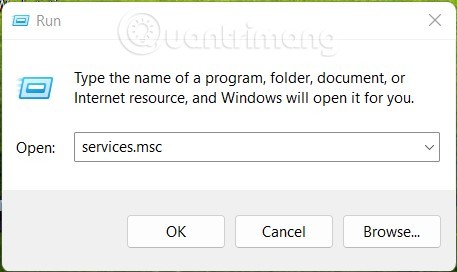
Step 1 : Press Windows + R to open Run , type services.msc then press Enter.
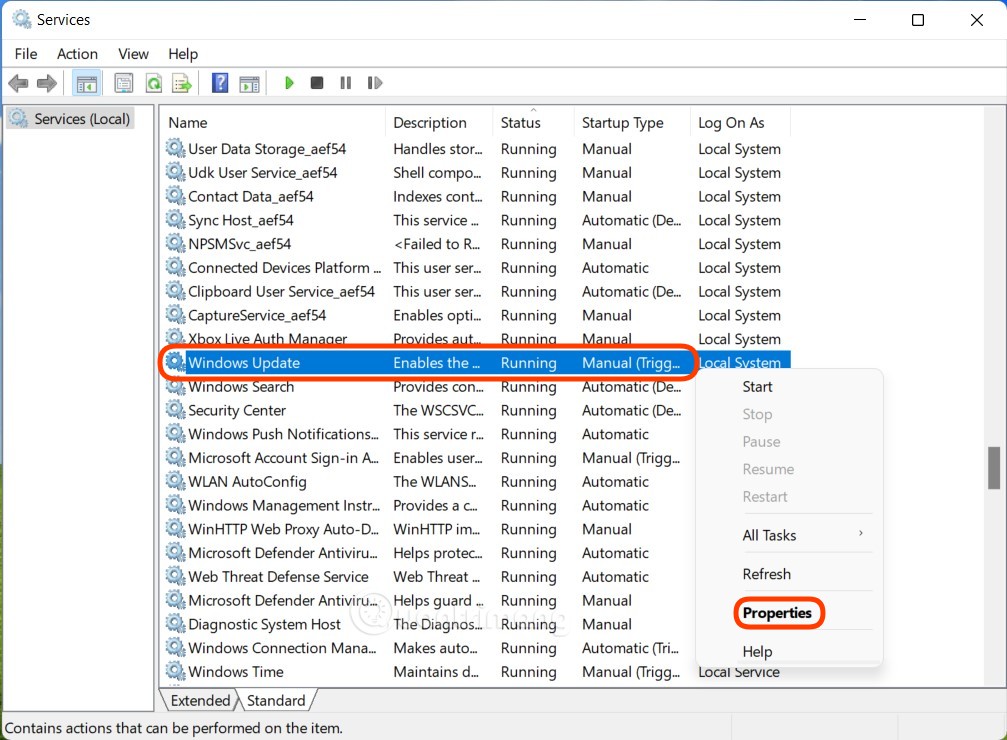
Step 2 : In the new window that appears, search for the Service named Windows Update and then right-click on it to select Properties.
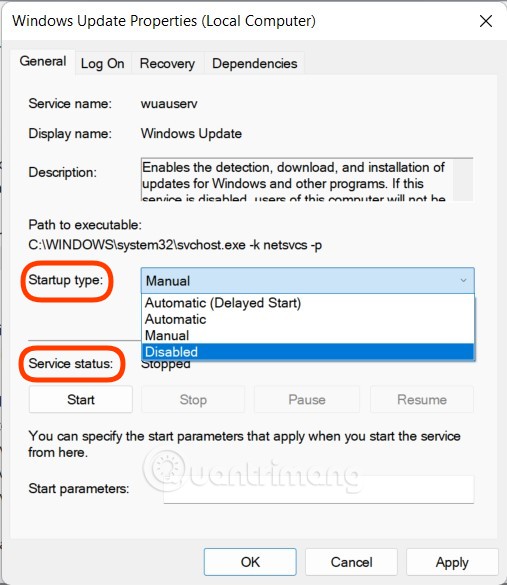
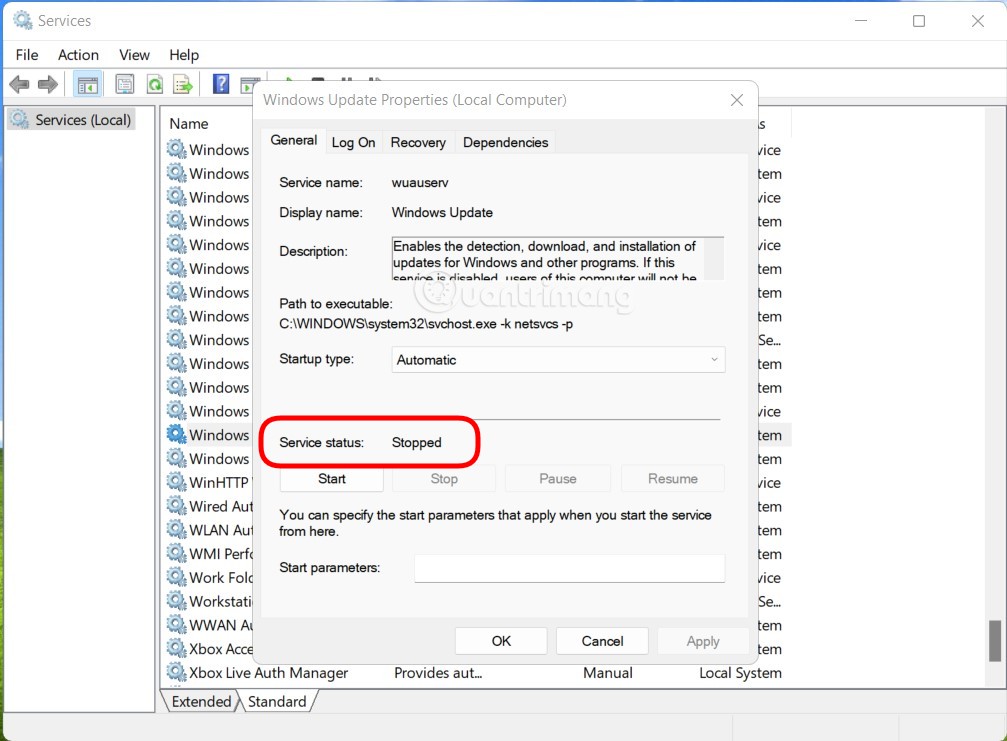
B3 : You need to check and change 2 items. First, in the Service status section , if you see the status as Running , you need to click Stop to stop Windows Update. Second, in the Startup type section, select Disabled. After selecting, click Apply and OK to confirm the changes.
3. How to turn off Windows Update using Group Policy Editor
Before doing so, you need to note that Windows 11 Home will not have Group Policy Editor. Therefore, this guide is not for those using Windows 11 Home.
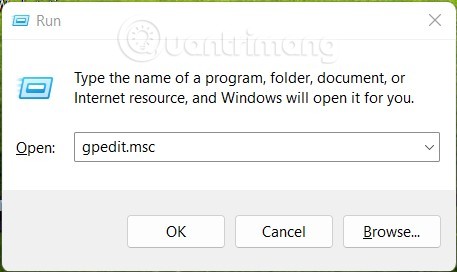
Step 1 : Press Win + R to open Run then type gpedit.msc and press Enter to open Group Policy Editor .
Step 2 : Find the folder path Local Computer Policy > Computer Configuration > Administrative Templates > Windows Components then move to the right box to find Windows Update.
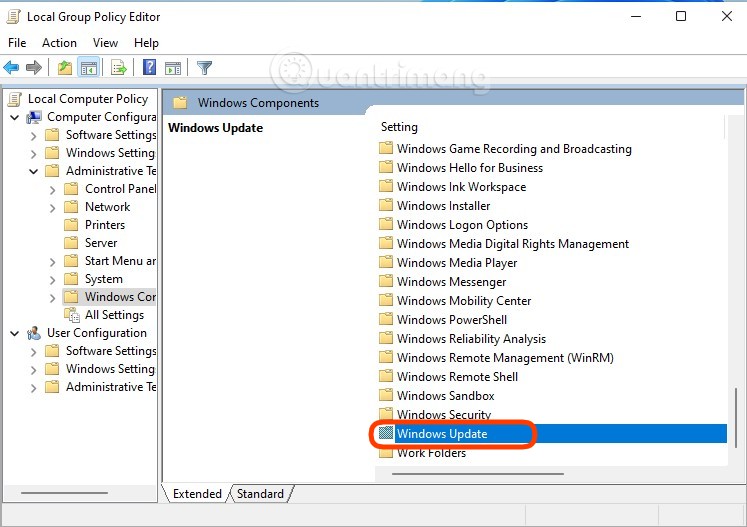
Step 3 : Open the Windows Update folder , then search and double-click Configure Automatic Updates and select Disabled to disable Windows Update. After selecting, click Apply and OK to confirm.

4. How to turn off Windows Update using Registry Editor
Of course, you can also edit the Windows Registry to turn off automatic updates on Windows 11. Here's how:
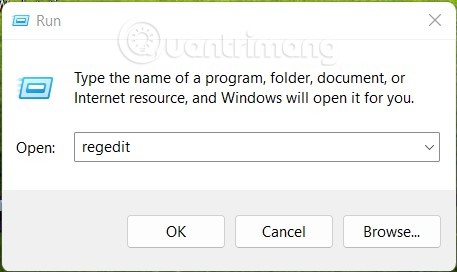
Step 1 : Still press Win + R to open Run , then type regedit and press Enter to open Registry Editor.
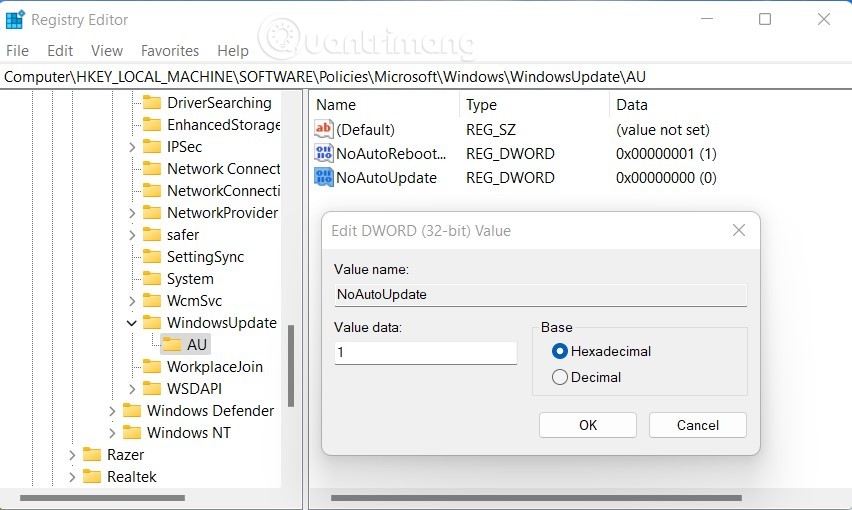
Step 2 : Find the AU key in Windows Update according to the following path:
HKEY_LOCAL_MACHINESOFTWAREPoliciesMicrosoftWindowsWindowsUpdateAUStep 3 : Open the AU key , then click any blank space in the right box and select New > DWORD (32-bit) Value . You name this value NoAutoUpdate and then give it a value of 1 in the Value data box . Save your changes and then restart your computer.
5. How to turn off Windows 11 updates using third-party software
In addition to available methods, you can also download third-party software to block Windows 11 updates. In this article, TipsMake.com recommends that you use EaseUS CleanGenius software. This software will help you permanently turn off the Windows 11 updater with just one simple operation.
The steps are as follows:
Step 1 : Download and install EaseUS CleanGenius for free.
Step 2 : After installation is complete, go to the Optimization section.
Step 3 : Here, you turn the switch in the Windows Automatic Updates section to Off.

Step 4 : To check if the Windows 11 updater is turned off or not, you can access Services by pressing Win + R to open Run , then type services.msc and press Enter.
Step 5 : Find and double click on the Windows Update service and you will see Stopped in the Service status section.
Wish you success!