Table of Contents
Sanhok's 4 km × 4 km battlefield creates early fights even outside its best-known hot drops. Ruins, Docks, Pai Nan, Paradise Resort, and Bootcamp all offer concentrated looting routes, but each exposes players to different risks. The best choice depends on the flight path, nearby parachutes, squad skill, and first safe zone—not a promise of specific items.
Loot is randomized and can be rebalanced. Special modes and map revisions may also alter buildings or place names, so use the in-game map as the current authority and treat the screenshots below as landmark references.

Quick comparison
| Location | Typical risk | Main advantage | Main danger |
|---|---|---|---|
| Ruins | Medium to high | Compact temple loot route | Close angles and limited exits |
| Docks | Medium | Containers and edge-of-map approach | Long sightlines and coastal rotation |
| Pai Nan | Medium to high | Many buildings near the center | River and bridge crossings |
| Paradise Resort | High | Dense compound with fast access to gear | Multiple rooms, courtyards, and entrances |
| Bootcamp | Very high | Central position and concentrated loot | Heavy landing competition |
1. Ruins

Ruins is a compact temple complex where players can move rapidly between loot spawns. Its walls and changes in elevation create cover, but they also let opponents hide close by. A late parachute can land directly on a player who is still searching for a first weapon.
Landing plan
- Watch how many parachutes commit to the main structure and nearby ground.
- Land beside a visible weapon when possible instead of choosing a favorite corner with no guaranteed item.
- Clear the closest section before crossing an exposed courtyard or chasing footsteps.
- Keep throwables for enemies holding narrow passages, but avoid bouncing grenades into your own route.
- Leave toward terrain cover rather than running along an obvious open line.
2. Docks

The coastal container area known as Docks in the classic layout offers clear, repeatable lanes. Containers provide hard cover and let a squad divide the search efficiently. The same straight lanes, however, make movement predictable, and the map edge can produce a long rotation if the first zone shifts away.
Landing plan
- Assign different container rows or buildings so teammates do not compete for the same gear.
- Check container tops and long gaps before leaving cover.
- Listen for players climbing or vaulting; vertical sound can reveal an opponent above you.
- Start rotating early when the safe zone is distant. Do not wait for perfect attachments.
If the current client uses a different name or layout for this coastal area, apply the same principles to its container lanes and shoreline exits.
3. Pai Nan
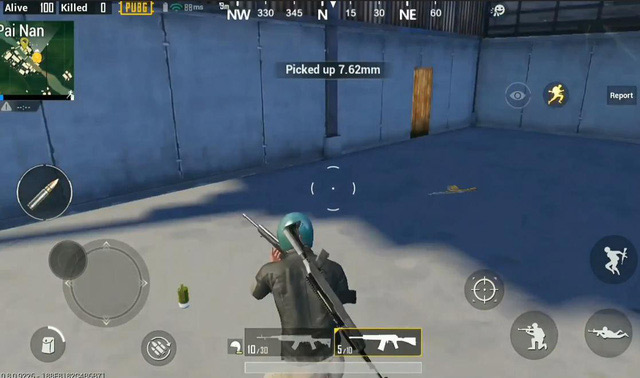
Pai Nan sits near Sanhok's center and is divided by water, buildings, and crossing points. The number of structures gives squads several loot paths, but teams on opposite banks can watch bridges or catch players moving through the river. Gunfire here also attracts rotations from multiple directions.
Landing plan
- Choose one side of the river during descent and land together.
- Clear the immediate row of buildings before crossing to the other bank.
- Use windows for information, not as a place to repeat the same peek.
- Check both bridge approaches and the far-bank windows before crossing.
- After the first fight, move away from the exact position where the shots were heard.
4. Paradise Resort
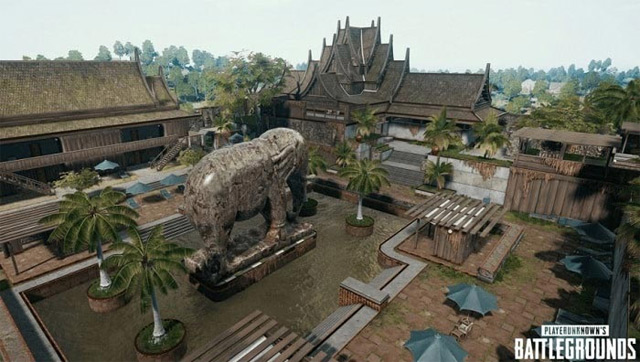
Paradise Resort is a dense, recognizable compound that often appeals to confident players. Courtyards, corridors, rooms, and multiple entrances create quick close-range fights. The structure rewards good audio awareness and team spacing; it punishes players who sprint through doorways without checking corners.
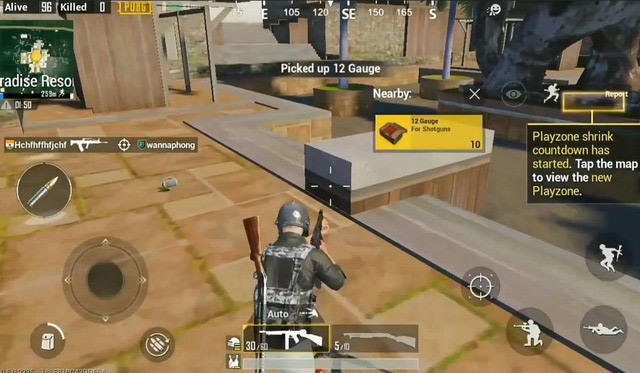
Landing plan
- If opponents will reach the roof or entrance first, divert to an outer section instead of landing unarmed beside them.
- Take the first usable weapon and armor. A pistol or shotgun can be more valuable than searching for an assault rifle while an enemy pushes.
- Avoid stacking the entire squad in one room. Hold connected angles that allow teammates to trade.
- Close or open doors deliberately; the sound and door state both provide information.
- Once the compound is secure, scan surrounding slopes before looting defeated players.
5. Bootcamp
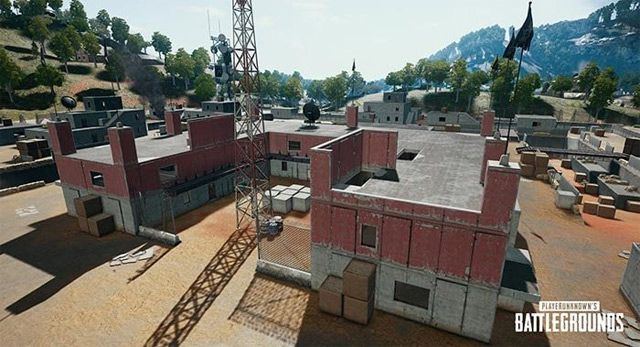
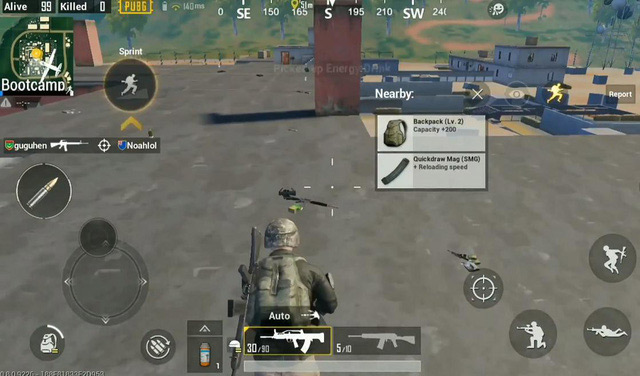
Bootcamp is Sanhok's classic hot drop. Its central position, main building, warehouses, walls, and surrounding structures create many landing choices and immediate fights. It can supply a squad quickly, but it is a poor choice for players who want a quiet start or are still learning touch controls.
Landing plan
- Count nearby parachutes and note which roof, courtyard, or warehouse each player targets.
- Land together in squads, but leave enough spacing to pick up separate weapons.
- Do not jump from a roof without confirming a safe landing and escape route.
- Expect a second team to arrive after the initial fight; heal and reload before opening loot crates.
- If the fight turns unfavorable, retreat through cover. Surviving with basic gear is better than contesting every room.
How to choose the right Sanhok drop
Use the flight path
A named location directly under the plane attracts more players because it is easy to reach. A longer glide can reduce competition, but landing late is dangerous. Mark a primary location and a nearby backup before jumping.
Watch parachutes, not just the map
The number and direction of nearby players matter more than a location's reputation. A normally quiet edge compound can become the hottest area in a particular match. Rotate the camera during descent and call out enemy landings to the squad.
Prioritize a functional loadout
During the first minute, look for one close-range weapon, suitable ammunition, armor, a helmet, and healing. Add optics, larger magazines, and a long-range weapon after the immediate threat is controlled. Carry at least one smoke grenade for open ground or a teammate rescue.
Plan the exit before finishing the loot route
The official PUBG Mobile map reference lists Sanhok at 4 km × 4 km. The small size means other teams can reach a location quickly. Check the safe zone, terrain, bridges, and available vehicles before staying for one more building.
Common looting mistakes
- Following a rigid route after an enemy lands on it.
- Standing still while managing inventory in a hot drop.
- Keeping several weapons' ammunition instead of supplies for the guns actually carried.
- Splitting the squad across a river or large compound without a tradeable distance.
- Repeating a doorway or window peek after being spotted.
- Leaving late and being forced across an exposed bridge by the blue zone.
New players can first follow TipsMake's guide to download and select Sanhok. For more tactics, read about dangerous positions around Ha Tinh and using the Flare Gun without exposing the squad unnecessarily.
Related Articles
 Things to Note in the Sanhok PUBG Mobile Map5 minutes read
 Places for 'Blood Battle' Gamers in PUBG5 minutes read
 Which QBU Should Be Combined with Guns in PUBG Mobile?4 minutes read
 The Most Dangerous Positions in Ha Tinh Point PUBG Mobile4 minutes read
 Good Map and Safe Map Locations Miramar PUBG Mobile4 minutes read
 The QBU Sniper Gun Information on PUBG Mobile4 minutes read
Reader Comments 0
Sign in with email or Google to join the discussion.