Remove 'reserve system' partition in Windows 7
Copy bootmgr from 100MB active partition or recovery partition to C: is extremely simple with EasyBCD. You can download EasyBCD here. The bootmgr will not be moved from the original location - it will only be copied to the C: partition directory. C: partition will be activated and 100MB partition will be deactivated.
Copy bootmgr from 100MB active partition or recovery partition to C: is extremely simple with EasyBCD. You can download EasyBCD here. The bootmgr will not be moved from the original location - it will only be copied to the C: partition directory. C: partition will be activated and 100MB partition will be deactivated.
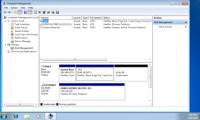
The steps to take are very simple and explained in the following 2 pictures. When opening EasyBCD , the first thing you need to do is find the BCD Backup / Repair section, then click on the Change boot drive item and then click Perform Action .

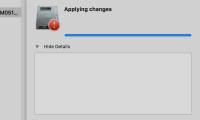
After you have done the 3 steps above, you will see an image like the one below, all you need to do is click OK .

Good luck!
Was this article helpful?
Your feedback helps us improve.
Related Articles
 This is how to delete Recovery partition and Recovery partition 450 MB on Windows 1010 minutes read
 Remove Windows 8 from dualboot system4 minutes read
 4 ways to quickly check the partition type on Windows 114 minutes read
 How to Extend System Volume4 minutes read
 Expand the system partition in Windows 75 minutes read
 Learn about 100MB partition when installing Windows 7/8 / 8.14 minutes read
Reader Comments 0
Sign in with email or Google to join the discussion.