Create partition during Windows 7 installation process
During the installation of Windows 7, you need to create a partition to install the operating system. According to Microsoft's instructions, you must spend at least 16GB for this partition. However, this is only the smallest size and is recommended not to be so. As you know, the operating system partition is the place where more space should be saved. Applications such as hotfixes, patches, service packs will take up a lot of space in this area. If you use these applications much, more space is needed.
This is why you should configure this partition appropriately. You can still expand this partition but it is better to plan ahead. Depending on the purpose of using the user's computer, this partition can be best placed in the range of 40GB - 100GB.
Start installing Windows 7, after completing the first important step, the second step will have to select the type of installation as ' Custom ' or ' Advanced '.

The next step will ask where you want to install the operating system, which means where the partition you want.
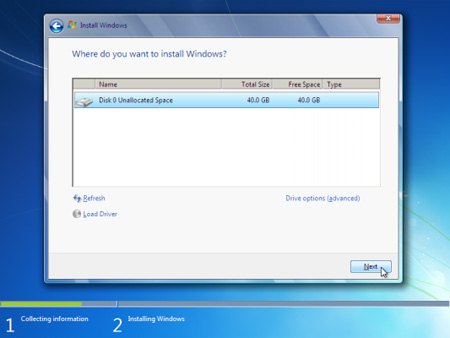
You have 2 options in this step:
+ Install operating system on the entire hard drive.
+ Create a partition on the hard drive and install Windows in that partition.
If you choose the first option, just click on ' Next ' to finish. The installation program will create a partition on the entire hard drive and format the drive with NTFS standard. After that, the program will install Windows on this partition.
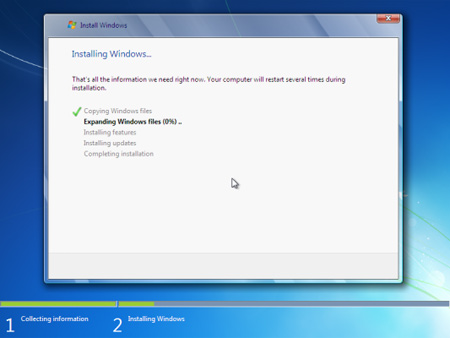
However, if you choose the second option, you will have to create a partition.
First, click Drive options (advanced). The screen will automatically move to the next step and show some options:
New - To create new partitions
Delete - To delete a partition, the data in that partition will be deleted.
Format - To format a partition completely, data in that partition will also be deleted
Extend - To expand a partition from 2 different hard drives. This is beneficial for you when your hard drive is full while the other drive is still empty. However, using this partition is not the same as using it on a single drive. It may be useful in some cases, but sometimes an error occurs. If an error occurs on a drive, all data in that extended drive will be unusable and may be lost.

To create a new partition, click ' New '. In the ' Size ' box, enter the size you want to create for the partition. Then click ' Apply '.
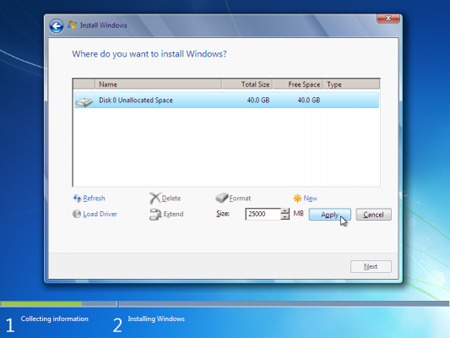
The installation program will notify you of an extra partition that will be created on the hard drive. This partition will be hidden by default and contains some important files for booting the computer.
Note : Even if you don't want to create this sub-partition, Windows still creates it. However, if you want to create that subdirectory yourself, Windows will still notify you that another partition will be created .

Now you can see the partition you just created and the hidden sub-partition. In most cases, Windows will be installed in partition number 2.
Click ' Format ' to delete this new partition.
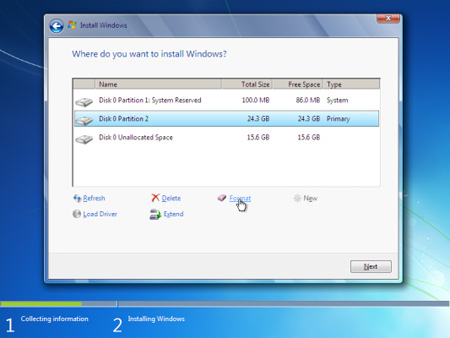
You will be notified that the data will be deleted. However, this is really unnecessary because the new partition is created and it is still empty.
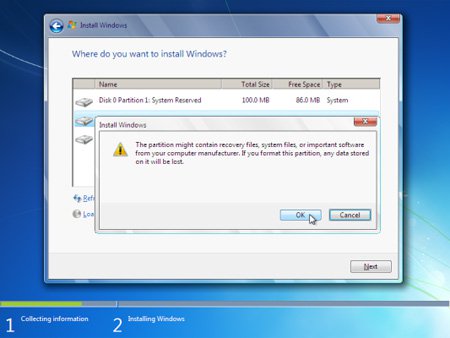
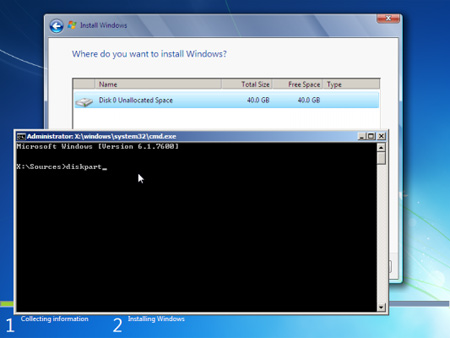
The installation process will continue as usual. In fact, there is another way to create partitions manually during Windows installation. You can do this when using the DISKPART command. This command is very useful when creating, expanding, performing other functions on partitions and drives. If you want this way, press SHIFT + F10 when the installation program is running.
The command window will appear, type the command ' diskpart '
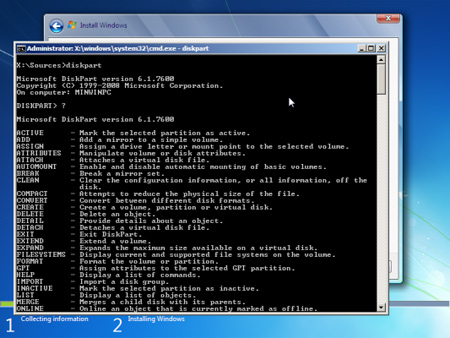
An interactive command line will be displayed.
If you need help from DISKPART, type ' /? '
Remember that you can change the size of the operating partition, but there will be no changes later.
You should read it
- ★ The life cycle of Windows 7 is shorter than Windows XP
- ★ Microsoft reduced $ 100 when upgrading from XP to Windows 8
- ★ The Windows 1.0 operating system is 40 years old
- ★ Microsoft still supports Windows RT despite being 'turned away' by firms.
- ★ Windows 8 'runs' less than 5 times less than Windows 7