Instructions for Partitioning Hard Drives with Partition Wizard 100% Successful
Hoang Ha PC will guide you how to successfully partition your hard drive using Partition Wizard. Let's learn how to use Partition Wizard in the article below!
Table of Contents
Introduction to Partition Wizard software
Minitool Partition Wizard professional hard drive partition software is a product of Partition Magic . It is considered the best disk partition program today. Since its release, Partition Wizard has had tens of millions of downloads from computer users around the world.
Partition Wizard has many great functions for users. It works on the operating system. You can not only divide hard drives with Partition Wizard, this software also has many other effective features such as: converting partition format from FAT to NTFS, changing cluster size without losing data, supporting Windows Dynamic Disk Volume, copying partitions, backing up and moving data without fear of loss, restoring partitions, supporting single disks or partitions larger than 2TB. Or supporting up to 32 hard disks in one system.
The strength of Partition Wizard software is its small size, only 10.5 MB. Operations on this software also ensure safety.

Some notes before dividing hard drive
Before proceeding to partition the hard drive for the computer, users need to pay attention to the following experiences:
- Operating system partition: partition from 60 GB > 100 GB to avoid the operating system drive being full. You must make sure that after installing all the necessary software, there will be about 50% left. This will help your computer maintain a fast and stable speed.
- When partitioning the operating system, you must set it as Primary. If you install two operating systems in parallel, the partition that is set as active will be prioritized to boot first.
The partition containing data should be set as Logical.
- Hard drive partition should be formatted as NTFS instead of FAT32 to avoid errors and save files with a capacity > 4GB.
- You should not divide too many partitions to avoid wasting space for management. If the hard drive is larger than 1TB, divide it into 4 partitions, if smaller, divide it into 3.
Instructions on how to partition a hard drive using Partition Wizard
To be able to divide a hard drive using Partition Wizard , you need to download and install this software on your computer. Below are specific instructions for you.
How to download and install Partition Wizard
Before installing, you need to note the following:
- Minimum 1GB RAM.
- Minimum hard disk space is 200MB.
- Minimum CPU is Intel Dual Core or higher.
- Partition Wizard can be used on all current operating system versions such as from
Step 1: Download MiniTool Partition Wizard software. You can use the link that TipsMake suggests below:
https://download.cnet.com/MiniTool-Partition-Wizard-Free-Edition/3000-2094_4-10962200.html
Step 2: After successfully downloading, you proceed to install. The first thing is to unzip the Setup.exe file and start running the file.
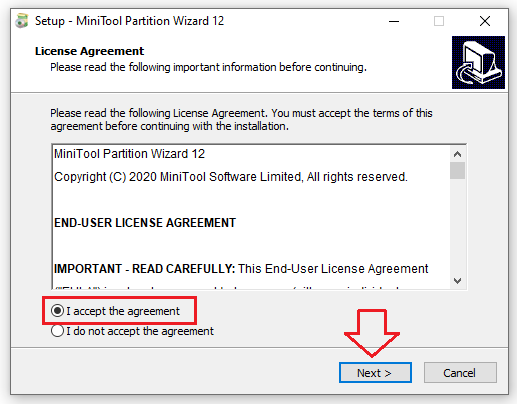
Step 3: Select I accept the agreement and Next to continue.
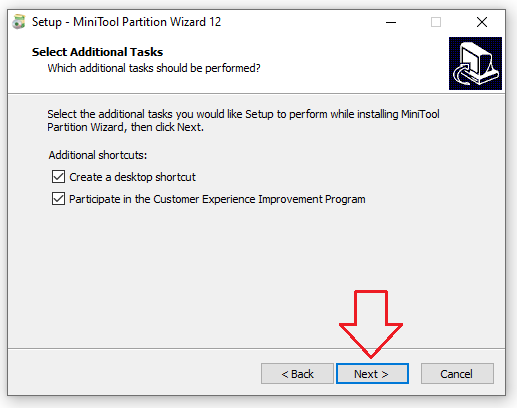
Step 4: Next you can choose to install the program or leave it as default and press Next to continue.
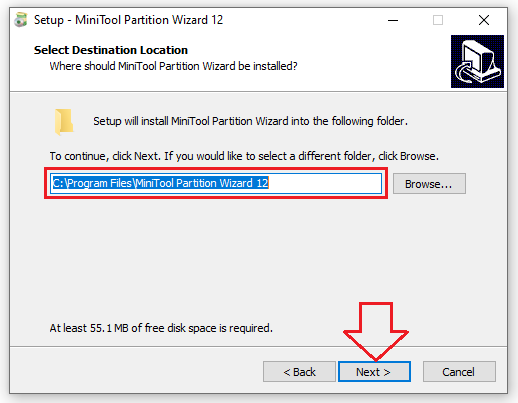
- Alternatively, you can leave it as default and press Next .
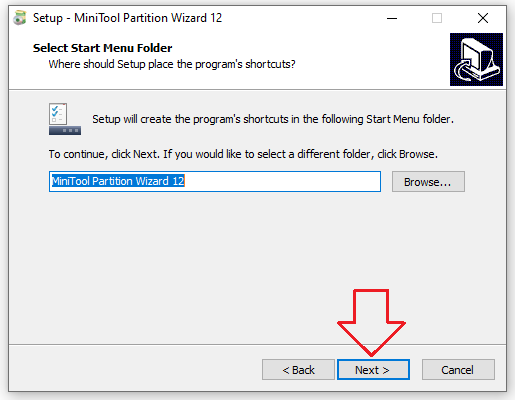
- Select Next to continue. You are allowed to name the shortcut for the program in the Start Menu.
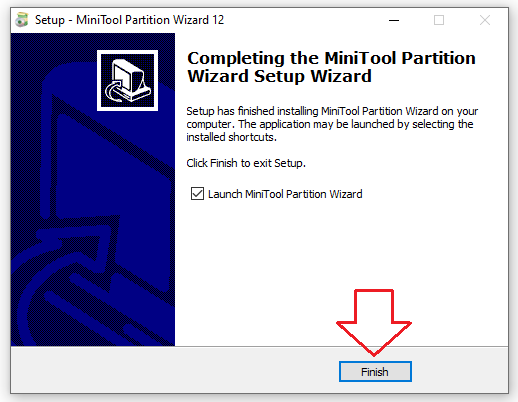
Step 5: Select Install

Step 5: Then select Finish to finish.
Partition hard drive with Partition Wizard software
To partition a hard drive using Partition Wizard , follow these steps:
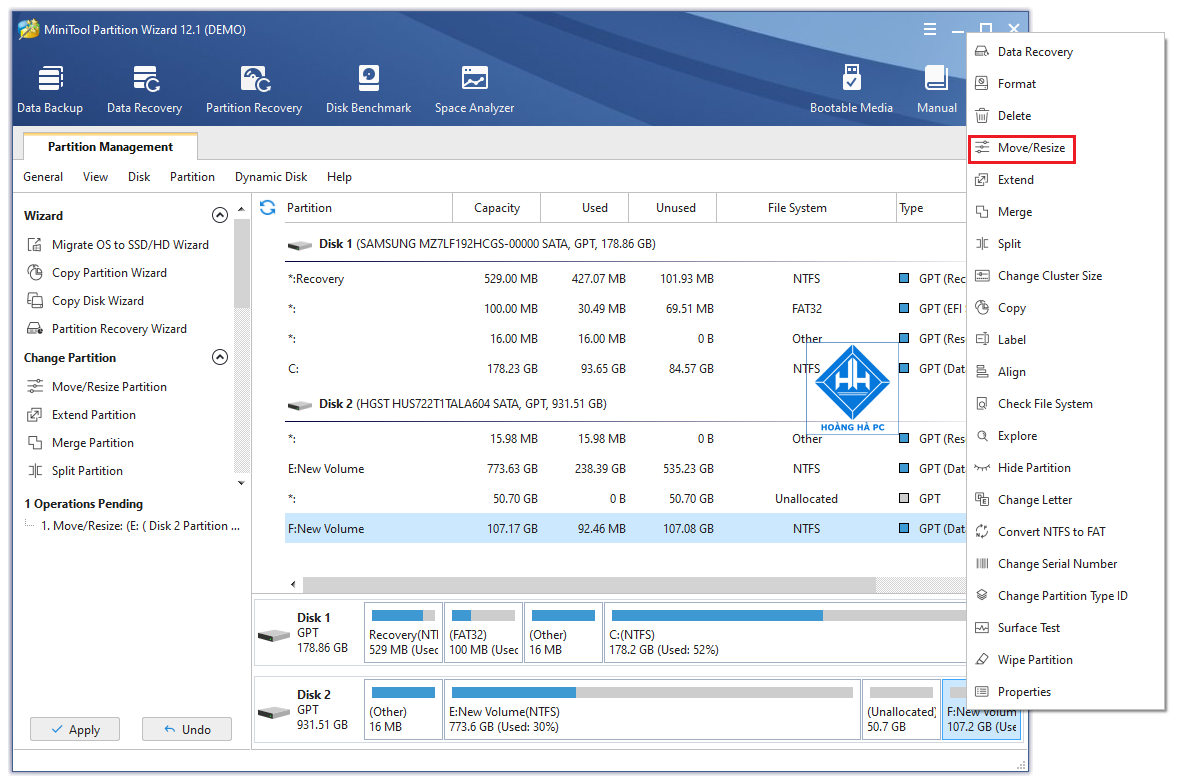
Step 1: Right-click on drive E and click on the ' Move/Resize ' function .
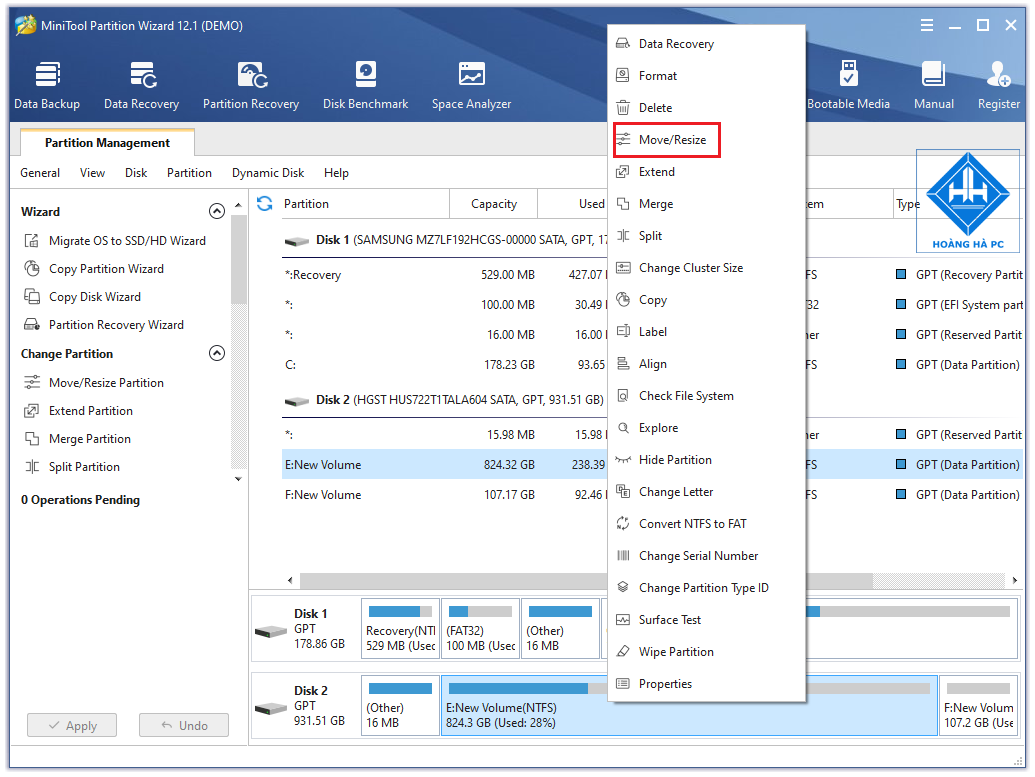
Step 2: The ' Move/Resize ' function window appears as shown below.
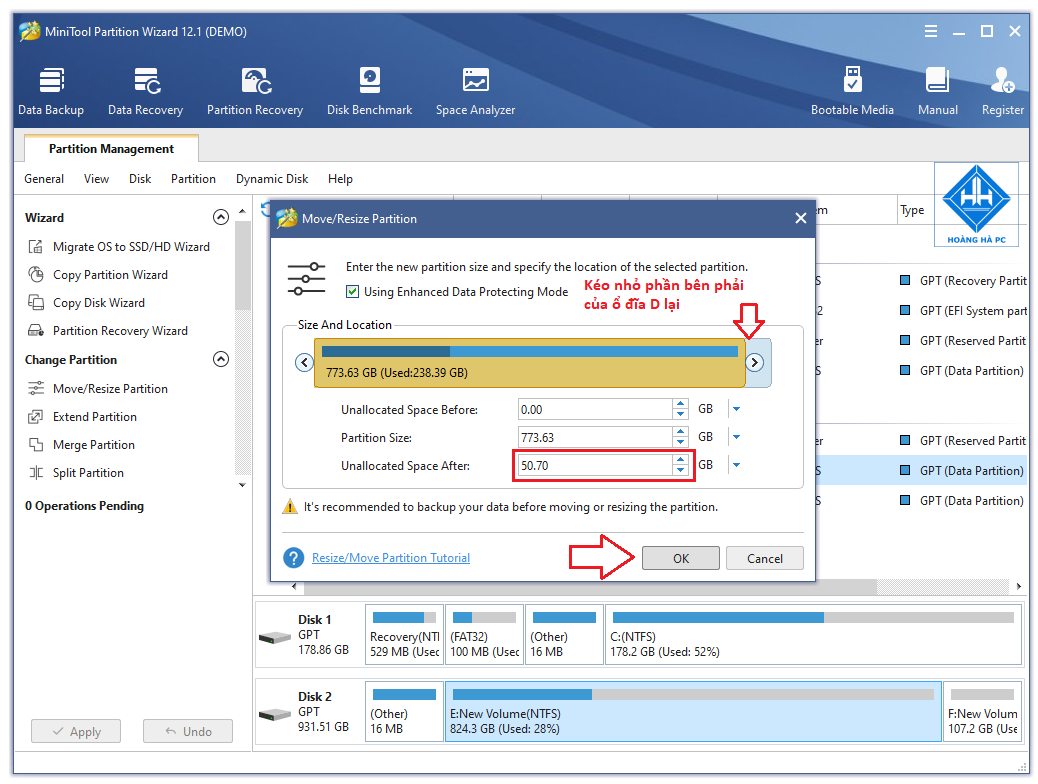
You can use the mouse to drag the right side of drive E to 50.70GB or type the exact number in the ' Unallocated Space After ' section to create an empty space on the right side of drive E and then press OK to continue.
Step 3: As you can see, a 50.70GB free space has been created on the right side of drive E .
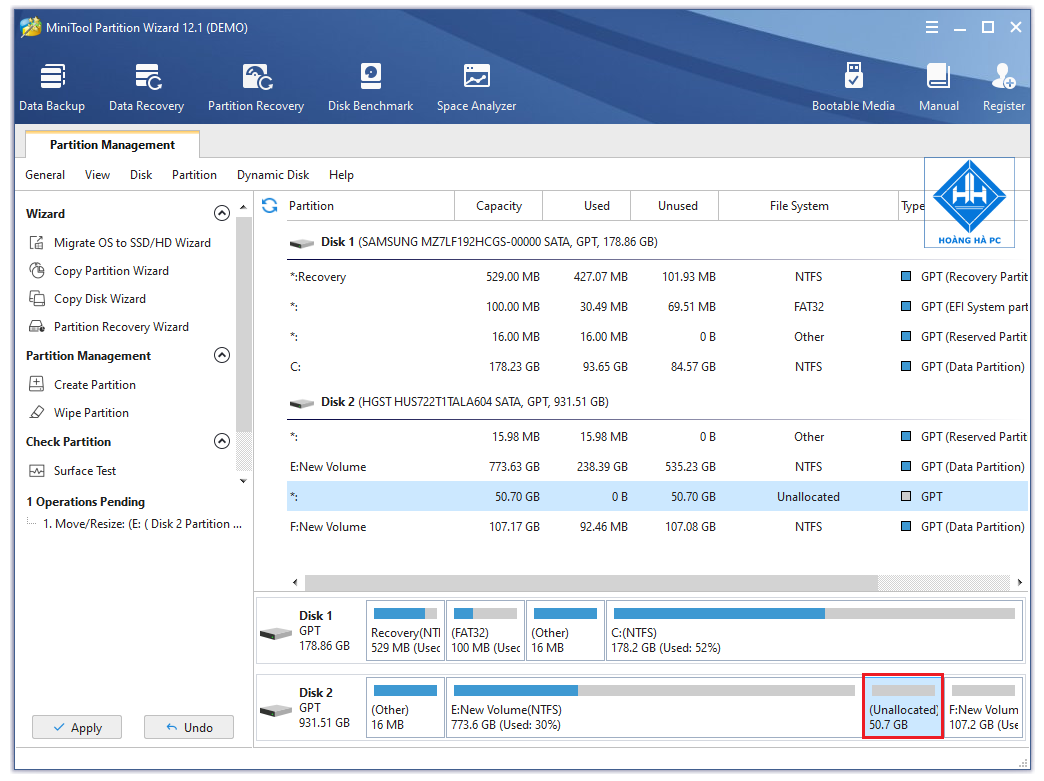
Step 4: Continue to select drive F to add 50.70GB , right - click and also select the ' Move/Resize ' function as you did with drive E.
Step 5: Use the mouse to drag the left side of drive F to take all the free space created from drive E.
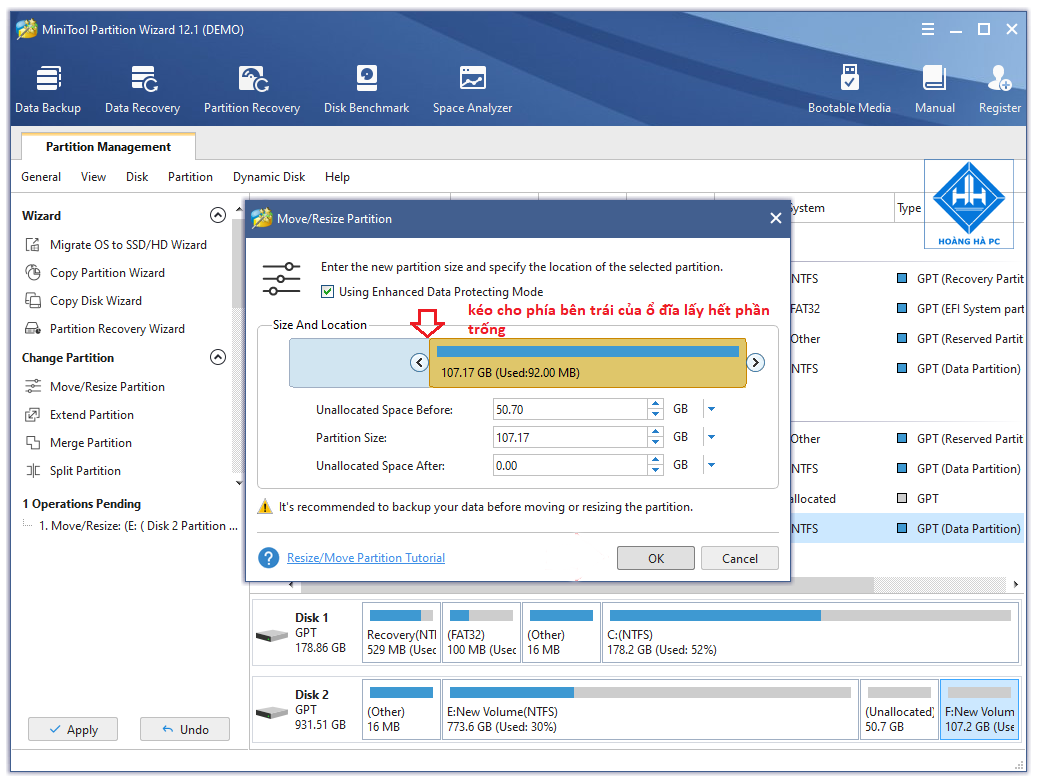
- Then you select OK to go to the next step.

Step 6: You can see the state we want to achieve is displayed. Click on the Apply Changes button .
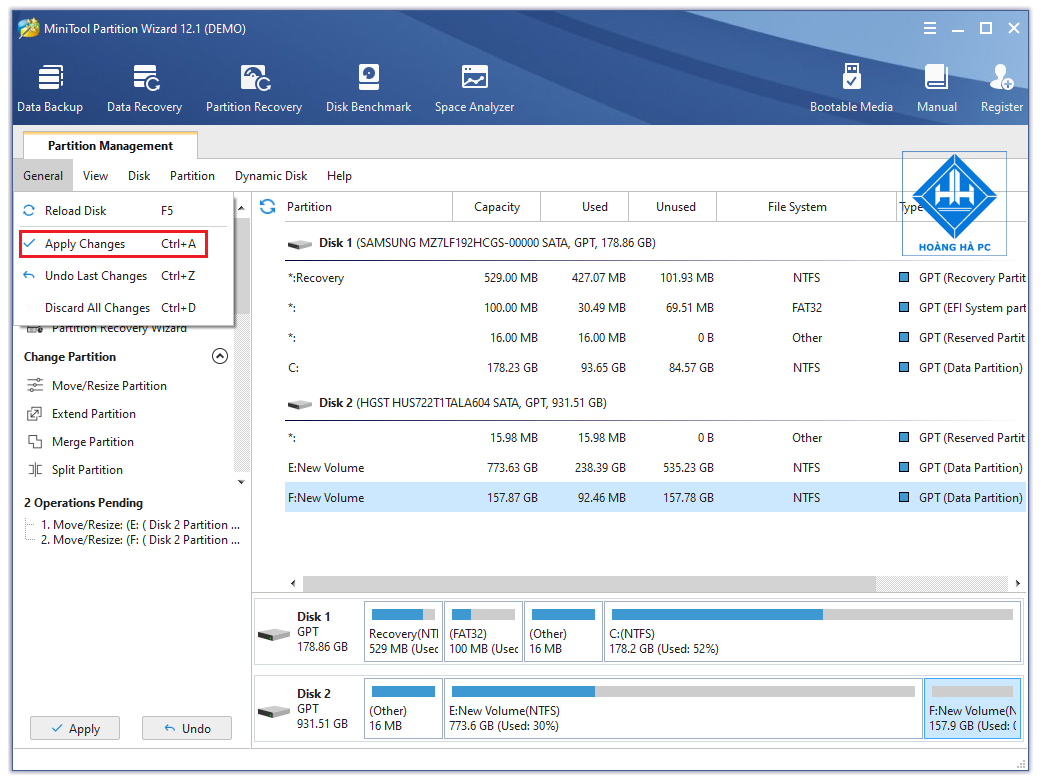
A dialog box will appear, reminding you to turn off power saving and other applications before proceeding with the repartition. You can follow the prompts and press the Yes button .
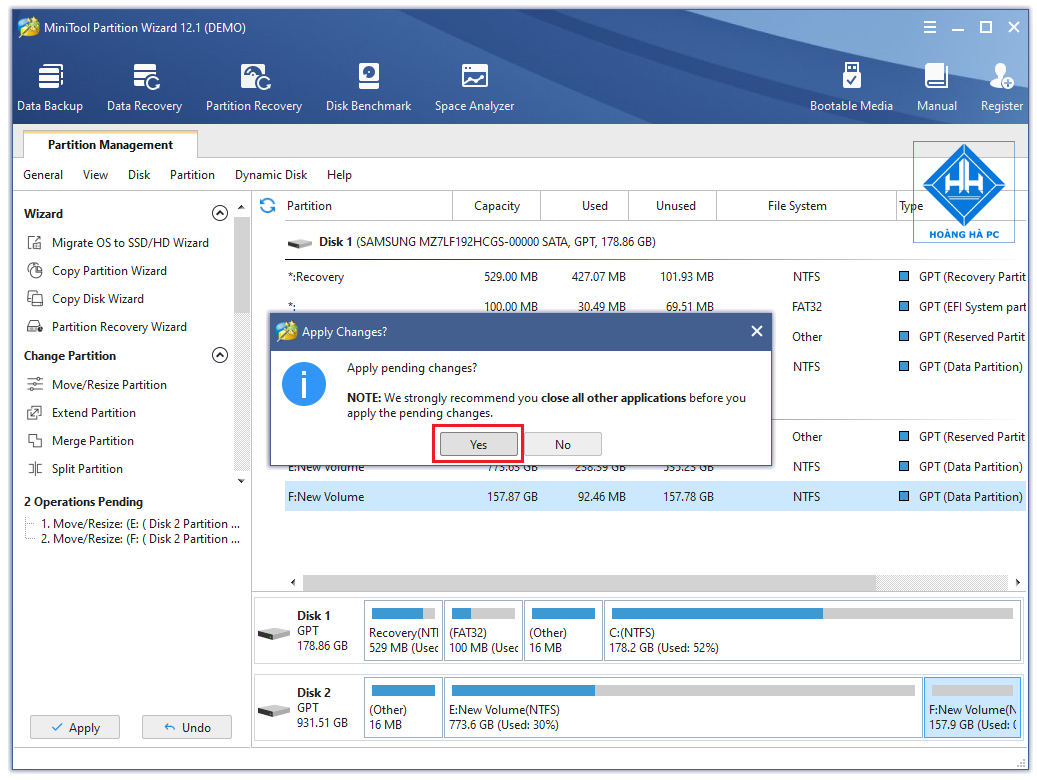
As soon as you press the Yes button , the program launches the necessary tasks to perform the repartitioning of the partitions. The dialog box notifies that the tasks have been successfully performed, you just need to press the OK button .
Step 7: Wait a few seconds for the system to partition the hard drive and you're done.
To change the name of the partition you just divided, right-click on the partition, select Label. Then enter a new name and click OK . To apply the new name, select Apply .
Was this article helpful?
Your feedback helps us improve.
Related Articles
 Steps to divide hard drive using MiniTool Partition Wizard software5 minutes read
 Review MiniTool Partition Wizard Free v11.56 minutes read
 How to Partition a Hard Drive in Windows 85 minutes read
 How to merge a hard drive in Windows 10 does not lose data with MiniTool Partition Wizard4 minutes read
 How to merge drives using MiniTool Partition Wizard, delete hard drive partitions.3 minutes read
 How to Create a Partition7 minutes read
Reader Comments 0
Sign in with email or Google to join the discussion.