Table of Contents
This practical guide explains how to share files with nearby sharing in Windows 11. Follow the steps in order, review the requirements first, and use the troubleshooting notes when a setting or option does not work as expected.
How to share files using Nearby Sharing Windows 11
Step 1:
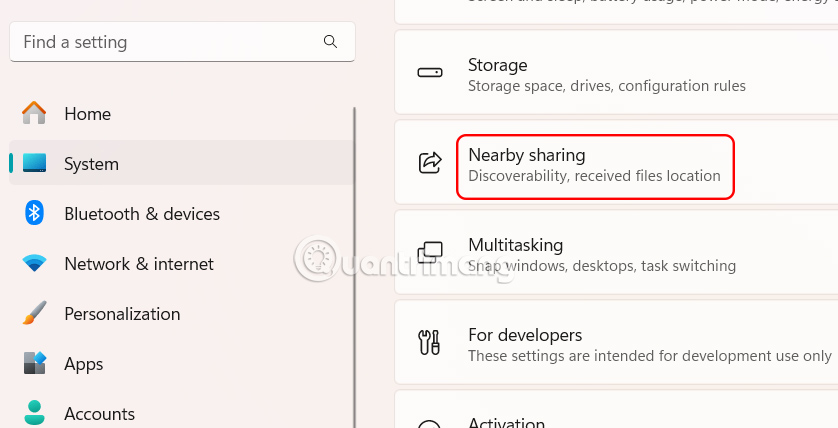
We open Settings then select System, then look to the side and select Nearby Sharing.
Step 2:
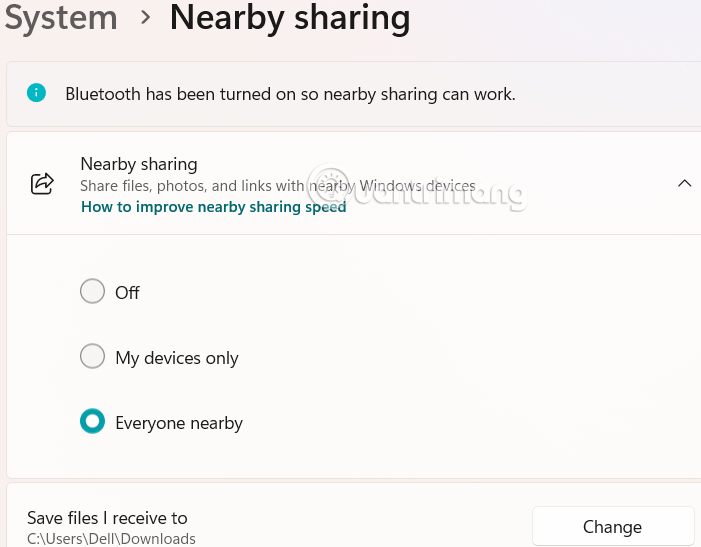
Now you will see 2 connection options to share files from your computer to another computer.
- My Devices Only: Share files with devices associated with your Microsoft account.
- Everyone Nearby: Share files with any nearby device.
Once selected, you can share the file using the Nearby Sharing feature on Windows 11. Depending on the option you choose, you can also share the file over Wi-Fi or Bluetooth.
Step 3:
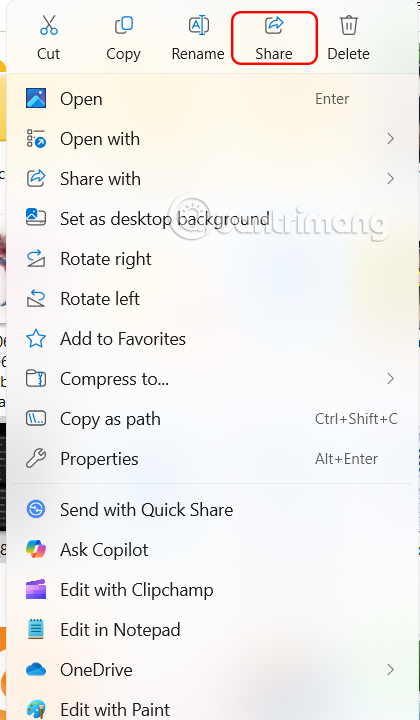
Find the file you want to share, right-select the file, and select the share icon .
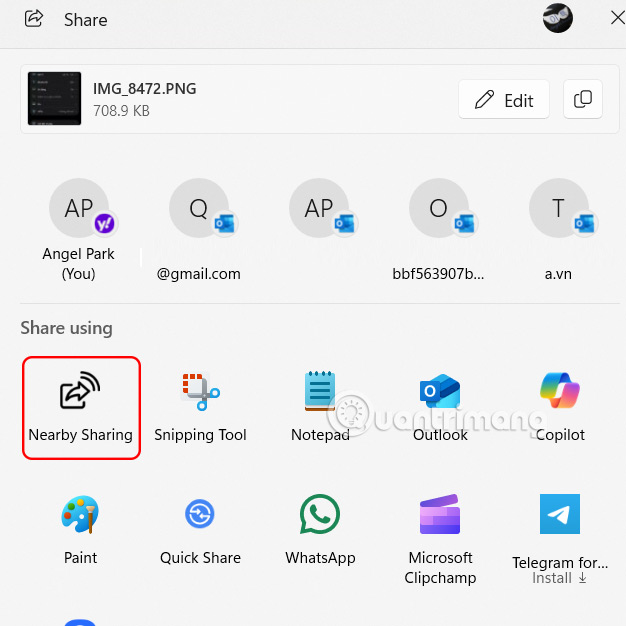
The interface appears as shown, click Nearby Sharing to share.
Step 4:
Now we will see the Windows PC with Nearby Sharing enabled near you, select that computer to connect and send files .
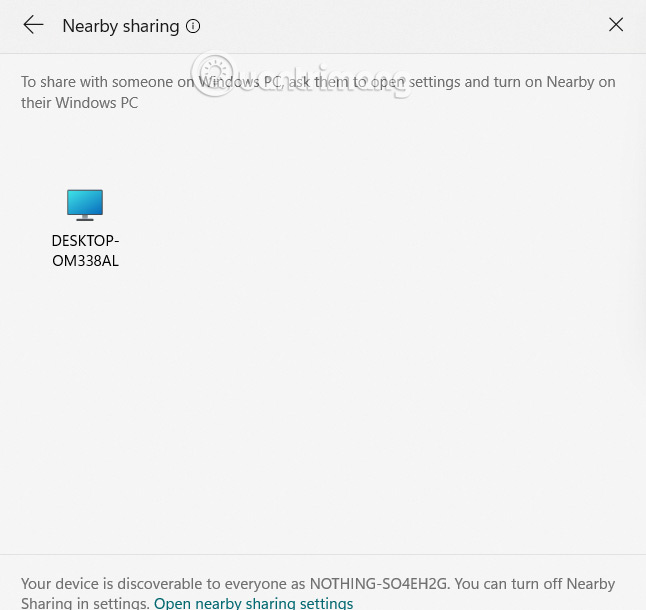
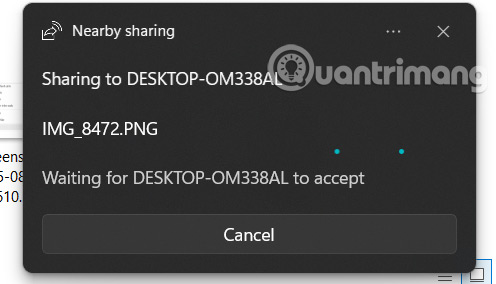
Immediately after that, the file sending process using Nearby Sharing is done. The other person just needs to agree to receive the file you sent.
Step 5:
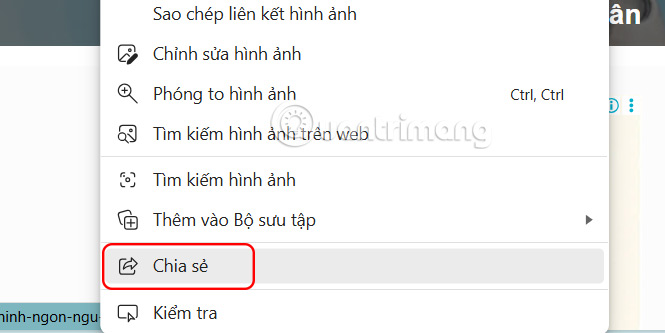
You can also share a web page using Nearby Sharing . Open Microsoft Edge and go to the web page you want to share. Right-click anywhere on the web page and select Share.
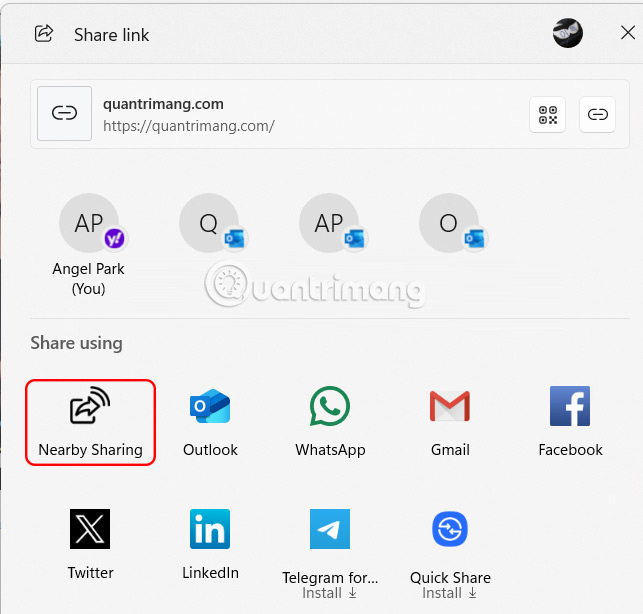
Then you also select Nearby Sharing to share the website on your computer.
FAQ
How to share files using Nearby Sharing Windows 11?
We open Settings then select System, then look to the side and select Nearby Sharing.
What does this guide cover?
This guide explains share files with nearby sharing in Windows 11, including the main steps, important details, and practical considerations.
Who is this guide for?
It is designed for readers who want a clear, practical overview and a reliable process they can follow without unnecessary complexity.
Related Articles
 4 Common Mistakes When Using Nearby Sharing and How to Fix3 minutes read
 ''airdrop'' for Windows: How to Use Nearby Sharing in Windows 115 minutes read
 Should I Use Google Nearby Share or Windows Nearby Sharing?7 minutes read
 Android Nearby Share App for Windows Officially Launched4 minutes read
 Steps to Use Ondrop to Share Unlimited Files3 minutes read
 Sharing: How to Share Files in Windows 10 LAN9 minutes read
Reader Comments 0
Sign in with email or Google to join the discussion.