Table of Contents
Learn how to fix the network and sharing center not opening error with clear steps, practical tips, and troubleshooting guidance for a reliable result.
Use commands to repair corrupted files on your computer
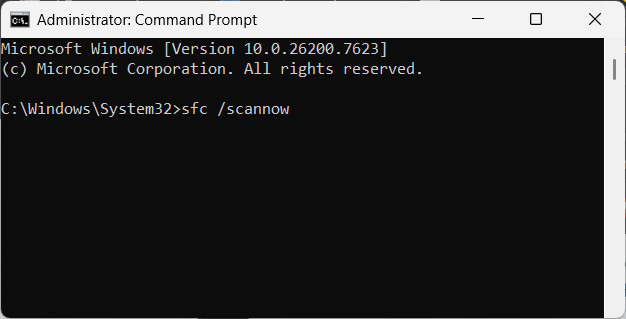
Step 1
Open the Command Prompt window with administrator privileges. Then enter the command sfc /scannow to perform a system scan.
This command checks core Windows files and replaces any corrupted files. If the system reports that the files have been repaired, restart your computer.
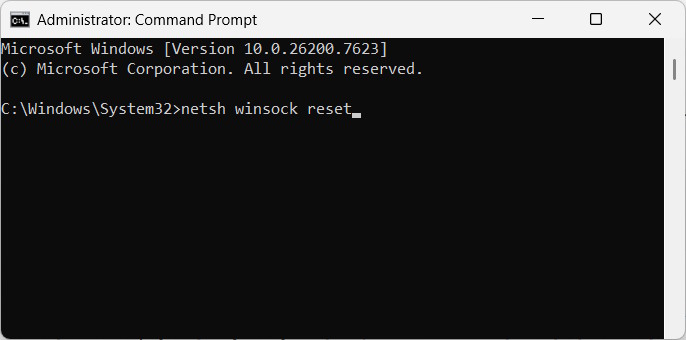
Step 2
Reopen the Command Prompt window with administrator privileges and enter the command netsh winsock reset.
This command resets Winsock to remove faulty entries that may be causing network tools and application discovery processes to malfunction.
Step 3
In the same window, enter each of the following commands and press Enter after entering each command.
netsh int ip reset
ipconfig /release
ipconfig /renew
ipconfig /flushdns
These commands remove faulty network information that may be preventing the opening of network components. Restart your computer for the changes to take effect.
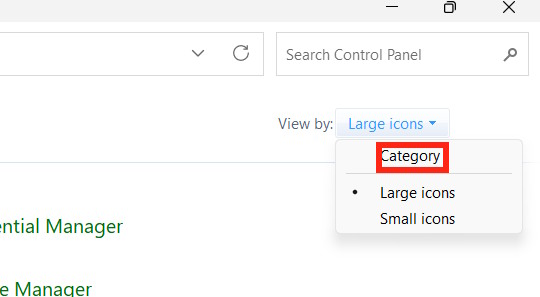
Open Network and Sharing Center using Control Panel
We open the Control Panel, then under View by: to, select Category .
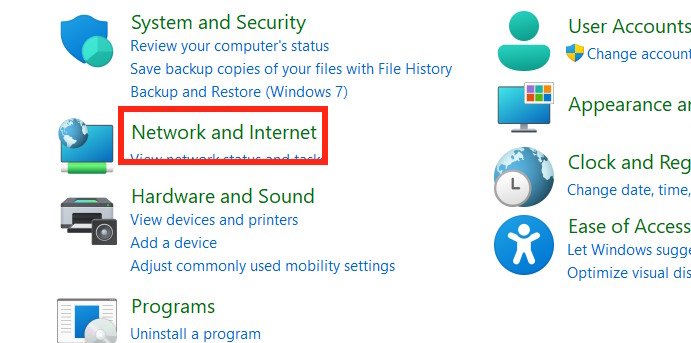
Now you just need to click on Network and Sharing Center to access it.
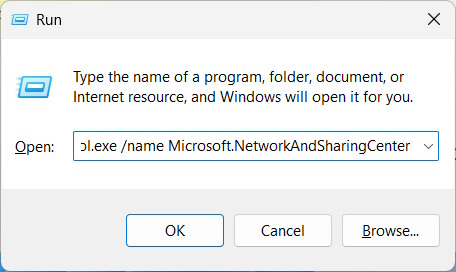
Alternatively, you can open the Run dialog box and enter the command control.exe /name Microsoft.NetworkAndSharingCenter to open the Network and Sharing Center.
Restart network services on Windows
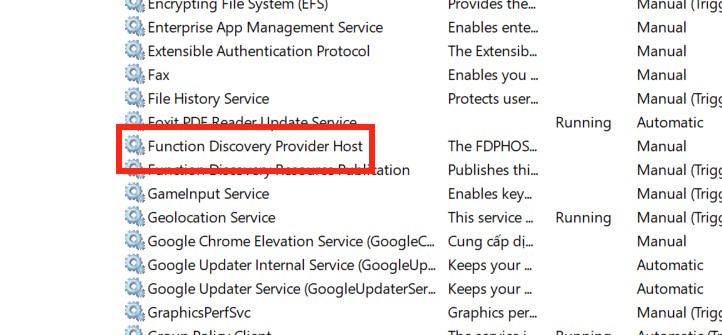
Step 1
Open the Run dialog box and type services.msc into the interface to access it. Next, in this interface, double-click on the Function Discovery Provider Host .
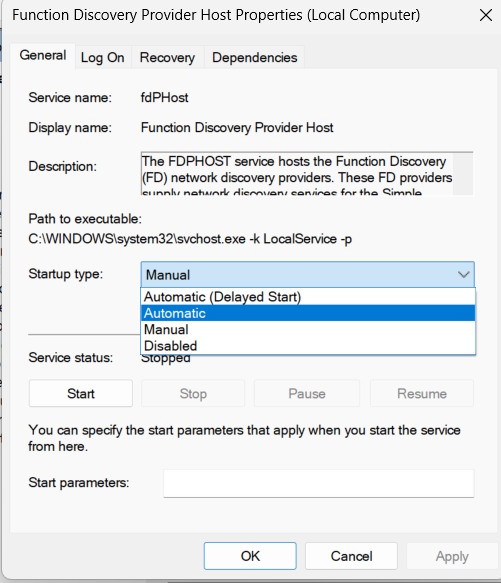
Step 2
Set Startup type to Automatic , then click Start if the service stops. This service helps find other devices on the network.
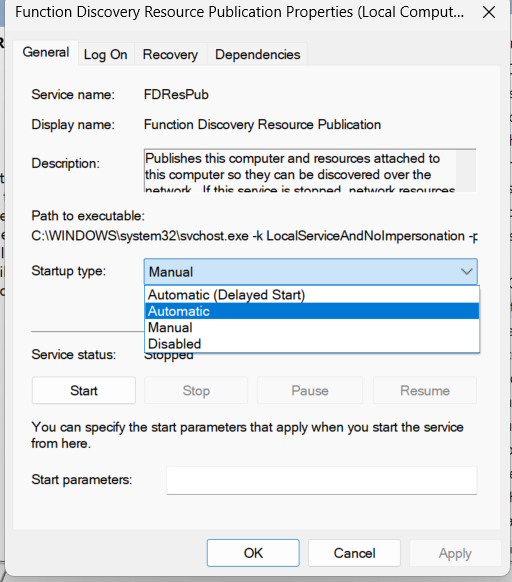
Step 3
Double -click on Function Discovery Resource Publication , set Startup type to Automatic , and start the service.
Step 4
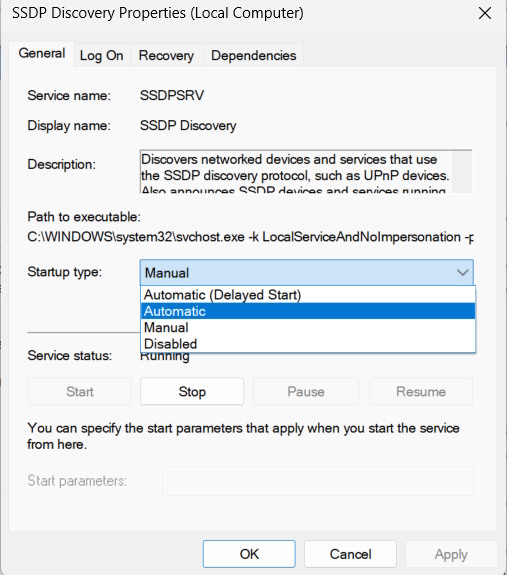
Double-click on SSDP Discovery , then select Automatic and restart the service.
Step 5
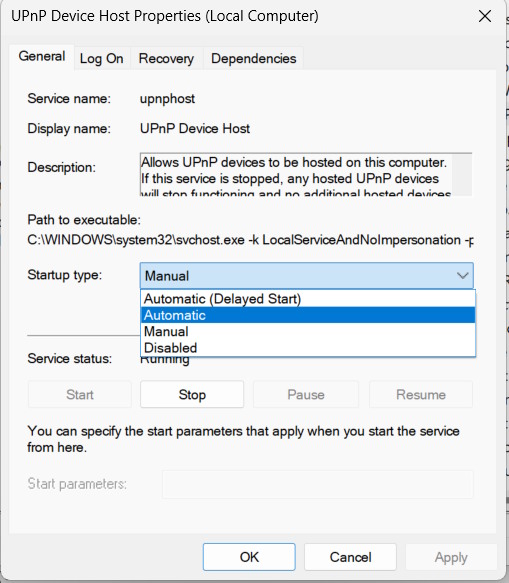
Open UPnP Device Host , set Startup type to Automatic , and start the service.
Step 6
Continue searching for the DNS Client and check if it's in Running mode. Finally, restart your computer.

Enable Network Discovery and File Sharing
Step 1
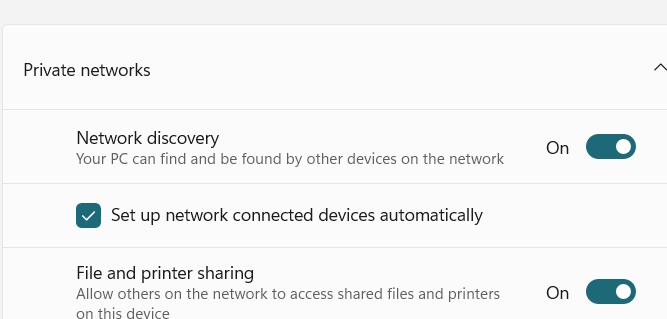
To access it, type "Manage advanced sharing settings" into the search bar . Then, expand the "Private" section , enable "Network discovery ," turn on "Automatic setup of network connected devices ," and enable " File and printer sharing ."
Step 2
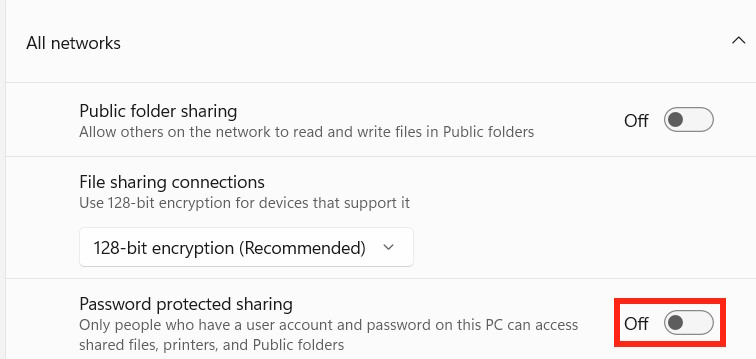
Expand All networks , then if you want anyone on the local network to be able to open the shared folder without entering the username and password, turn off Password protected sharing .
Update or reinstall your network driver
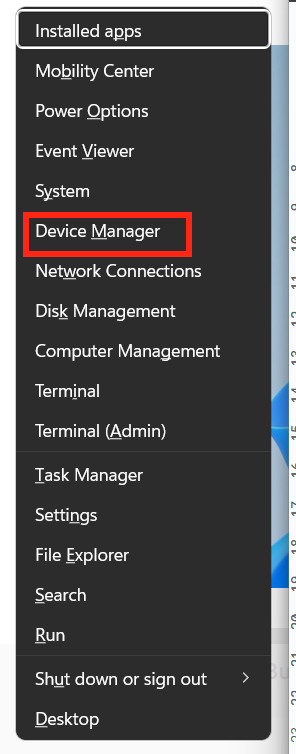
Step 1
Press Windows + X and then select Device Manager from the list.
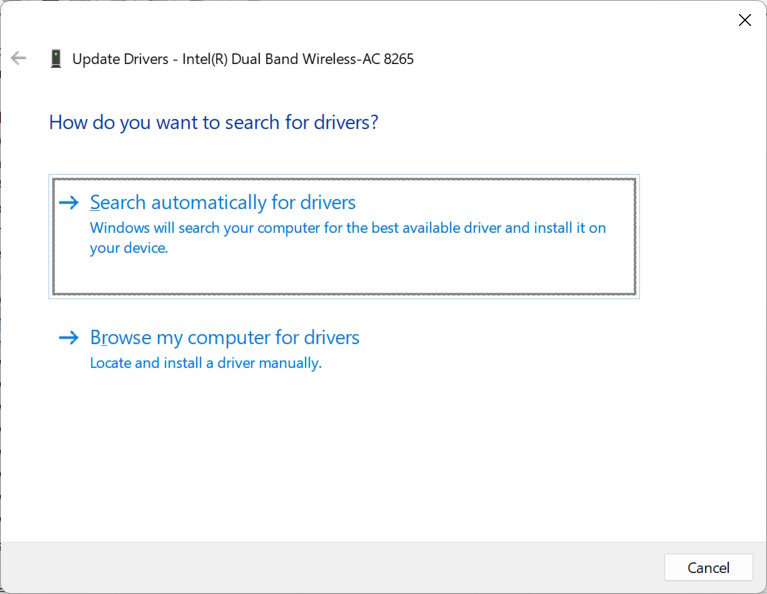
Step 2
Expand Network adapters , then right-click on Wi-Fi or Ethernet and select Update driver . Choose Search automatically for drivers and follow the instructions.
If the update fails, tap the adapter again and select Uninstall device.
Final Thoughts
Use this guide as a practical checklist for how to fix the network and sharing center not opening error. Work through the steps in order, verify each result, and adjust the options to match your needs.
Frequently Asked Questions
What do you need before following this How to Fix the Network and Sharing Center Not Opening Error guide?
Review the required tools, accounts, settings, or materials mentioned in the article. Learn how to fix the network and sharing center not opening error with clear steps, practical tips, and troubleshooting guidance for a reliable result.
What are the main steps for how to fix the network and sharing center not opening error?
Follow the sections in order, especially Use commands to repair corrupted files on your computer, Step 1, Step 2. Complete each step before continuing and verify the result as you go.
What should you do if the process does not work as expected?
Recheck the prerequisites, update the relevant app or service, review the settings, and repeat the step that caused the issue. Use any troubleshooting notes included in the guide.
Was this article helpful?
Your feedback helps us improve.
Related Articles
 How to Fix 'an Unexpected Error Occurred' Error When Opening6 minutes read
 Fix Windows Errors: Complete Guide: How to Fix the ''error Opening File8 minutes read
 Network Sharing Settings in Windows 78 minutes read
 Types of Data Center Design8 minutes read
 How to See Active Network Connections (Windows)6 minutes read
 Error Opening XML File in the Wrong Format and How to Fix the Error Effectively6 minutes read
Reader Comments 0
Sign in with email or Google to join the discussion.