Instructions for filming and taking game screen shots in Windows 10
If you want to capture a video or take a screenshot of the game you are playing on a computer running Windows 10 , there is no need to install any support tools. By default Windows 10 has a built-in Game Bar , which allows users to record video or take photos of the game they are playing to save or upload to YouTube or any other video sharing website.
- Instructions for filming the screen with CyberLink Youcam
- Instructions for filming a screen with Bandicam
- How to use Camtasia Studio to record a screen?
Video capture of Windows 10 screen with Game Bar
With Game bar you can return videos of any application or game you want. The clips will be saved in MP4 format.
Step 1 : At the game screen, you press Windows + G key combination to open Game bar. If it's the first time you open Game Bar, the dialog box Do you want to open Game bar? will appear, click the option Yes, this is a game to start.
In case you don't see the Game Bar dialog box appear, you can play the game in full screen mode, so the Game Bar is hidden, so switch to window mode to see it.

Step 2 : The Game Bar dialog box appears with action icons as fast as opening the Xbox app, controlling the recording process, taking photos, recording the screen of the game playing and installing.
To record a video of the open game, press the Windows + Alt + R key combination or click the red Record button to proceed with the recording. Then a timer will appear in the upper right corner of the game window you are playing.
To stop recording, press the Windows + Alt + R key combination or click the Record button again. When you want to hide / show the timer, press Windows + Alt + T.

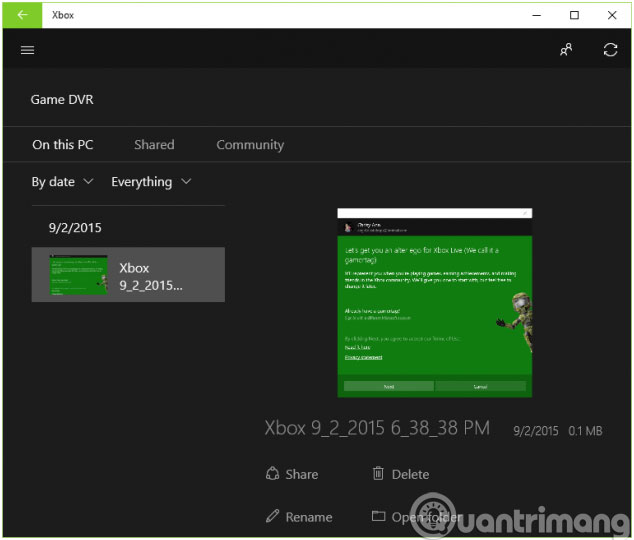
Step 4 : When the recording stops, a message will appear informing you that the video has been recorded. To review the recorded video clip, open the Xbox app and access the Game DVR icon in the menu bar. Here, you will see a list of all the screenshots and videos recorded in the On this PC section .

By default Windows will save all videos and screenshots to C: UsersUSERVideosCaptures , where USER is the name of the account you are using.
Do the same thing if you want to take a picture of the game you are playing. Photos will be saved in PNG format. However, to take a screenshot of the game, press the Windows + Alt + PrtSc key combination or click the Screenshot button with the camera icon in the Game Bar interface.

Use the Record that feature in Game Bar
The Game Bar Record that allows you to save the last 30 seconds of an application or game. It works by recording continuously in the background and saving the last 30 seconds ( the length can be changed ) when this feature is used.
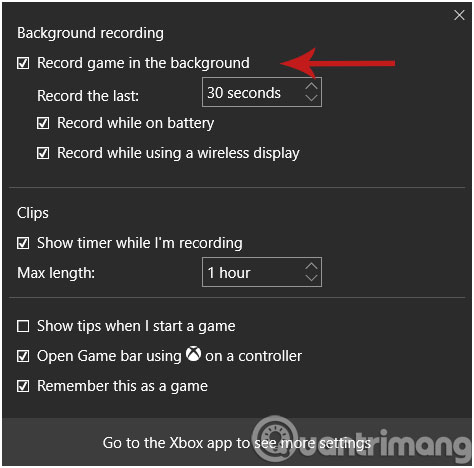
Press the Windows + G key combination to activate Game Bar, then click the Settings button to open the settings menu. Then tick the Record game option in the background under Background recording . In addition, Record the last item allows you to change the recording time.

To use this feature, simply activate the Game Bar application, press the Windows + Alt + G key combination or press the Record button that has the icon as shown below.

Having fun!
See more:
- Ways to take screen shots of Windows 10
- How to change Win 10 computer wallpaper
- How to create a VPN on Windows 10
- Instructions for fixing 100% Full Disk error on Windows 10
- How to speed up Windows 10 by turning off the application that runs in the background