Table of Contents
This guide explains how to capture and Record Game Screens with Game Bar Is Available on, with clear steps, practical tips, and important checks before you begin.
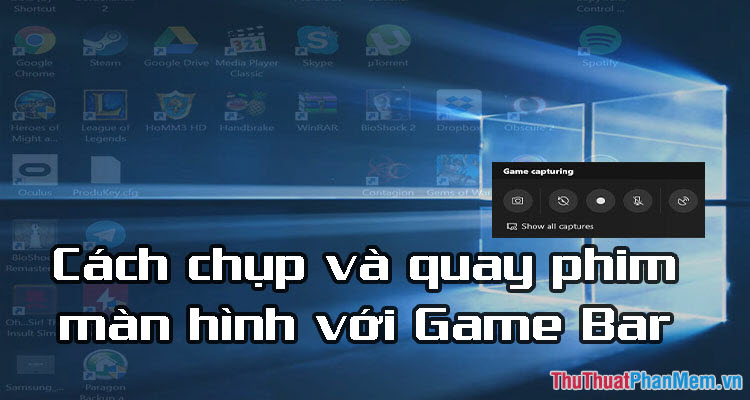
1. Turn on, turn off Game Bar on Windows 10
First, we have to activate the Game Bar on Windows by the following:
Step 1: Go to Start => Settings .
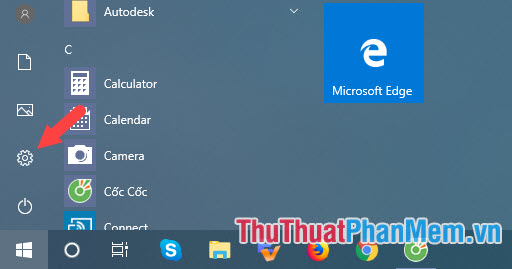
Step 2: Select the Gaming section.

Step 3: You select the Game bar and toggle the switch Record game clips, screenshots, and broadcast using Game bar to On to turn it on or Off to turn it off.
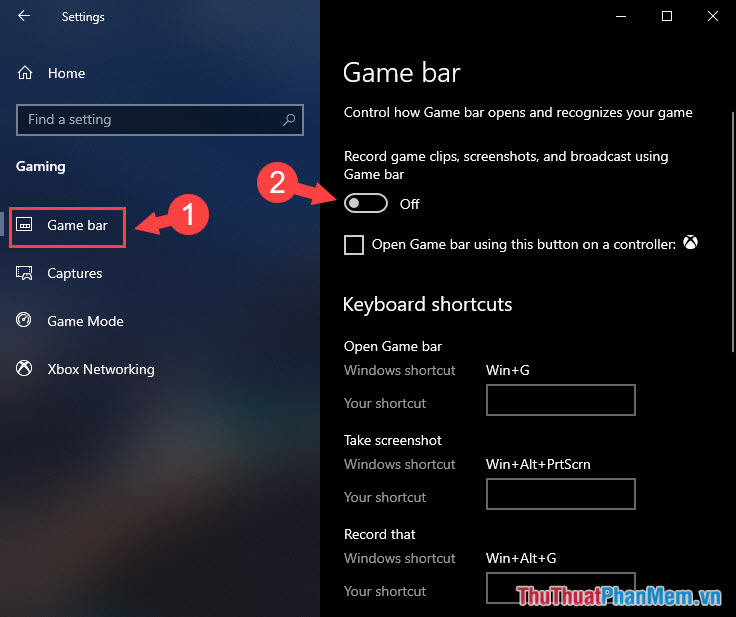
Step 4: You pay attention to the important shortcuts in the Game Bar as:
- Open Game Bar ( Window + R ) to open the Game bar menu.
- Take Screenshot ( Win + Alt + PrtScrn ) to take screenshots quickly.
- Start / stop recording ( Win + Alt + R ) To record / stop screen recording mode.
In addition, we can change the custom shortcut keys to your liking by customizing your shortcut .

2. Shooting, rotating game screen with Game Bar
Step 1: You open the game up and press the key combination Windows + G . Here, we can take a quick picture with Windows key + Alt + Prt Scr or click on the camera icon (1) . To rotate the game screen, we can use the key combination Windows + Alt + R or click the circle icon (2) to rotate the screen.
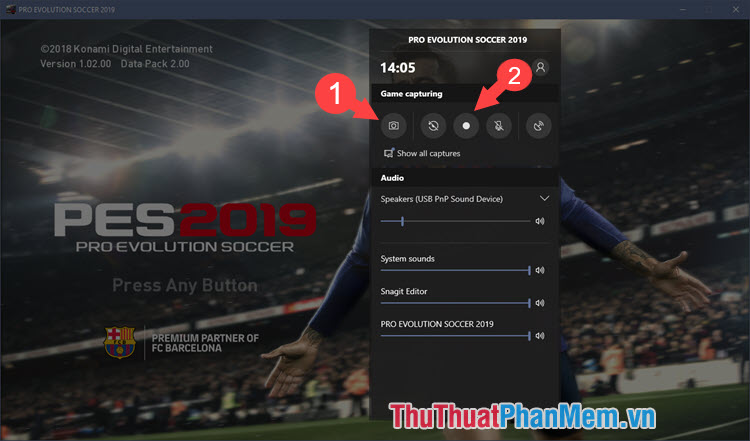
Step 2: If you record the screen, the Record status frame will display the time you are recording with the Pause and Turn On / Off Micro buttons.
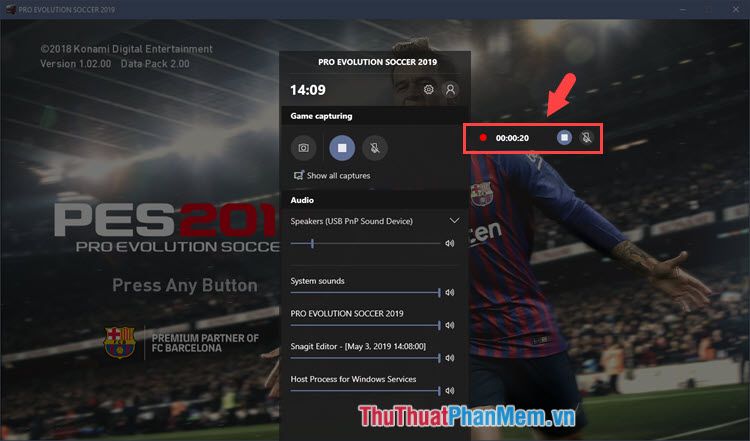
After shooting, press the Pause button and the video will automatically save to the Capture folder. You may notice a notification is displayed in the bottom right corner of the screen where the clip is stored.
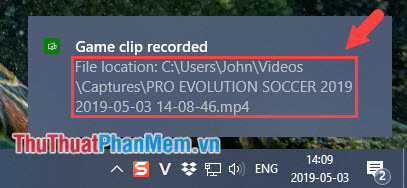
Step 3: To open the image, the clip we have taken, shoot, you open the Captures folder under the path in the status line with the default image format is PNG and the video format is MP4.

Through this article, we know how to shoot and take screenshots when playing games in a simple and convenient way on Windows 10 without using external software such as Mirilis Action, Bandicam. Please create your own clips and memorable images when playing games with Game Bar to share for friends to admire!
FAQ
What should I know about Capture and Record Game Screens with Game Bar Is Available on?
Focus on the key features, requirements, limitations, and practical use cases explained in this guide.
How do I get the best results with Capture and Record Game Screens with Game Bar Is Available on?
Follow the recommended steps, use current software or information, confirm compatibility, and review settings before major changes.
Are there any risks or limitations?
Potential limitations depend on compatibility, data quality, cost, privacy, support, and how the product or method is used.
Related Articles
 How to Capture and Record Game Screen on Windows 10 Using Game Bar5 minutes read
 Instructions for Filming and Taking Game Screen Shots in Windows6 minutes read
 Screen Capture Tools for GIF Screens for Windows 105 minutes read
 How to Use Faststone Capture to Record Computer and Laptop3 minutes read
 How to Capture and Record Video Games with Fraps Software6 minutes read
 How to Use Xbox Game DVR to Record Screen in Windows 1010 minutes read
Reader Comments 0
Sign in with email or Google to join the discussion.