Table of Contents
This updated guide explains how to check BIOS version in Windows 11 with clear steps, practical tips, and useful context. When your computer has problems or when you want to upgrade hardware such as CPU, RAM or SSD, checking the BIOS version on your Windows computer is one of the important details to know to ensure compatibility when upgrading.
How to Check BIOS Version Using System Information
Step 1:
Press the Windows + R key combination to open the Run dialog box. Next, enter the keyword msinfo32 and press OK to access.

Step 2:
Display the System Information interface, select the System Summary tab and look to the right to find the BIOS Version/Date line . Through this section, you will know the manufacturer, version number and release date of the current BIOS.

How to Check BIOS Using Command Prompt
Step 1:
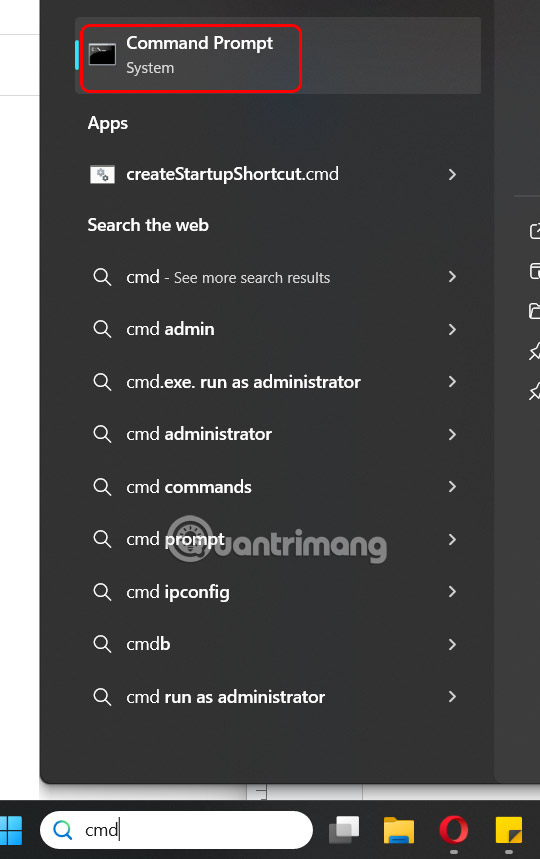
You type cmd in the search bar and then select the Command Prompt result in the search bar.
Step 2:
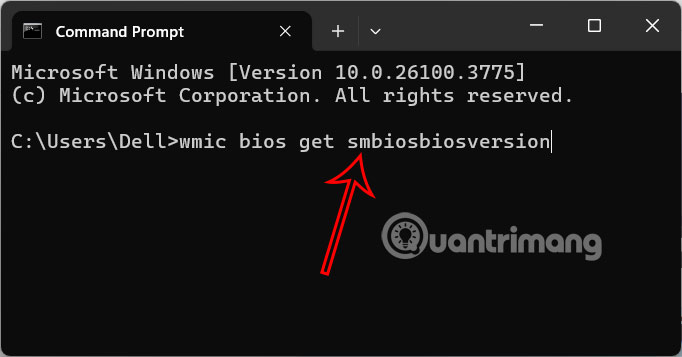
At this interface, enter the command wmic bios get smbiosbiosversion and press Enter to execute the command.
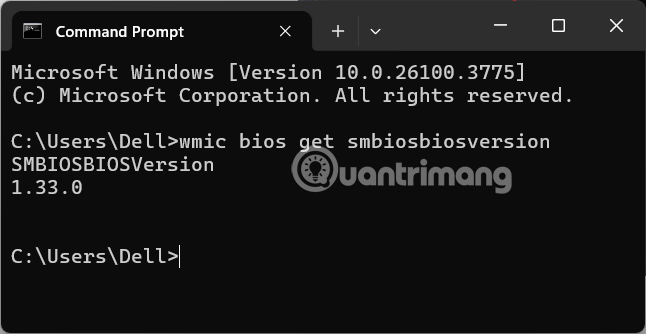
As a result, the user will see the current BIOS version being used on Windows displayed under the title SMBIOSBIOSVersion.
FAQ
What should I prepare before I check bios version in windows 11?
Review the requirements and options in the guide first. Having the correct device, app version, account access, or materials ready helps prevent avoidable errors.
How long does it take to check bios version in windows 11?
The time depends on the task and your setup. Most basic steps can be completed quickly, while downloads, updates, scans, or troubleshooting may take longer.
What should I do if the steps do not work?
Repeat the instructions in order, confirm that your software or device is supported, and check permissions, connectivity, and available updates before trying again.
Related Articles
 How to Check BIOS Version: Step-by-Step Guide4 minutes read
 Display BIOS Information on Windows 10 Using Command Prompt4 minutes read
 5 Tips for Using the BIOS to Help You Master Your Computer8 minutes read
 Instructions for Entering BIOS on Different Computers6 minutes read
 How to Check a Computer Using UEFI or BIOS3 minutes read
 How to Check the Computer That Supports Efi // Uefi or Legacy4 minutes read
Reader Comments 0
Sign in with email or Google to join the discussion.