How to take screenshots in BIOS
Windows doesn't support you any keyboard shortcuts to take BIOS screenshots, but you can follow the instructions below to take BIOS screenshots.
Table of Contents
Taking a screenshot of your computer screen is very simple, you just need to use the shortcut key to take a photo. However, to take a screenshot in BIOS, you need to do more steps. Basically, Windows does not support you with shortcut keys to take a screenshot of BIOS, but you can follow the instructions below to take a screenshot of BIOS.
How to take screenshots in BIOS
Step 1:
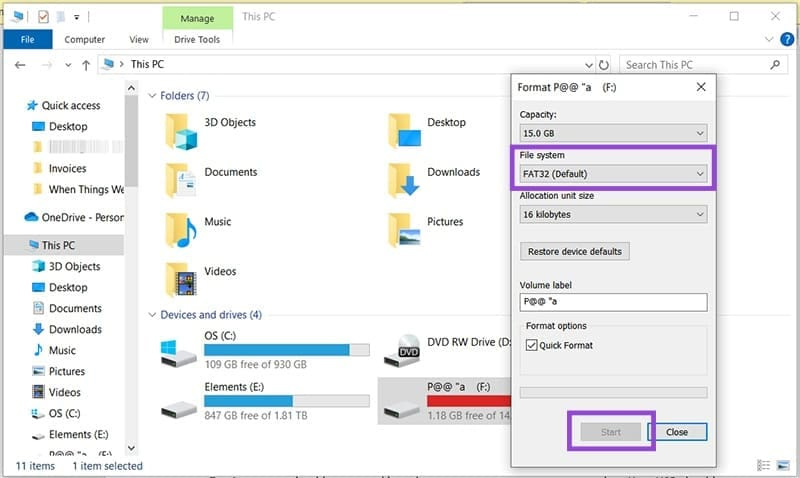
Prepare a blank USB and format it to run in BIOS. Connect the USB to the computer, then right-click and select Format in the displayed menu. In the displayed menu, in File System, select FAT32 (Default) and then click the Start button below. Then click OK to reformat the drive.
Step 2:
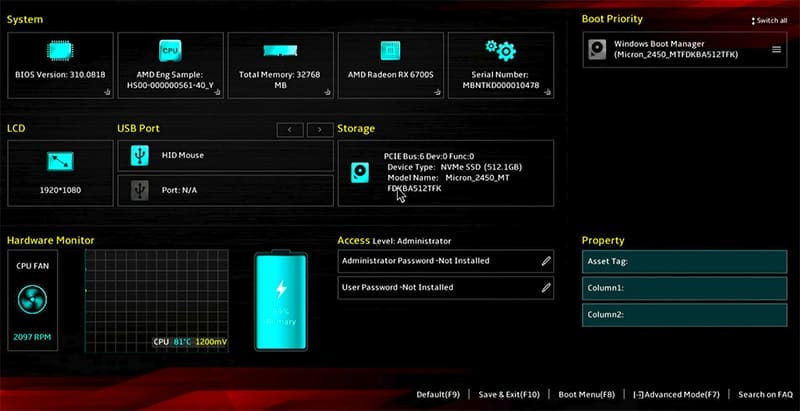
Restart your computer and then press the BIOS access shortcut key depending on your computer.
Step 3:
Once you're in the BIOS screen you want to take a screenshot of, press the Print Screen button (or F12, F10, or F8 on some computers).
A new message will appear asking where you want to save the screenshot, select USB if BIOS supports it. The image will be saved as a '.bmp' file.
Then the computer restarts as normal.
Was this article helpful?
Your feedback helps us improve.
Related Articles
 5 tips for using the BIOS to help you master your computer7 minutes read
 Instructions for entering BIOS on different computers5 minutes read
 Ways to reset BIOS password or remove BIOS password9 minutes read
 How to Enter BIOS2 minutes read
 Display BIOS information on Windows 10 using Command Prompt2 minutes read
 Understanding BIOS: An Indispensable Component of a Computer6 minutes read
Reader Comments 0
Sign in with email or Google to join the discussion.