Table of Contents
This guide explains how to transfer images from phone to TV using dlna using a clear, step-by-step process. It also highlights the settings and checks that can help you avoid common errors.
DLNA is a popular method of connection between electronic devices together. Users can use DLNA to connect and share media files between devices, just be connected to the Internet.
With the continuous development of current technology, many new technologies have been developed to improve the previous techniques, to support users a lot in the process of use. With DLNA, you will not need the cable as the way to connect HDMI as before to project the phone screen on the TV. As long as we have 2 devices connected to the same network, we can transfer any image, video, audio quickly and easily. The steps below explain how to transfer images from your phone to a TV using DLNA.
- What is DLNA connection technology on computers, TVs, phones, etc.?
Transfer photos from phone to TV via DLNA
The following article only applies to Andoid phones, smart TVs that can connect to the Internet. First of all, we need to check whether phones and TVs support DNLA. Then connect them to a Wi-Fi network to connect the phone to the TV.
Step 1:
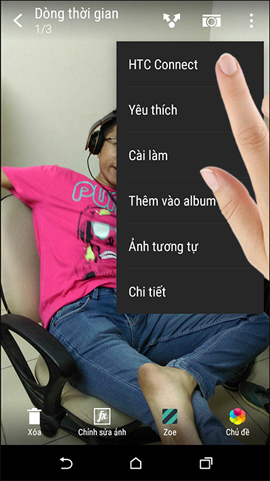
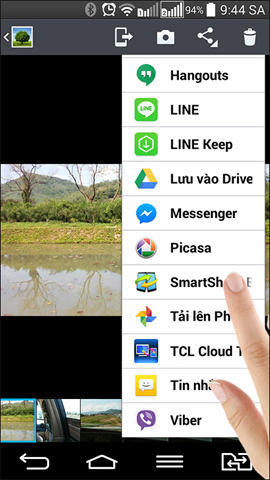
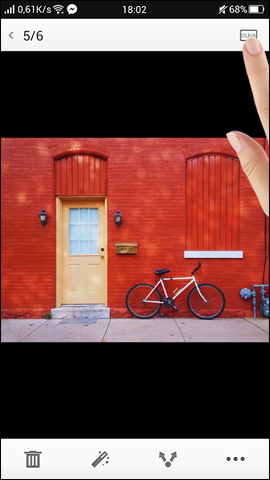
On the phone, we open the image we want to transfer to the TV and find the sharing icon to open the DNLA feature. Depending on the phone line, this icon will be different.
On Sony phones There will be A share icon of the square .

On Samsung phones Will be The Smart View feature (or the square sharing icon is available).

On HTC phones Will be HTC Connect feature .
On LG phones is SmartShare .
On Phone Oppo Will have DLNA Available for identification.
Step 2:
Mobile devices will filter out detected devices. A list appears for you to select the TV you want to transfer the image to. Just click the TV name to connect. For example, transfer photos from Oppo phone to a Samsung Smart TV with DLNA connection.
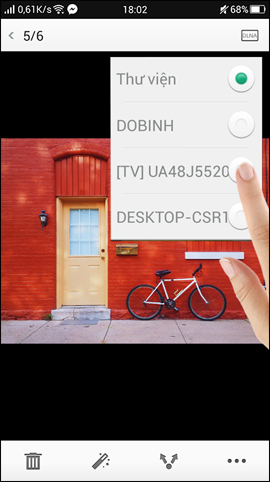
At the same time, a TV message appears to connect to the phone. We click Allow And the image will be uploaded.

So the image has been transferred from the phone to the TV by DLNA connection method. The conversion process is very fast and you only need to allow the TV to connect to the phone. However, it is necessary to identify two connected devices that support the DNLA protocol.
I wish you all success!
FAQ
What should I prepare before I transfer images from phone to TV using dlna?
Review the requirements in the guide, confirm that your device or software is compatible, and save important work before changing settings related to transfer images from phone to TV using dlna.
Why might transfer images from phone to TV using dlna not work as expected?
The most common causes are incompatible versions, missing permissions, incorrect settings, or an interrupted internet connection. Recheck each step and restart the app or device when appropriate.
Can beginners follow these transfer images from phone to TV using dlna steps?
Yes. Follow the steps in order, avoid skipping confirmation screens, and compare your interface with the screenshots because labels may differ slightly between versions.
Related Articles
 What Is DLNA Connection Technology on Computers, Tvs, Phones, Etc.?6 minutes read
 How to Transfer Photos from a Laptop to a TV Using DLNA5 minutes read
 10 Best Dlna Stream Apps for Android9 minutes read
 How to Transfer All Data from an Old Android Phone to a New Phone?11 minutes read
 How to Transfer Photos from Iphone, Ipad to Windows 10 Computer?8 minutes read
 How to Transfer Contacts from Any Smartphone to Windows Phone 8. 17 minutes read
Reader Comments 0
Sign in with email or Google to join the discussion.