Table of Contents
This updated guide explains how to Tell If Your Computer Has USB 2.0 Ports through clear steps, practical examples, and important checks that help prevent common errors.
Method 1 of 2:
Checking USB Ports in Windows
-
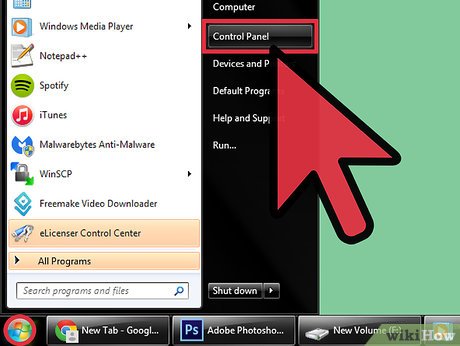 click the 'Start' button and select 'Control Panel.' The Control Panel window will display on-screen.
 -
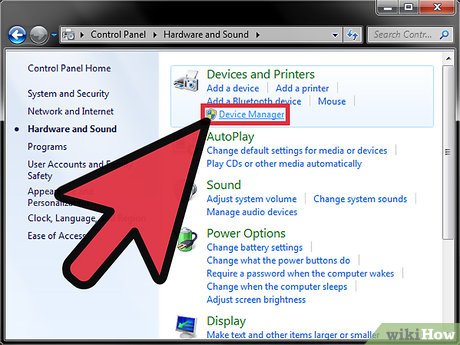 click 'System and Maintenance' and select 'Device Manager.'
 -
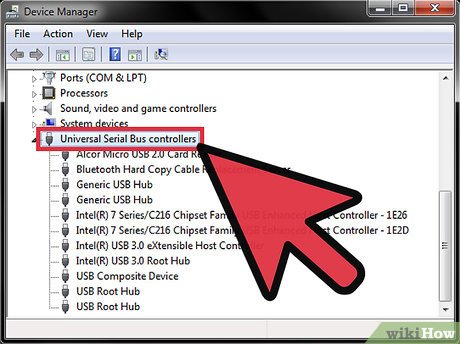 Double-click, or open 'Universal Serial Bus controllers.'
 -
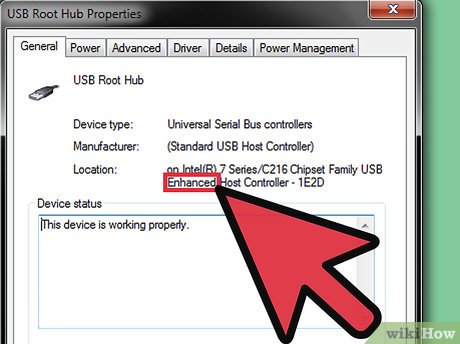 Verify whether any of the USB controllers in the list are labeled as 'Enhanced.' If your USB controllers are listed as 'Enhanced,' then your Windows computer has USB 2.0 ports installed.[1]XResearch source
Method 2 of 2:
Checking USB Ports on Mac OS X
-
 Open the Applications folder and select 'Utilities.'
 -
 Open 'System Profiler.' The System Profiler window will open and display on-screen.
 -
 click 'USB' in the left pane under Hardware.
 -
 Review the list of USB ports in the top pane to determine whether your computer contains any USB 2.0 ports. Each USB port will be labeled specifically as 'USB 1.0,' USB 2.0,' or 'USB 3.0.'
- If the USB ports aren't labeled appropriately, click each port and make note of the value next to 'Speed' in the bottom pane. If the speed is listed as '480 Mbp/sec,' then the USB port is capable of 2.0 speeds.[2]XResearch source
FAQ
What is the easiest way to Tell If Your Computer Has USB 2.0 Ports?
Start with the requirements in this guide, then follow each step in order. Check the result after every major change so problems are easier to identify.
Can beginners follow these instructions?
Yes. The process is organized into practical steps, and you can repeat any step before moving forward.
What should I check if the method does not work?
Confirm your software or device version, permissions, settings, file format, and internet connection when the task depends on online services.
Related Articles
 16 Connection Ports Are Commonly Found on Computers and Their Functions20 minutes read
 How to Lock USB Ports on Windows 7/8/104 minutes read
 How to Disable USB Ports: Step-by-Step Guide6 minutes read
 How to Lock USB Ports Using USB Disabler Pro on Your Computer4 minutes read
 Learn to Use Lesson 3 Computer - Basic Buttons and Ports on the Computer10 minutes read
 Computer Buttons and Ports9 minutes read
Reader Comments 0
Sign in with email or Google to join the discussion.