How to record the screen with external audio on iOS
Since iOS 11 launched, Apple has released the Screen Recording feature on the iPhone. However, the screen recording feature only records system audio being played on the device, but does not record external audio from the microphone..
Luckily, there is a setting hidden inside iOS for switching audio inputs.
Step 1: If not already, you need to add screen recording feature to Control Center. To do this, open Settings >> Control Center . Continue to choose Customize Controls .
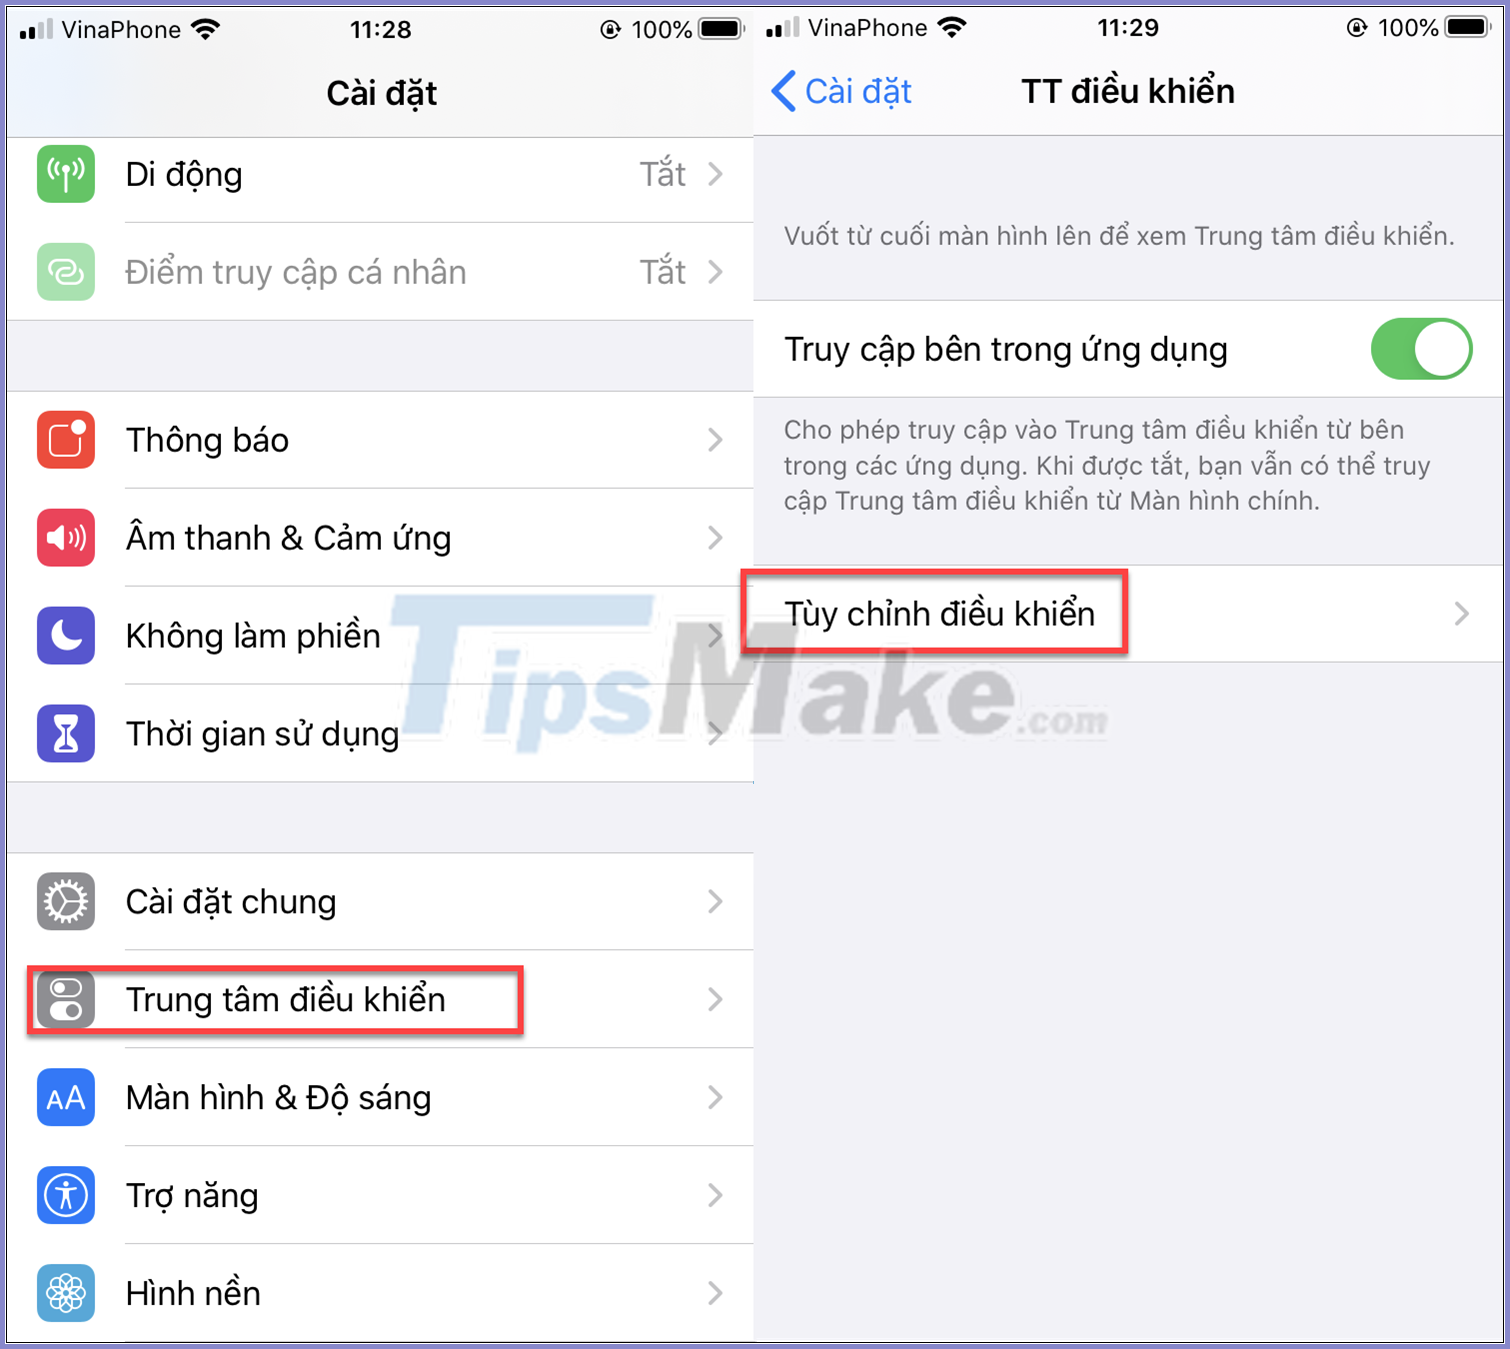
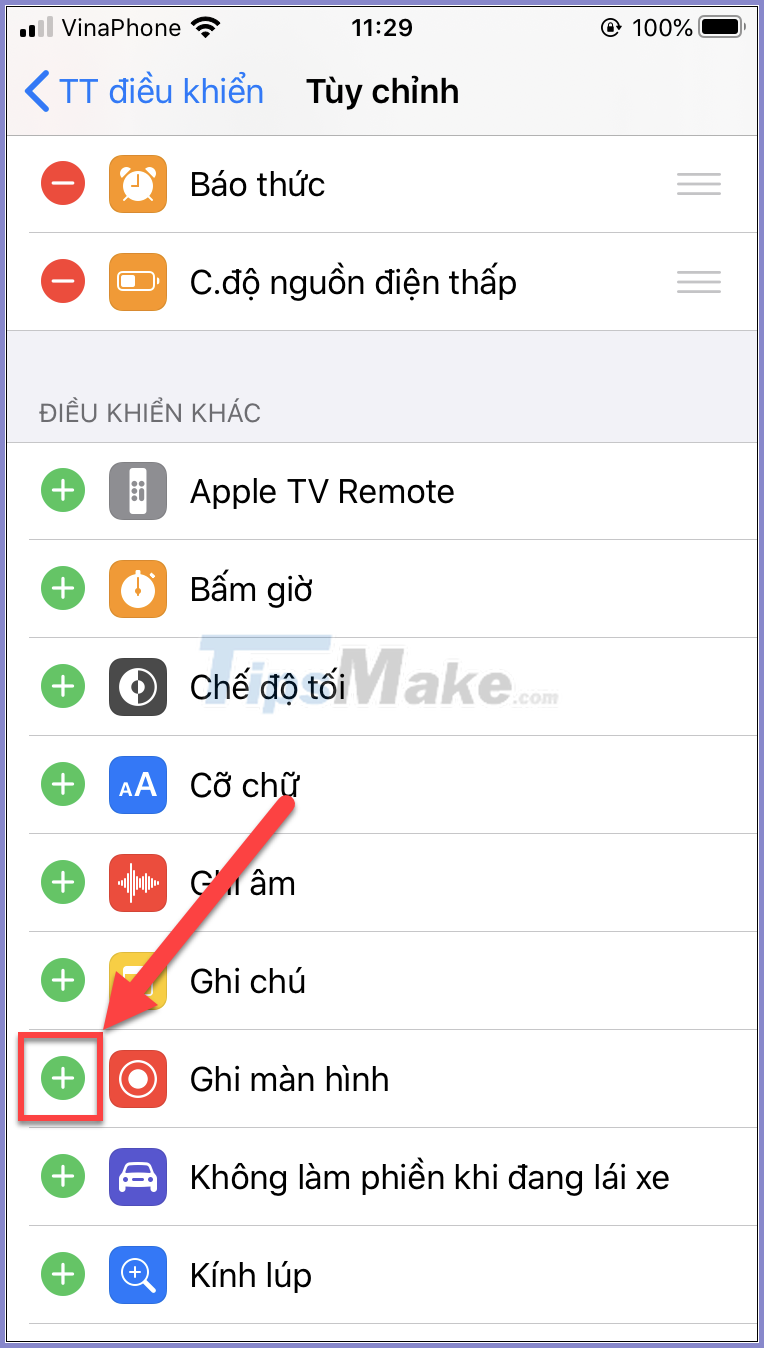
In the list, find Screen Recording and tap the plus sign on the left to add the feature to Control Center.
Step 2: To record your screen as usual, just open Control Center by swiping up from below and tap on the Screen Recording icon. But when you want to record from microphone sound, you will need to set the following:
Swipe up to open Control Center, press and hold the Screen Record icon .

You will see a menu column appear to select an application to serve the screen recording. Below is the Microphone icon , the default is Off. Click this icon to change it to On .

Step 3: Go back and proceed to record the screen as usual, only the audio source will be your microphone instead of outputting it from the phone.

Just now is a little trick that you can record the screen with external sound on iOS. Good luck!