How to put Windows 7 Start button on Windows 10 computer
For those who prefer the Start button of Windows 7 or Windows 8 will not be very interested in the Start menu on Windows 10. Many people reflect that the Start menu on Windows 10 makes them confused and does not have the simplicity as on Windows 7.
The best solution is to put the traditional Start button on Windows 7 on Windows 10. It sounds incredible, but it can be done easily when you install the Classic Shell program on your computer. Network administrators have ever instructed you how to put Windows 8 search bar on Windows 10. And today will be to bring Windows 7 Start button to Windows 10. Follow the tutorial of Network Administrator offline.
Step 1:
Download Classic Shell using the link below and install it on your computer.
- Download Classic Shell software

Step 2:
Immediately after successful installation on the computer, click on the Start button and no menu appears. Instead, the Settings dialog box will appear.

Step 3:
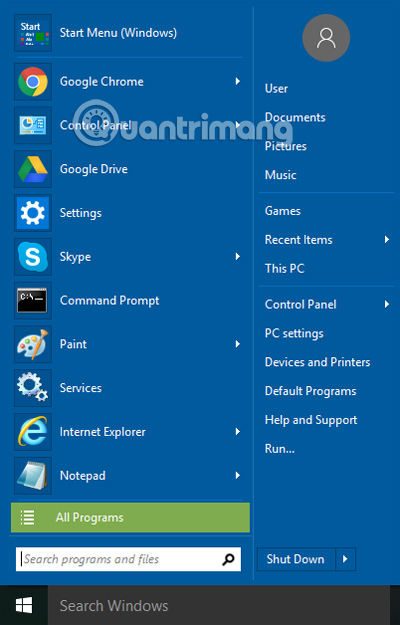
If we close this dialog box and click on the Start button again, we will see the "god" Windows 7 Start menu appear on the screen.
Step 4:
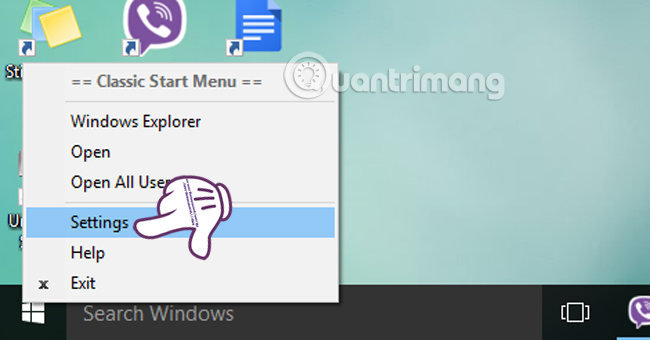
Next, right-click on the Start button on the screen and select Settings .
Step 5:
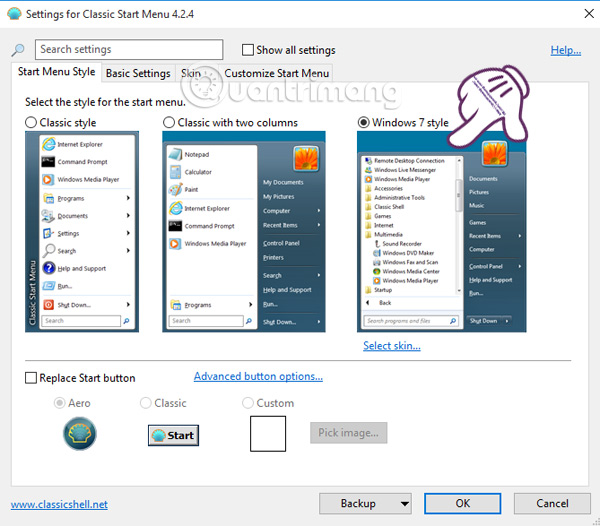
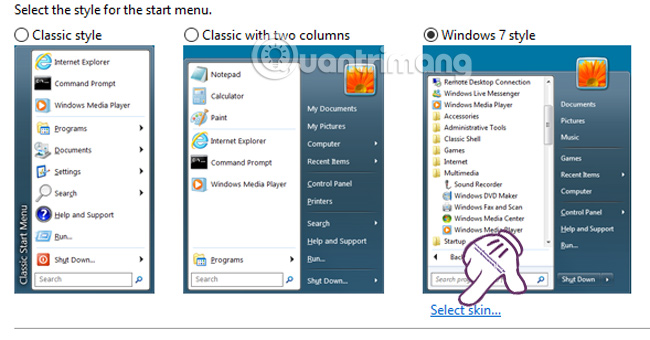
Soon the Settings dialog box of the program will appear. Here, we can choose 3 different menu types, including:
- Classic Style : like the menu of Windows XP but adds search.
- Classic with two columns : has the same characteristics as Windows Vista.
- Windows 7 Style : the default menu of Windows 7.
If you want to choose any design interface, check the item to select it only.
Step 6:
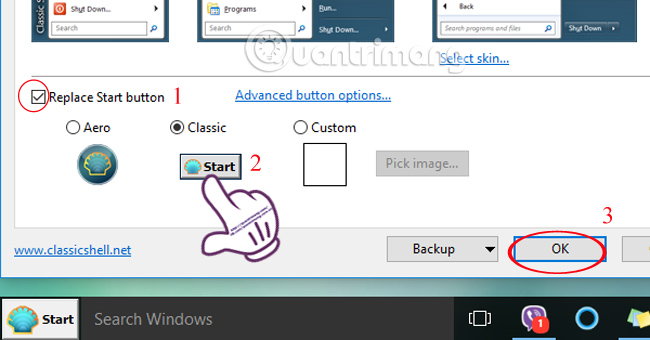
When you choose the Start interface type, we can choose to change the Start button interface right below. Check the Replace Start button and select the type of Start button design you want. The program will provide 2 options are Aero and Classic with Classic Shell icon included. And Custom is selected icon when clicking Pick image .
Step 7:
In addition, we can adjust the design for 3 menu types when clicking Select skin . right below when you select a certain menu interface type.
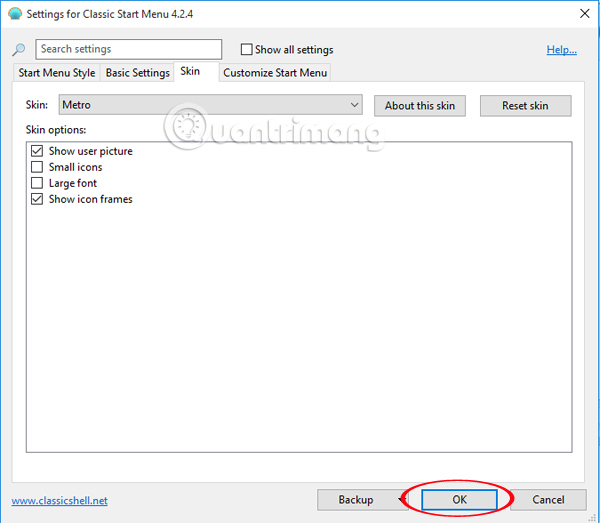
The setup dialog box will appear shortly. Here you can optionally adjust items with the Windows 7 Start menu. Finally, when finished setting click OK to save.
Finally, you have successfully brought the Windows 7 Start menu back to Windows 10. Simple steps, light software does not occupy much of the machine's capacity. Besides, we can customize other options in the Settings dialog box according to user purpose.
Refer to the following articles:
- 7 ways to do, customize in post will help your Windows 10 "as fast as wind"
- Instructions for dividing hard drives right in Windows 10
- Tips to customize Taskbar on Windows 10 effectively
I wish you all success!