Table of Contents
Learn how to permanently disable AI on Google chrome with clear steps, practical tips, and troubleshooting guidance for a reliable result.
Disable AI on Google Chrome using the Registry
Step 1
First, open the Registry on your computer, then navigate to the following path.
HKEY_LOCAL_MACHINESOFTWAREPolicies
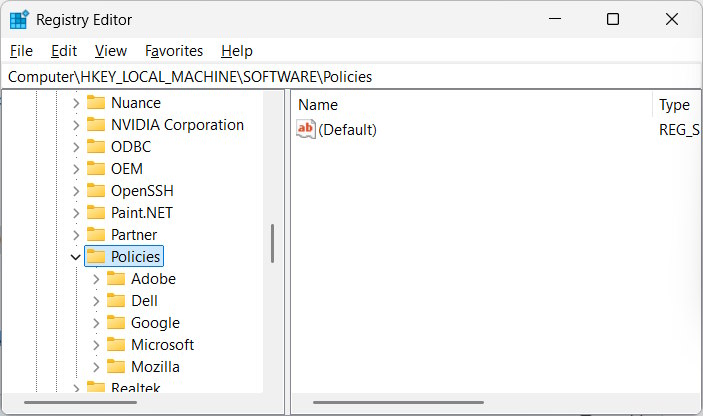
Now, right-click on Policies , select New, and then select Key .
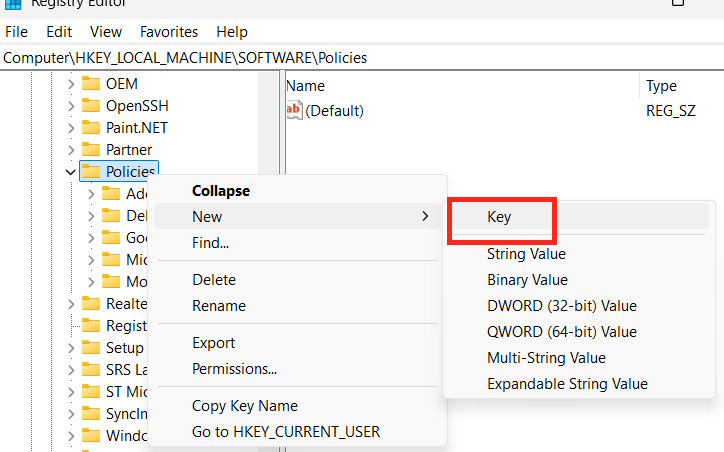
Now, name the new keyword "Google" if you haven't already.
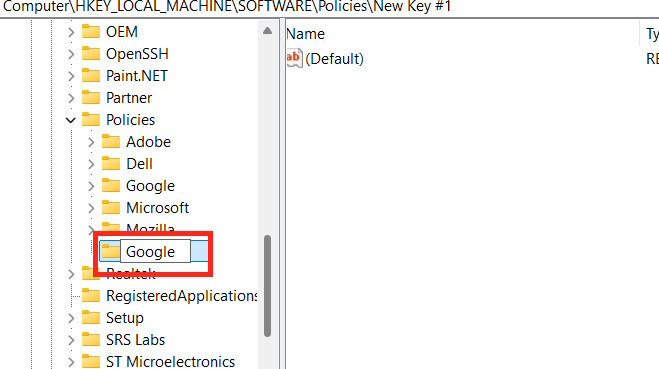
Step 2
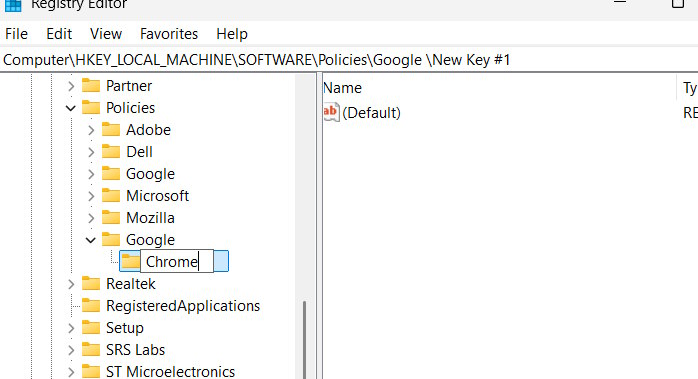
Right- click on the Google key , then select New , and then click on Key .
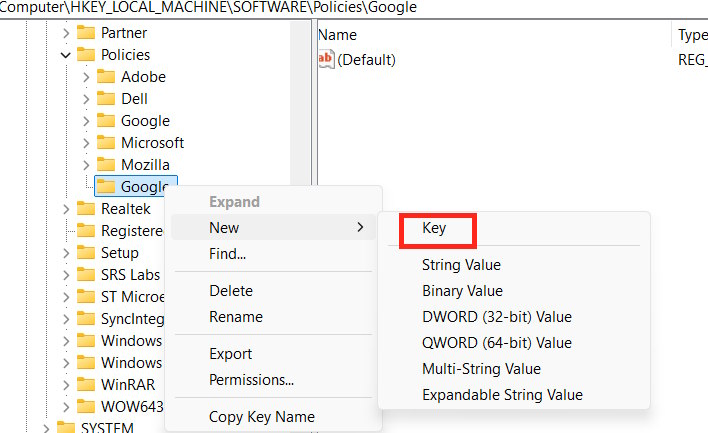
You will name this new key Chrome, as shown in the image.
Step 3
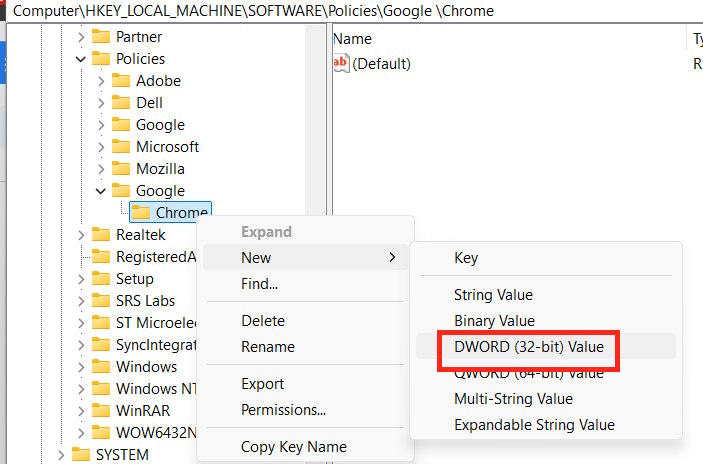
Right- click on the Chrome key, select New , and then click on DWORD (32-bit) Value in the list.
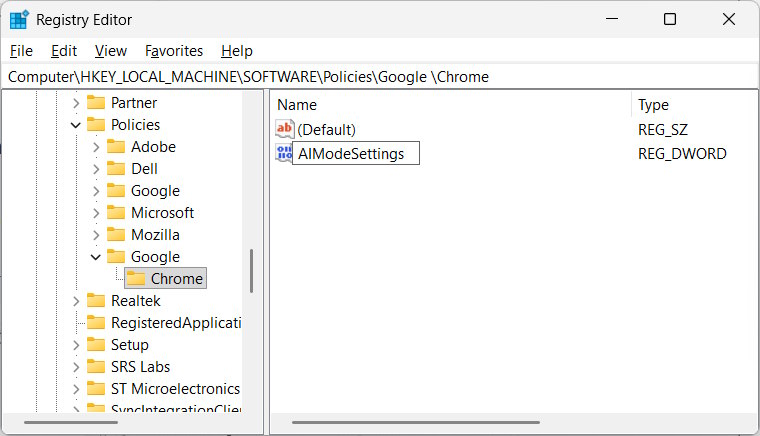
Name this value AIModeSettings .
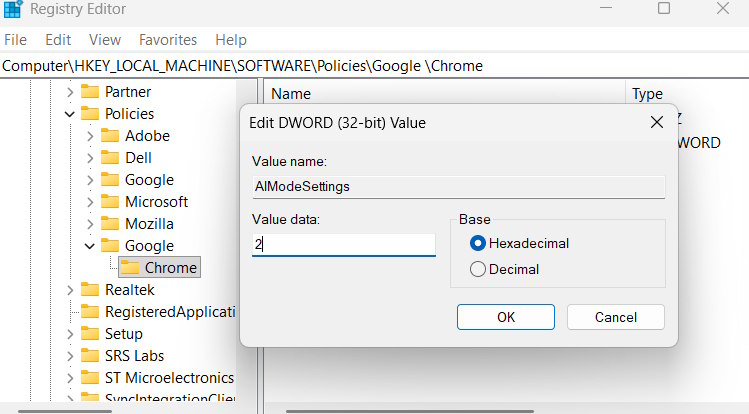
Double-click this value and enter 2 to disable AI on Google Chrome .
Step 4
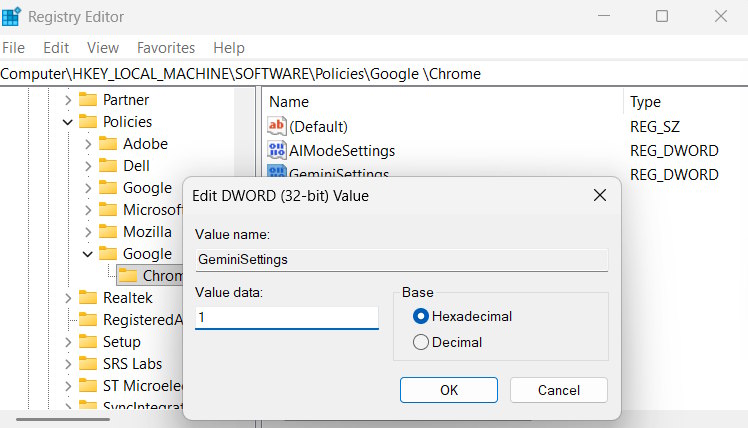
Right- click on the Chrome key, select New , then select DWORD (32-bit) Value. Name the new value GeminiSettings .
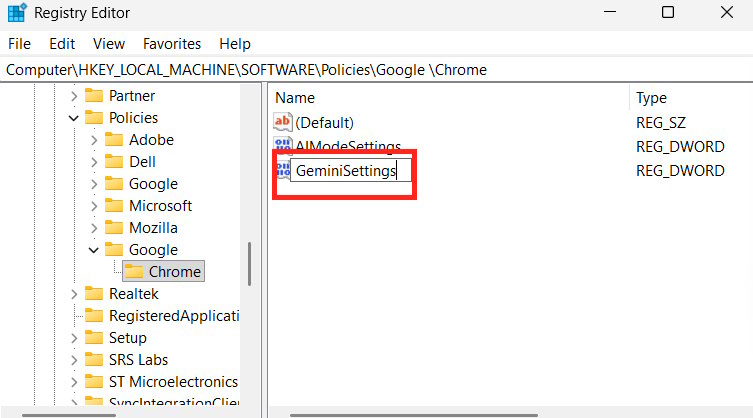
Now, double-click on the new value and enter 1 to disable the Gemini integration feature in Chrome.
Step 5
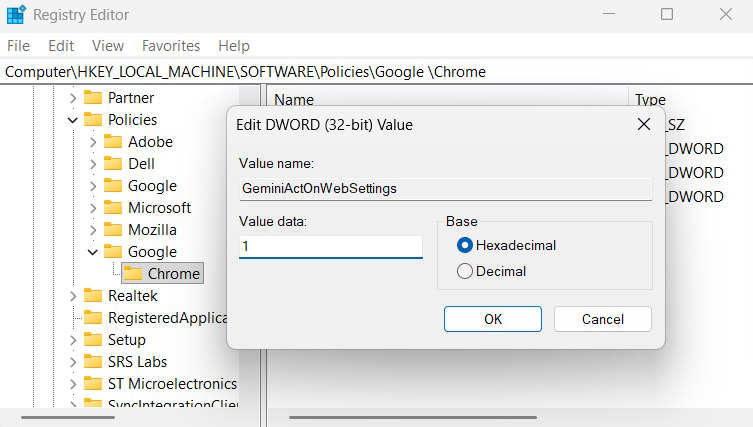
Right- click on the Chrome key, select New, and then select DWORD (32-bit) Value . Enter a name for the new value: GeminiActOnWebSettings .
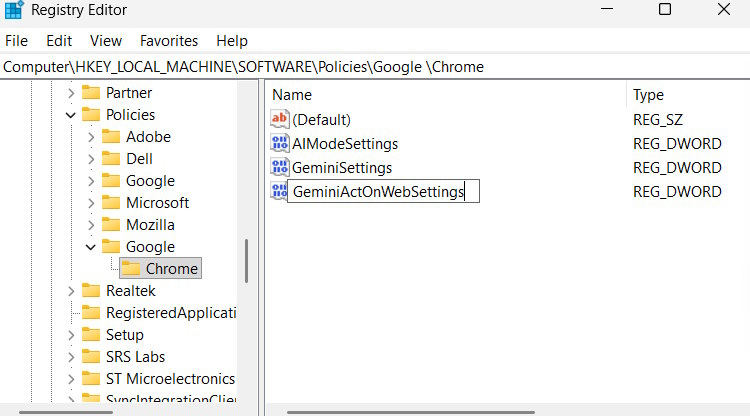
We double-click on this value and change it to 1 to prevent Gemini from affecting the web content.
Step 6
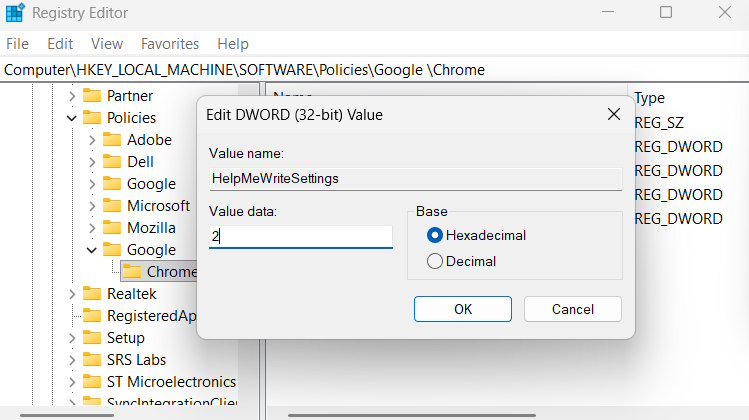
Continue by creating a new value in the Chrome key named HelpMeWriteSettings .
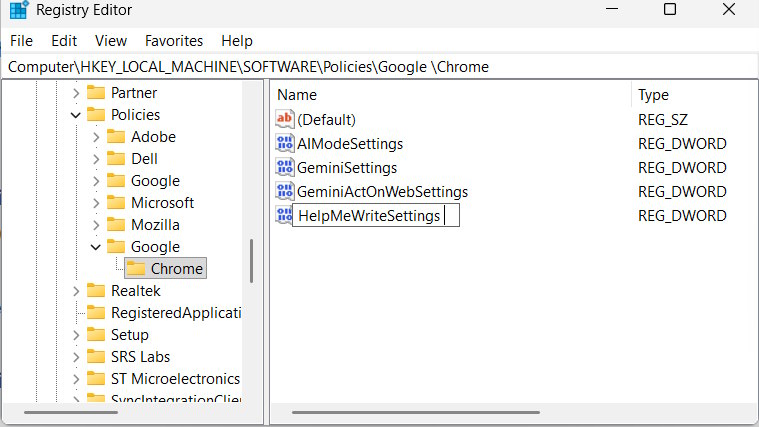
Double-click this value and enter 2 to disable the AI-powered auto-write feature.
Next, we create a CreateThemesSettings value in the Chrome key, then double-click and enter 2 to disable AI-generated custom themes and wallpapers.
Create a DevToolsGenAiSettings value in the Chrome key and change it to 2 to disable Chrome DevTools from using AI models.
Continue by creating the HistorySearchSettings value and changing it to 2 to disable AI-powered history search.
Create a TabCompareSettings value in Chrome and set it to 2 to disable the AI tool that compares information between your tabs.
Next, create a TabOrganizerSettings value and enter 2 to disable the AI-powered tab sorter.
Add the AutofillPredictionSettings value to the Chrome key and enter the value 2 to disable Chrome's AI-based autofill feature.
Next, create a SearchContentSharingSettings value and enter 1 to disable Chrome's options for sharing page and file content with Google's AI.
Next, create the GenAILocalFoundationalModelSettings value and enter 1 to prevent Chrome from using pre-existing AI models.
Finally, restart your computer.
Disable AI features in Chrome using a command
Open Command Prompt as an administrator , then enter the following command to execute it.
( reg add "HKLMSOFTWAREPoliciesGoogleChrome" /f reg add "HKLMSOFTWAREPoliciesGoogleChrome" /v AIModeSettings /t REG_DWORD /d 2 /f reg add "HKLMSOFTWAREPoliciesGoogleChrome" /v GeminiSettings /t REG_DWORD /d 1 /f reg add "HKLMSOFTWAREPoliciesGoogleChrome" /v HelpMeWriteSettings /t REG_DWORD /d 2 /f reg add "HKLMSOFTWAREPoliciesGoogleChrome" /v CreateThemesSettings /t REG_DWORD /d 2 /f reg add "HKLMSOFTWAREPoliciesGoogleChrome" /v HistorySearchSettings /t REG_DWORD /d 2 /f reg add "HKLMSOFTWAREPoliciesGoogleChrome" /v TabCompareSettings /t REG_DWORD /d 2 /f reg add "HKLMSOFTWAREPoliciesGoogleChrome" /v AutofillPredictionSettings /t REG_DWORD /d 2 /f reg add "HKLMSOFTWAREPoliciesGoogleChrome" /v DevToolsGenAiSettings /t REG_DWORD /d 2 /f reg add "HKLMSOFTWAREPoliciesGoogleChrome" /v SearchContentSharingSettings /t REG_DWORD /d 1 /f reg add "HKLMSOFTWAREPoliciesGoogleChrome" /v TabOrganizerSettings /t REG_DWORD /d 2 /f reg add "HKLMSOFTWAREPoliciesGoogleChrome" /v GeminiActOnWebSettings /t REG_DWORD /d 1 /f reg add "HKLMSOFTWAREPoliciesGoogleChrome" /v GenAILocalFoundationalModelSettings /t REG_DWORD /d 1 /fIf you want to restore Chrome to its default state and remove the Chrome key, enter the command below.
reg delete "HKLMSOFTWAREPoliciesGoogleChrome" /f
If you want to delete the Google folder , enter the command below.
reg delete "HKLMSOFTWAREPoliciesGoogle" /f
Final Thoughts
Use this guide as a practical checklist for how to permanently disable ai on google chrome. Work through the steps in order, verify each result, and adjust the options to match your needs.
FAQ
What do you need before following this How to Permanently Disable AI on Google Chrome guide?
Review the required tools, accounts, settings, or materials mentioned in the article. Learn how to permanently disable AI on Google chrome with clear steps, practical tips, and troubleshooting guidance for a reliable result.
What are the main steps for how to permanently disable ai on google chrome?
Follow the sections in order, especially Disable AI on Google Chrome using the Registry, Step 1, Step 2. Complete each step before continuing and verify the result as you go.
What should you do if the process does not work as expected?
Recheck the prerequisites, update the relevant app or service, review the settings, and repeat the step that caused the issue. Use any troubleshooting notes included in the guide.
Related Articles
 Disable PDF Reader Functionality on Google Chrome3 minutes read
 How to Disable Chrome Software Reporter Tool7 minutes read
 How to Enable, Disable Flash Player on Google Chrome3 minutes read
 How to disable Google Chrome's AI features on your computer3 minutes read
 New Feature in the New Version of Google Chrome6 minutes read
 The Quickest Way to Disable Gemini in Gmail, Google Photos, and Chrome7 minutes read
Reader Comments 0
Sign in with email or Google to join the discussion.