How to install the Print Server in Windows Server 2012
In today's article, we will see how to install the Print Server, which is very important for administrators and system management.
In today's article, we will see how to install the Print Server, which is very important for administrators and system management. To install the Print Server in Windows Server 2012, follow these instructions:
Step 1 - Go to Server Manager > Manage > Add Roles and Features > Next > Select Role-based installation or Feature-based installation , then select Next Select a server from the server pool . Finally, click Next.
When you have completed the steps above, in the Roles list , look for Print and Document Services . Then a window will open.

Step 2 - Click Add features and then select Next 3 times in a row.

Step 3 - Select Print Server , then click Next.
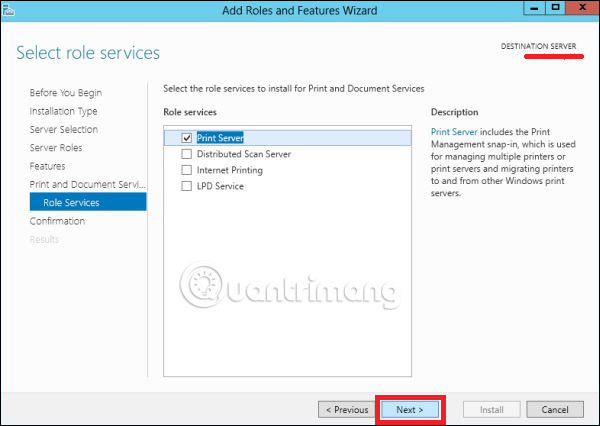
Step 4 - Click Install.

Good luck!
See more:
- How to install and open File Server Resource Manager in Windows Server 2012
- Learn about File and Storage Services in Windows Server 2012
- How to configure and adjust WSUS in Windows Server 2012
Was this article helpful?
Your feedback helps us improve.
Related Articles
 Configure Print Driver in Windows Server 20121 minutes read
 Microsoft launches Universal Print, a completely new cloud-based print server solution3 minutes read
 The net print command in Windows4 minutes read
 Instructions for installing Windows Server 2016 on Windows 103 minutes read
 Instructions for installing Windows Server 2012 step by step5 minutes read
 Managing printers in Windows Server 2008 - Part 25 minutes read
Reader Comments 0
Sign in with email or Google to join the discussion.