Table of Contents
This updated guide examines How to Install Iis in Windows Server 2012 and organizes the essential facts, background, and practical takeaways in clear American English.
Now, install IIS Role by following the steps below!
Step 1 - To install IIS, go to " Server Manager ", then go to Manage , then Add Roles and Features .

Step 2 - Click Next in the window as shown below.

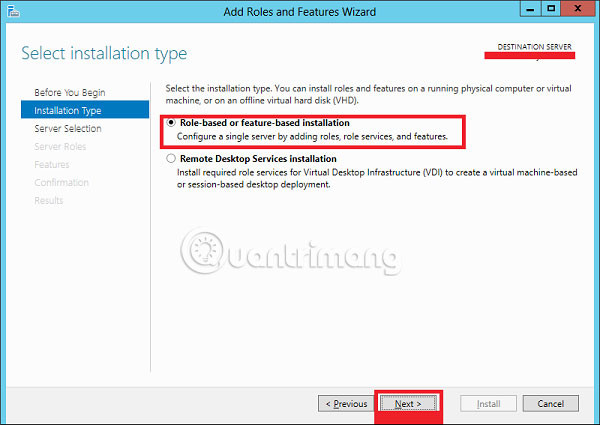
Step 3 - Choose Role-based or feature-based installation options and then click Next .
Step 4 - This example will install a Local IIS because it will select a server from the server pool. Then click Next .

Step 5 - From the Roles list, select the 'Web server' (IIS) Server role , and then click Next .

Step 6 - Click Next .

Step 7 - Click Next .
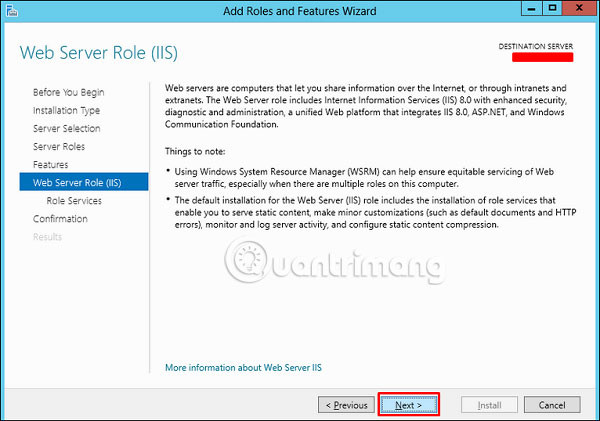
Step 8 - You can choose all the default settings or customize them according to your needs.

Step 9 - Click Install .

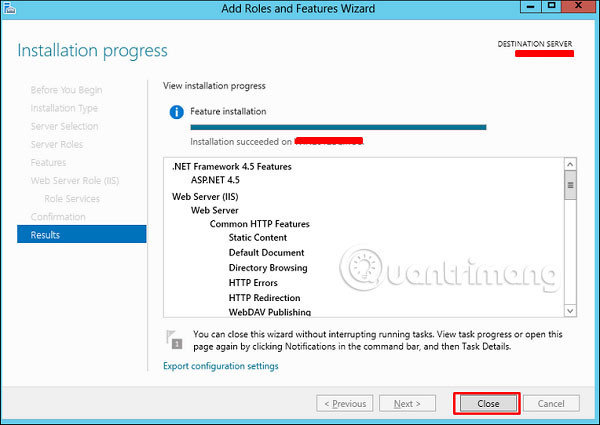
Step 10 - Wait until the Installation Wizard ends. When it is done, click Close .
Step 11 - Check if your IIS is properly installed. This can be done by opening your Internet browser and then typing http:/// localhost and will see the following screenshot:
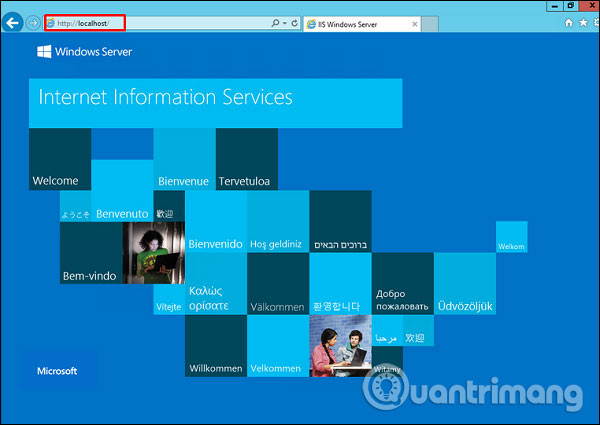
:
- How to install software for clients from Windows Server 2012 R2 using Group Policy
- How to create Primary Zones in Windows Server 2012
- Install Role, configure role on Windows Server 2012
FAQ
What is How to Install Iis in Windows Server 2012 about?
It provides a structured overview of Windows Server 2012, explains the main context, and highlights practical takeaways for readers.
Why does this topic matter?
Understanding the main concepts helps readers evaluate the issue, avoid common mistakes, and make better-informed decisions.
How should readers use this information?
Use the guidance as a practical starting point, confirm details that may have changed, and follow current product, safety, or security recommendations.
Related Articles
 Instructions for Installing Windows Server 2016 on Windows 104 minutes read
 How to Installing Windows Server 2012 Step by Step6 minutes read
 Steps to Install Windows Server 2022 on a Virtual Machine6 minutes read
 How to Install a VPN on Windows Server 20194 minutes read
 How to Install and Use IIS on Windows Server 20195 minutes read
 How to Install Software for Clients from Windows Server 2012 R23 minutes read
Reader Comments 0
Sign in with email or Google to join the discussion.