How to Get a Calendar on Your Desktop
Method 1 of 4:
Adding a Calendar Widget to Your Windows 10 Desktop
-
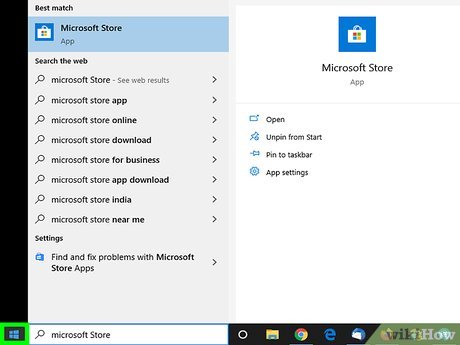
 Click the Windows Start menu. It's the button with the Windows logo. It's in the lower-left corner in the taskbar by default.
- Unfortunately, none of the calendar widgets for Windows 10 have the ability to add events or sync with your Windows calendar or other calendars. However, you can quickly access the built-in Windows calendar by clicking the date and time in the taskbar. Click the plus (+) to add a new event or sync another calendar service with your Windows calendar.
-
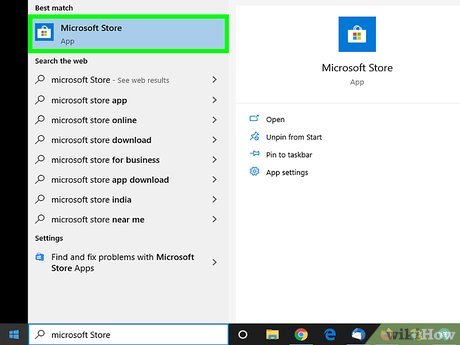
 Click the Microsoft Store. It has an icon that resembles a white shopping bag with a Microsoft logo on it.
-
 Click Search. It's in the upper-right corner of the Microsoft Store. This displays a search bar.
 -
 Type Widgets HD in the search bar. The search bar is in the upper-right corner where you clicked the "Search" button. This displays a list of apps that match your search.
 -
 Click GET next to the app title. This adds the app to your purchases (Widgets HD is free).
 -
 Click Install. It's the blue button that appears after you add Widgets HD to your apps. This installs Widgets HD.
 -
 Open Widgets HD. After Widgets HD finishes downloading, you can either click Launch in the Microsoft Store or click the Widgets HD icon in the Start menu. It has a yellow icon with an image that resembles a clock.
 -
 Click Calendar. It's below "Date & Time" in the list of widgets you can add. This adds a widget with a calendar to your desktop. The calendar widget displays the current date and all the days of the month.
 -
 Click and drag the calendar widget. You can place the Calendar widget anywhere you want on your desktop by clicking and dragging it.
- To change the size of the calendar, open Widgets HD and click Settings. Click the drop-down menu below "Display Size" and select "Large" or "Small".
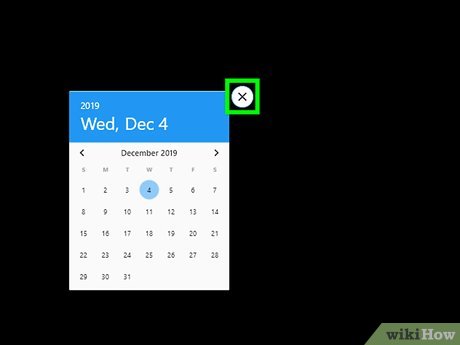
- Click the "x" icon to the left of the calendar. This removes the calendar widget from your desktop.

Method 2 of 4:
Syncing Another Calendar to the Windows Calendar
-
 Open the Windows Calendar app. Use the following steps to open the Windows Calendar.
- Click the Windows Start menu.
- Type "Calendar".
- Double-click the Calendar app in the Start menu.
-
 Click the Gear icon. It's at the bottom of the sidebar menu to the left. This displays the Settings menu in a sidebar to the right.
 -
 Click Manage Accounts. It's at the top of the Settings menu to the right.
 -
 Click + Add Account. This option appears in the menu to the right when you click "Manage Accounts". This displays a window with a list of services you can add.
 -
 Click a service you want to add. You can add an Outlook, Exchange, Google, Yahoo, or iCloud account.
 -
 Sign in to your account. The sign-in screen is a little different for each service. You will most likely need to enter the email address and password associated with the service you want to add. For example, if you want to add a calendar associated with your Google account, you would sign in with the email address and password associated with your Google account.
 -
 Click Allow. This allows Windows to access the information associated with the account you signed in to.
Method 3 of 4:
Adding a Calendar Widget to Your Mac Desktop
-
 Open the App Store. It's has a blue icon that resembles a capital "A". If the App Store is not in your dock, click the magnifying glass icon in the upper-right corner and type "App Store" in the search bar and press the Enter key.
 -
 Type MiniCalendar & Widget in the search bar. The search bar is in the upper-right corner of the screen. This searches for the MiniCalendar & Widget app.
- Alternatively, you can place your mouse cursor in the upper-right corner or lower-right corner to display the Apple calendar in a sidebar to the right.
-
 Click GET below Mini Calendar & Widget. It's below the app title in the App Store. This displays an install button below the app title.
 -
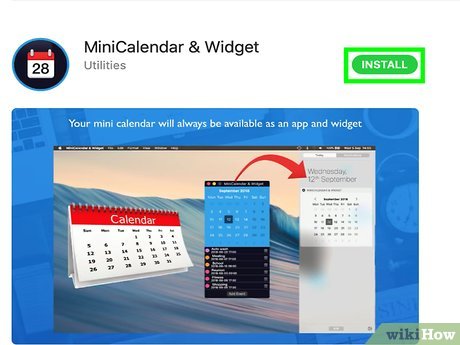
 Click Install App. This appears below the app after you click GET. This installs the.
 -
 Open Mini Calendar & Widget. After the MiniCalendar & Widget app finishes installing, you can click Open in the App Store to open it, or you can click on it in the Applications folder in the Finder.
- Alternatively, you can click the magnifying glass icon in the upper-right corner and search "Mini Calendar & Widget" and press the Enter key.
-
 Click Allow. When you first open Mini Calendar & Widget, it asks if you want to allow it to access your Mac calendar. Click Allow to agree.
 -
 Click and drag the calendar to move it. This allows you to move the Calendar widget to your desired location on your desktop.
- To add a new event to the Mini Calendar & Widget, click New Event at the bottom of the list of events. Fill out the form and click Ok.
-
 Right-click the Mini Calendar app in the dock. It has a black icon with an image that resembles a calendar page. Right-click it to display a pop-up menu.
 -
 Hover over Options. This displays a pop-out menu with some additional options.
 -
 Click Open at Login (optional). This enables the Mini Calendar & Widget app to start as soon as you log in to your Mac.
 -
 Click This Desktop below "Assign To" (optional). This pins the Mini Calendar & Widget to the desktop you currently have open.
- Alternatively, you can select All Desktop to pin it to every desktop.
-
 Click the red "x" icon to remove the calendar. If you want to remove the calendar Widget, click the red-x icon in the upper-left corner to close the app.
Method 4 of 4:
Adding a New Calendar Service to Apple Calendar
-
 Open the Calendar app. If it's not in your dock, click the magnifying glass icon in the upper-right corner and type "Calendar.app" and press the Enter key. This opens the Apple Calendar app.
 -
 Click the Calendar menu. It's in the upper-left corner of the screen in the menu bar. This displays a drop-down menu.
 -
 Click Add Account. This displays a window with a list of services you can add.
 -
 Select a service and click Continue. There are several calendar services you can add to Apple Calendar. You can add an iCloud account, Exchange, Google, Facebook, Yahoo, AOL, or Other CalDAV account. Click Continue in the lower-right corner of the window when you are ready.
 -
 Sign in to your account. The sign-in screen is going to be a little different depending on which service you want to add. You will most likely need to enter the email address and password associated with the account you want to sign in to. For example, if you want to add a calendar associated with your Google account, you would sign in with the email address and password associated with your Google account.
 -
 Click the checkbox next to "Calendar" and click Done. You can also add email, contacts, and notes to your Apple services. Check Calendar to add your calendar and click Done in the lower-right corner. This adds the calendar to your Apple Calendar app. You can click the different calendars you have added in the sidebar to the left.
- To add an event to the Apple Calendar, click a time slot below a date and fill out the form in the pop-out window.
Share by
Micah Soto
Update 05 March 2020


