How to enable low battery warning on Windows 11
To avoid the situation of the computer running out of battery, users can turn on low battery warning on Windows 11 with the battery capacity level that you set yourself..
To avoid the situation of the computer running out of battery, users can enable low battery warning on Windows 11 with the battery capacity level that you set yourself. After activating the low battery warning on the computer, when the battery level you set is reached, a notification will be displayed in the right corner of the screen to let users know and charge the computer battery. Below are instructions for enabling low battery warning on Windows 11.
Enable Windows low battery warning via Power Options
One way to get low battery notifications is to use Windows 11's built-in alerts feature, which appears via the system tray.
Step 1:
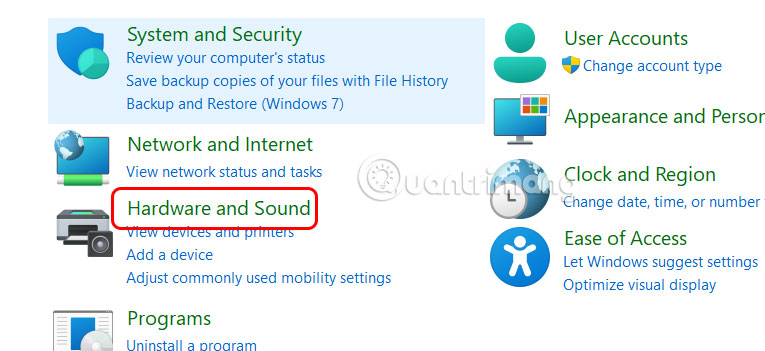
Open Control Panel and click on Hardware and Sound as shown below.
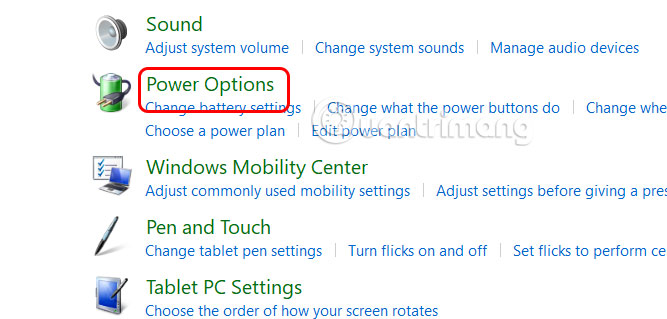
Next, we click on Power Options to adjust the battery on the computer.
Step 2:
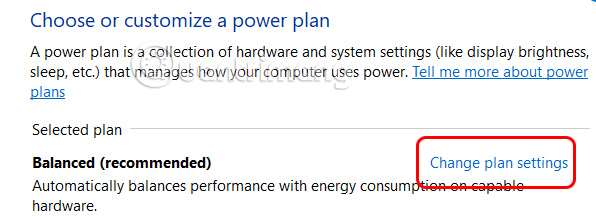
Go to the new option, we click on Change Plan Settings .
Continue to click on Change Advanced Power Settings to access advanced battery settings on your computer.

Step 3:
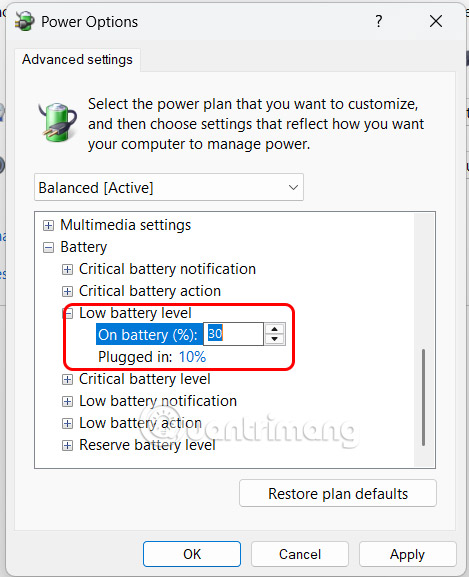
In the new dialog box, click on Battery at the bottom to expand the settings. Continue to click on Low Battery Level and then adjust the low battery capacity % level to send notifications . Then click Apply to save the settings.
Create Low Battery Alert Using Windows 11 Task Scheduler
Step 1:
In the Notepad interface, the user enters the command content below and replaces the battery capacity you need to report low battery at if ($Level -lt 30) .
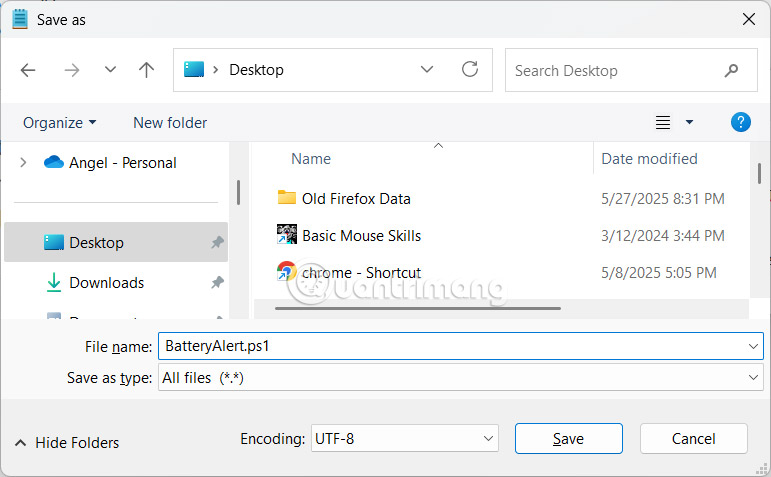
$Battery = Get-WmiObject -Class Win32_Battery $Level = $Battery.EstimatedChargeRemaining if ($Level -lt 30) { [Windows.UI.Notifications.ToastNotificationManager, Windows.UI.Notifications, ContentType = WindowsRuntime] $template = [Windows.UI.Notifications.ToastNotificationManager]::GetTemplateContent([Windows.UI.Notifications.ToastTemplateType]::ToastText01) $toast = $template.GetElementsByTagName("text")[0] $toast.AppendChild($template.CreateTextNode("Pin còn dưới 30%! Vui lòng cắm bộ sạc.")) $notifier = [Windows.UI.Notifications.ToastNotificationManager]::CreateToastNotifier("Cảnh báo pin") $notifier.Show([Windows.UI.Notifications.ToastNotification]::new($template)) }Then save the file with the file name BatteryAlert.ps1 with the format All Files and save it on the Desktop.
Step 2:
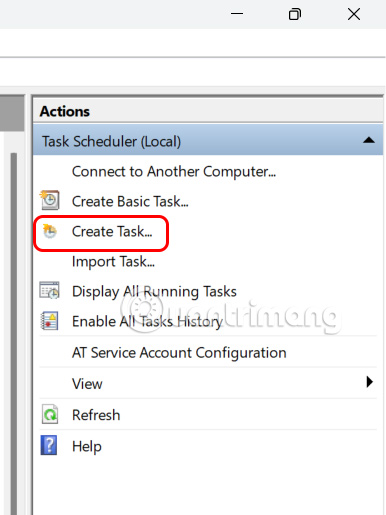
Next, we open Task Scheduler and then click Create Task .
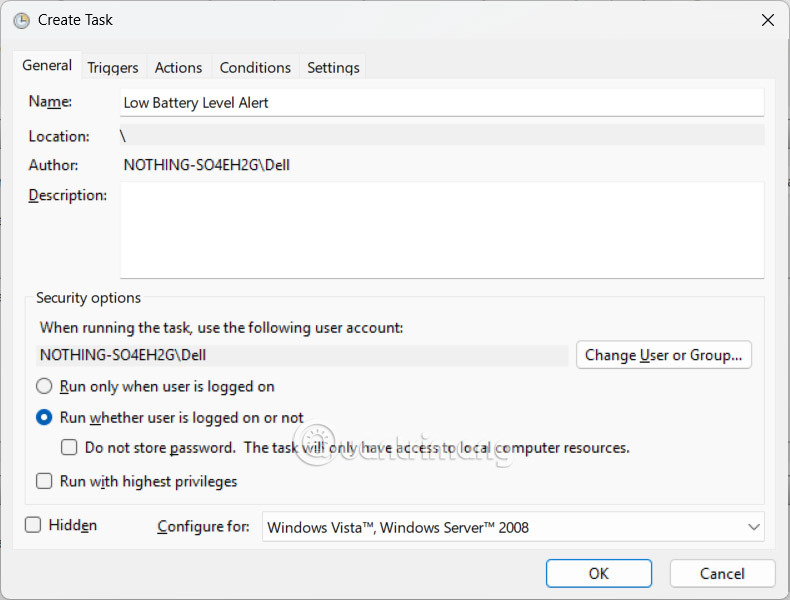
Display the new interface, enter the name at Name and then select Run Whether User Is Logged On or Not .
Step 3:
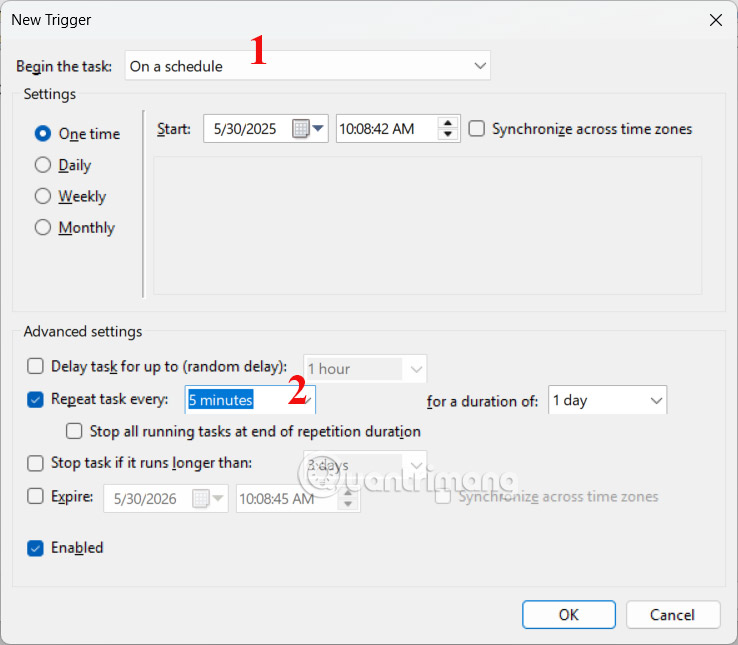
Click on the Triggers tab and select New to create a new task. At Begin the Task, we select On a Schedule to create a scheduled task. Next, at Advanced Settings, the user selects Repeat Task Every and selects the number of minutes for the task to repeat .
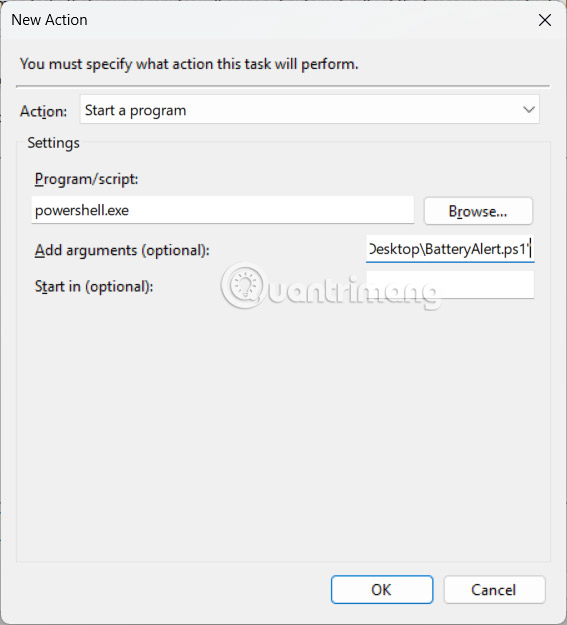
Step 4:
Click on the Actions tab and click New to create a new task. Then in Program/Script , enter powershell.exe . In Add Arguments (Optional) , paste the path below and replace it with the path to the Notepad file you saved .
-ExecutionPolicy Bypass -File "C:UsersUsernameDesktopBatteryAlert.ps1"Finally click OK to save the settings.
Task Scheduler will run a PowerShell script every five minutes or custom time to check your laptop's battery level. If the battery level drops below the specified percentage, you will receive a notification.