How to enable Dolby Vision HDR in Windows 11
The Windows 11 24H2 update lets you take full advantage of your high-dynamic range (HDR) TV or PC display. Here's how to enable Dolby Vision HDR in Windows 11..
The Windows 11 24H2 update lets users take full advantage of their high-dynamic range (HDR) TV or PC display. When users connect an HDR10-enabled TV or display to an HDR-enabled Windows PC, the picture is brighter, more vibrant, and more detailed than on an SDR display. Here's how to enable Dolby Vision HDR in Windows 11.
How to enable Dolby Vision HDR in Windows 11
Step 1:
You press the Windows + I key combination to open Settings on the computer. Then the user clicks on System on the left side and then clicks on Display on the side interface.

Step 2:
Switch to the screen settings interface, click on HDR to adjust the settings. Continue to click on Use HDR to expand the settings on the computer.

Step 3:
If your PC has multiple displays connected, select the display you want to set up . Now you need to check the 2 options as shown below to enable Dolby Vision HDR in Windows 11 .
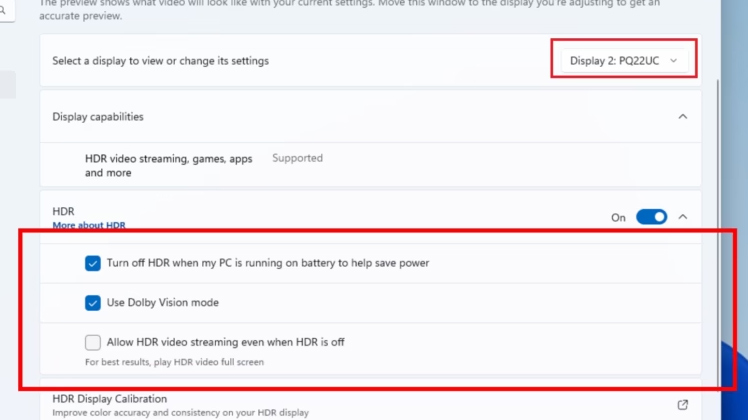
Turning Dolby Vision HDR on or off on your Windows 11 display can dramatically improve your viewing experience, allowing for brighter, more vibrant images that enhance the overall quality of your content. If you have multiple displays, you can choose which display to turn on Dolby Vision on, ensuring a consistent experience.