How to customize Touchpad on Windows 10 Creators Update
Instead of using a computer mouse, many people choose and prefer to use Touchpad. In some different laptops, Touchpad will be provided with some operations such as scrolling pages with 1, 2 or 3 fingers, zooming in or out, displaying desktop screens, etc.
And if you are using Windows 10 Creators Update, we can immediately use the feature available on Touchpad, allowing customization of gestures depending on the needs of each user. The following article will help readers make custom Touchpad gestures on Windows 10.
Step 1:
First of all press the Windows + I key combination to open the Windows Settings interface on the computer. In this interface, click on Devices then find the Touchpad item.
Without the Touchpad item, the computer is not supported with gesture functions.

Step 2:
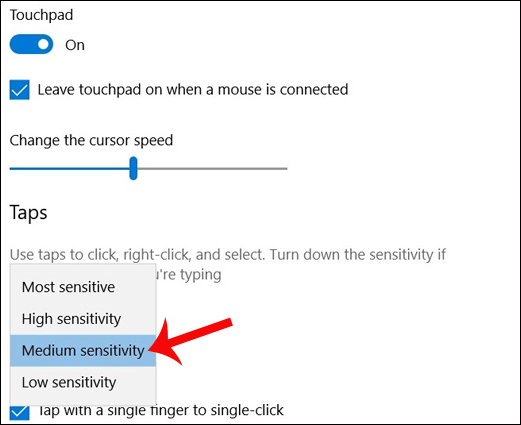
Looking at the interface on the right, we will see all the gesture customization for the Touchpad on the computer. There will be the option Leave on when a mouse is connected . You can uncheck the box to disable the Touchpad automatically when there is a mouse connection.

Step 3:
Next to this interface, we scroll down to the Taps area to proceed to configure Touchpad to include:
- Tap with a single finger to single-click: Use 1 finger to press once (Singer-click).
- Tap with two fingers to right-click: Use 2 fingers to right-click (Right-click).
- Tap twice and drag to multi-select: Double-click and drag to select multiple files at once.
- Press the lower right corner of the touchpad to right-click: Click on the lower right corner of Touchpad to right-click the mouse.
If you do not like any customization, you just need to leave the tick at that gesture.

Step 4:
Next, in the Touchpad sensitivity section, on the Touchpad's operable drop-down list, there are four levels:
- Most sensitive: Touchpad sensitivity at the highest level.
- High sensitivity: High sensitivity.
- Medium sensitivity: Medium sensitivity.
- Low sensitivity: Low sensitivity.
Here, initially, users should adjust to Medium sensitivity level , then gradually increase if used.

Step 5:
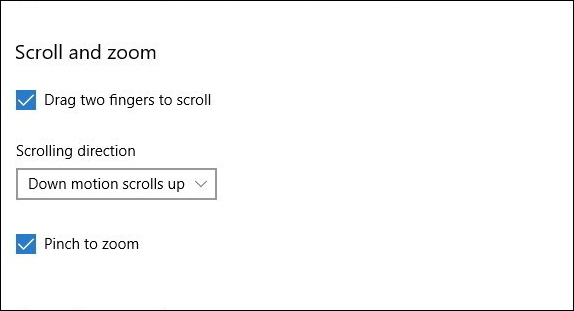
Then scroll down to Scroll and zoom will have 2 settings to customize scrolling and zooming with Touchpad.

Step 6:
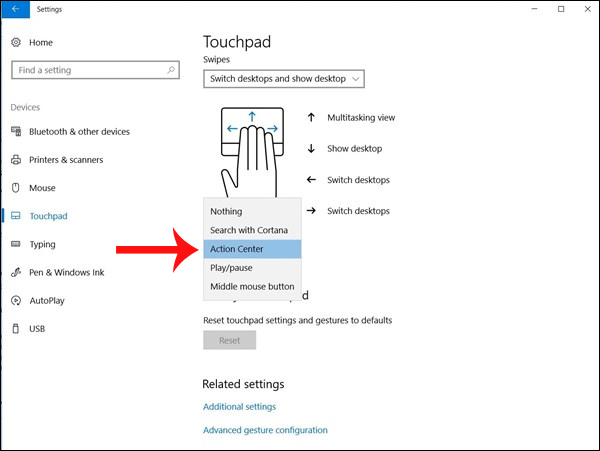
To set up gestures for Touchpad 3, click the Swipes drop-down menu. There will be 4 options:
- Nothing: Disable gesture of 3 fingers.
- Switch apps and show desktop: Run Task View when swipe up with 3-finger gestures, return to the desktop when swipe down, and toggle running apps when swiping left or right.
- Switch desktop and show desktop: Swiping up and down will be similar to the above option. If swiping left or right will switch between virtual desktops.
- Change audio and volume: Swipe up / down to increase / decrease the system volume, swipe left / right to change the song when using the media player.
Besides 3-finger gestures can also be set to open the search bar Cortana or Actions Center bar, or use Touchpad as middle mouse.

Step 7:
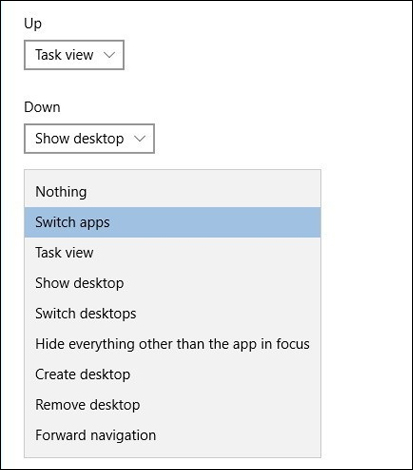
If you want to add some other gesture options, click on Advanced gesture configuration at Related settings , then select the gesture you want to use.

Above is the article on how to customize Touchpad gestures on Windows 10 Creators Update. We can change gestures, add 3 or 4 finger gestures on the Touchpad or even add some other special gestures if you want.
I wish you all success!