How to Create an Apple ID for Children
This wikiHow teaches you how to set up Family Sharing in your iCloud Settings, and how to use Family Sharing to create an Apple ID for a child. Open your iOS device's settings. Do this by tapping the gear icon on one of the device's home....
Method 1 of 2:
iPhone or iPad
-
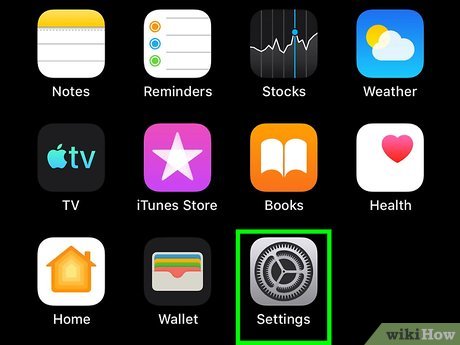 Open your iOS device's settings. Do this by tapping the gear icon on one of the device's home screens. You may see it inside of a folder called Utilities.[1]
 -
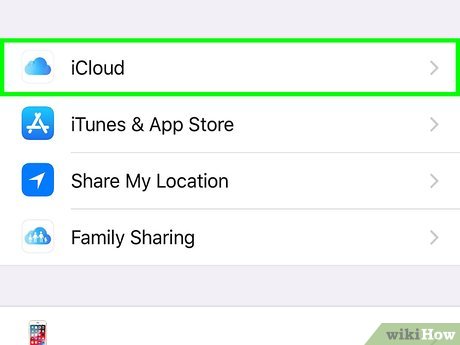 Scroll down and tap iCloud. You may have to scroll down a few times to find it.
 -
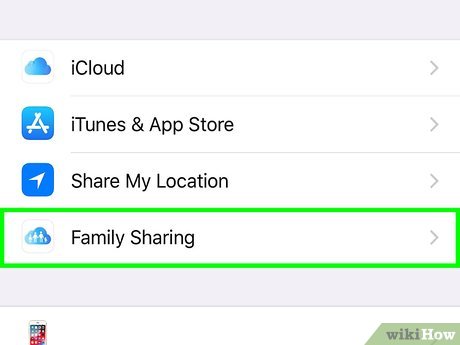 Tap Set Up Family Sharing. When you set up Family Sharing, you become the family 'organizer,' which means you can add a child account for which you'll have full administrative control.[2]
 -
 Tap Get Started.
 -
 Tap Continue to use confirm that you want to be the organizer for this family.
- If you see a different account listed than your own, click the link at the bottom that says 'Not [xxx] or want to use a different ID?' and then sign in.
-
 Tap Continue to make your iTunes and App Store purchases available to the family. Now you won't have to pay for the same app twice if you want it on multiple family members' devices.
 -
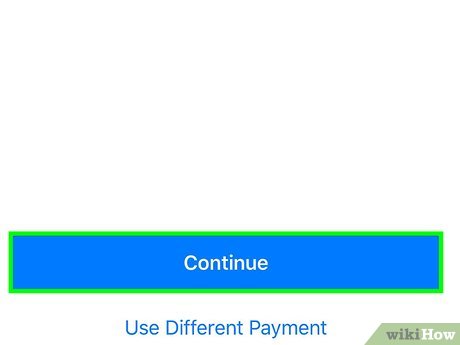
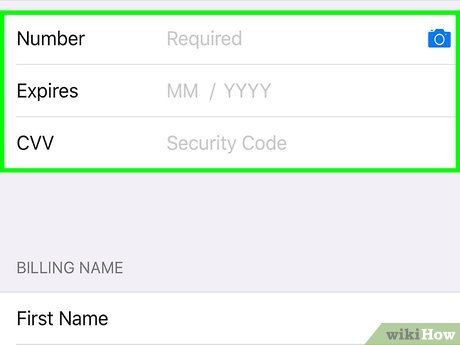 Enter your credit card information. This is required to prove that you're an adult.[3]
- If you've already entered your credit card information, tap Continue to confirm that you want to use the card on file.
-
 Tap Share Your Location. This allows other members of your family to see your whereabouts in Find My Friends. When finished, you'll return to the Family screen.
- If you don't want to share your location, tap Not Now.
-
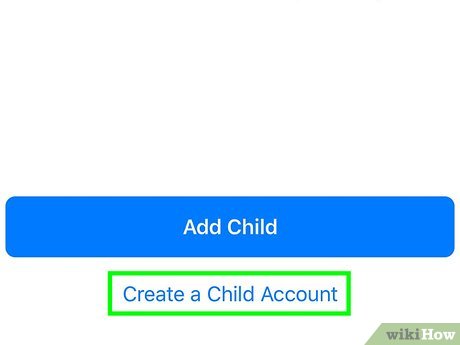 Tap the blue Create an Apple ID for a Child link. You may have to scroll down to locate it.
 -
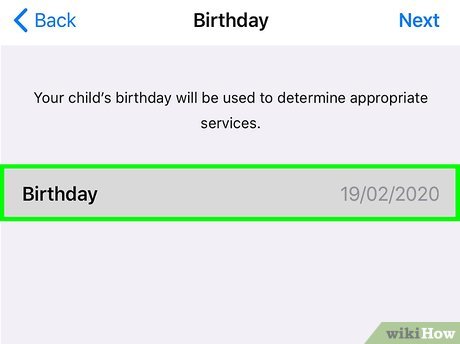 Enter the child's birth date and tap Next.
 -
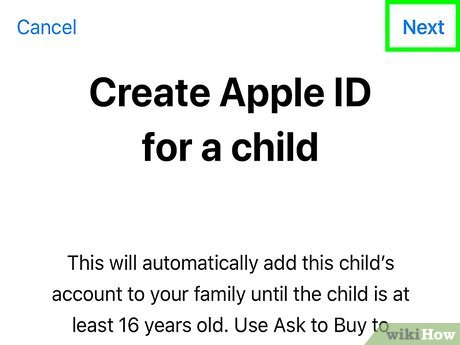
 Tap Agree to accept the Parental Disclosure.[4]
 -
 Verify your credit card information and tap Next.
 -
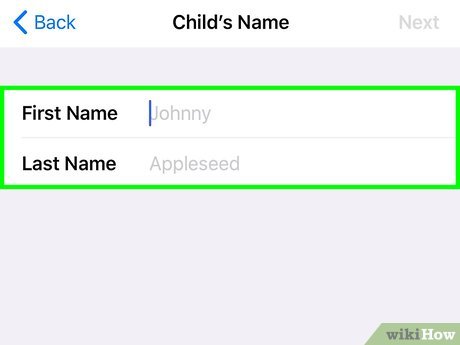 Enter your child's name and tap Next.
 -
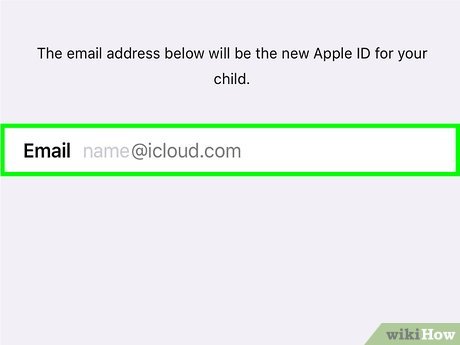 Enter an Apple ID for your child and tap Next. This is the name your child will use to sign in to Apple devices and services.
 -
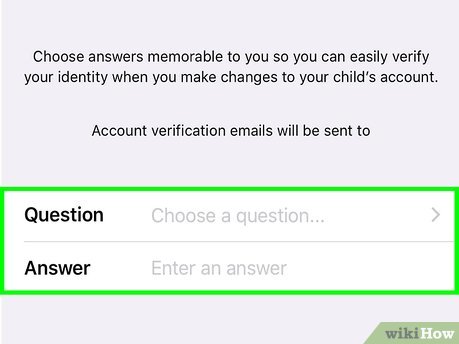 Follow the on-screen instructions to set up a new password and security questions.[5]
 -
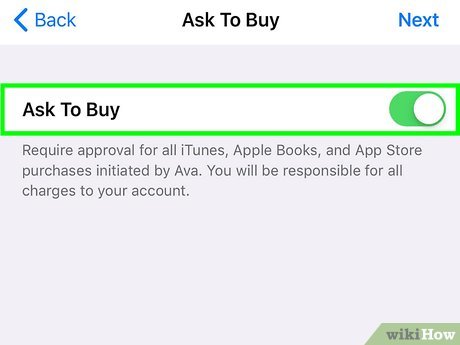 Make sure 'Ask to Buy' is on and tap Next. When enabled, iTunes or App Store purchases your child attempts to make will require your permission.
 -
 Tap Share Locationso your child's location appears in Find My Friends. Only family members will see your child's location.[6]
- If you don't want to enable location sharing for your child, tap Not Now instead.
-
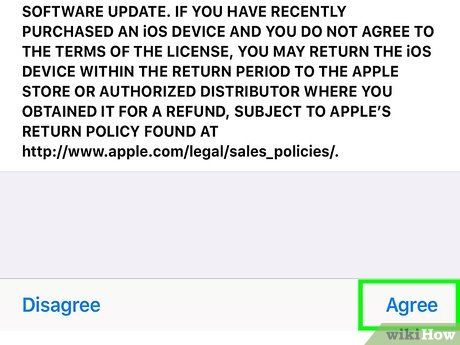 Tap Agree to accept the Terms and Conditions. Once this step is complete, your child's account is ready to use. Your child can now sign in to any Apple device or service with their new Apple ID.[7]
Method 2 of 2:
Mac
-
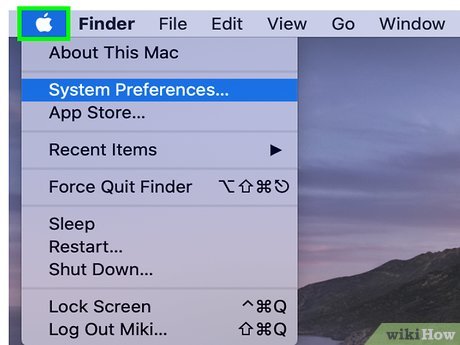 Click the Apple menu. It's the black apple-shaped icon on the far left of the menu bar at the top of the screen.[8]
 -
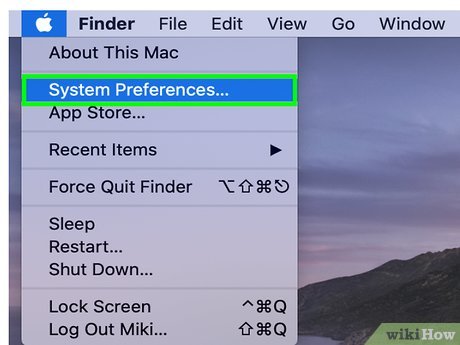 Click System Preferences.
 -
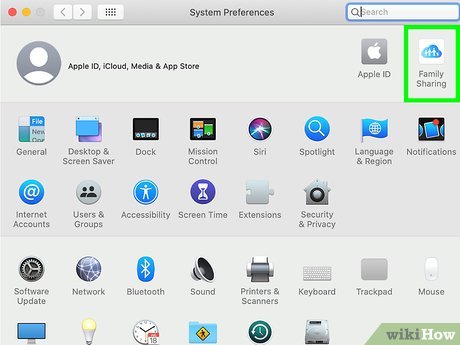
 Click iCloud. If you don't see this option, click the button that looks like three rows of dots at the top of the screen, or Show All.
 -
 Click Set Up Family. It's on the left sign of the screen, beneath your name and photo.[9]
- When you set up Family Sharing, you become the family 'organizer,' which means you can add a child account for which you'll have full administrative control.
- If you've already set up Family Sharing, you'll see Manage Family instead. Click this and then skip to step 11.
-
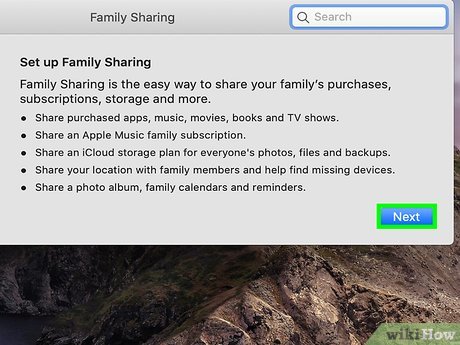 Read the description of Family Sharing and click Continue.
 -
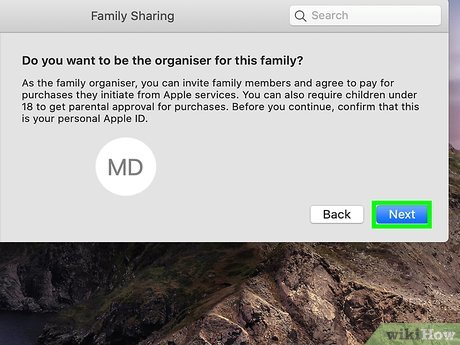 Click Continue to confirm that you want to be the organizer for the family. The Family organizer is able to add people to the family, including child accounts.
 -
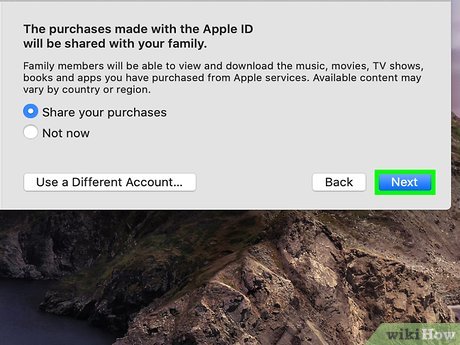 Click Continue to confirm that your iTunes and App Store purchases will be available on your family's devices.
 -
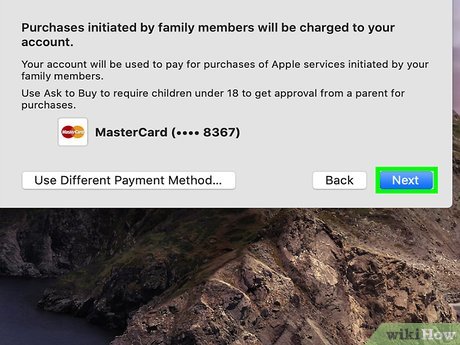 Enter your credit card information and click Continue. This is required to add an Apple ID for a child, though your card will not be charged.
- If you already have a credit card associated with your account, it should appear here with only the last 4 digits visible.
-
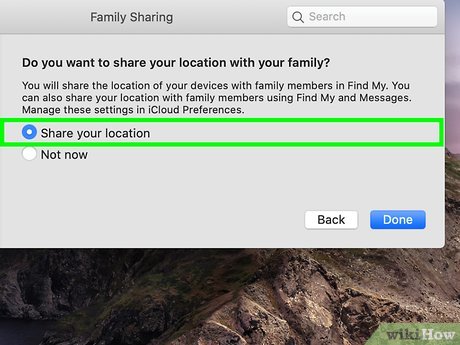 Choose whether or not to share your location with other members of your family. If you choose 'Share your location,' other members of your family will be able to see you in 'Find My Friends.'
 -
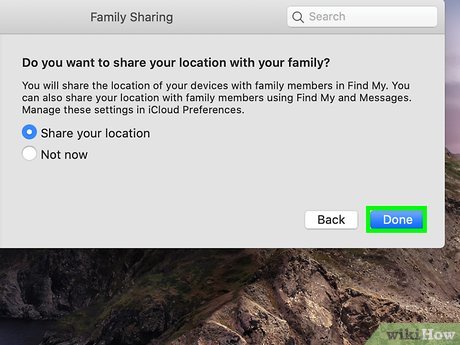 Click Continue. Now you'll return to the Family Sharing screen.
 -
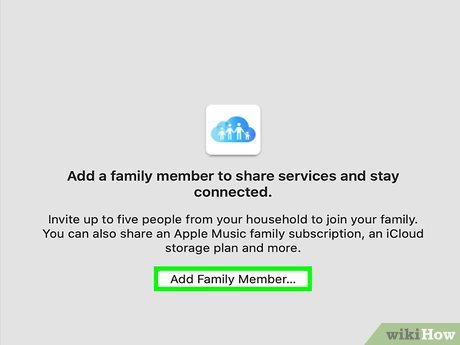 Click + or Add Family Member…. The appearance of the button may vary depending on your version of macOS.
 -
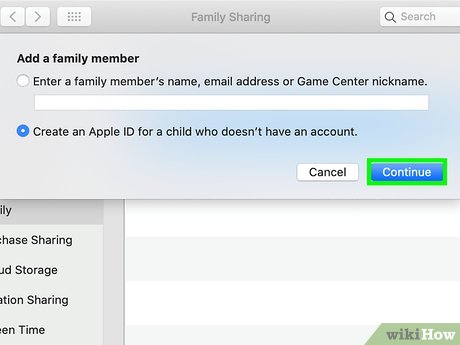 Click Create an Apple ID for a child who doesn't have an account.
 -
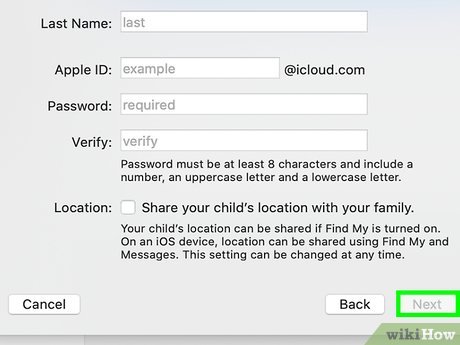
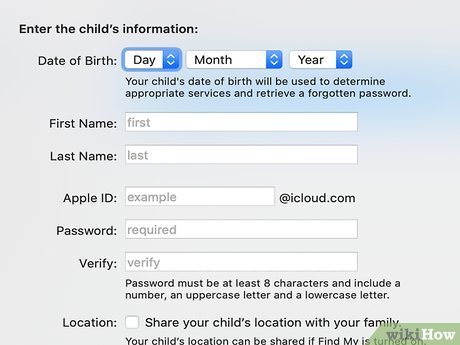 Enter your child's information into the 'Enter the child's information' screen.
- Choose your child's birthday from the dropdown menus.
- Type a new Apple ID (the username they'll use to log into Apple products and services) for your child.
- Enter and verify a new password.
- Place a check next to 'Share your child's location with your family' so that you can find your child under Find my Friends.
- Click Continue.
-
 Follow the prompts to complete the account setup. You'll create security questions, confirm your credit card, and accept the Apple ID agreement. When the setup is complete, you'll return to the Family Sharing screen.
 -
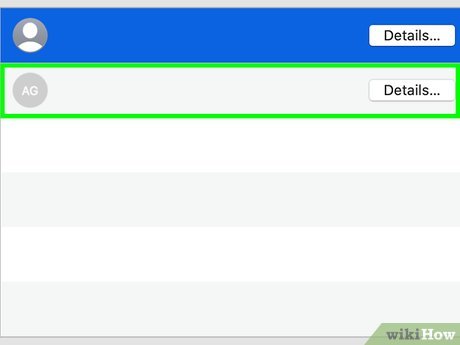 Click your child's account on the left side of Family Sharing.
 -
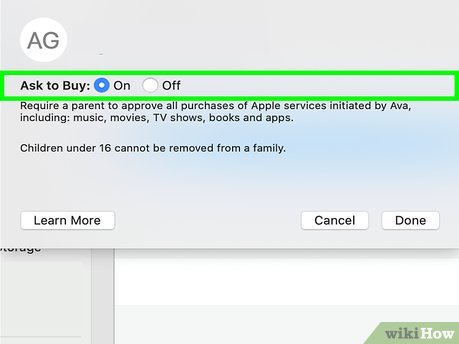 Make sure 'Ask to Buy' is checked. This makes it so every purchase your child attempts to make from iTunes or the App Store will prompt you to give permission.[10]
 -
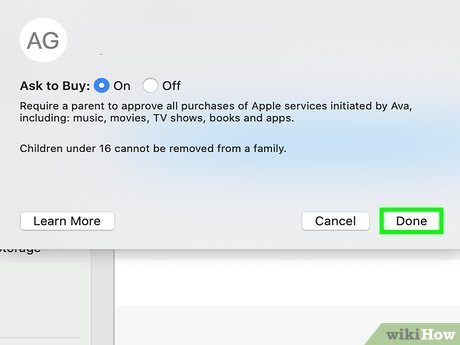 Click Done. Your child can now sign in to any Apple service or product using their new username and password.