How to create a photo frame on Paint
Creating a photo frame on Paint is very simple, helping you create new points for the image.
Table of Contents
Paint is the basic image editor on Windows computers, assisting users with some basic features such as painting Paint images, cutting images on Paint, inserting logos into images on Paint. Although there are not as many advanced customizations as other professional software like Photoshop, Paint can still help you create artistic images, such as creating a picture frame on Paint.
The frame makes Paint images relatively simple and not too complicated. You just need to create an image border and add color to the border frame. If you want to use unique frame styles, use some photo collage software like Fotor, PhotoCollage, . The following article will guide the creation of frames for photos on Paint.
- These framed art apps for phones
- How to create photo effects on Photoshop
- How to use PicPlayPost to merge, create frames for videos
- 30 tools to support online photo editing without using Photoshop
Instructions for creating photo frames on Paint
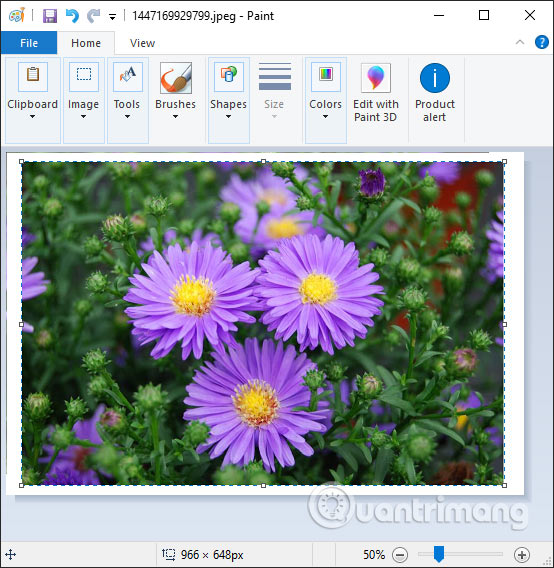
Step 1:
We open the image we want to create a frame on Paint. Next, the user brings the mouse to the bottom right corner of the image until the first two arrows appear and press and drag down to expand the image area.

If the image is large, we need to scale it down by clicking the minus Zoom out in the size adjustment bar displayed in the right corner of the screen.

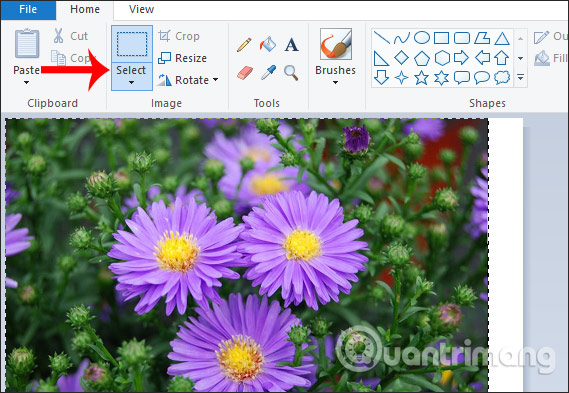
Step 2:
We click on the Select icon at the top of the toolbar and use the mouse to circle the entire image.
Click and hold on the image, then move them to the middle so that the white frame will be displayed on the four sides of the image, or you can arbitrarily align the frame.
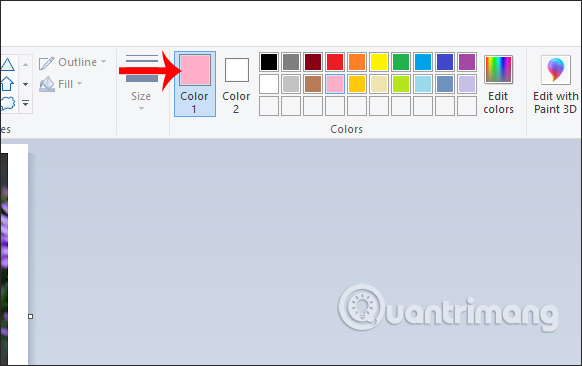
Step 3:
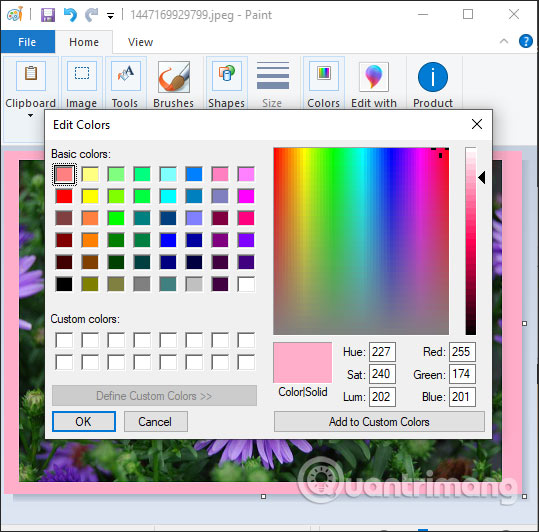
Next, click on the Fill with color paint bucket icon to fill the image border. Click on the white border and click Color 1 to select the color you want.
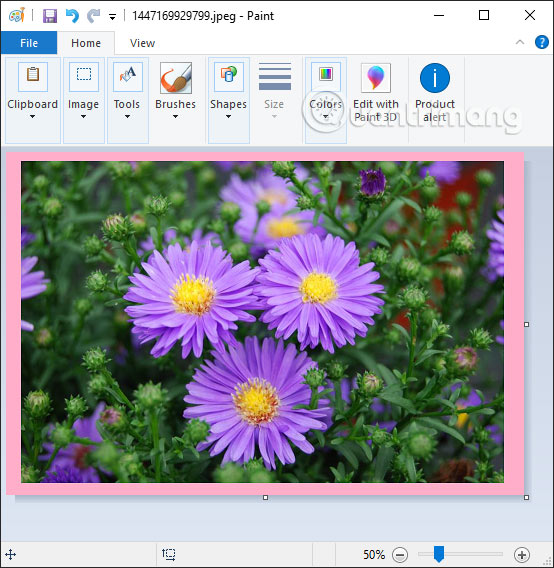
Fill the border with the image and you get the image with the border as shown below.
If you want to add more colors, click Edit colors and then select the color in the palette that Paint provides.
Step 4:
If the user wants to create another picture frame outside, then drag the image area as step 1 is. Then select Select and drag the image to the middle. Then display an additional picture frame as shown.
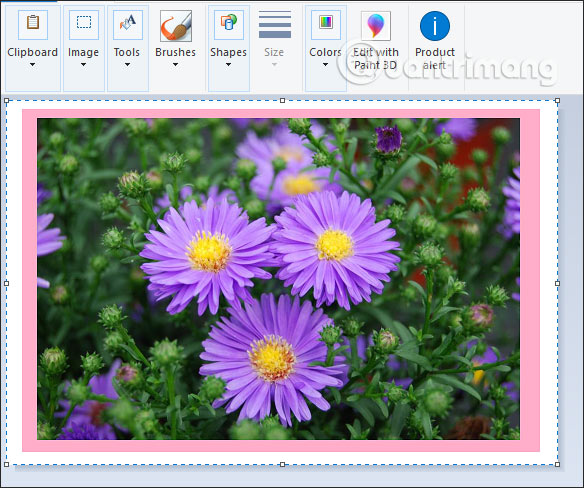
Next, fill the outer border to create a different color frame. The final image results are as follows.

Creating photo frames on Pain is very simple and there are not many steps taken. Users can create multiple frames around the image, and arrange the colors used to bring newfoundness to the image.
I wish you all success!
Was this article helpful?
Your feedback helps us improve.
Related Articles
 How to cut the image with Paint3 minutes read
 How to create a photo size of 3x4 in Paint3 minutes read
 How to download and install Paint.NET2 minutes read
 Instructions for creating a Valentine double heart photo frame3 minutes read
 How to merge photos into the frame on Paint4 minutes read
 How to create a 3x4 photo in Paint3 minutes read
Reader Comments 0
Sign in with email or Google to join the discussion.