Table of Contents
This updated guide examines How to Merge Photos into the Frame on Paint and organizes the essential facts, background, and practical takeaways in clear American English.
Although there are no advanced professional photo editing features like other software, but painting images on Paint is very simple and easy. We can combine multiple images into one image, or use the existing frame to stitch the image. From there you can use the newly merged image into the frame and then merge it into another image. The following article will guide you how to read pictures on Paint.
- The best free photo editing software on your computer
- Top software to create videos from photos on Android
- How to combine photos on software CollageIt
- How to combine photos in Photoshop from 2 different images
Instructions for blending photos on Paint into frames
Step 1:
We download the picture frame we want to frame. Next, the user clicks the bottom corner of the image when a 2-dimensional arrow appears and drags to expand the image area .

Step 2:
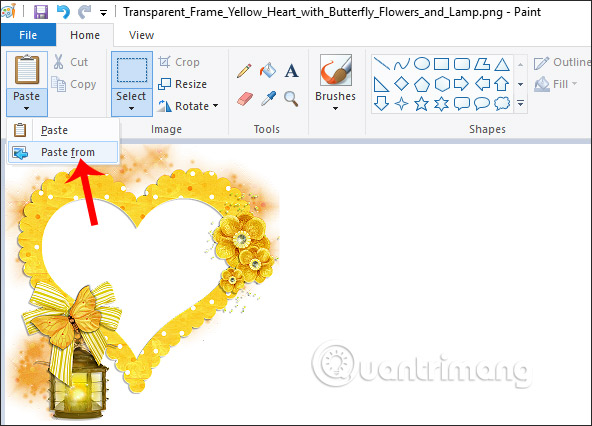
Next click Paste and select Paste form and select the image you want to merge into the frame . So we have 2 images to be processed on Paint.
Step 3:
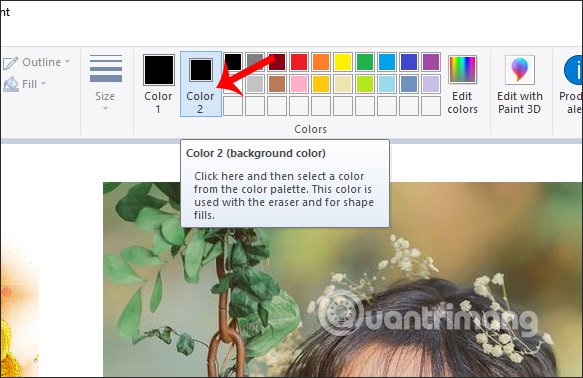
Next, click on Color 2 and then select black in the color palette next to it.
Next, click on the Fill with color paint bucket icon and fill it withblack in the part you want to merge . In the picture is the area inside the heart shape. When the fill color is finished the area inside the image will have a black shape as shown below.

Step 4:
Users click on the Select section and click Transparent selection to make the selection transparent.
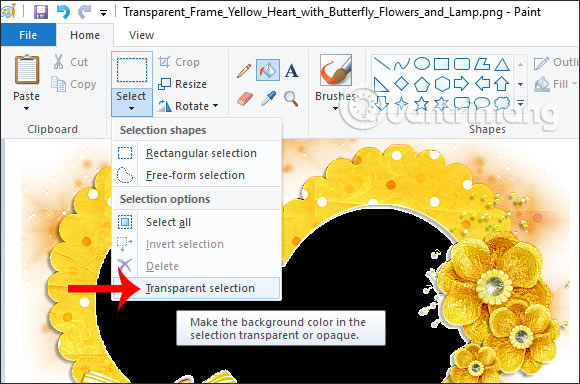
Click on Selection and then use the mouse to circle the image .
Step 5:
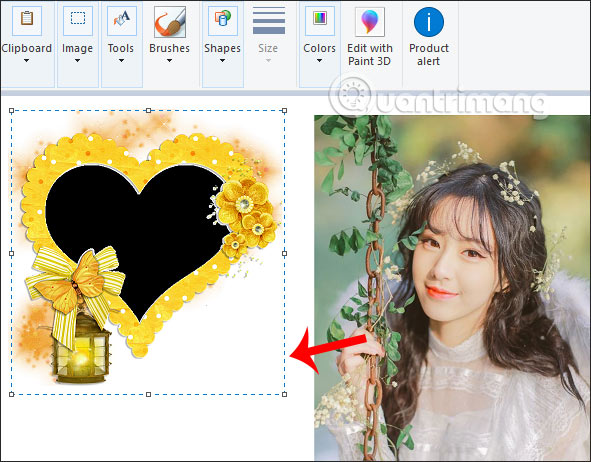
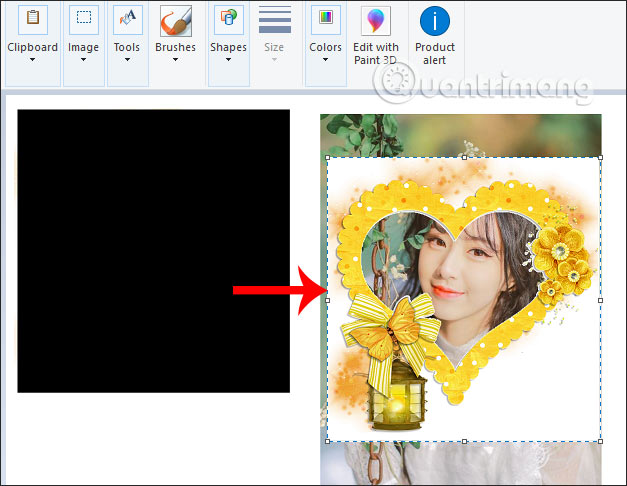
Once you have selected the frame area, we move the image frame to the side of the image to select the area of the image to be blended into the frame. The user moves the frame to the position you need to pair. The inner part of the heart has become transparent to blend into another image.
Step 6:
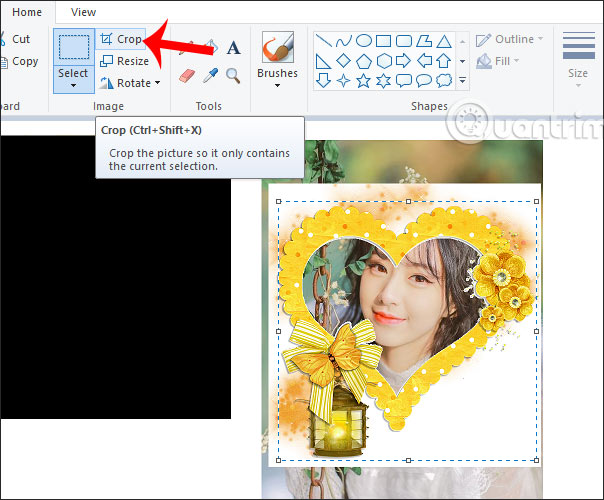
When you like the image area, we continue to manipulate the removal of unnecessary, unnecessary areas of the image. You also click Selection , dragthe frame around the image area to use , and then click the Crop text above to crop the image.
In case you want to edit it at any step, press Ctrl + Z to return to the operation to be changed again.
Step 7:
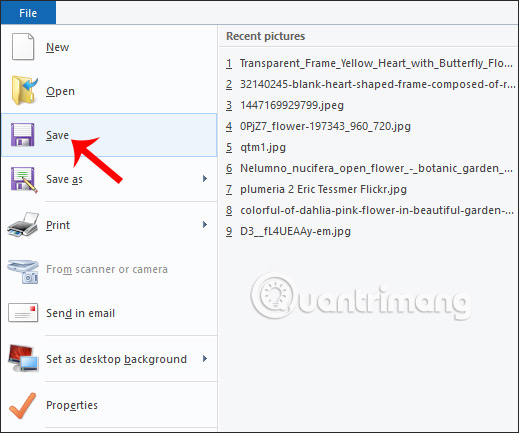
Finally, click File and then Save to save the image, or click Save As to save the new image.
The complete image when merged into the frame is as follows. In addition to the heart frame, you can choose other more artistic frames.
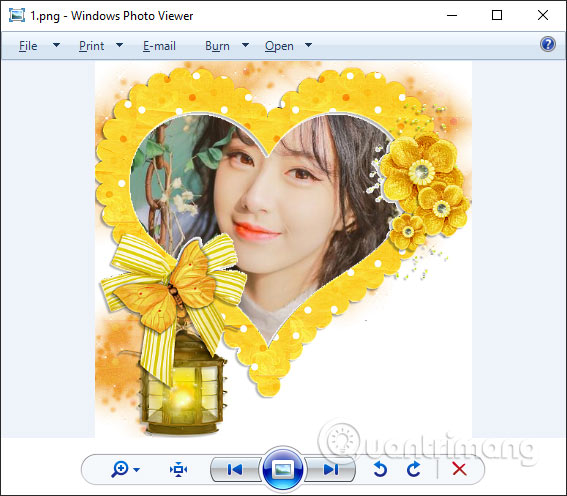
So you already know how to blend the image into Paint's frame. We can choose any frame we want and then blend the existing image into the frame.
I wish you all success!
FAQ
What is How to Merge Photos into the Frame on Paint about?
It provides a structured overview of transplant photos on Paint, explains the main context, and highlights practical takeaways for readers.
Why does this topic matter?
Understanding the main concepts helps readers evaluate the issue, avoid common mistakes, and make better-informed decisions.
How should readers use this information?
Use the guidance as a practical starting point, confirm details that may have changed, and follow current product, safety, or security recommendations.
Related Articles
 Merge Multiple Photos into One Common Frame Using GIMP5 minutes read
 How to Use Paint: How to Create a Photo Frame on Paint4 minutes read
 How to Merge Multiple Photos into a Photo Frame in Photoshop3 minutes read
 How to Merge Multiple Photos into One Frame in Photoshop7 minutes read
 Learn How to Use Paint to Edit Photos on Windows23 minutes read
 Cut the Paint Image: How to Cut the Image with Paint4 minutes read
Reader Comments 0
Sign in with email or Google to join the discussion.