How to create a loop effect on PowerPoint
Creating a slide with a loop effect in PowerPoint can make your slides look more engaging. You can use this effect for a variety of content.
Table of Contents
Creating a looping slide in PowerPoint can make your slides look more engaging. You can use this effect for a variety of things, such as a conference presentation or adding a background to make your slides more eye-catching. In this article, you will learn how to use looping effects in PowerPoint for a variety of content types.
Instructions for creating loop effects on PowerPoint
Step 1:
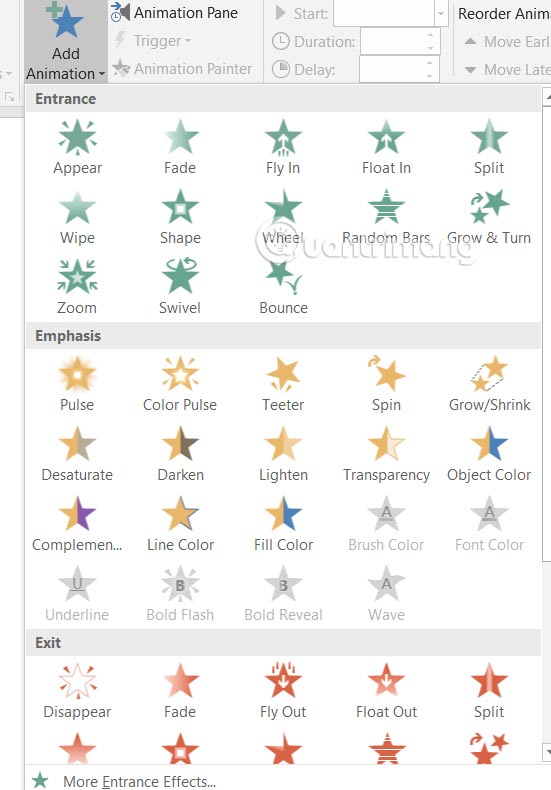
Select the object you want to animate, then click Animations > Add Animation and choose an effect that matches the content you have selected.
Step 2:
Next, click on Animation Pane to make adjustments.
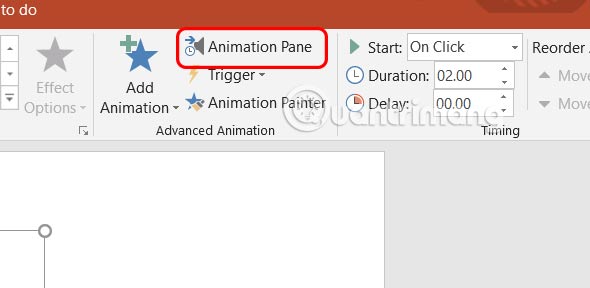
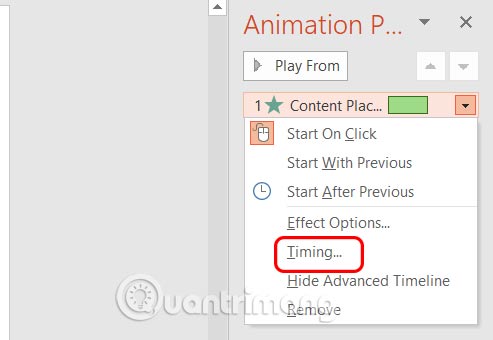
Displayed on the right side of the screen, right-click on the effect and select Timing to adjust the time.
Step 3:
Displays a table with items for you to set up with the items included.
- Start options: Choose when the effect starts On Click, With Previous, After Previous animation.
- Duration: The time it takes for the effect to complete.
- Delay: The amount of time before the weather begins.
- Repeat: Set the number of times the effect repeats or repeats until the end of the slide.
- Triggers: Control when and how the effect starts (optional).
Here you will set up as follows:
- Start: Select With Previous or After Previous.
- Repeat: Select a number or select Until End of Slide to configure the repeat effect in your PowerPoint.
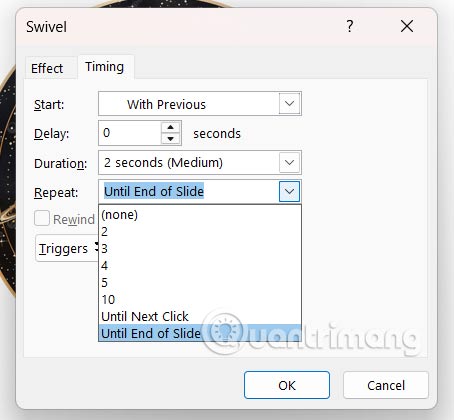
Finally click OK to save, the effect will repeat until the end of the slide.
Was this article helpful?
Your feedback helps us improve.
Related Articles
 How to create Spotlight effect in PowerPoint2 minutes read
 How to Loop in PowerPoint on PC or Mac7 minutes read
 How to create an effect for an Excel chart in PowerPoint9 minutes read
 How to use disappearing effects in PowerPoint4 minutes read
 How to create PowerPoint photo album with effects4 minutes read
 How to create PowePoint color schemes3 minutes read
Reader Comments 0
Sign in with email or Google to join the discussion.