How to connect a local AI model to Obsidian using MCP
MCP stands for Model Context Protocol. It is a common protocol for connecting AI models to external tools, but what makes it groundbreaking is its ability to integrate well with Obsidian and LM Studio..
Using cloud-based AI tools can be frustrating. Since many people primarily use Obsidian for note-taking, any time they want to ask ChatGPT or NotebookLM something, they have to copy their notes into a separate window. Their personal knowledge base seems locked away from the AI, which could actually be useful for summarizing. Many people also worry about their private notes being sent to servers they don't control. Then someone discovered MCP, and everything changed.
MCP stands for Model Context Protocol. It is a common protocol for connecting AI models to external tools, but what makes it groundbreaking is its ability to integrate well with Obsidian and LM Studio . Instead of copying and pasting, local AI models can now automatically read, search, and even write to the repository. By using the MCP layer with local tools, everything is now completely free, all data is local, and AI is now integrated with notes in a way that cloud tools cannot.
Here's what you can do with a local Obsidian MCP setup!
Integrate AI directly into the Obsidian repository
With the Obsidian MCP setup locally, the tools now interact seamlessly. Instead of treating the archive as a collection of static files, the MCP turns it into something the AI assistant can actively work with. It provides a full set of Obsidian-specific tools, allowing the model to read, search, edit, and organize notes directly on the computer. Additionally, running LLM offline on the computer has several benefits over using a paid AI service API, such as better privacy and unlimited free usage.
The setup allows you to instantly access the contents of any file, whether you need to reference an old idea or extract details from project notes. If you want to collect a lot of notes at once, you can batch read entire folders. You can run simple or complex searches whenever you need to find something deep in your archive. You can also list recent changes, access recurring notes, or browse entire folders when you need an overview of your work.
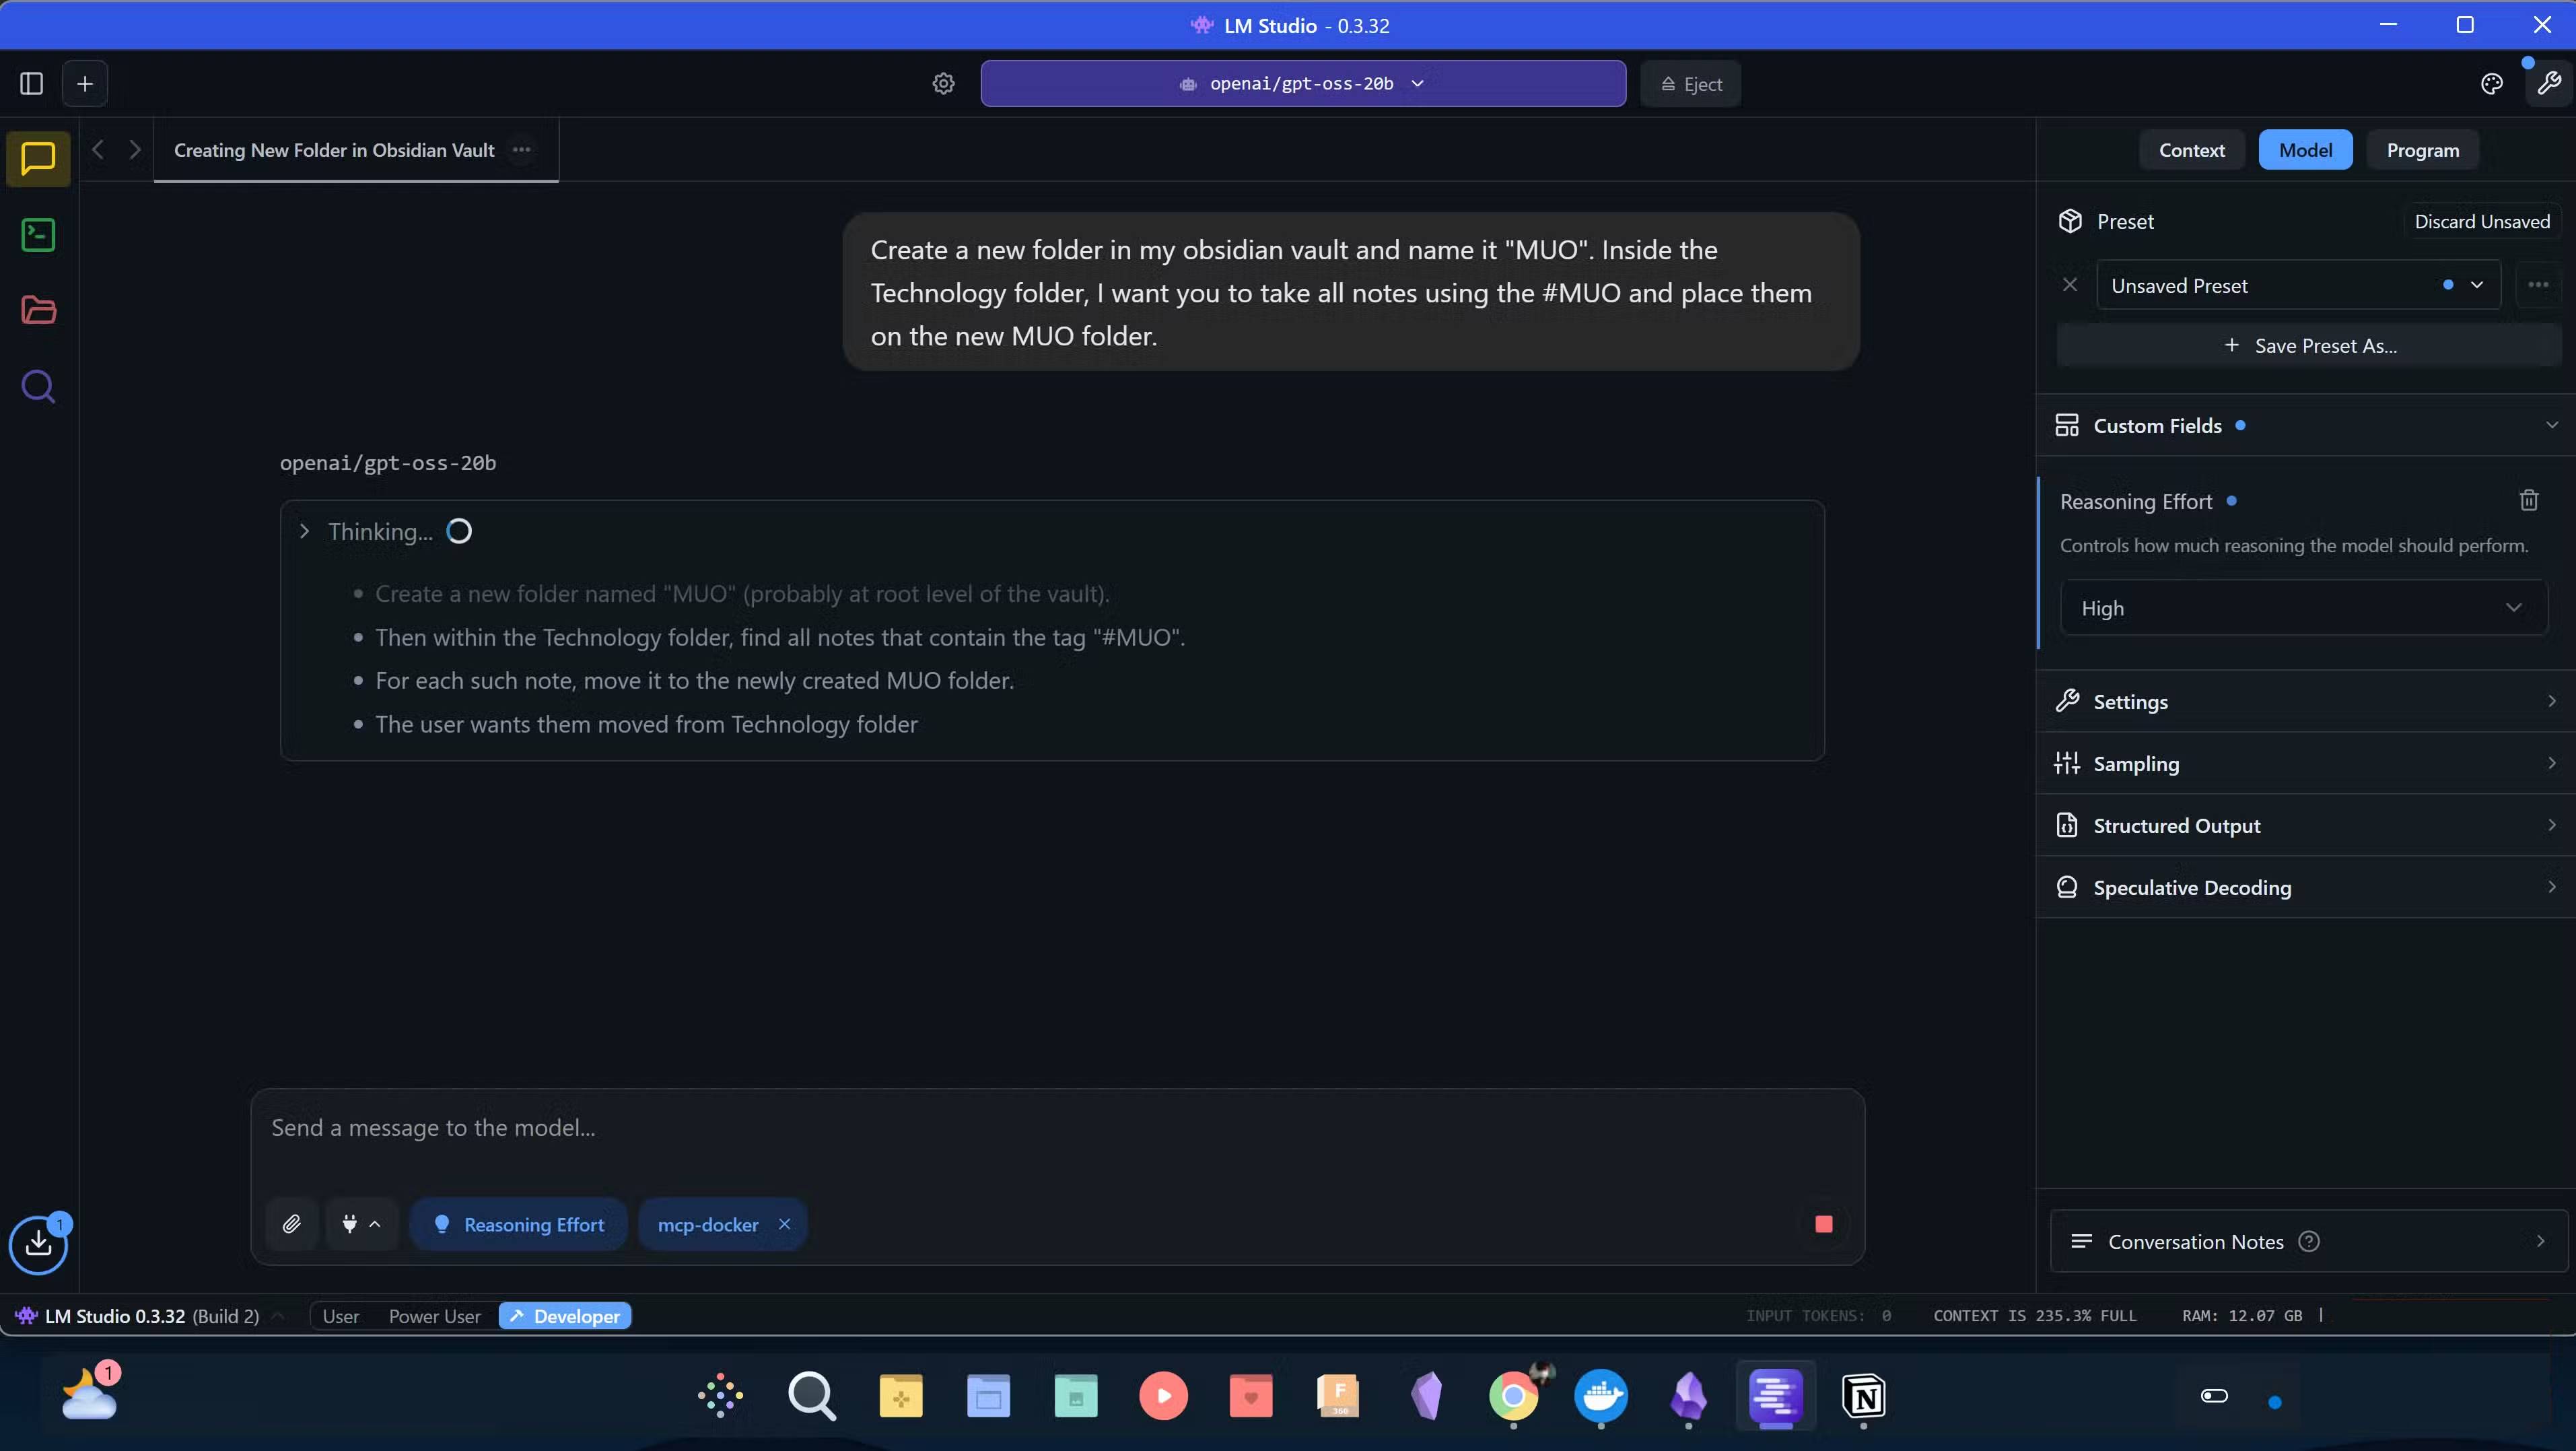
For more complex tasks, such as writing and editing, you can also set the model inference level to High , which will yield better results for tasks that require more context understanding and reasoning. The results can then be sent to Obsidian MCP to directly add new content to a specific note in the repository. All of this happens seamlessly without switching windows, copying text, or manually managing files. The local LLM can interact directly with the repository.
While it is possible to use Retrieval-Augmented Generation (RAG) as a simpler and faster way to connect your Obsidian repository to your local LLM, it is limited to data retrieval. This works well if you only need to provide context to the LLM from your notes, but if you want your model to interact directly with the Obsidian repository, you will need an MCP layer.
Setup is extremely simple
It only takes a few minutes!

The term MCP may sound intimidating at first, but the actual setup process is pretty straightforward. You'll need to install a few things, hook them up, and everything will be up and running.
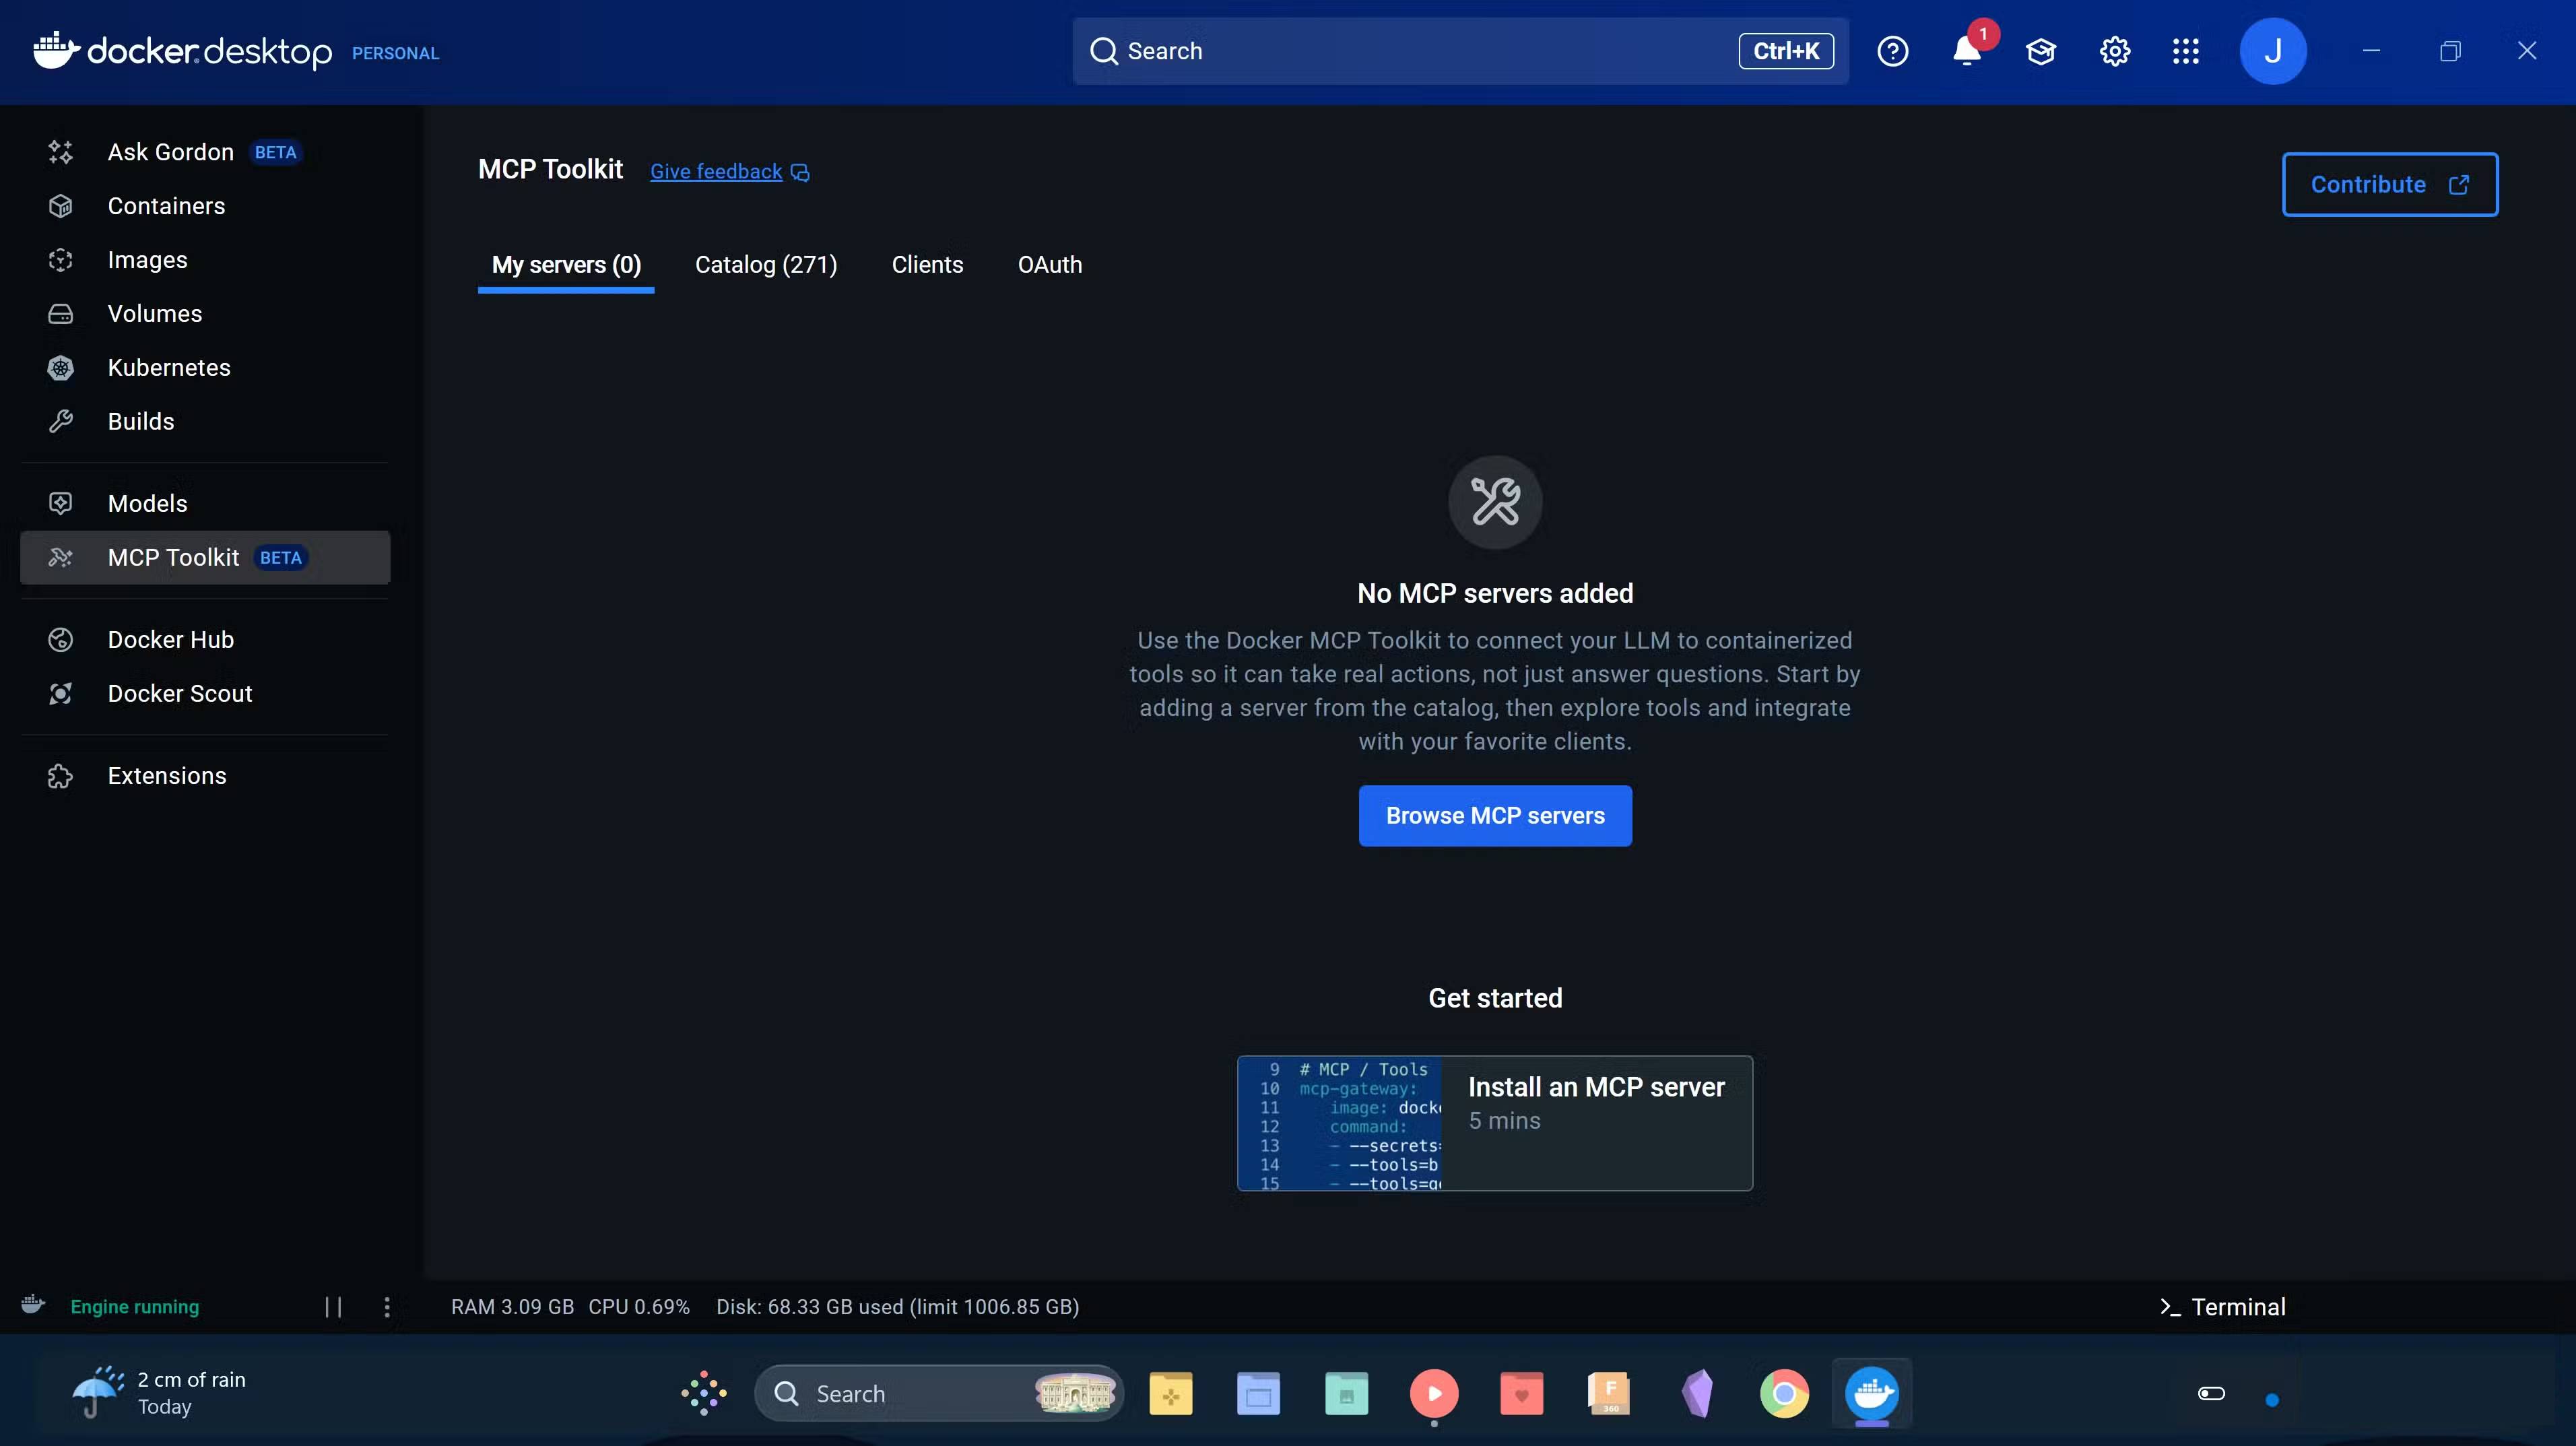
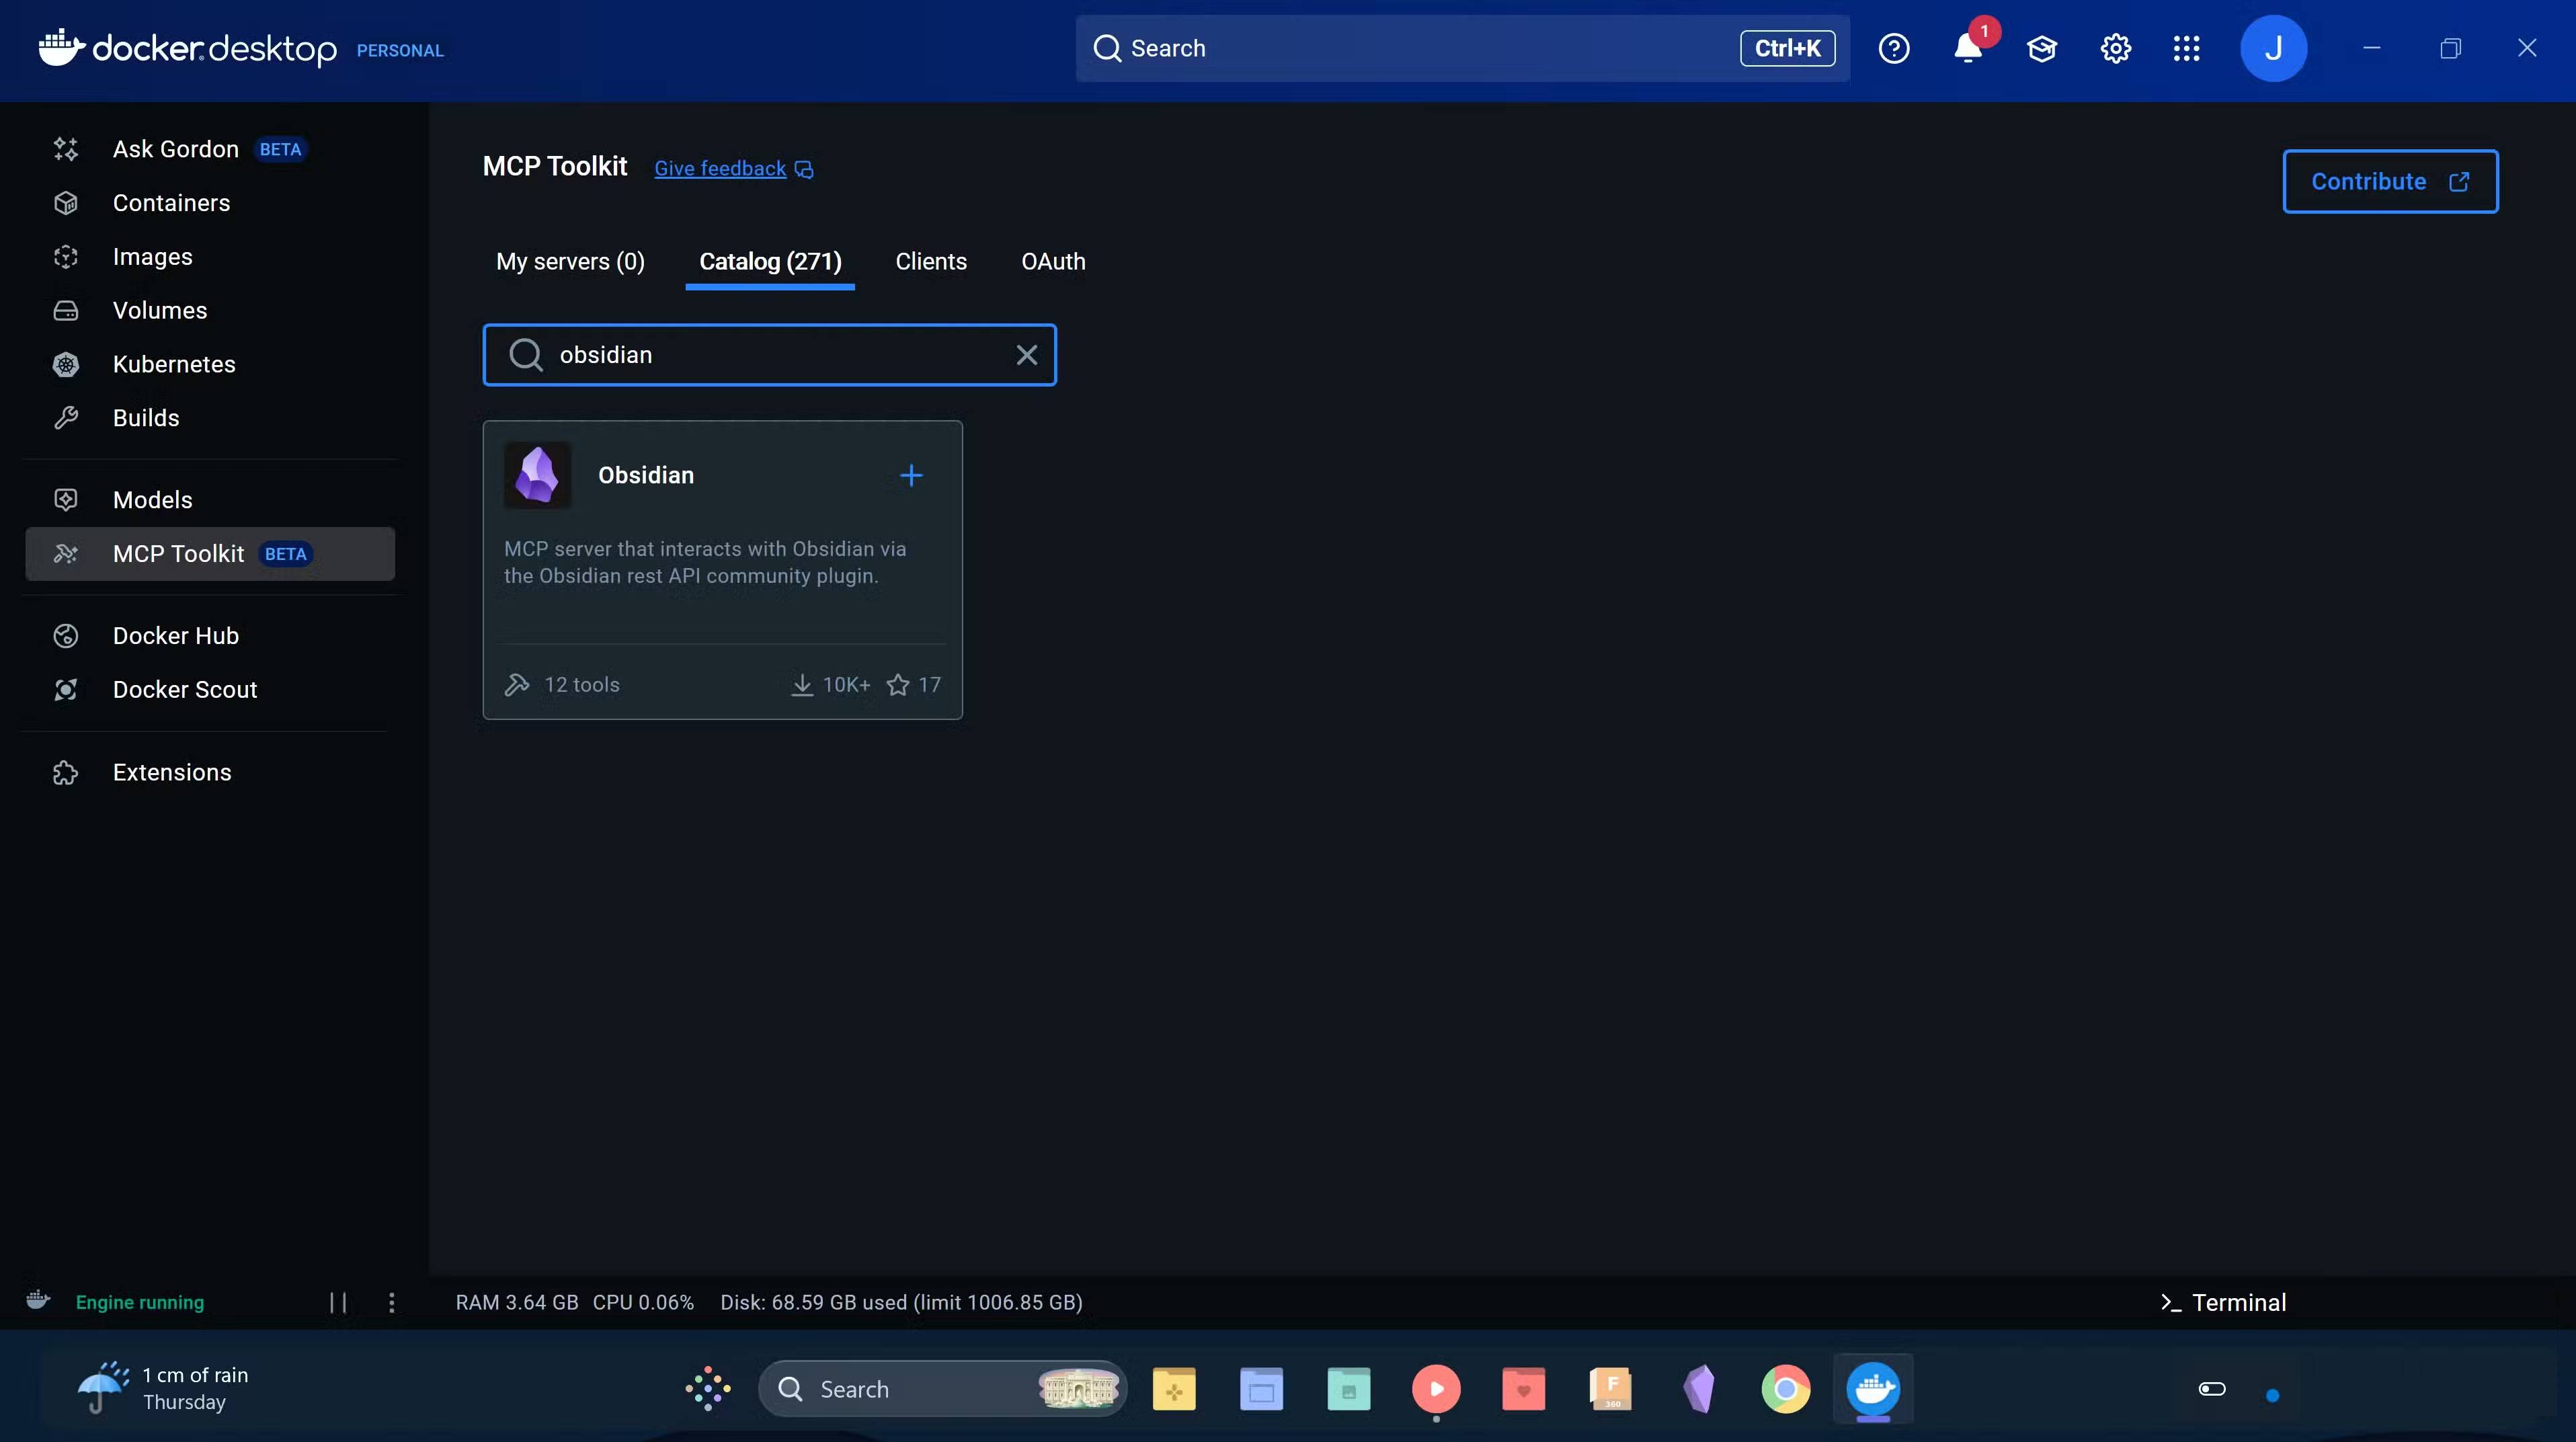
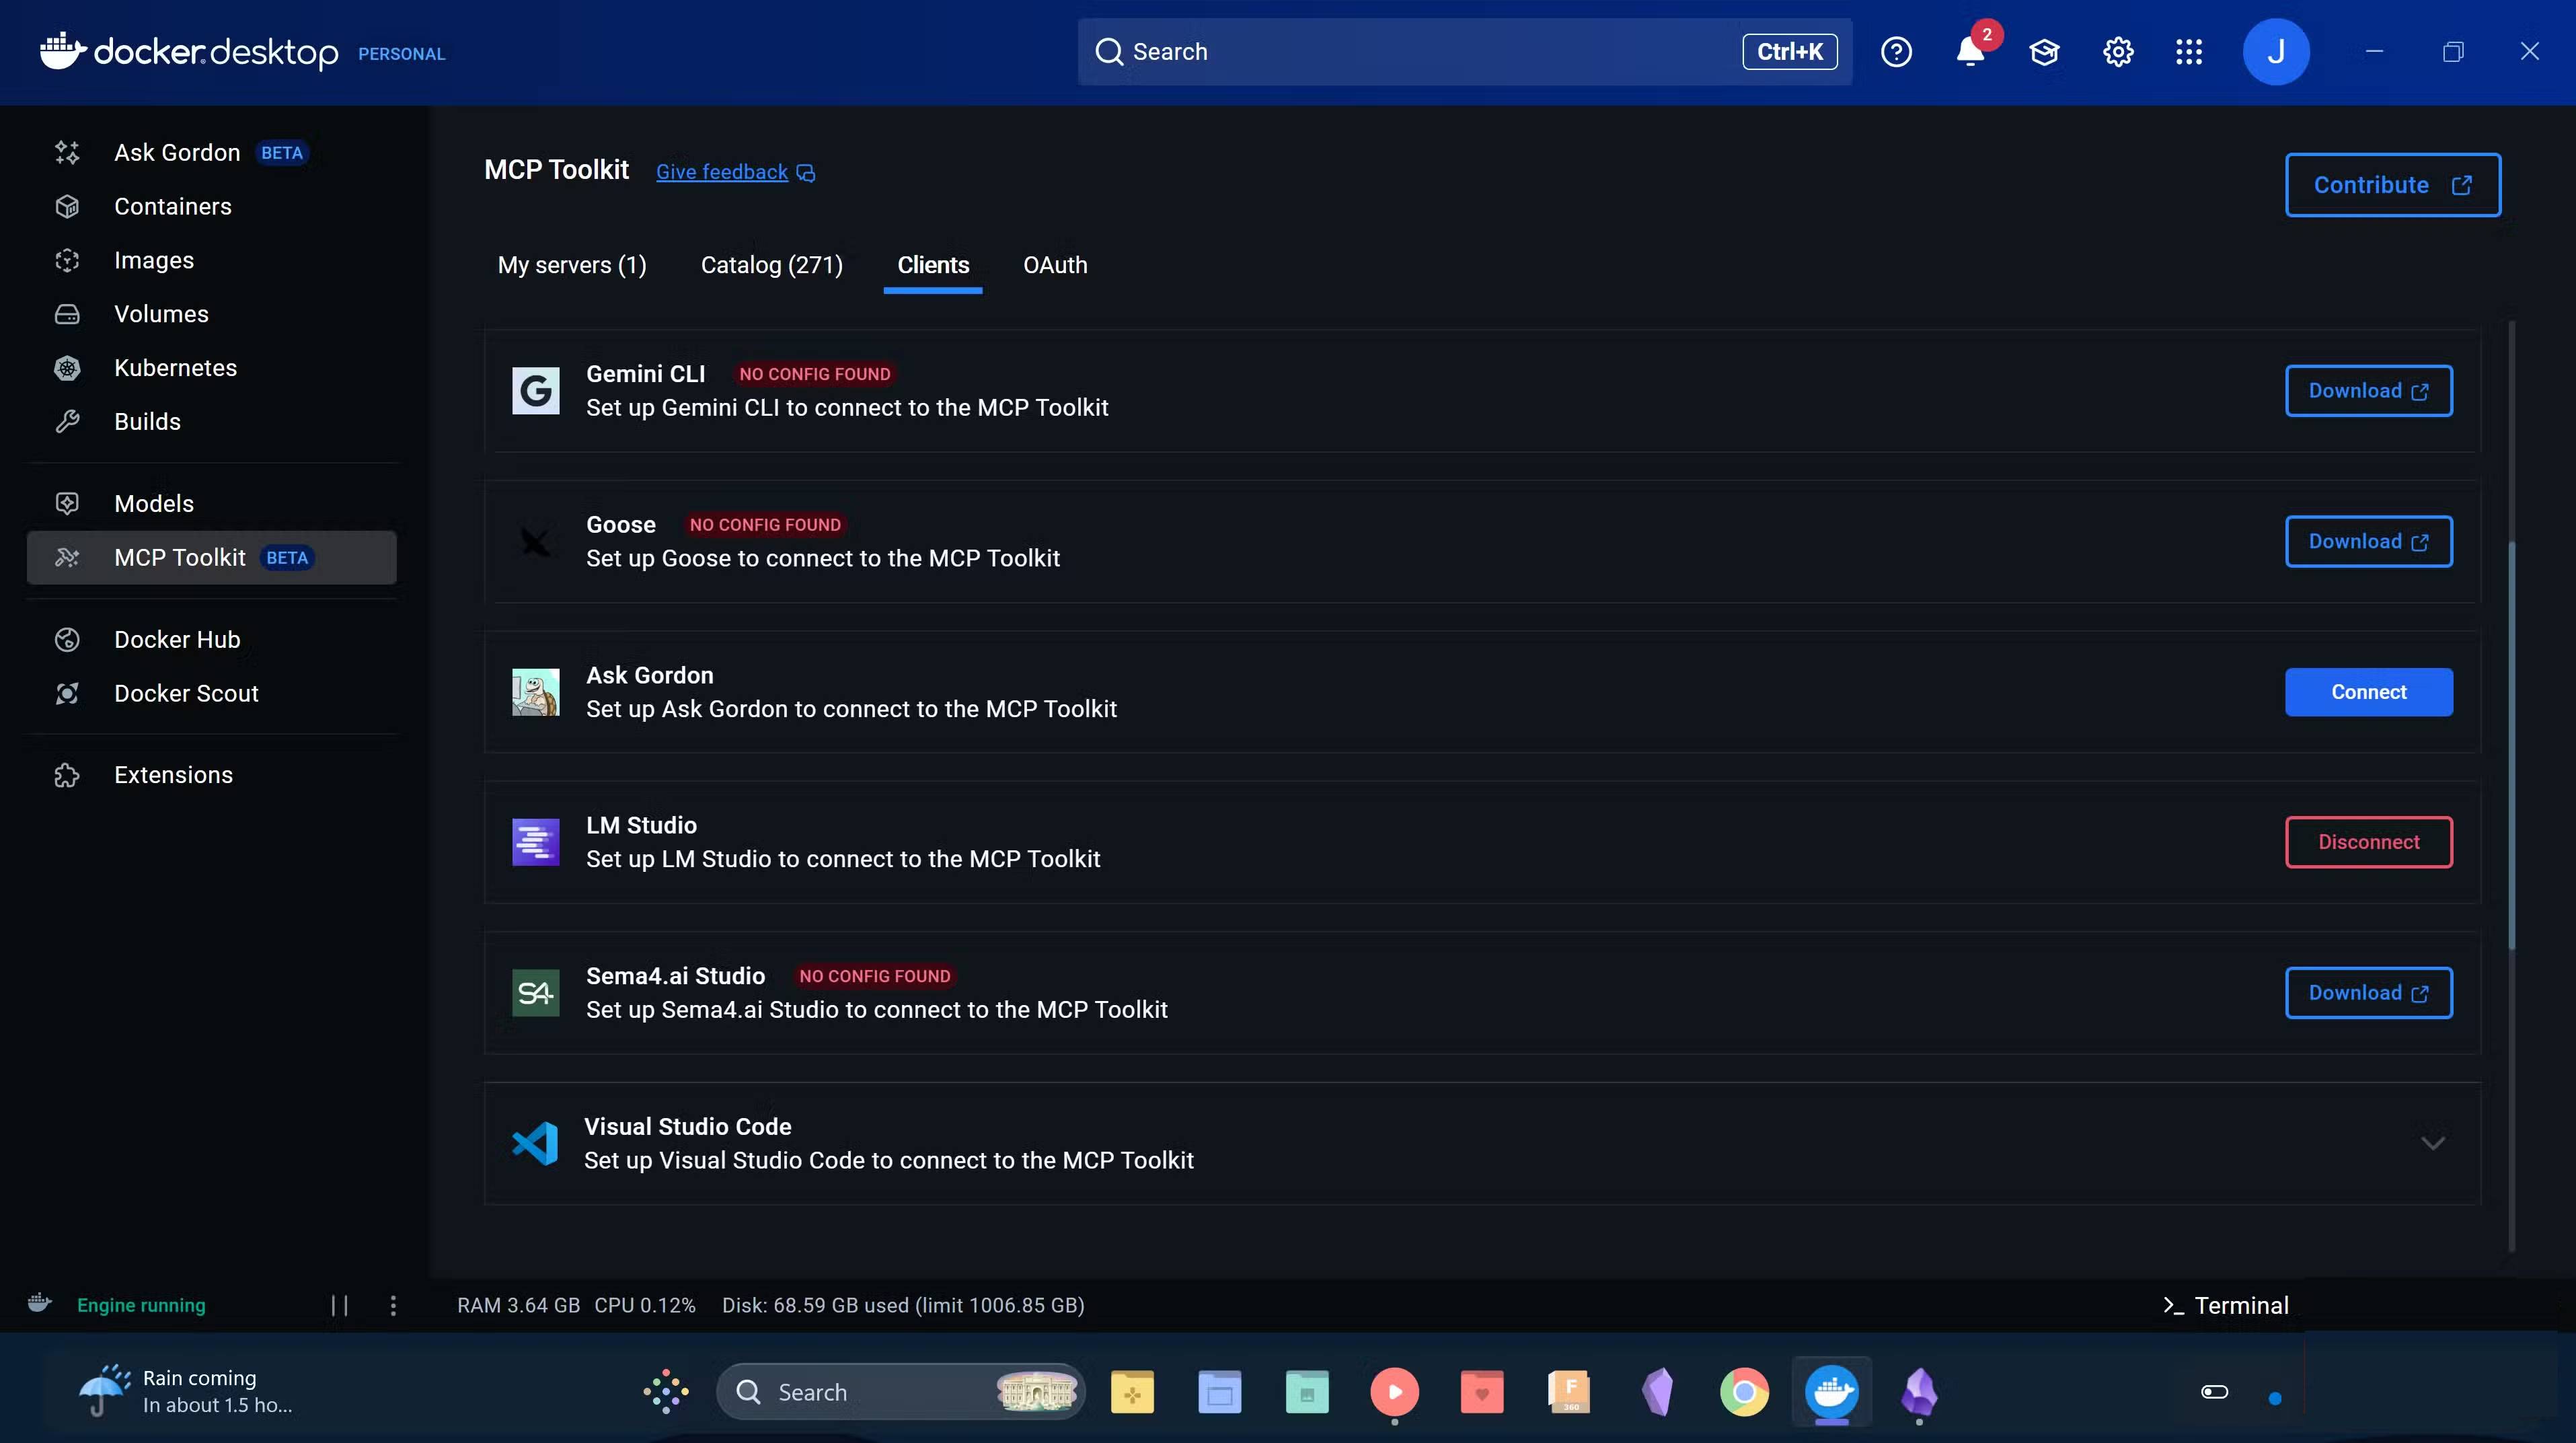
Start by installing Docker Desktop on your PC from the official website. Docker handles the backend infrastructure, so you don't have to manage servers or do complex configuration. Then, install the Obsidian MCP server inside Docker from the MCP Toolkit section .
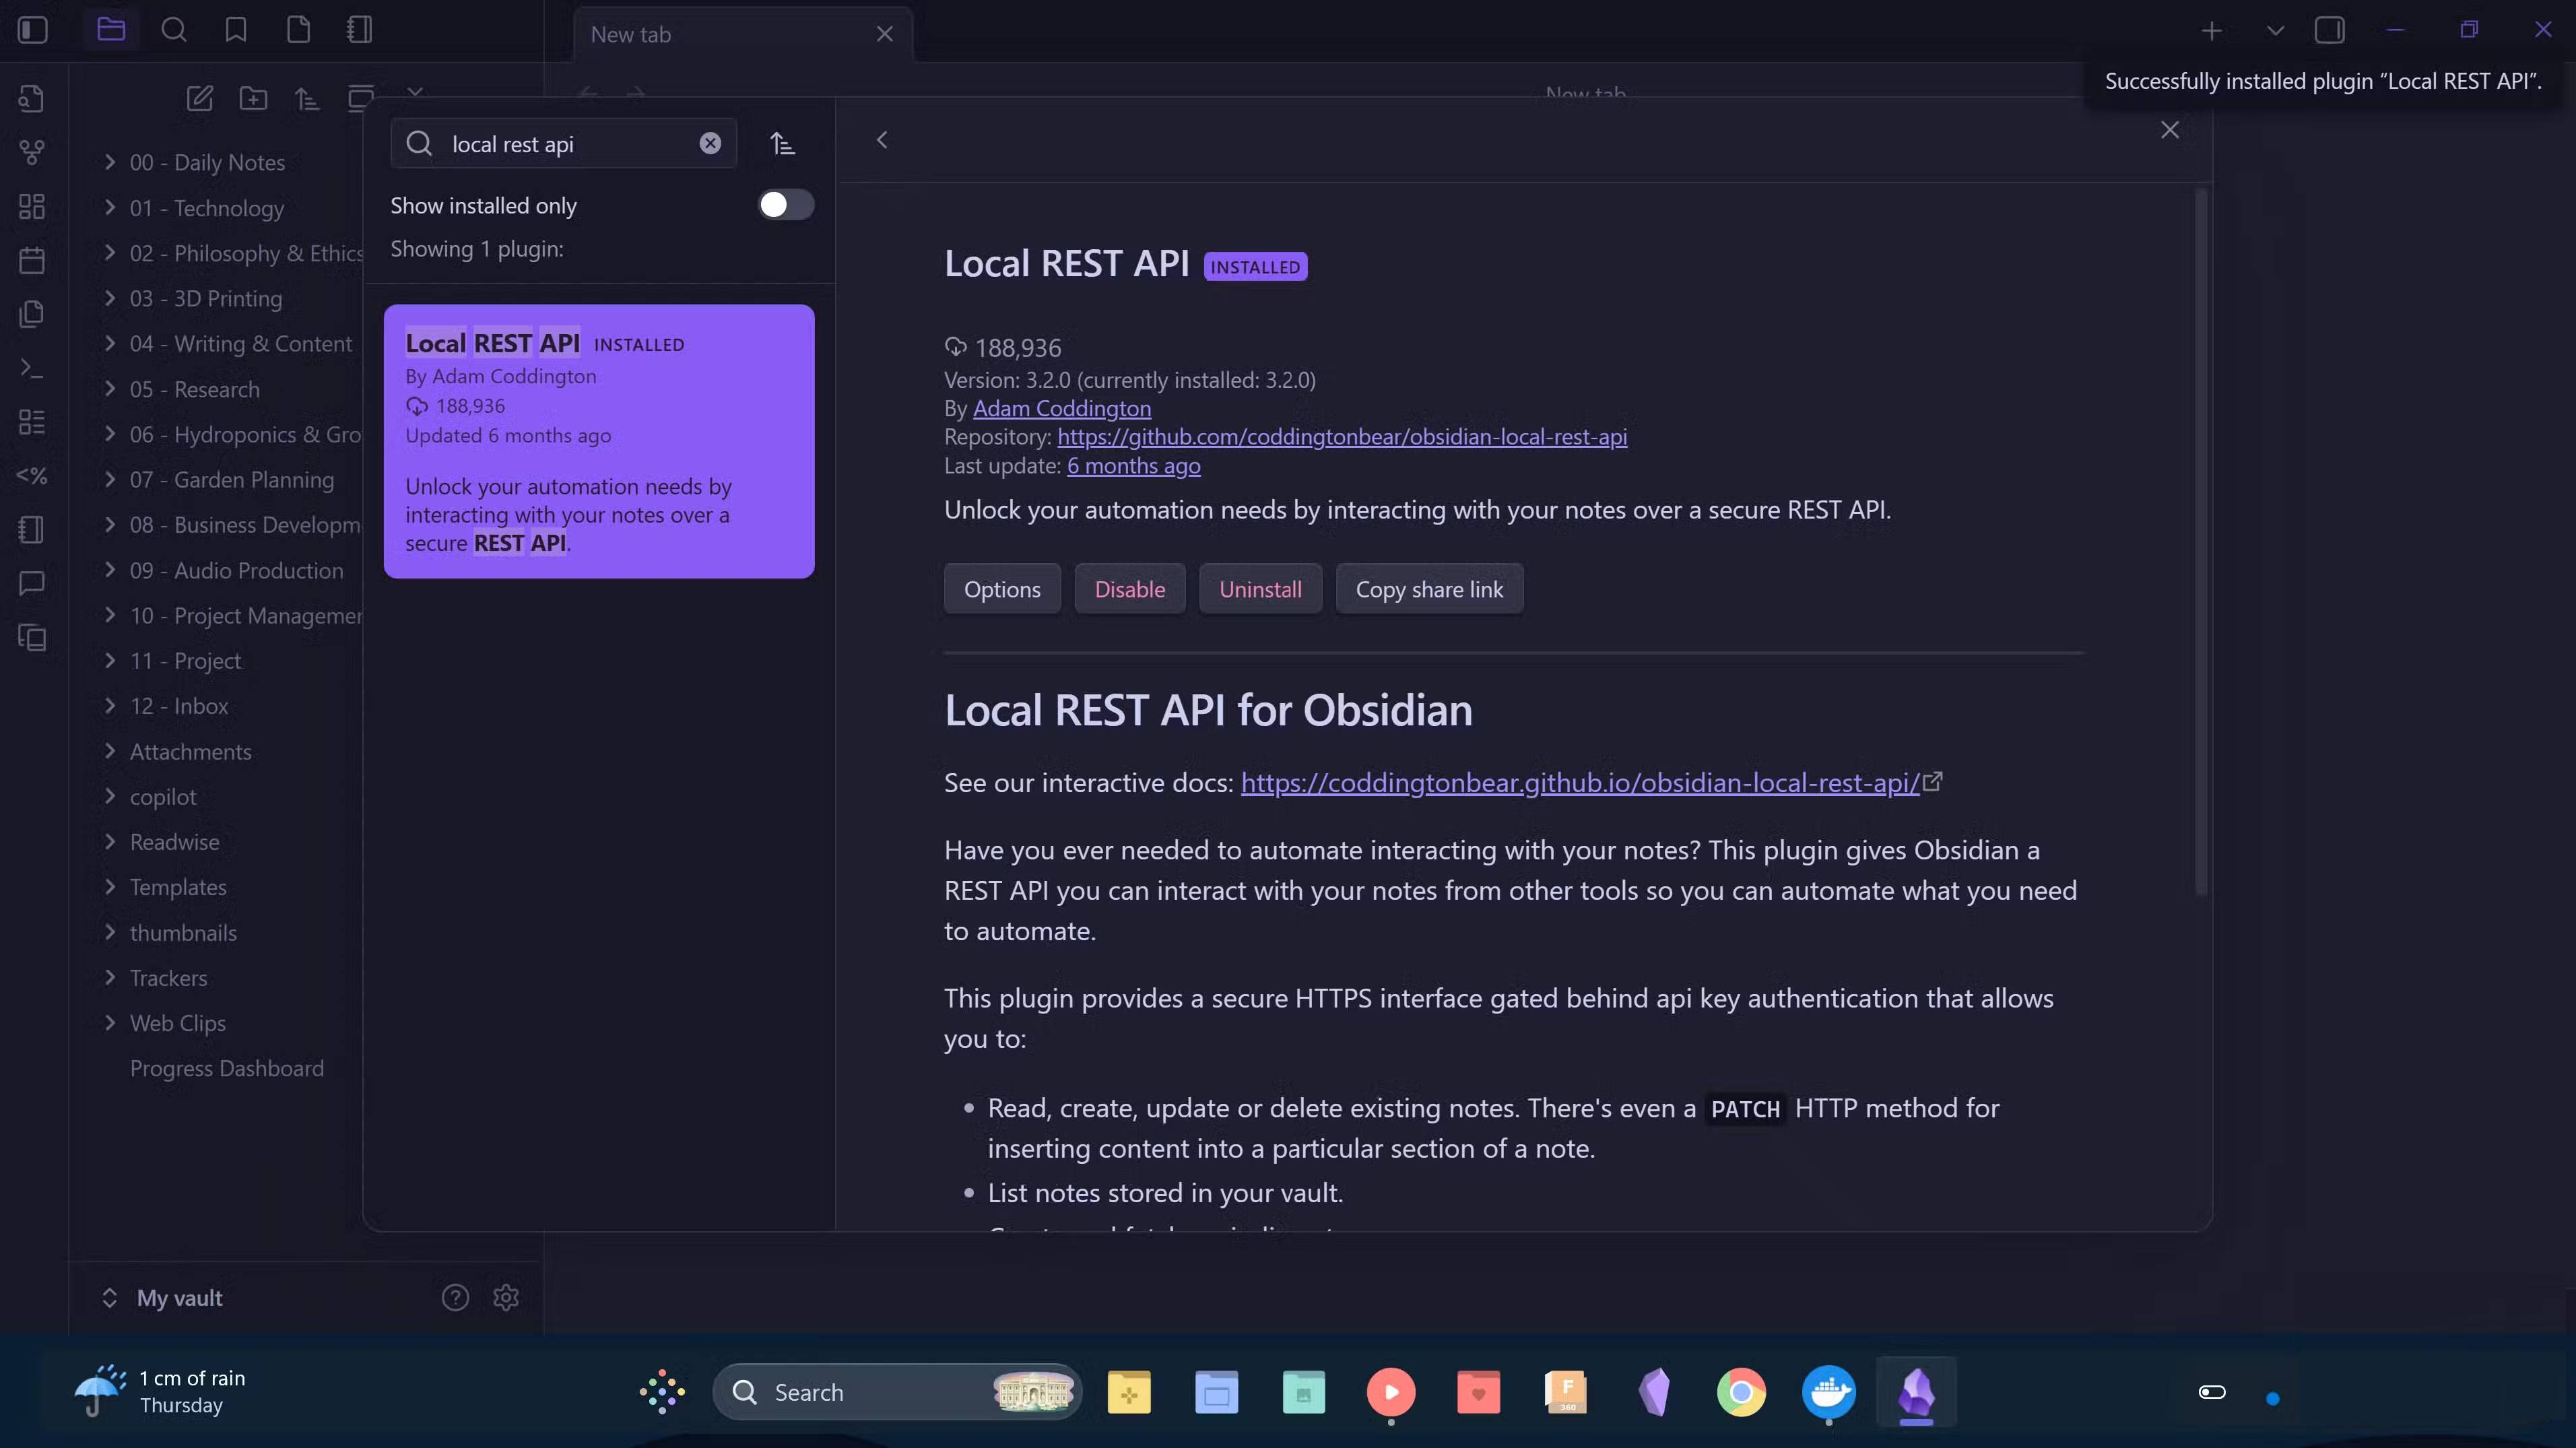
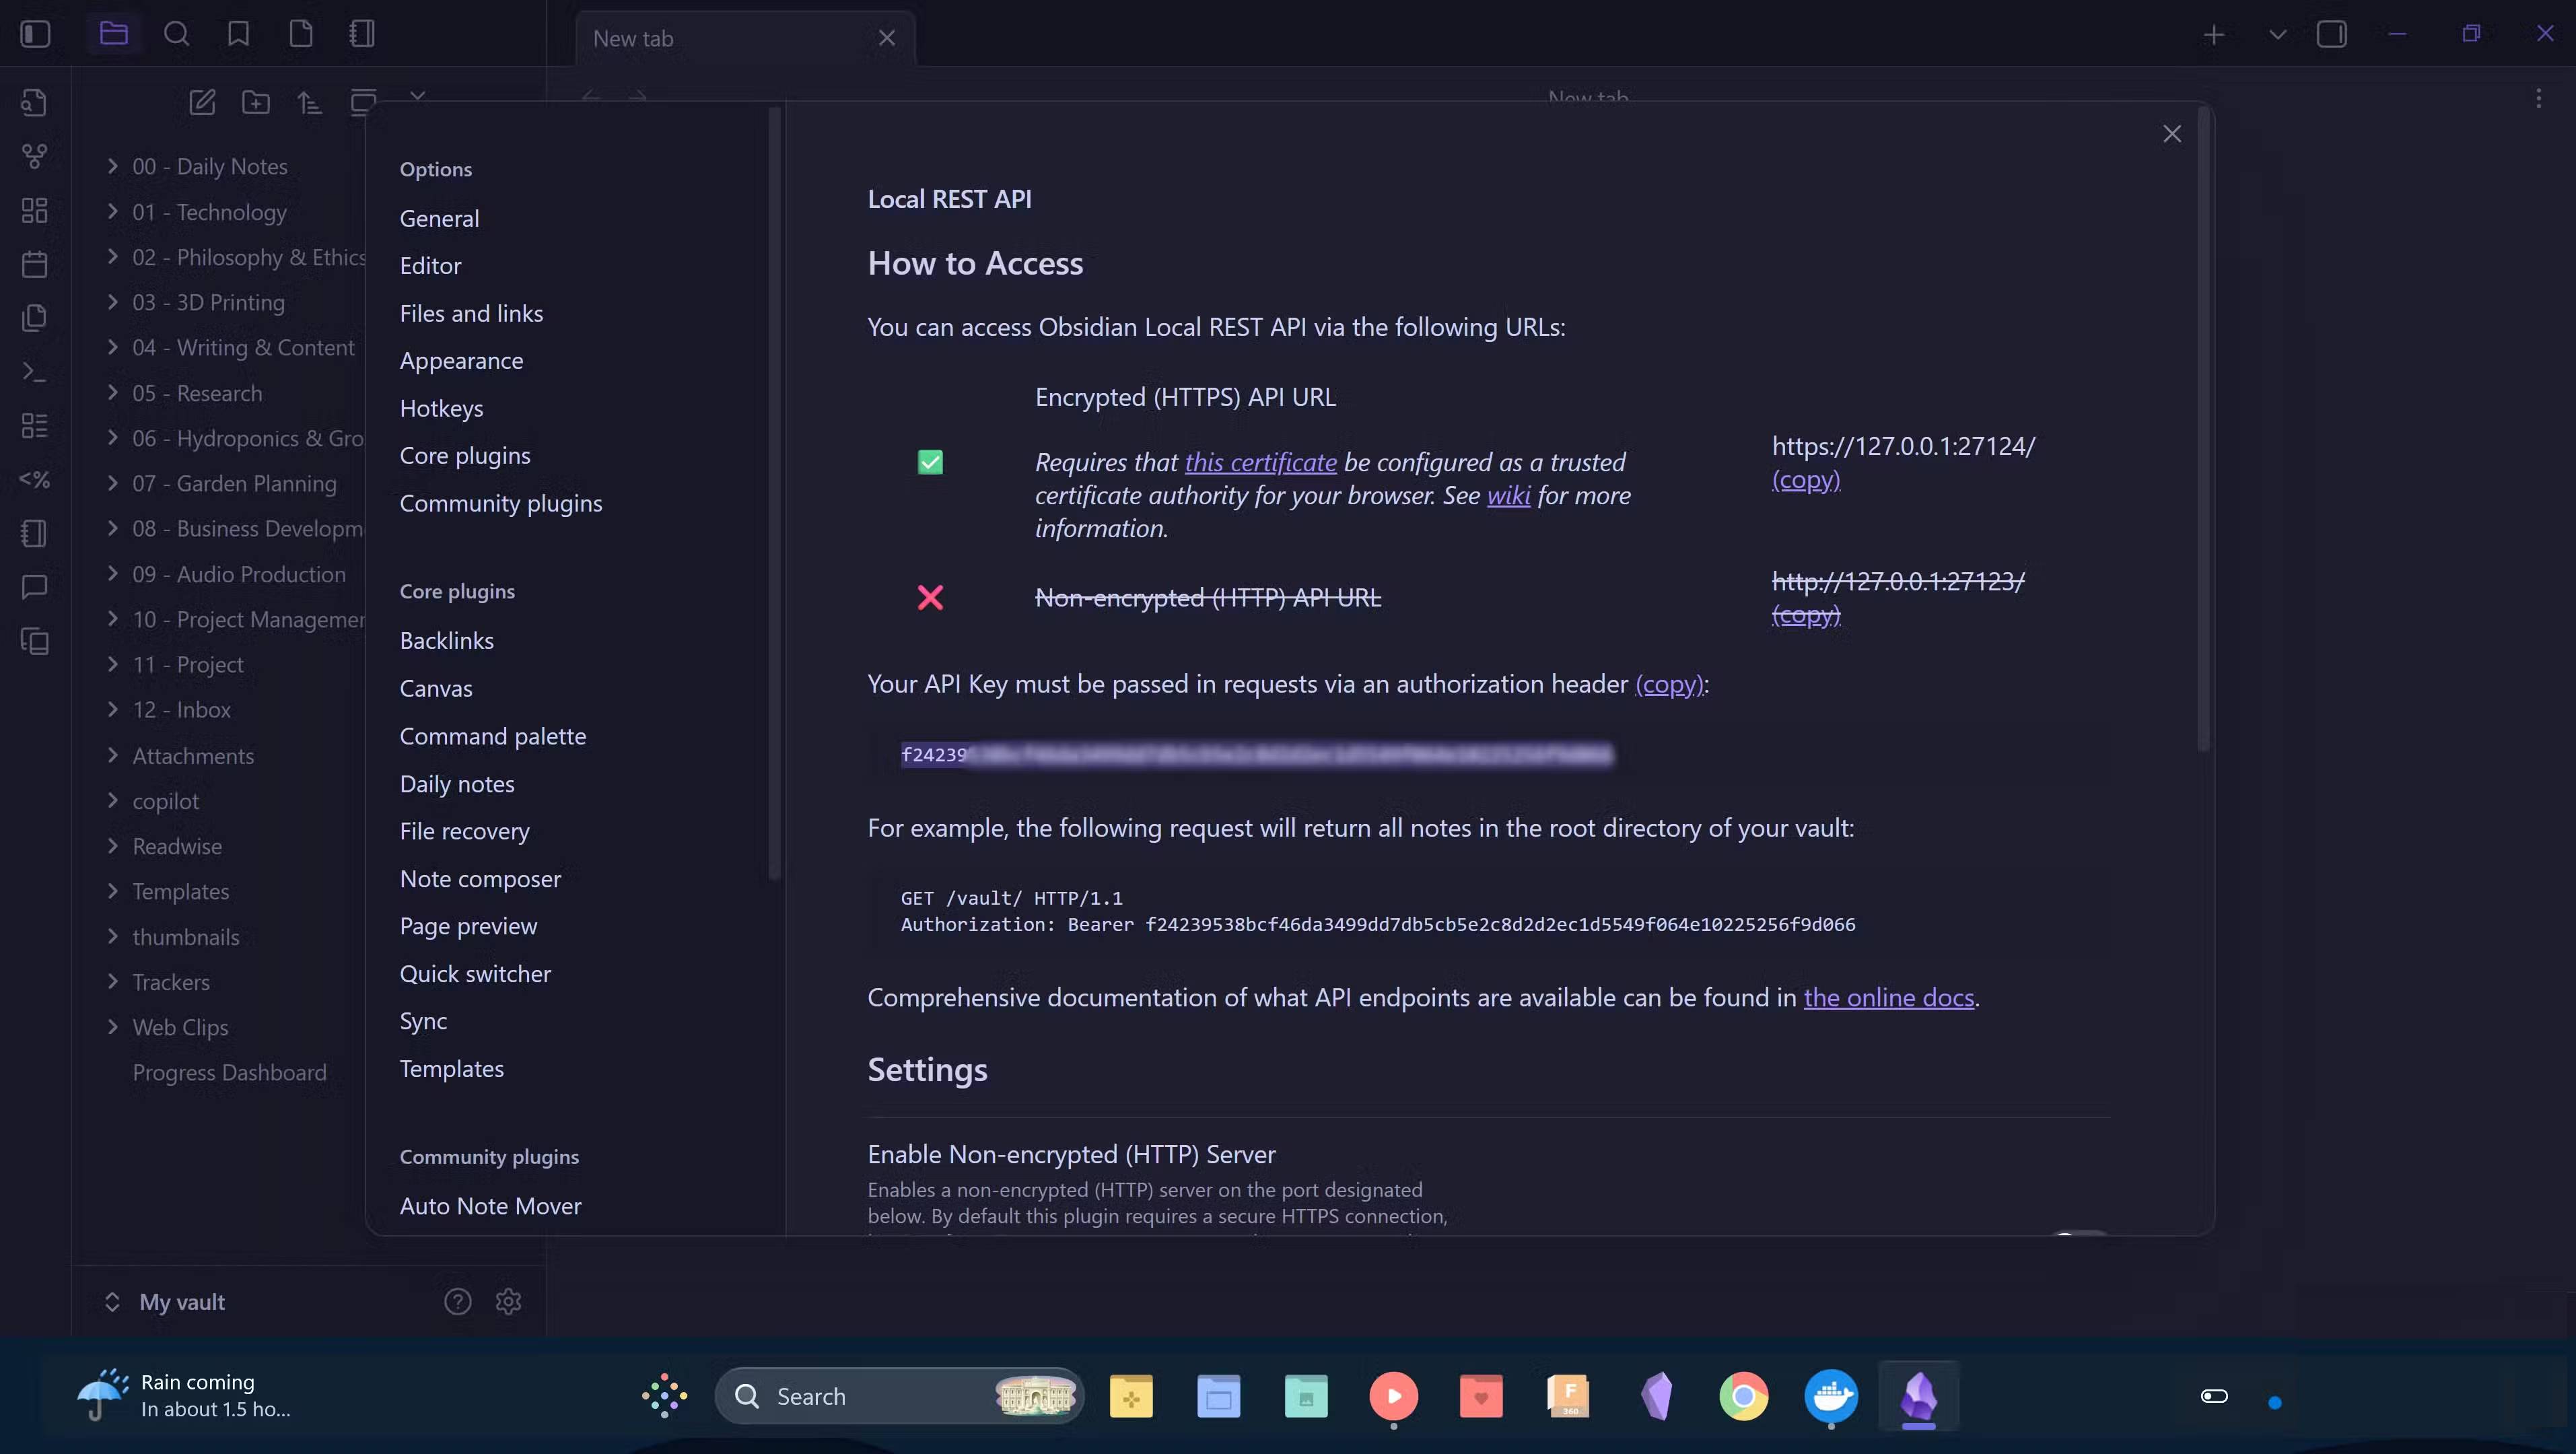
Obsidian MCP will require the Obsidian API. To get the API, you need to open Obsidian and install the Local REST API community plugin . This plugin allows external tools to securely communicate with your repository. Go to Options and get the Obsidian API key from the plugin settings, add it to the Obsidian MCP API field, and press check.
Now it's time to connect your local LLM to MCP. Install LM Studio from their official download page and download your preferred AI model from the app. Then, go back to Docker MCP Toolkit , click on Clients and download LM Studio . This will automatically connect Obsidian MCP to LM Studio.
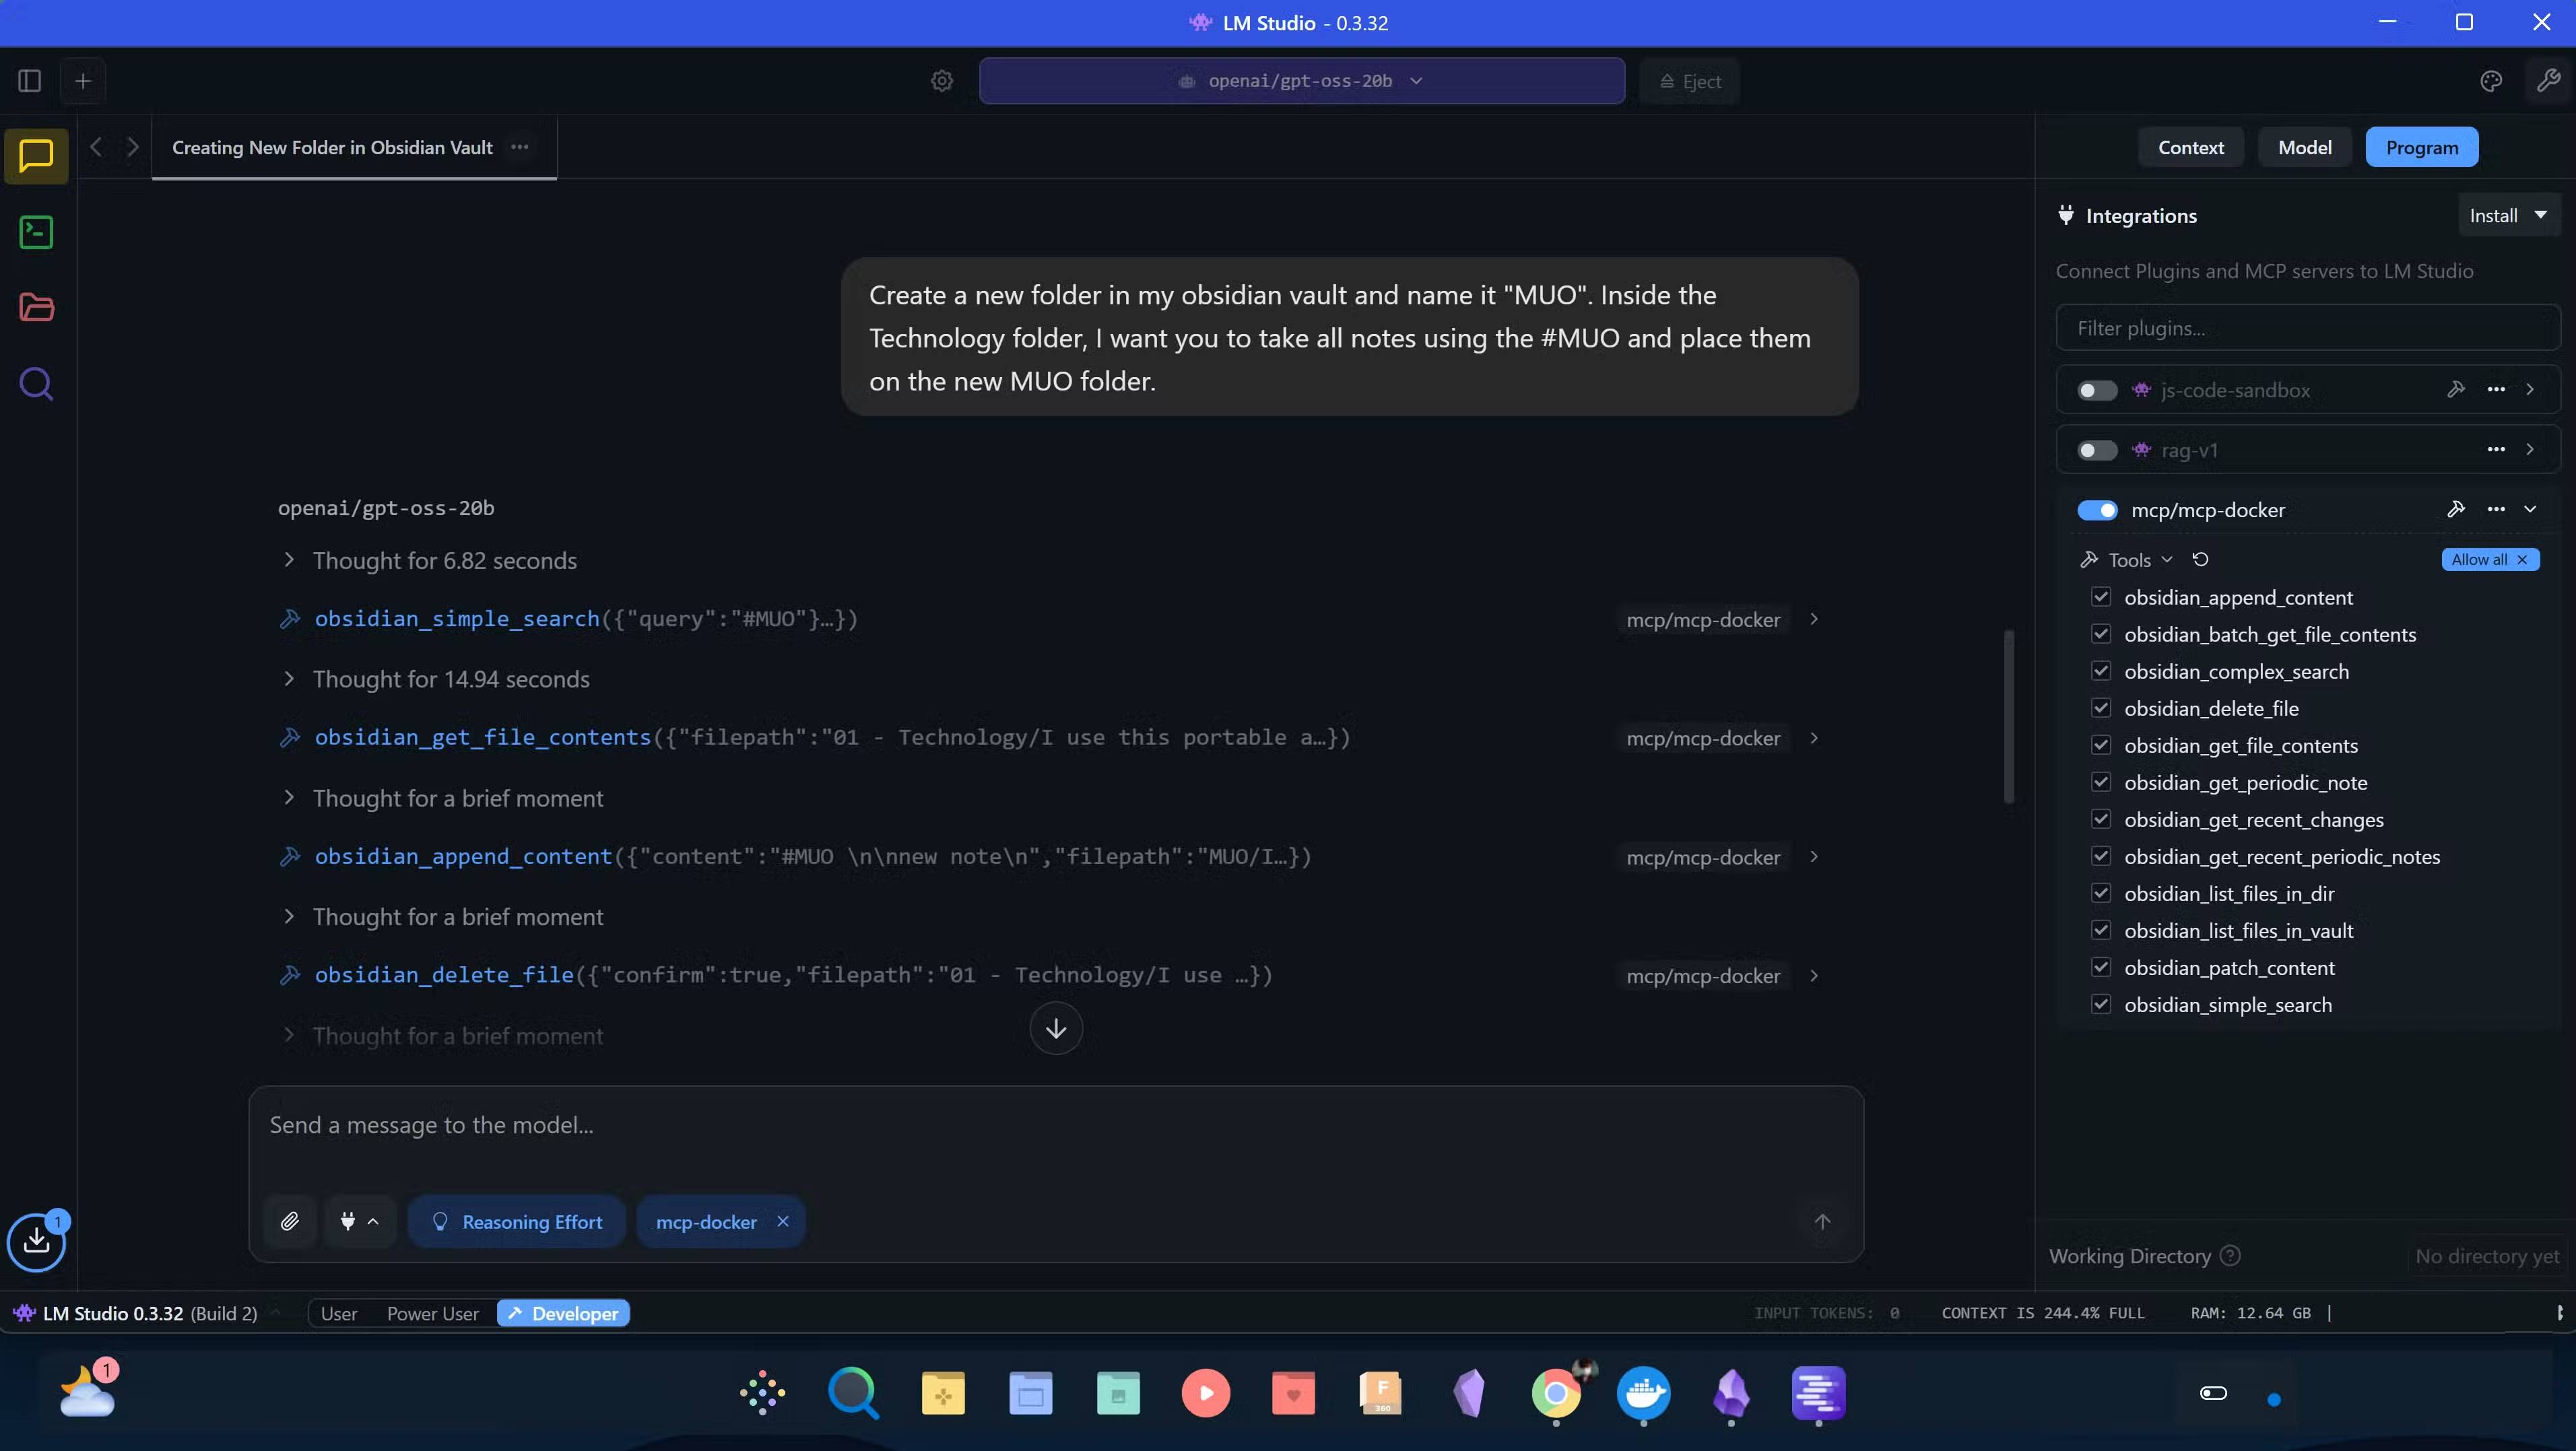
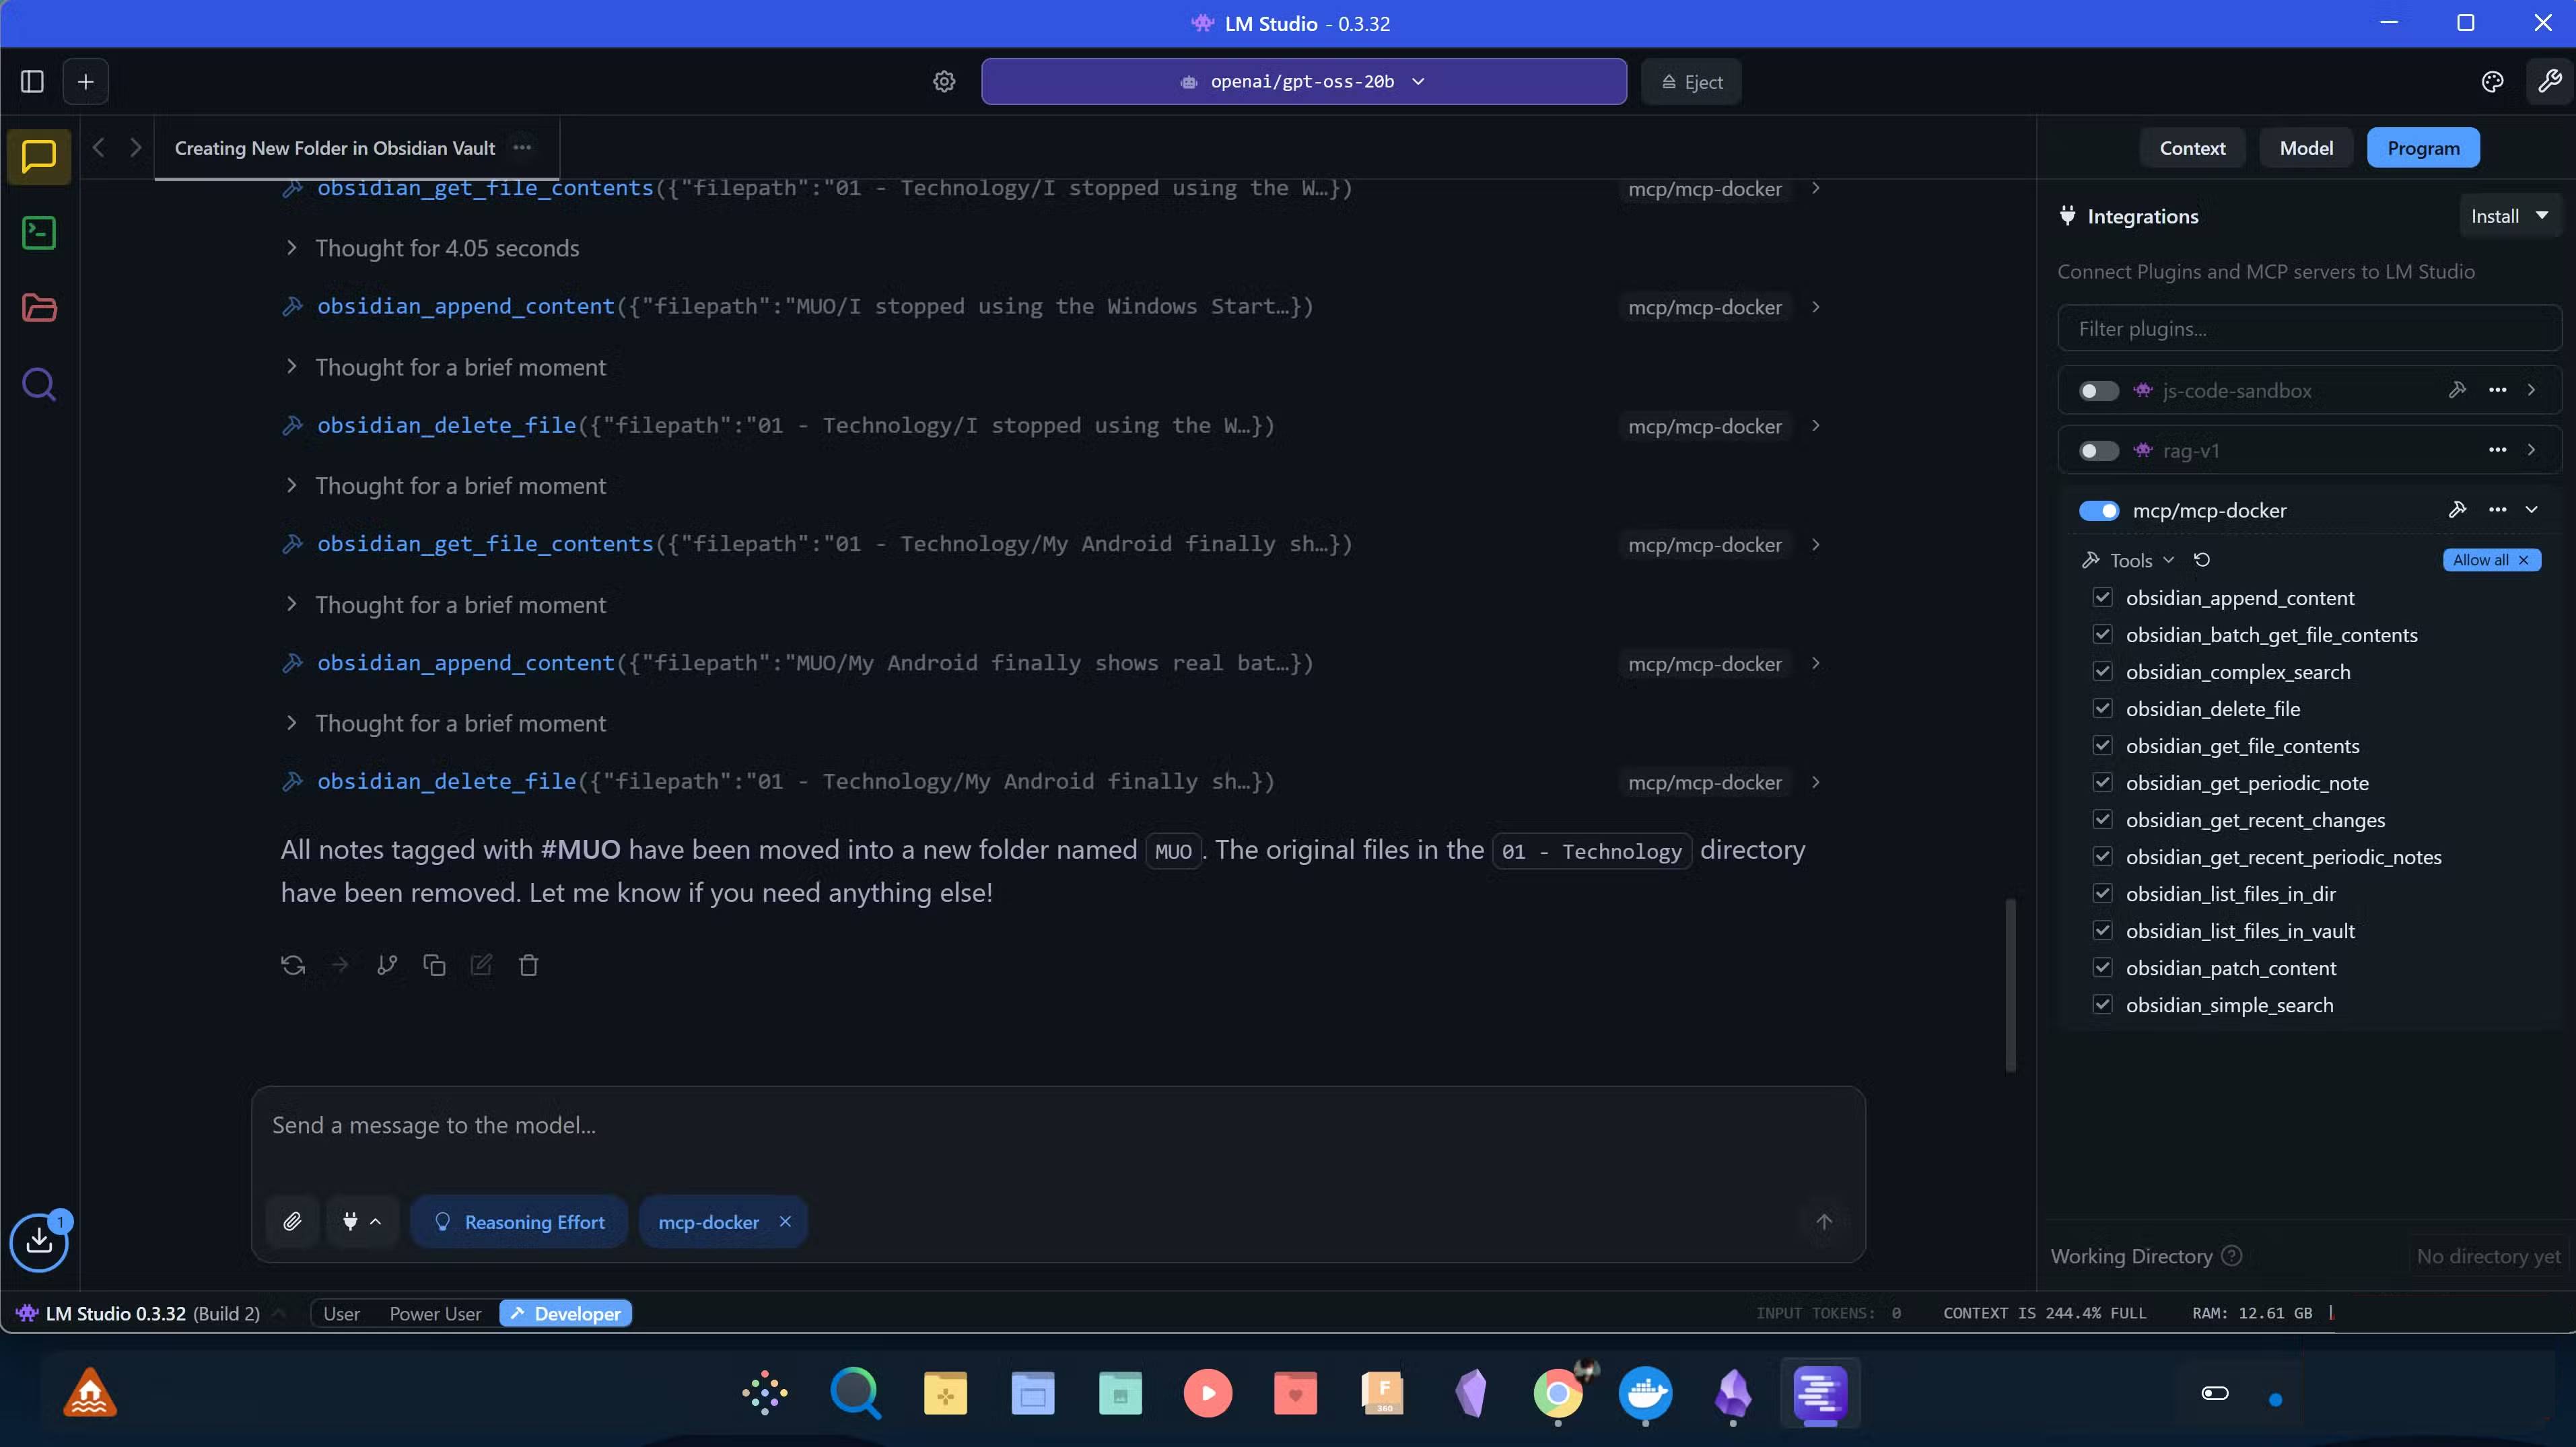
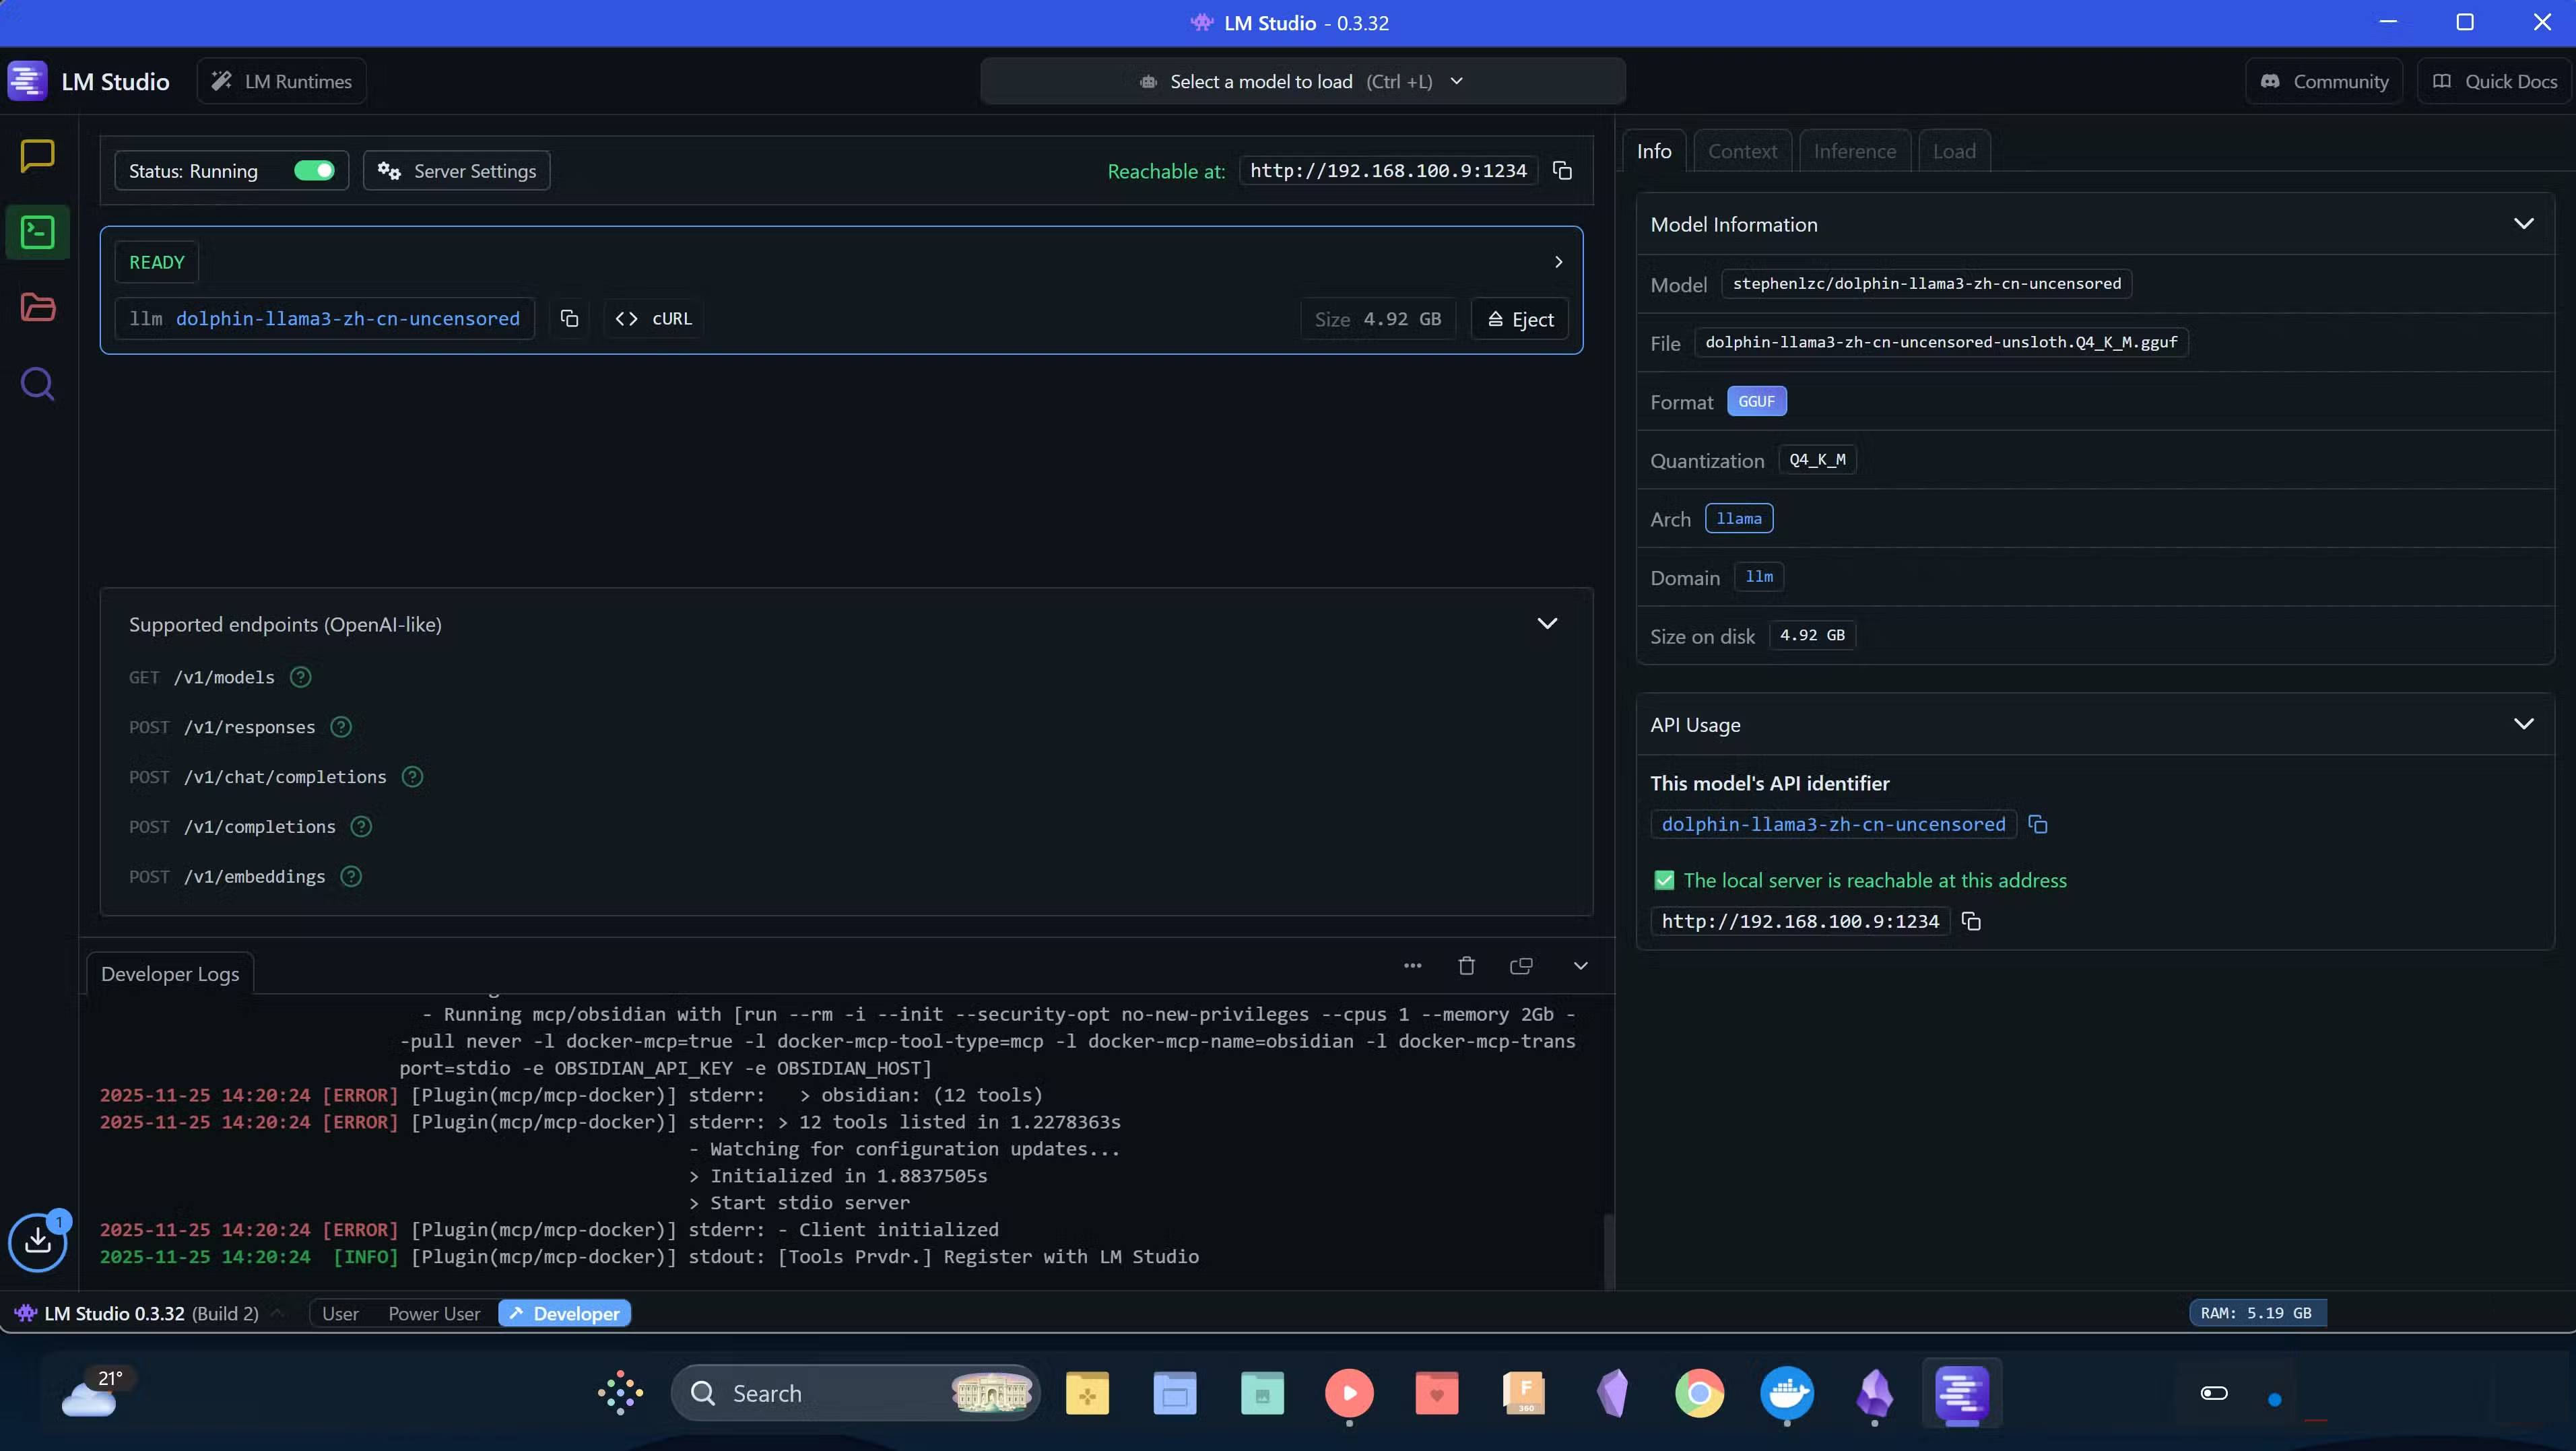
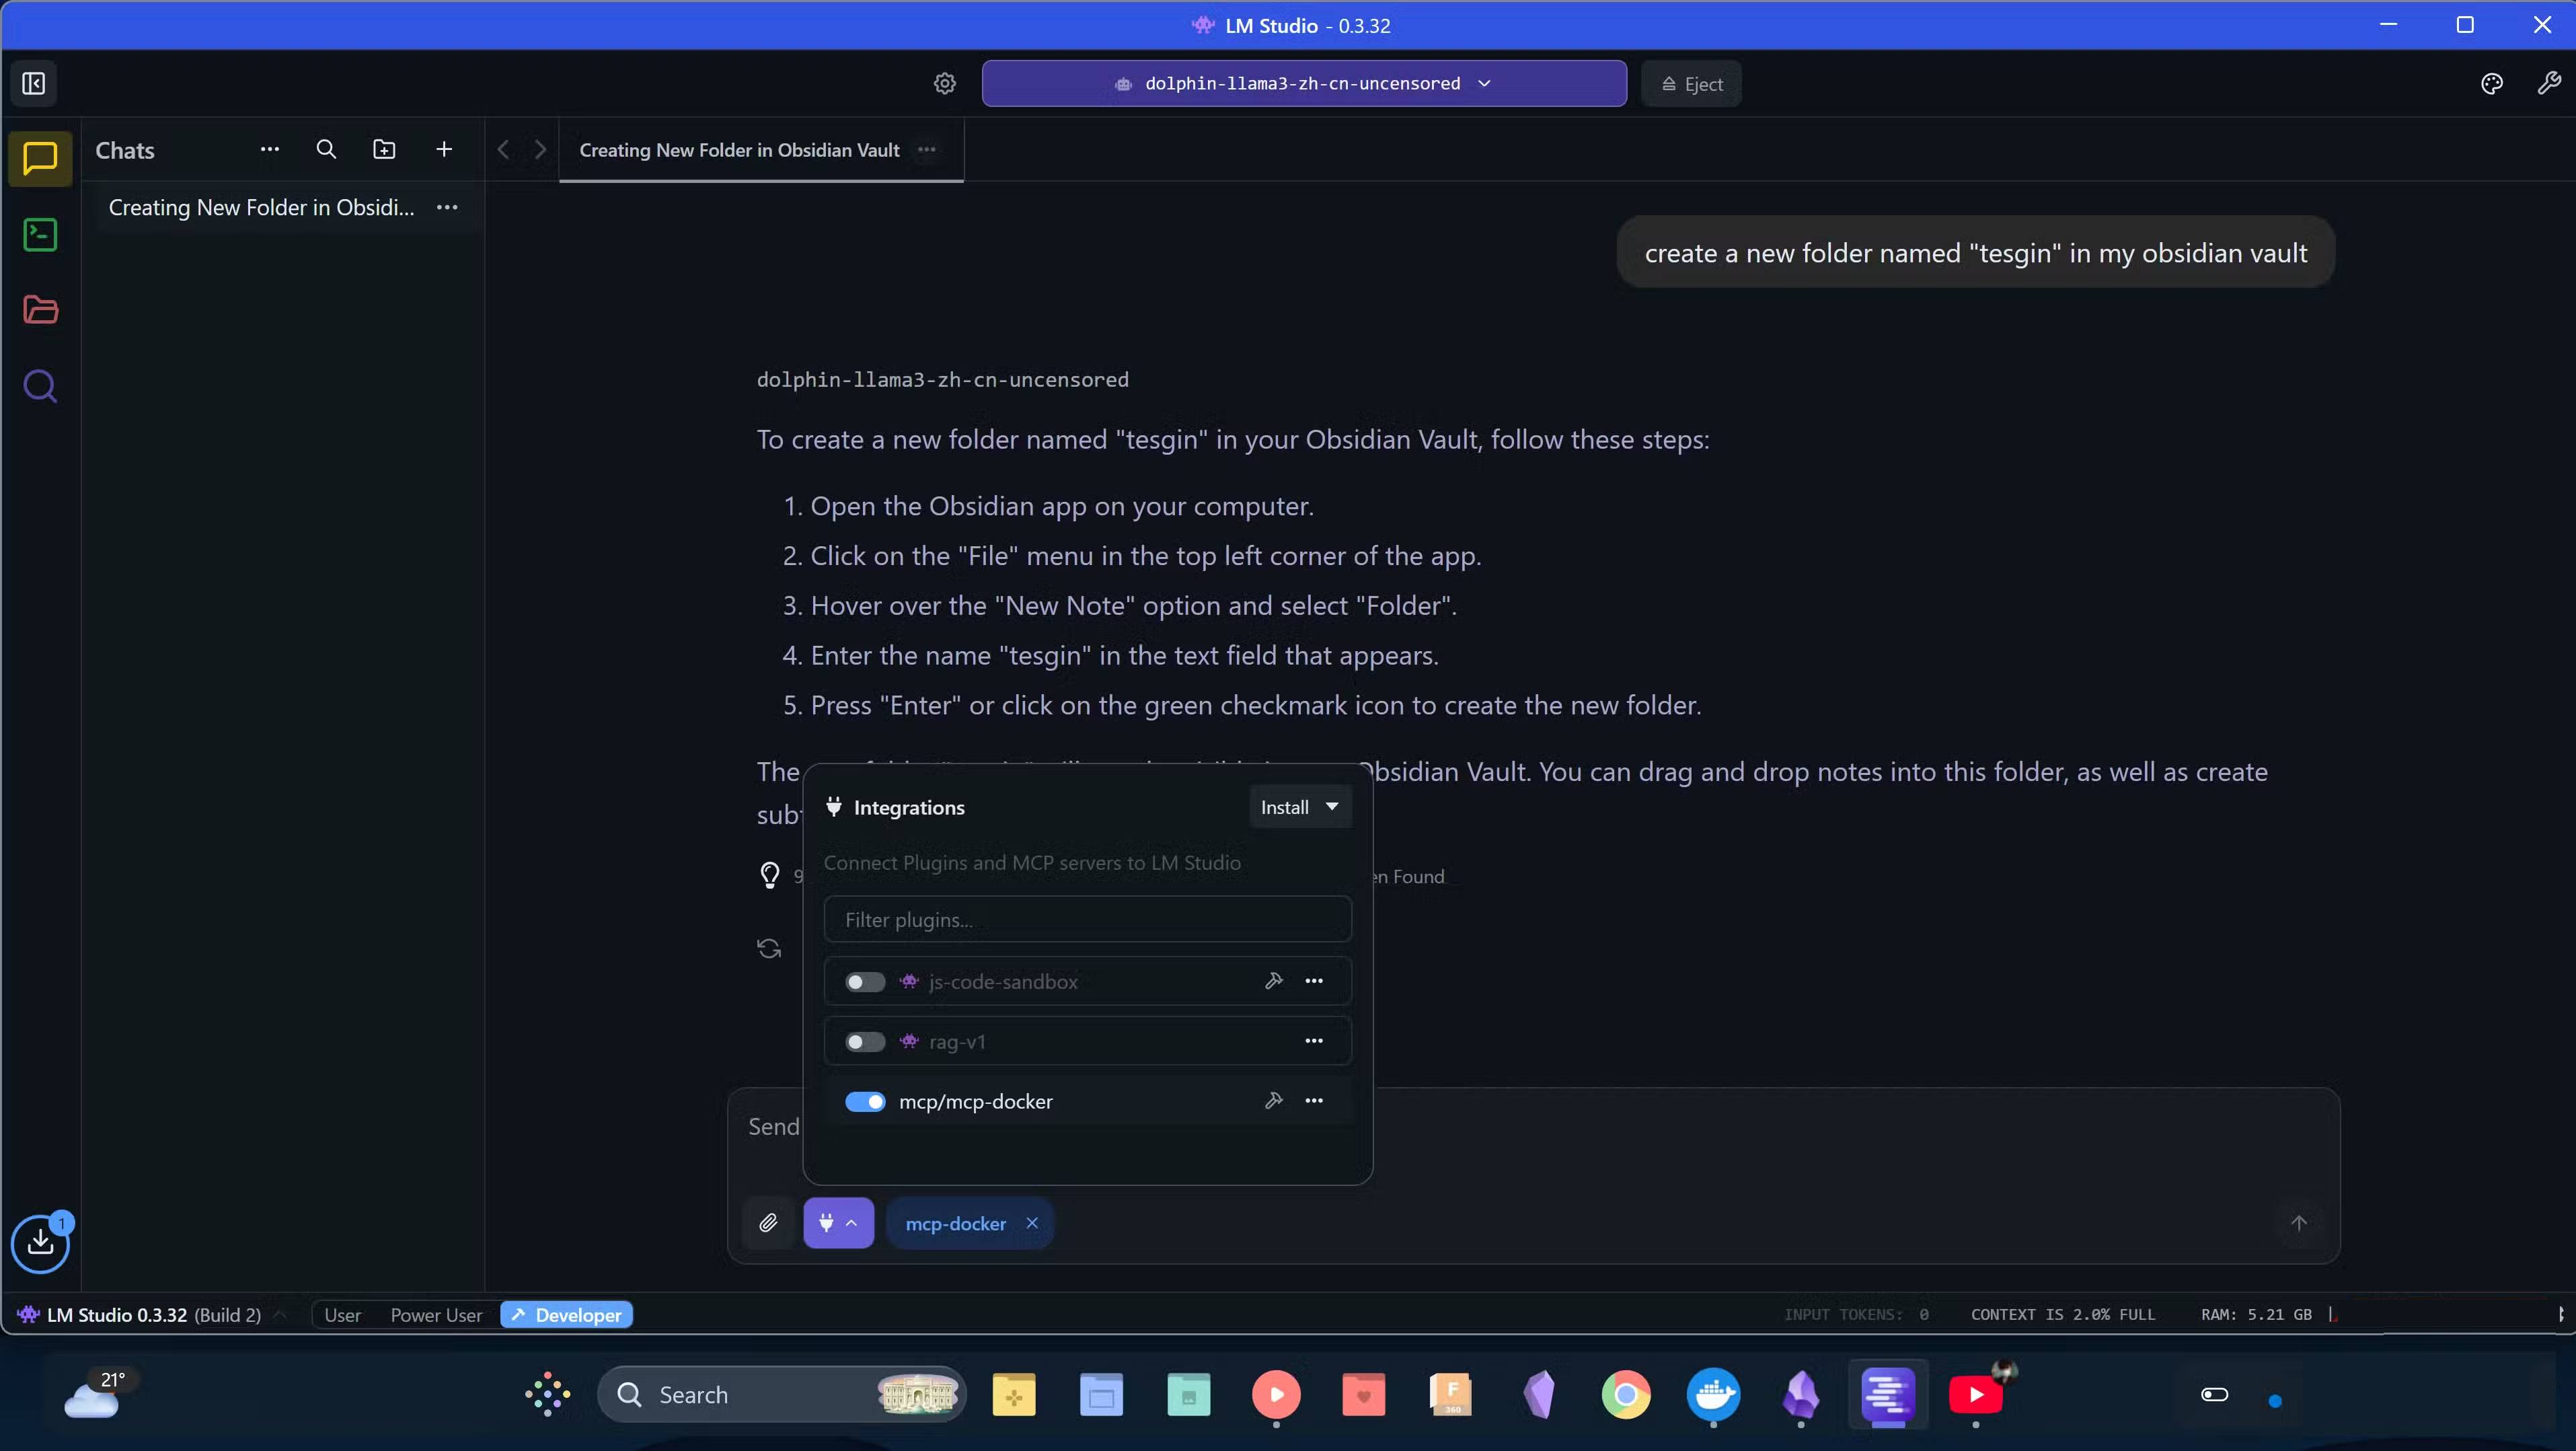
To start using the setup, launch LM Studio and host an AI model in the Developer tab . Once running, go to the Chat tab , click the plug icon at the bottom of the prompt dialog, and enable mcp/mcp-docker. Your chat interactions will now be connected directly to the Obsidian vault!
While most conversational models work with this setup, the smaller 8B models don't understand the idea of interacting directly with the MCP and often give instructions instead of actually doing work. In testing, inference-capable models, such as OpenAI/gpt-oss-20b, were able to interact with the Obsidian vault via the MCP server, so you should start with openai/gpt-oss-20b when first trying this setup.
Try it today!
If you've used Obsidian and have a decent PC, you've got everything you need to get started. Setup only takes a few minutes, and once you're up and running, you'll immediately notice the difference compared to cloud AI tools. You'll have AI that truly understands your archive because it's working directly inside; you'll have your privacy back and you'll have real control over your tools. This combination saves time and makes your workflow smoother and more personal. Get set up today and see how it changes the way you work with notes!