How to use local LLM to sort chaotic Obsidian inventory
Using an AI-powered note tagger and an auto-move note plugin, you can easily reorganize your notes whenever your archive gets messy..
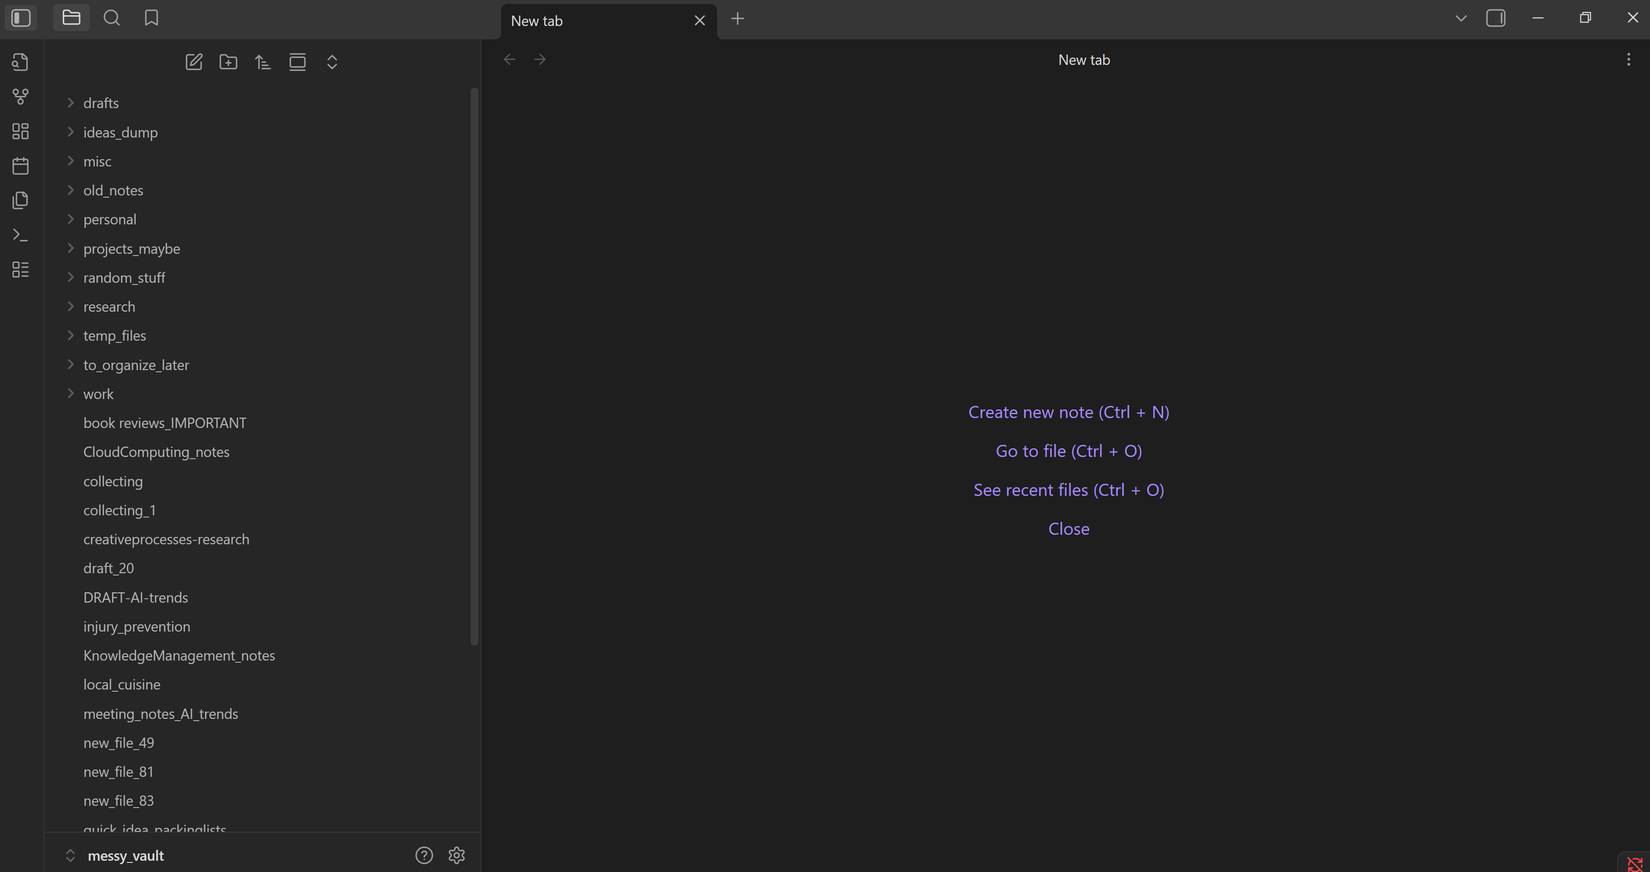
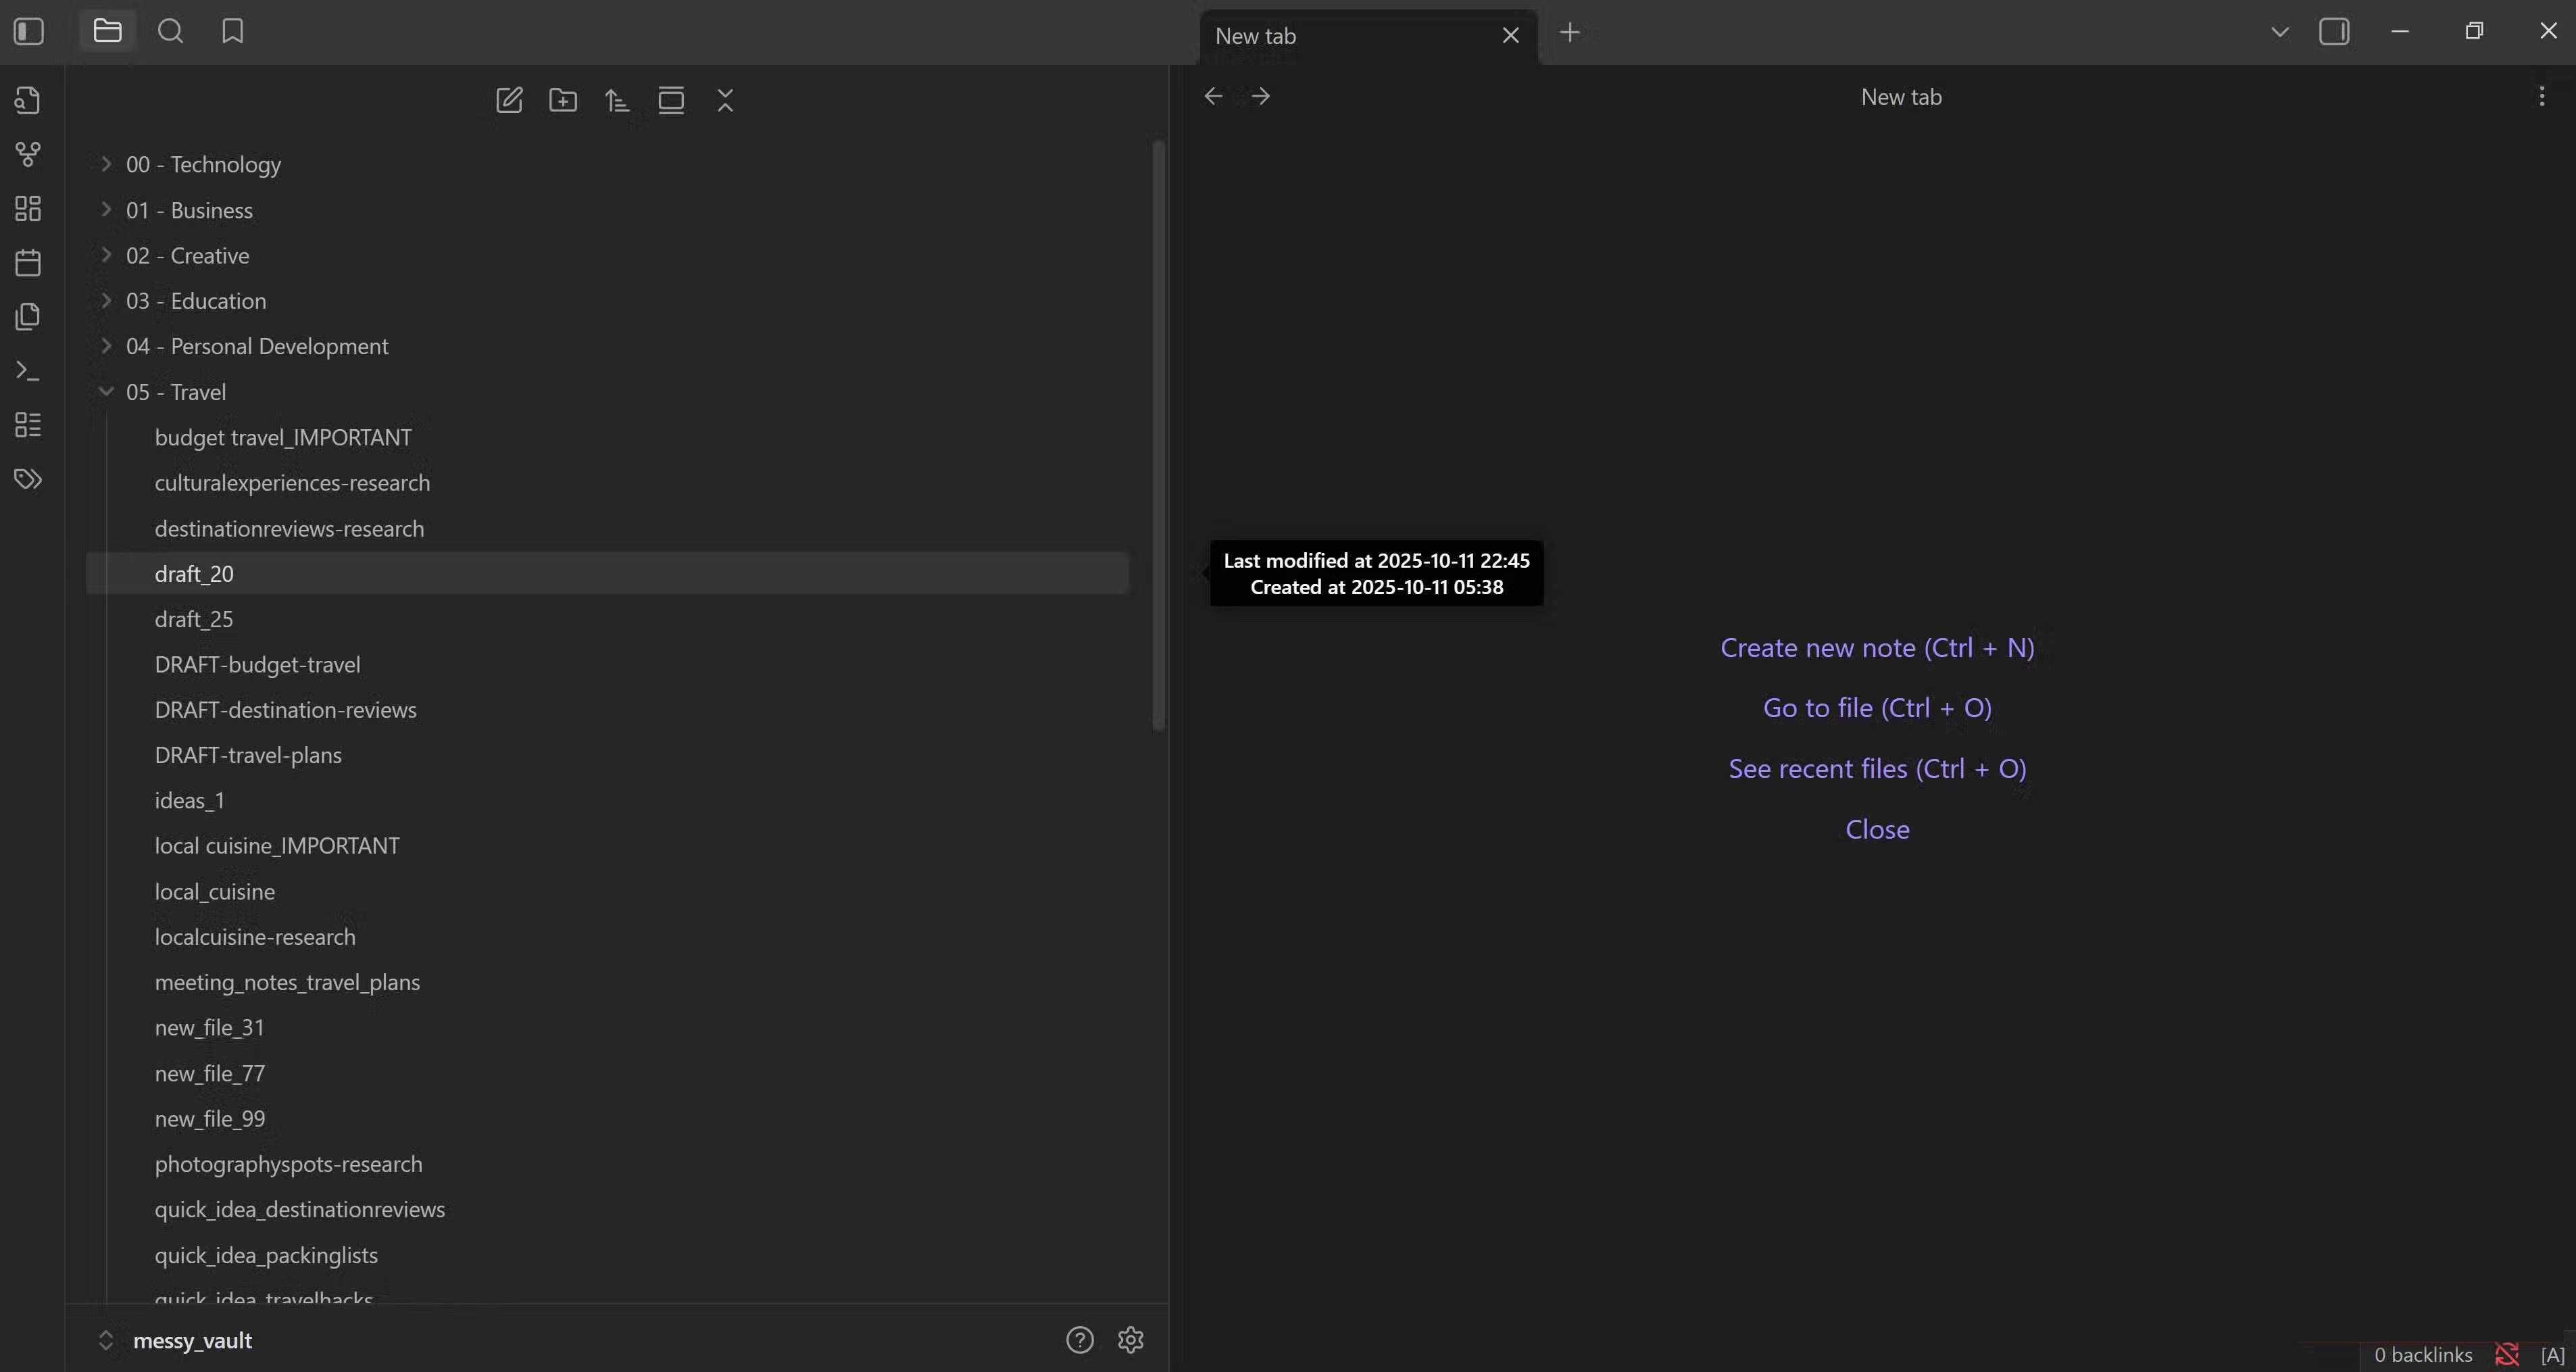
Most Obsidian users start out with a perfectly organized routine. Every note is filed in its designated folder, tags are consistently applied, and everything looks neat. But as life gets busy, those routines quickly fall apart. Notes start piling up in random places, tags become inconsistent, and that beautiful archive turns into a digital mess.
So people started looking for AI-powered solutions and found a system that worked. By using an AI-powered note tagger and a plugin that automatically moves notes, you can easily reorganize your notes whenever your archive gets messy.
How to set up AI auto-sorting in Obsidian
Setting up tools and plugins
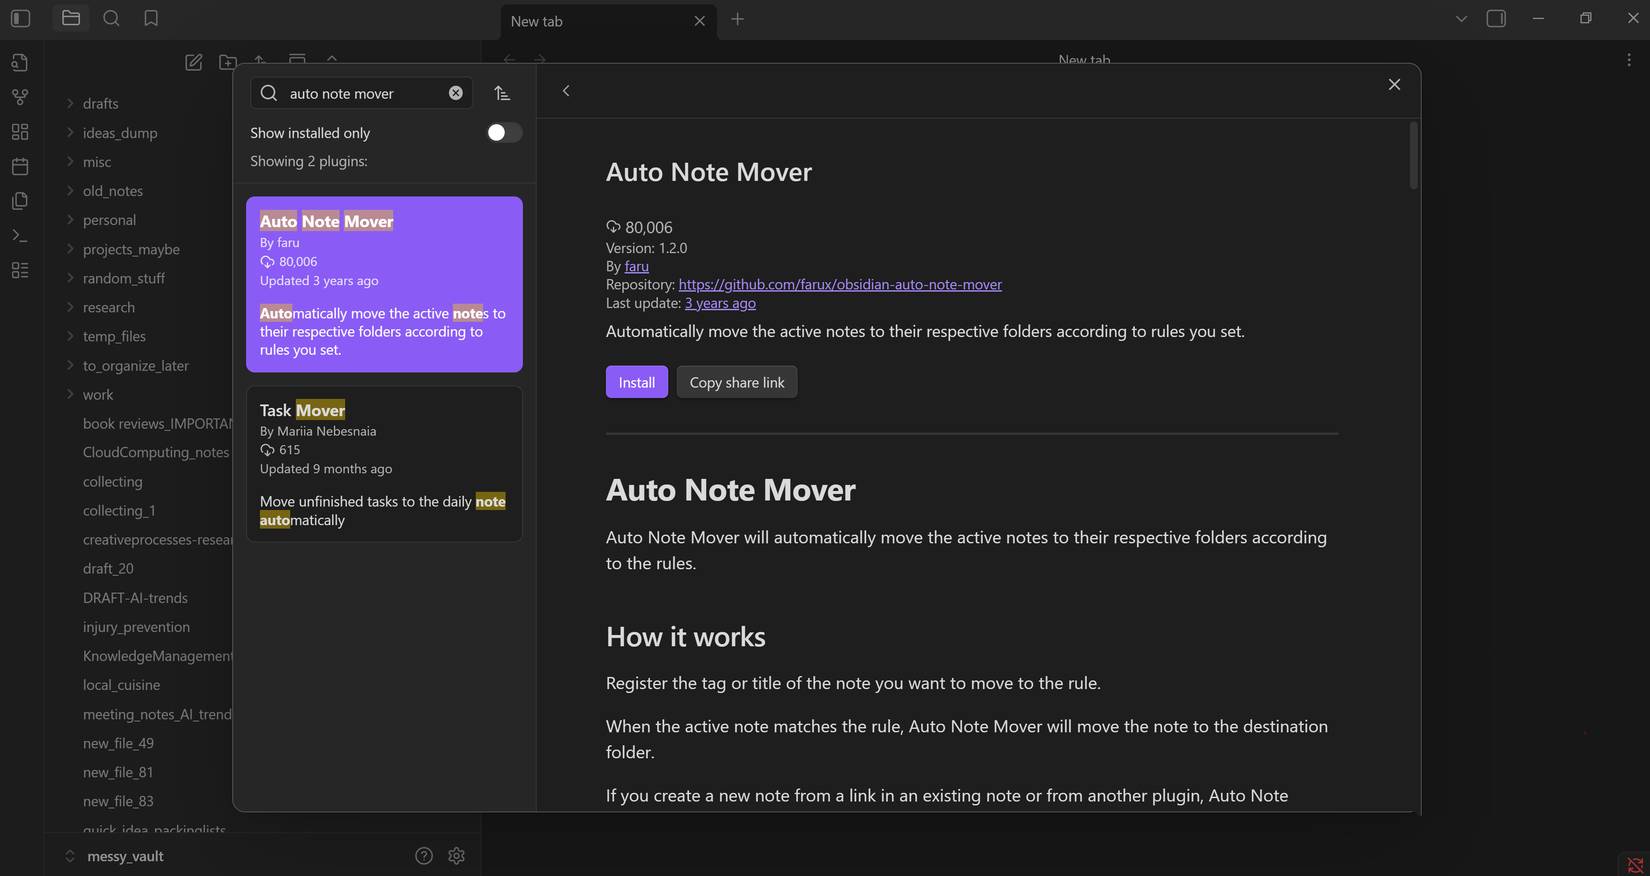
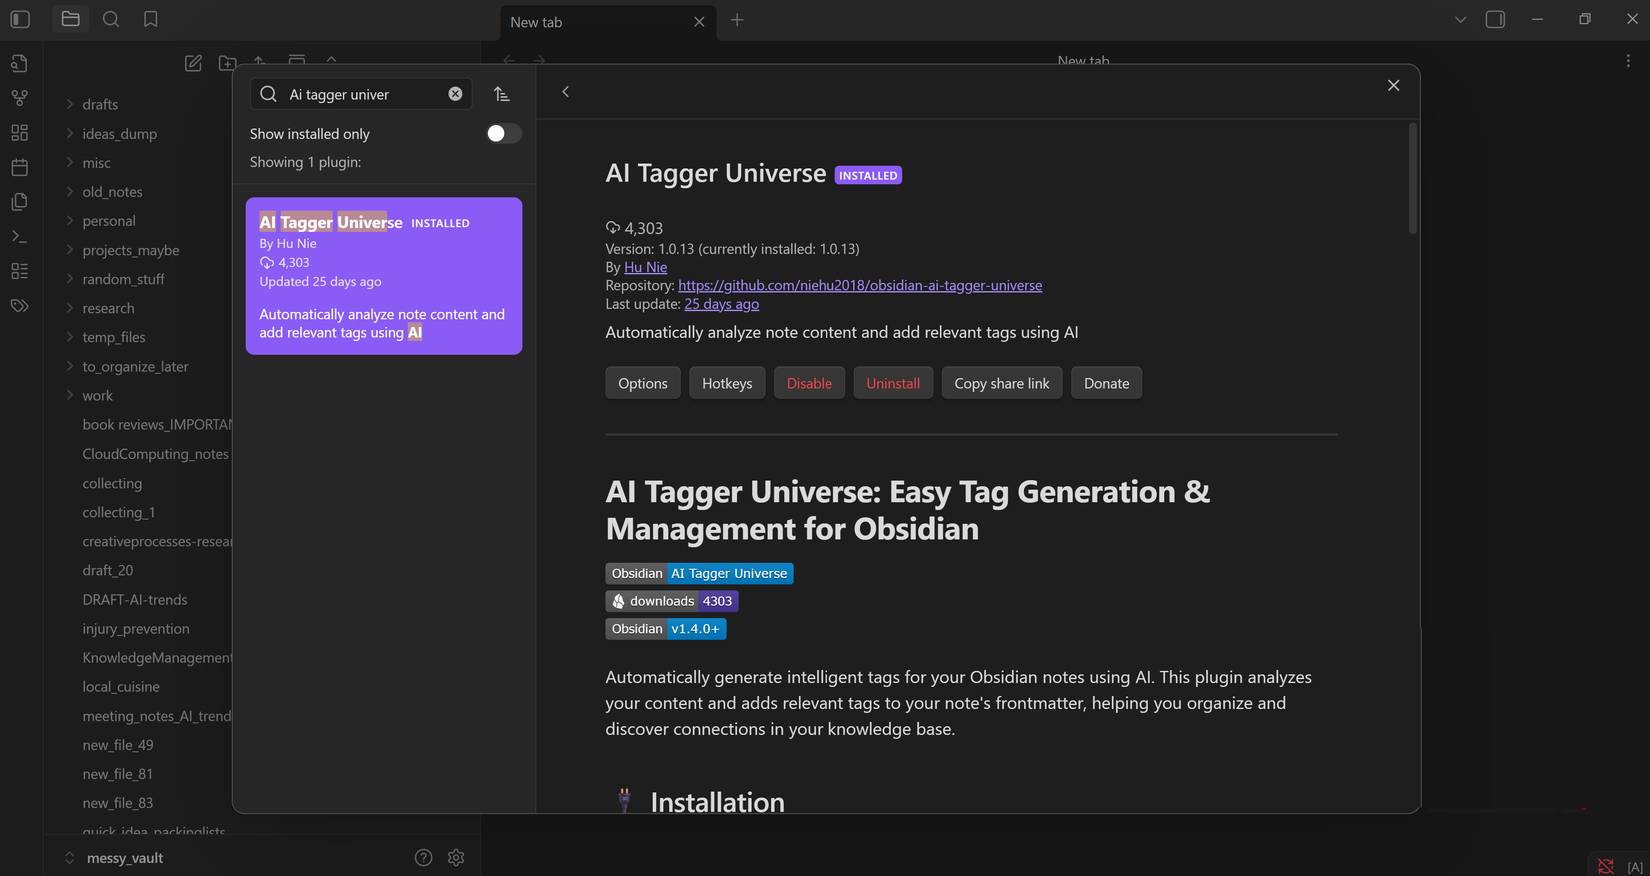
You can download plugins from the Obsidian community plugin repository. Search for faru's Auto Note Mover and install it first. This plugin automatically moves notes based on the tag or title you specify. Next, install Hu Nie's AI Tagger Universe . This plugin is a clever way to link your notes in Obsidian. It uses AI to do the heavy lifting by analyzing the content of your notes and suggesting tags, making organization possible for this setup.
Although AI Tagger Universe can be run using an OpenAI API key, it is recommended that you host your own AI offline using LM Studio for security reasons. So, download LM Studio from the official website. With this free tool, you can run your own AI on your computer in just a few minutes.
System setup

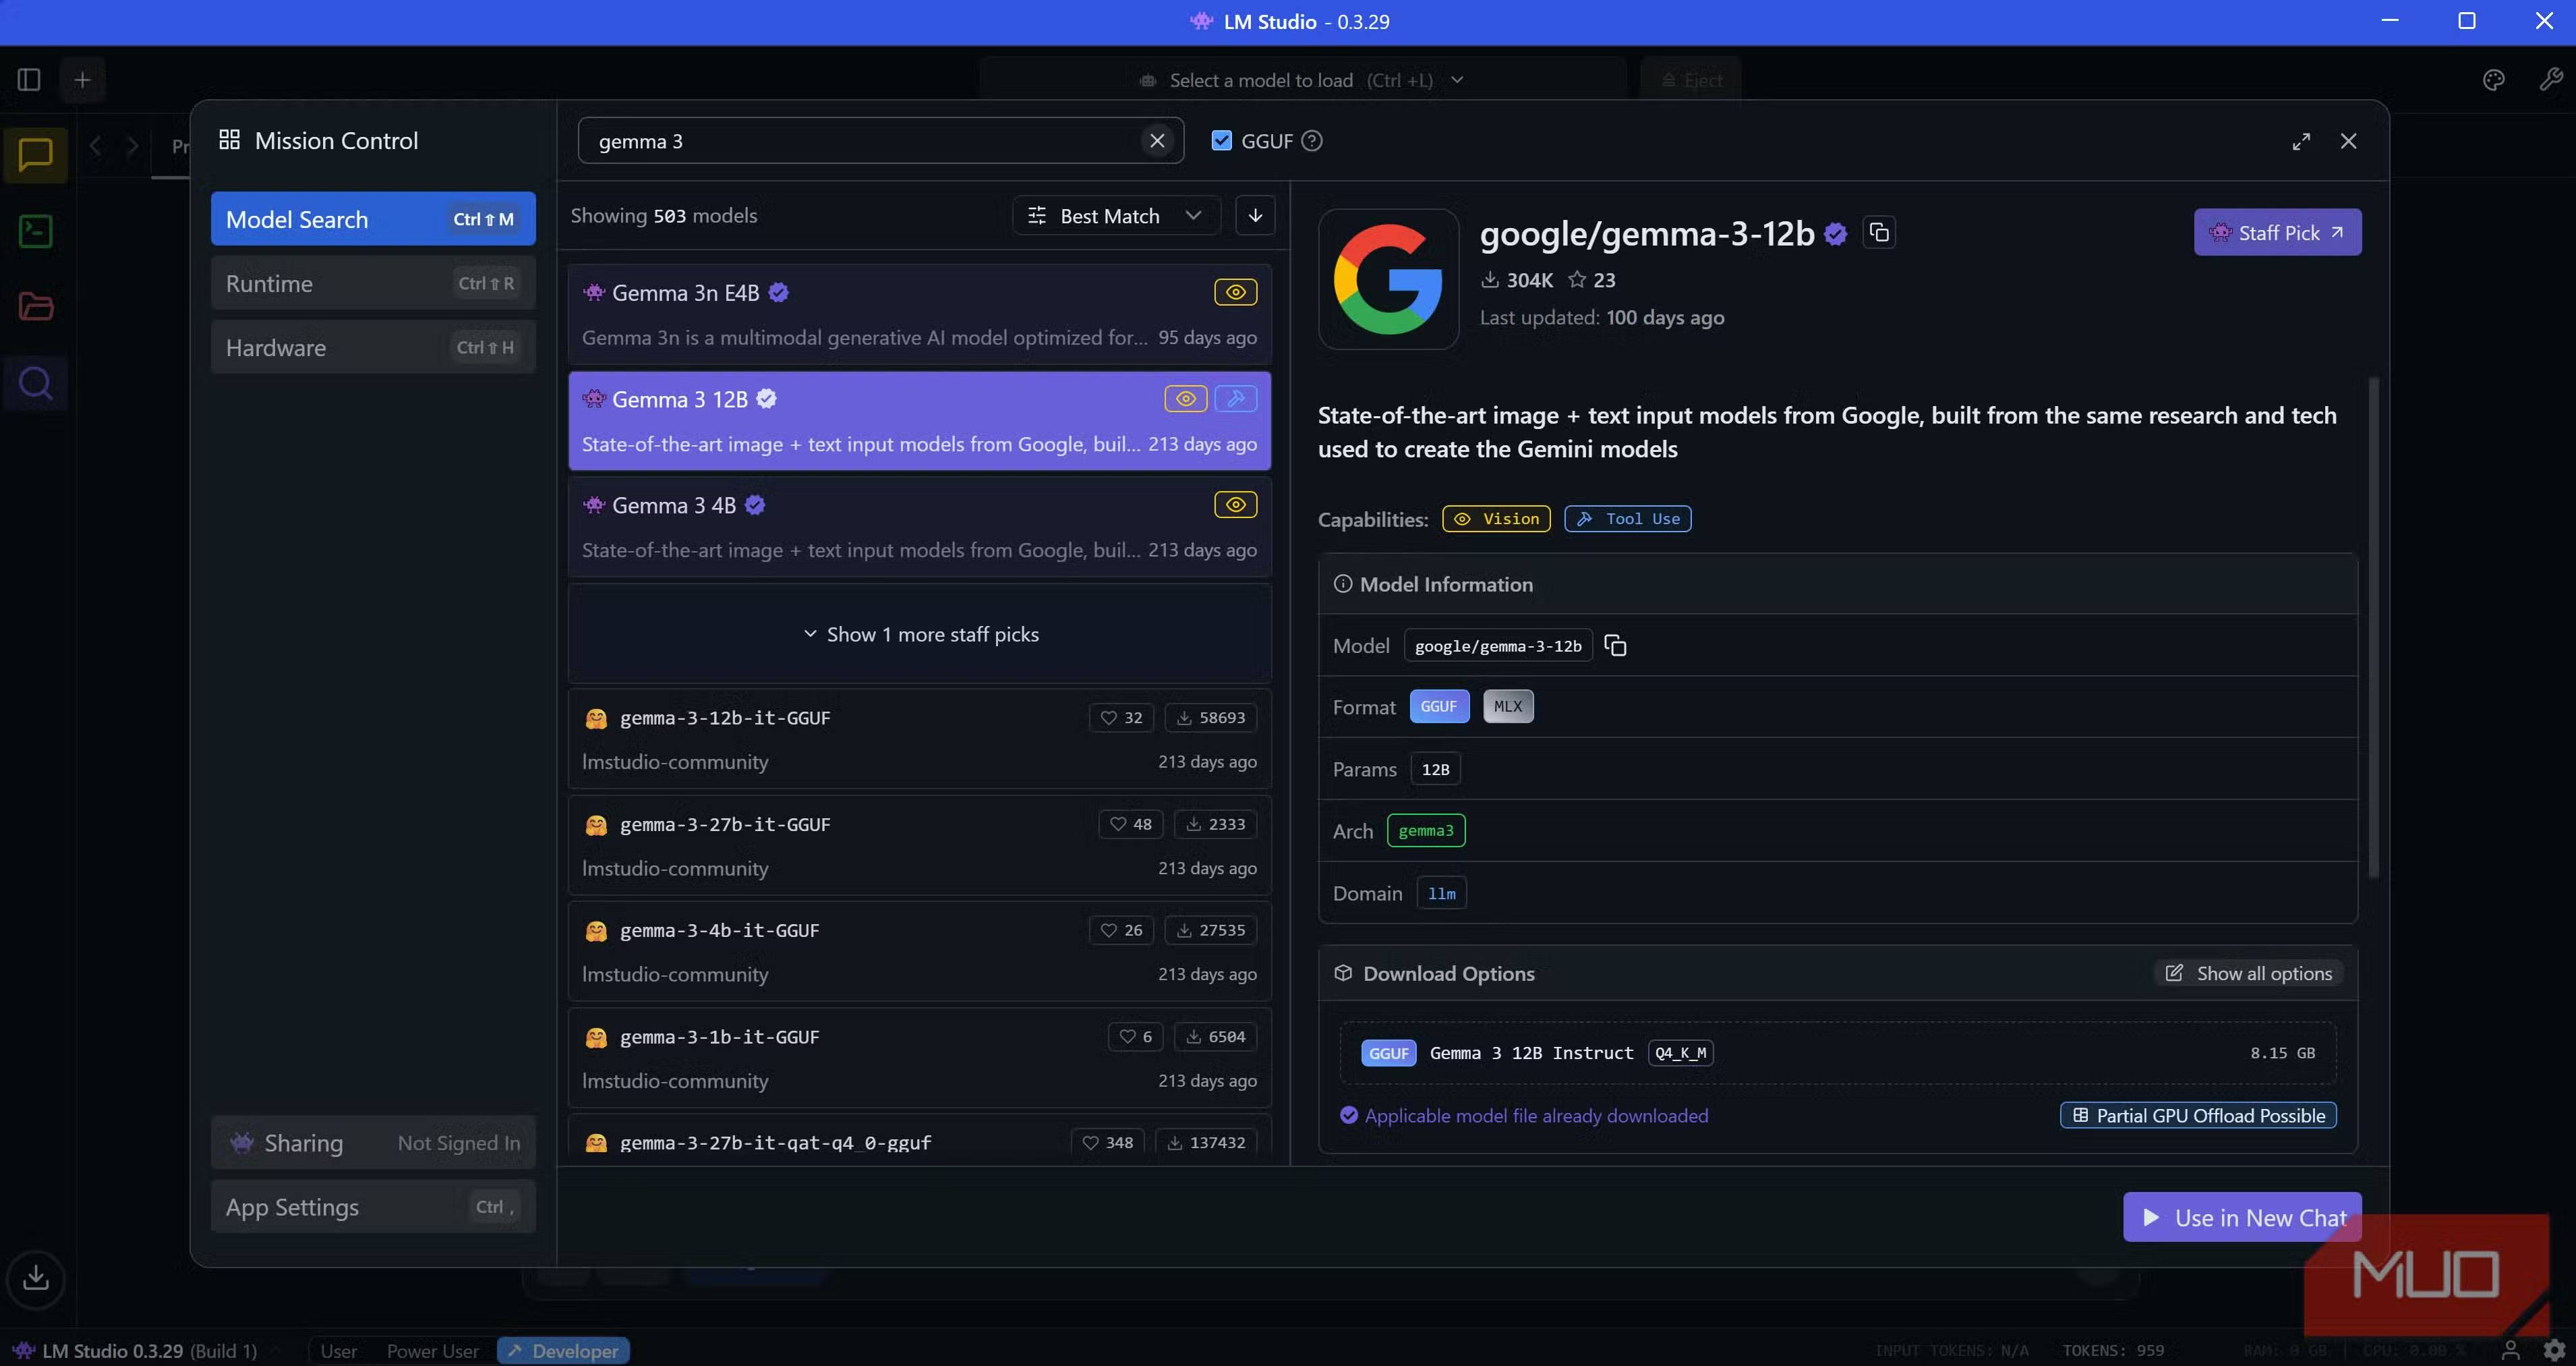
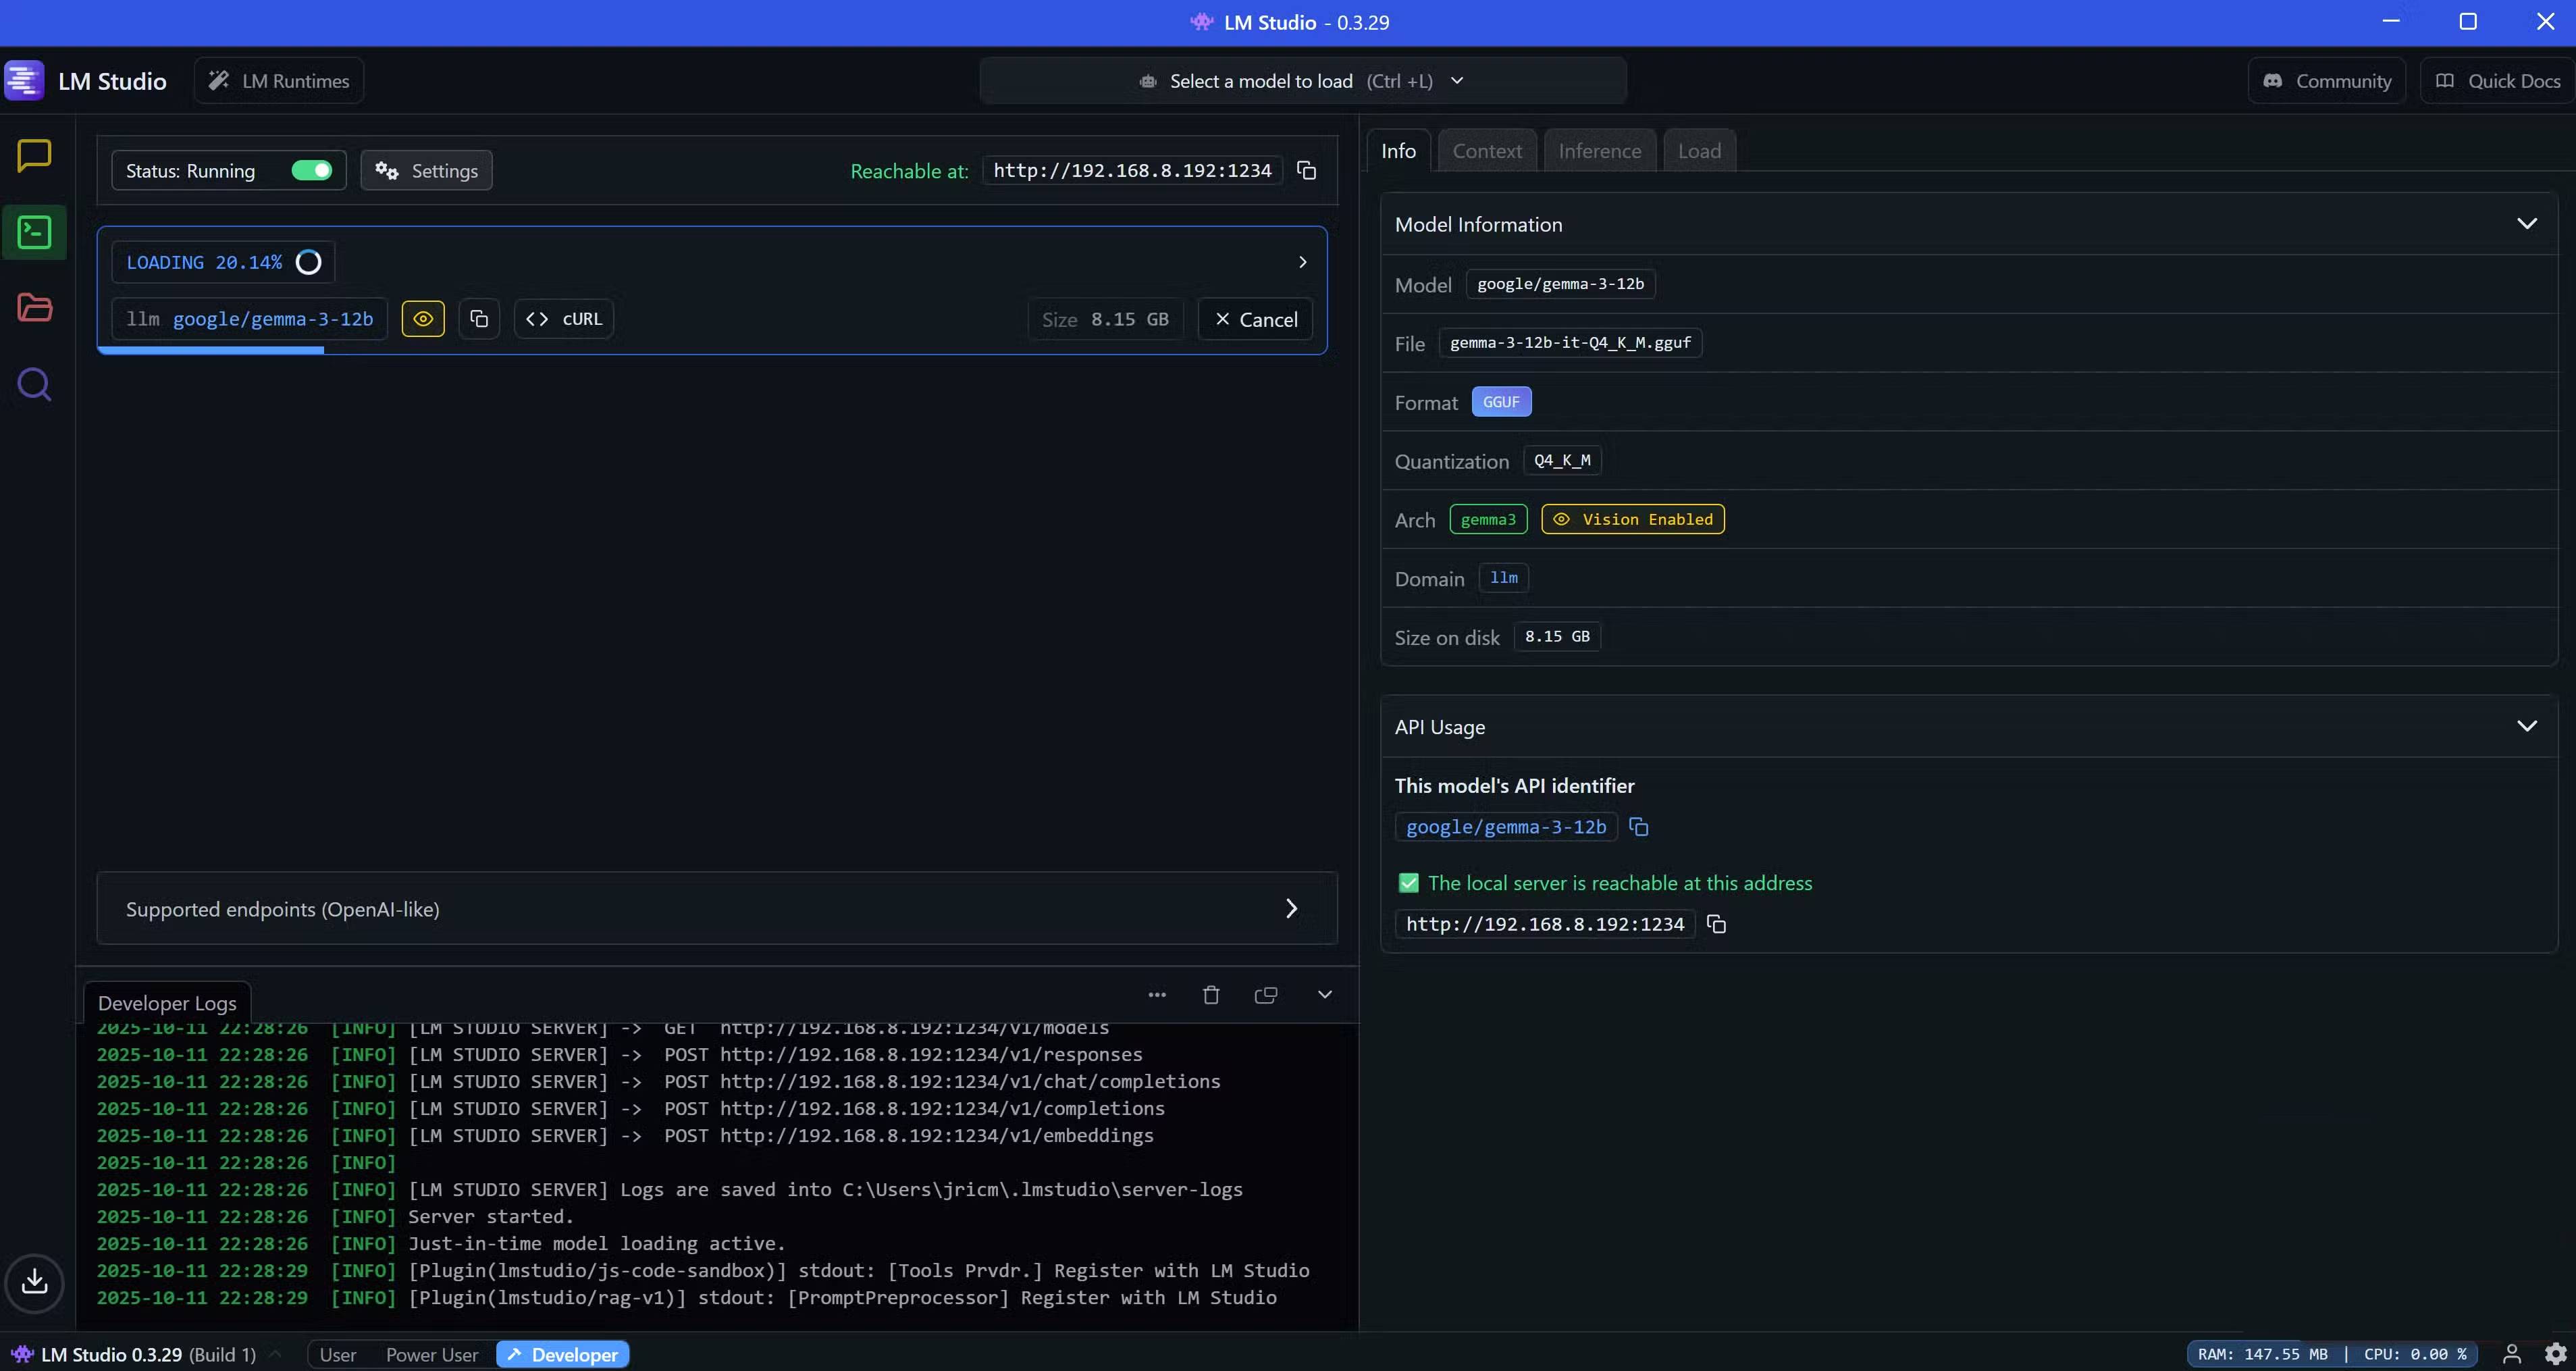
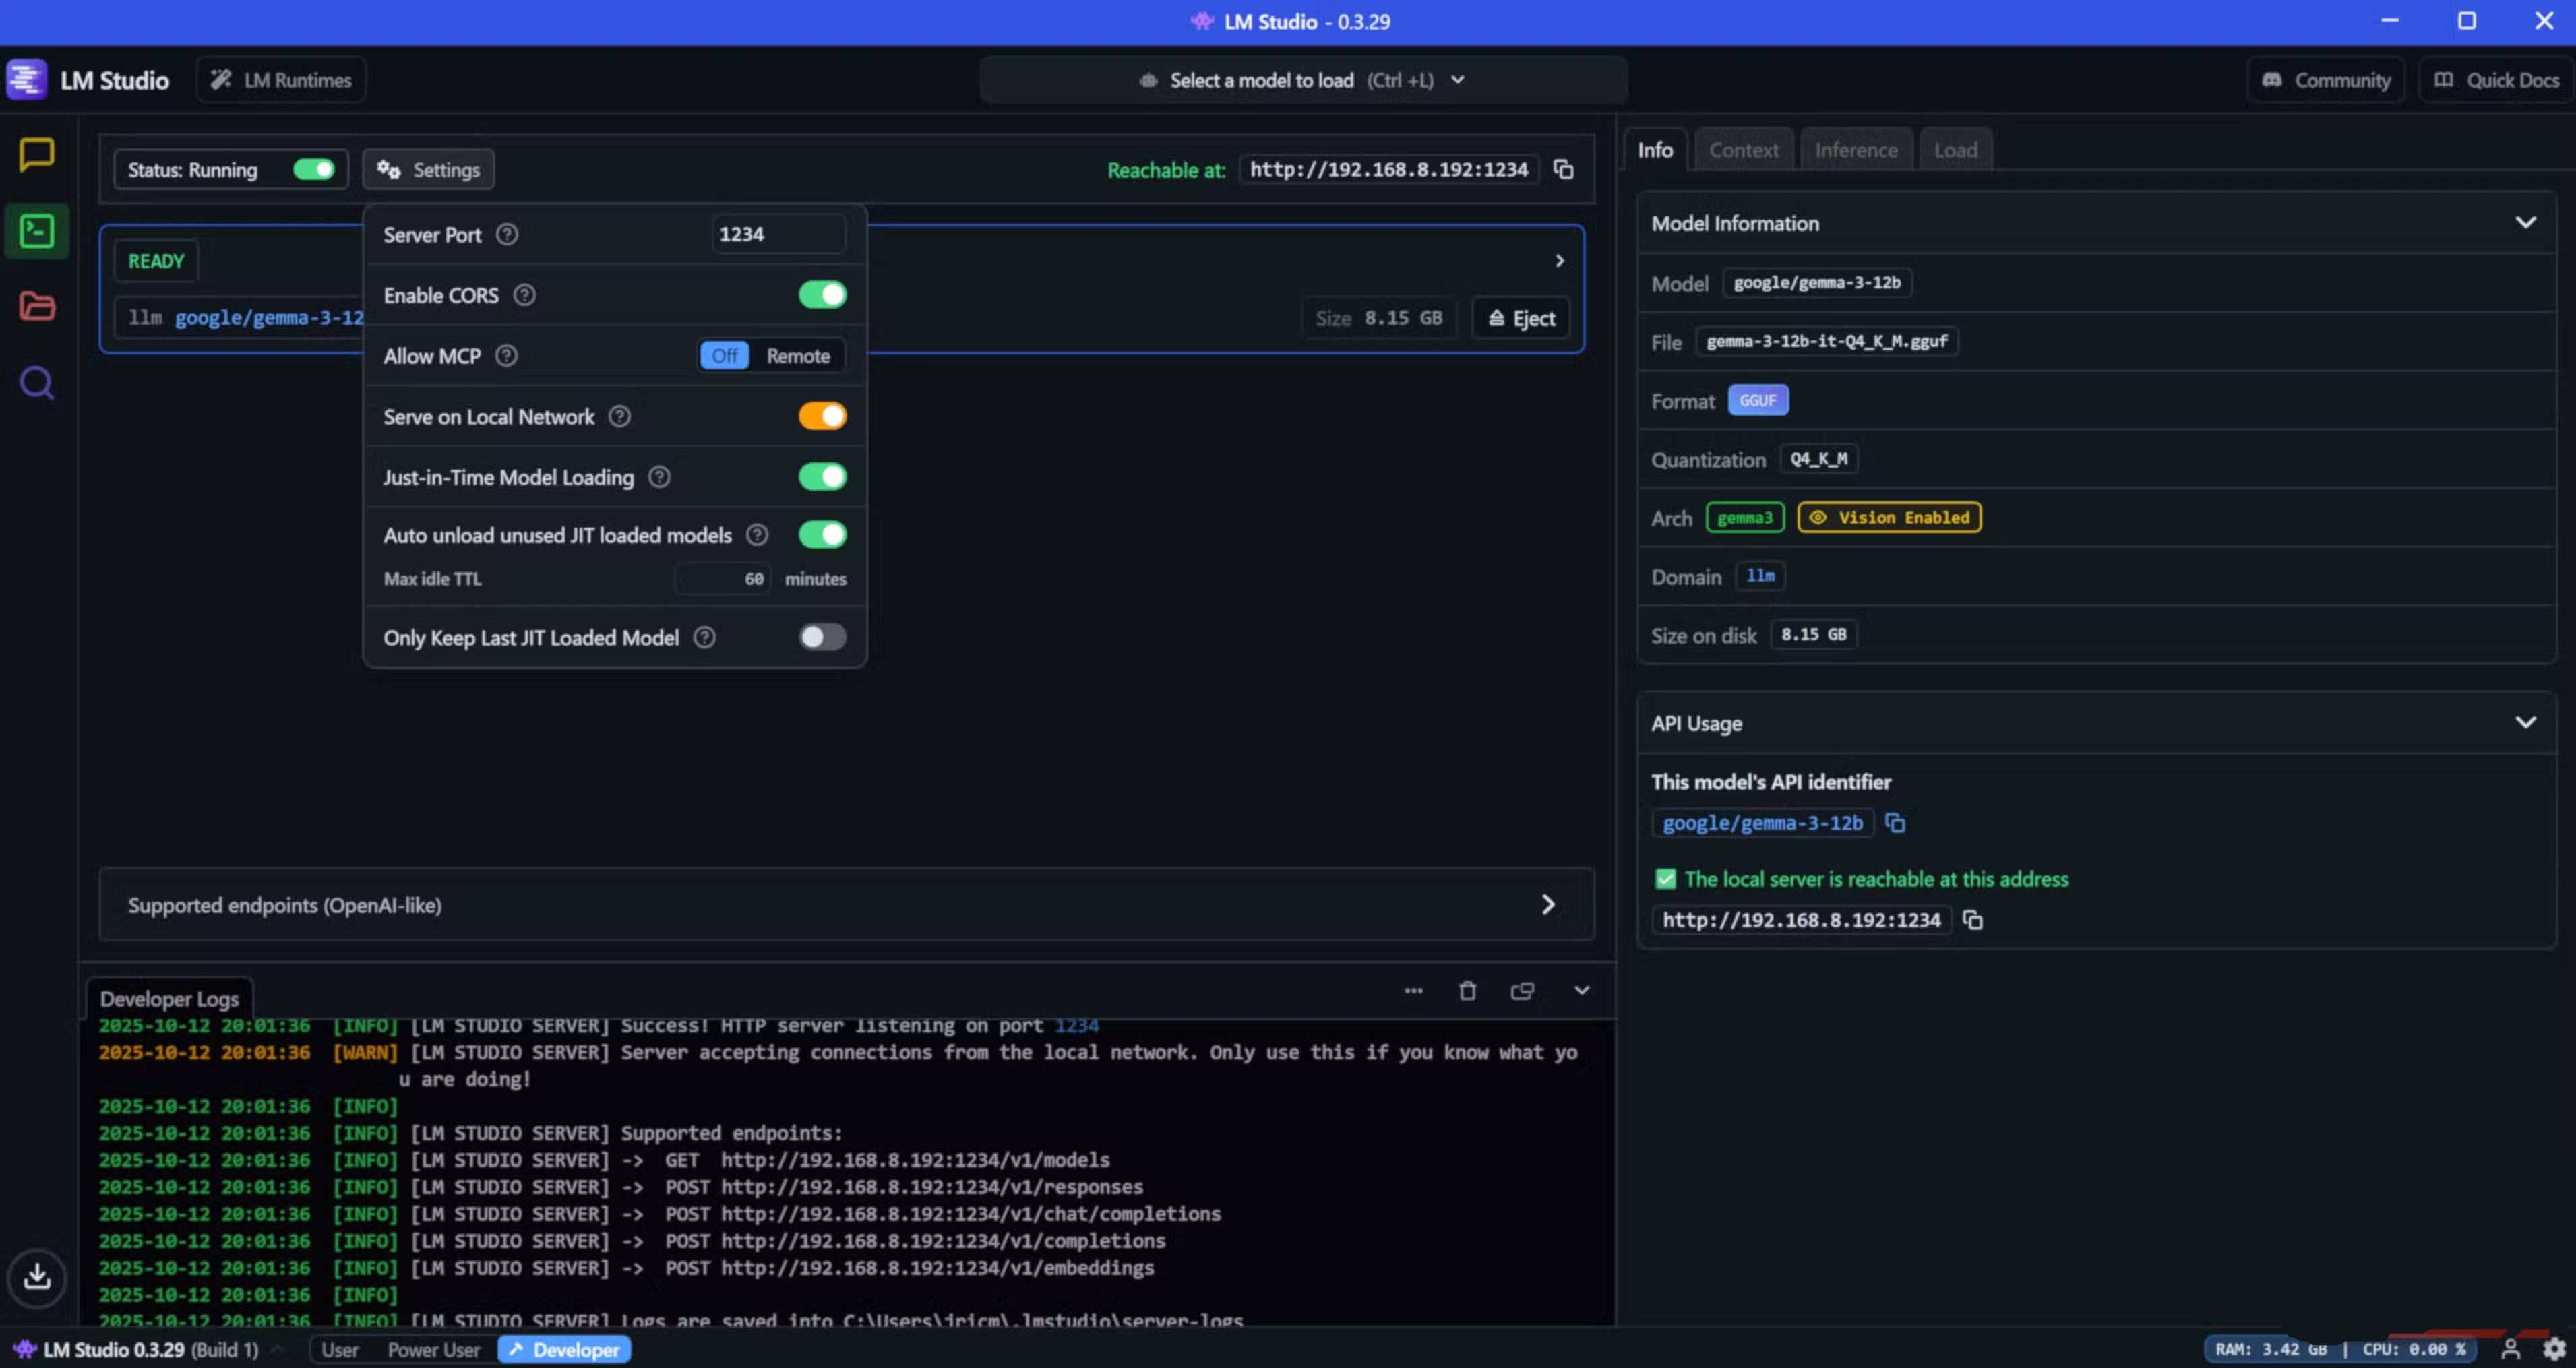

First, let's start by configuring AI Tagger Universe. Connecting a local LLM to the Obsidian repository is pretty straightforward. After launching the application, download a chat model (Gemma 3 12B), click the Developer panel in the right sidebar with the terminal icon, load the LLM by selecting Gemma 3 12B from the drop-down menu, then enable CORS in the model settings. Once the model is loaded, go to AI Tagger Universe's options menu, select Local LLM as your service type, then copy the Local LLM Endpoint and Model Name from LM Studio. Next, hit Test Connection to confirm that the local AI and Obsidian plugin are working properly.
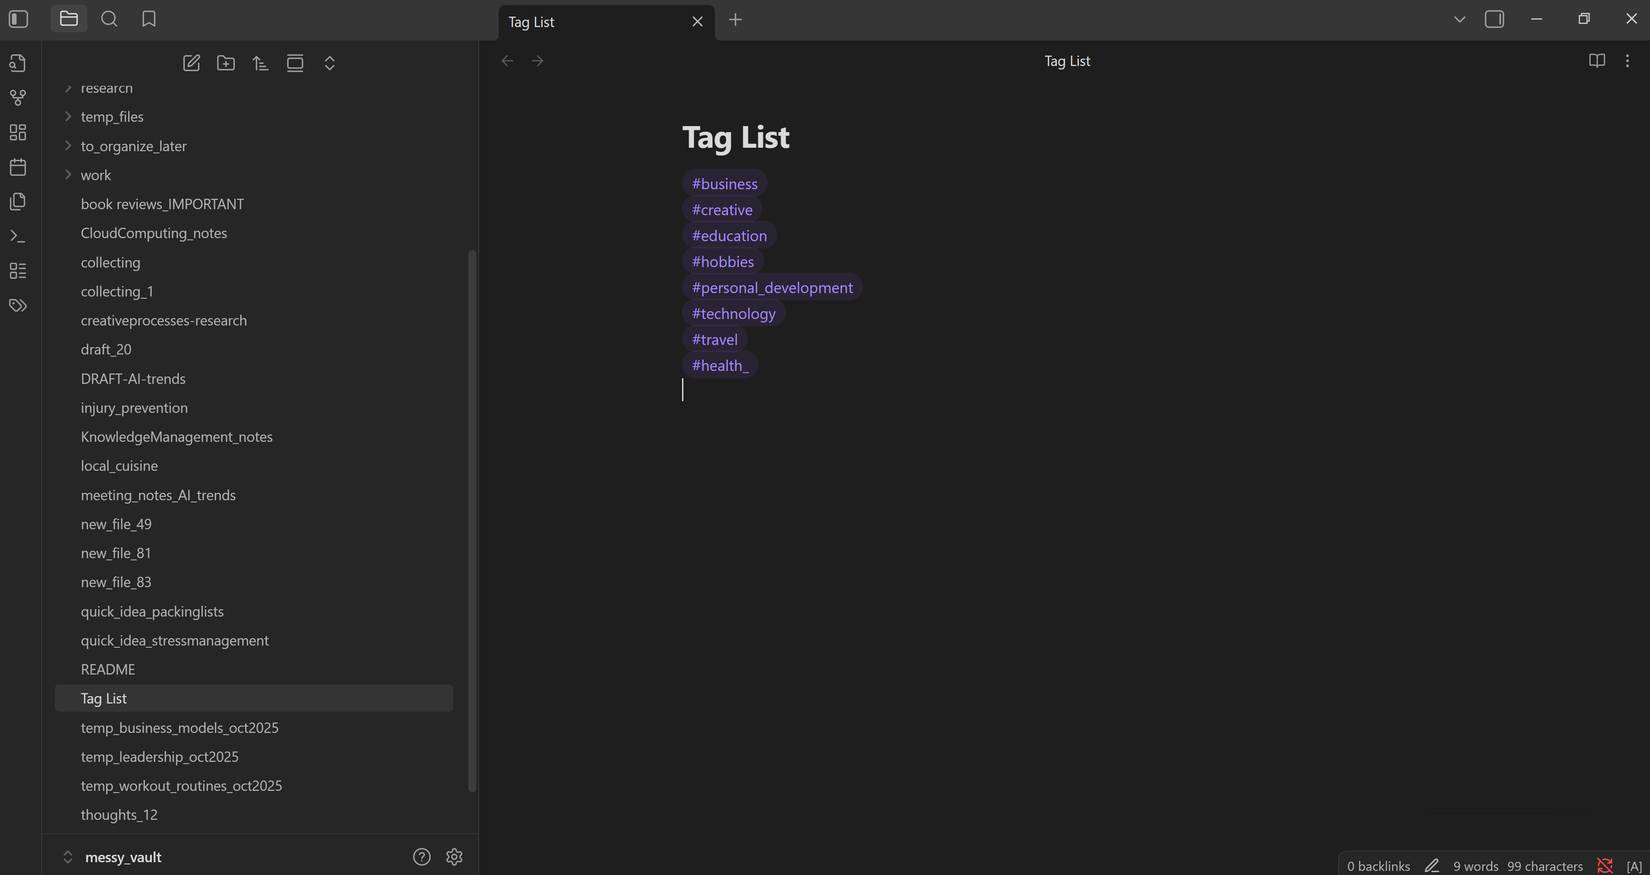
Once the connection is established, configure the AI's tagging behavior. Based on our testing, pre-defining tags ensures consistency when storing notes into folders. So, create a new note called "Tag List" in the root folder of your repository and fill it with all the tags you want the AI to use.
Then go back to the plugin options menu and set:
- Tagging Mode → Use only predefined tags
- Tag Source → From predefined tag file
- Tag List Path → (path to the newly created Tag List note)
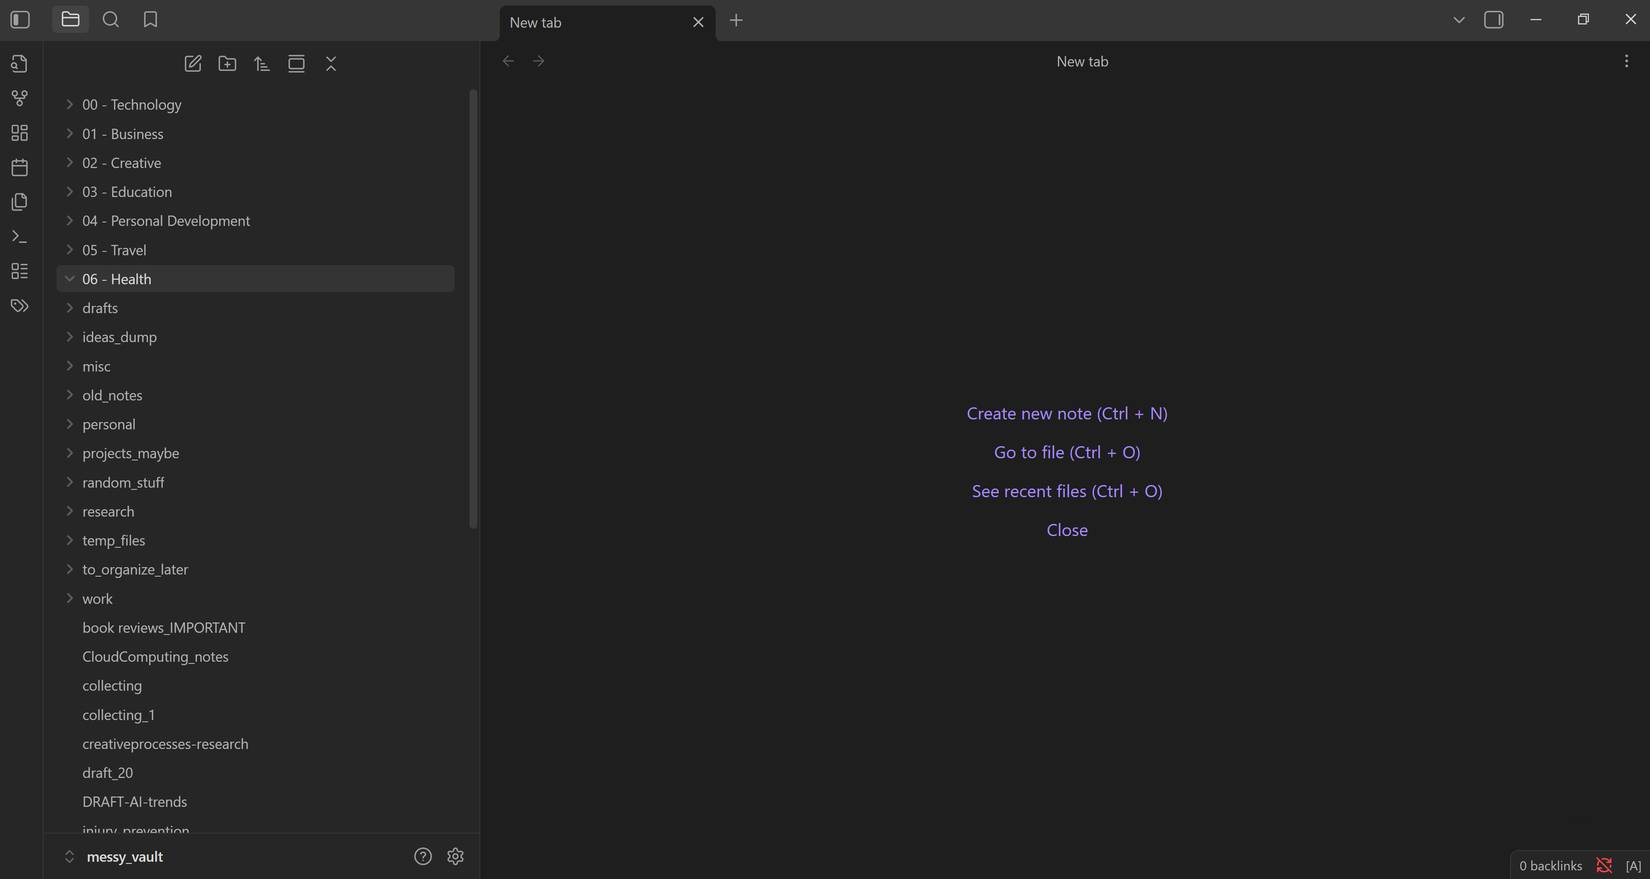
Before configuring Auto Note Mover, create all the folders where you want to organize your notes. Since you have predefined tags, create a folder for each tag. This ensures that all notes with similar tags will be saved in the same folder.
Once you have created the folders, configure Auto Note Mover. Open the plugin options and create rules that match your desired organization. For example, have a rule that automatically moves any notes tagged #technology to the 00 - Technology folder .
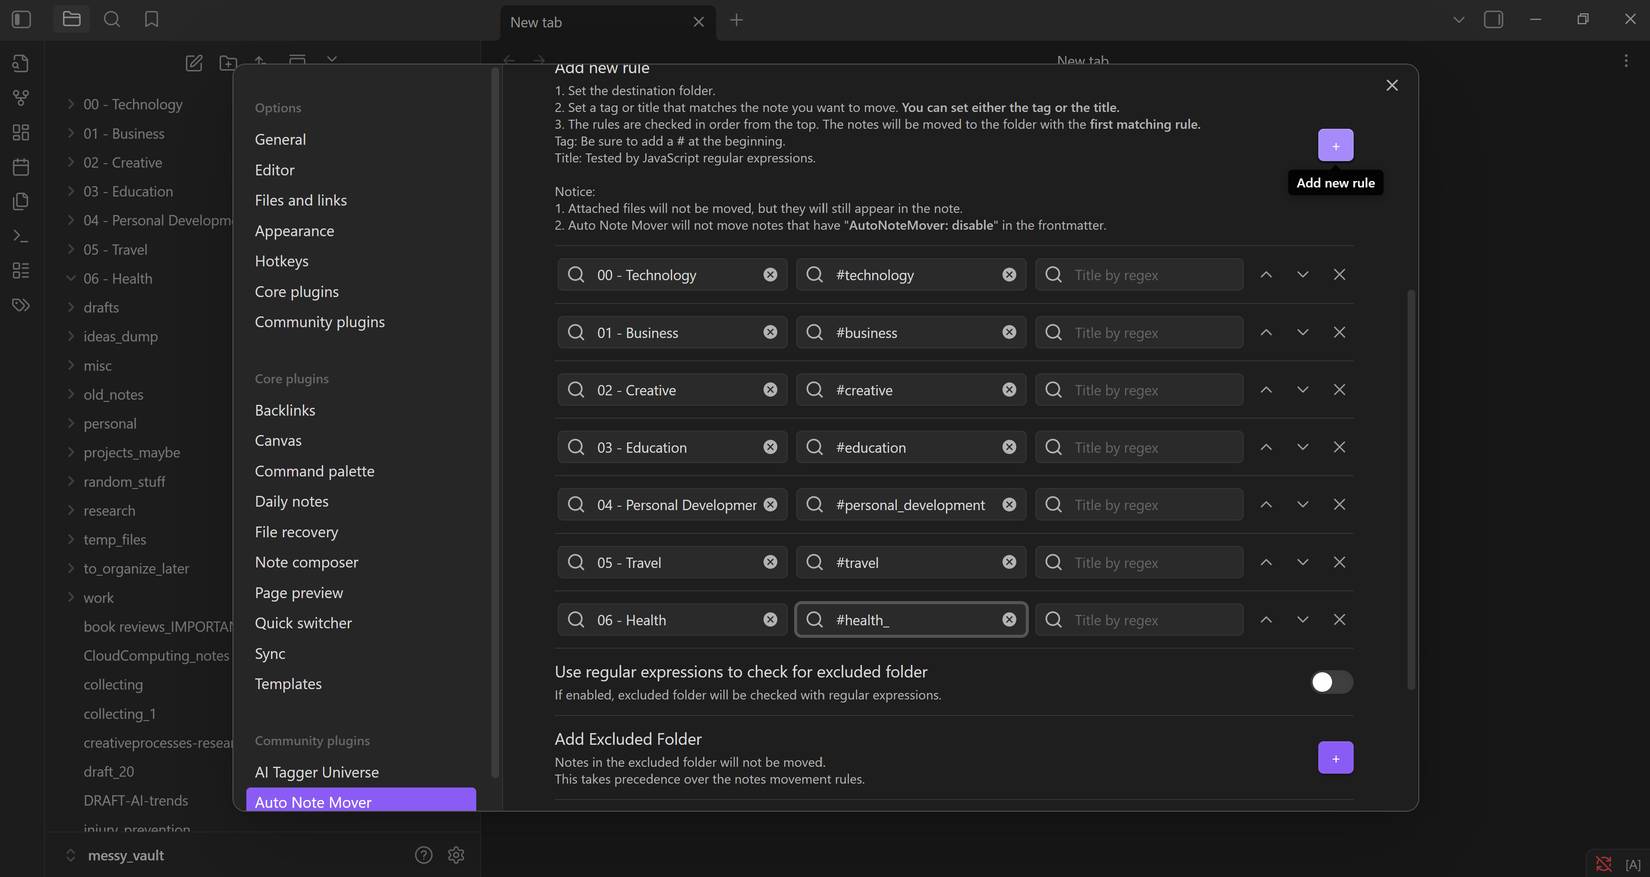
You can add as many rules as you like by clicking the plus (+) icon. The plugin supports both tags and title templates, so get creative with your sorting rules.
Organize your entire archive
Clean up hundreds of scattered notes
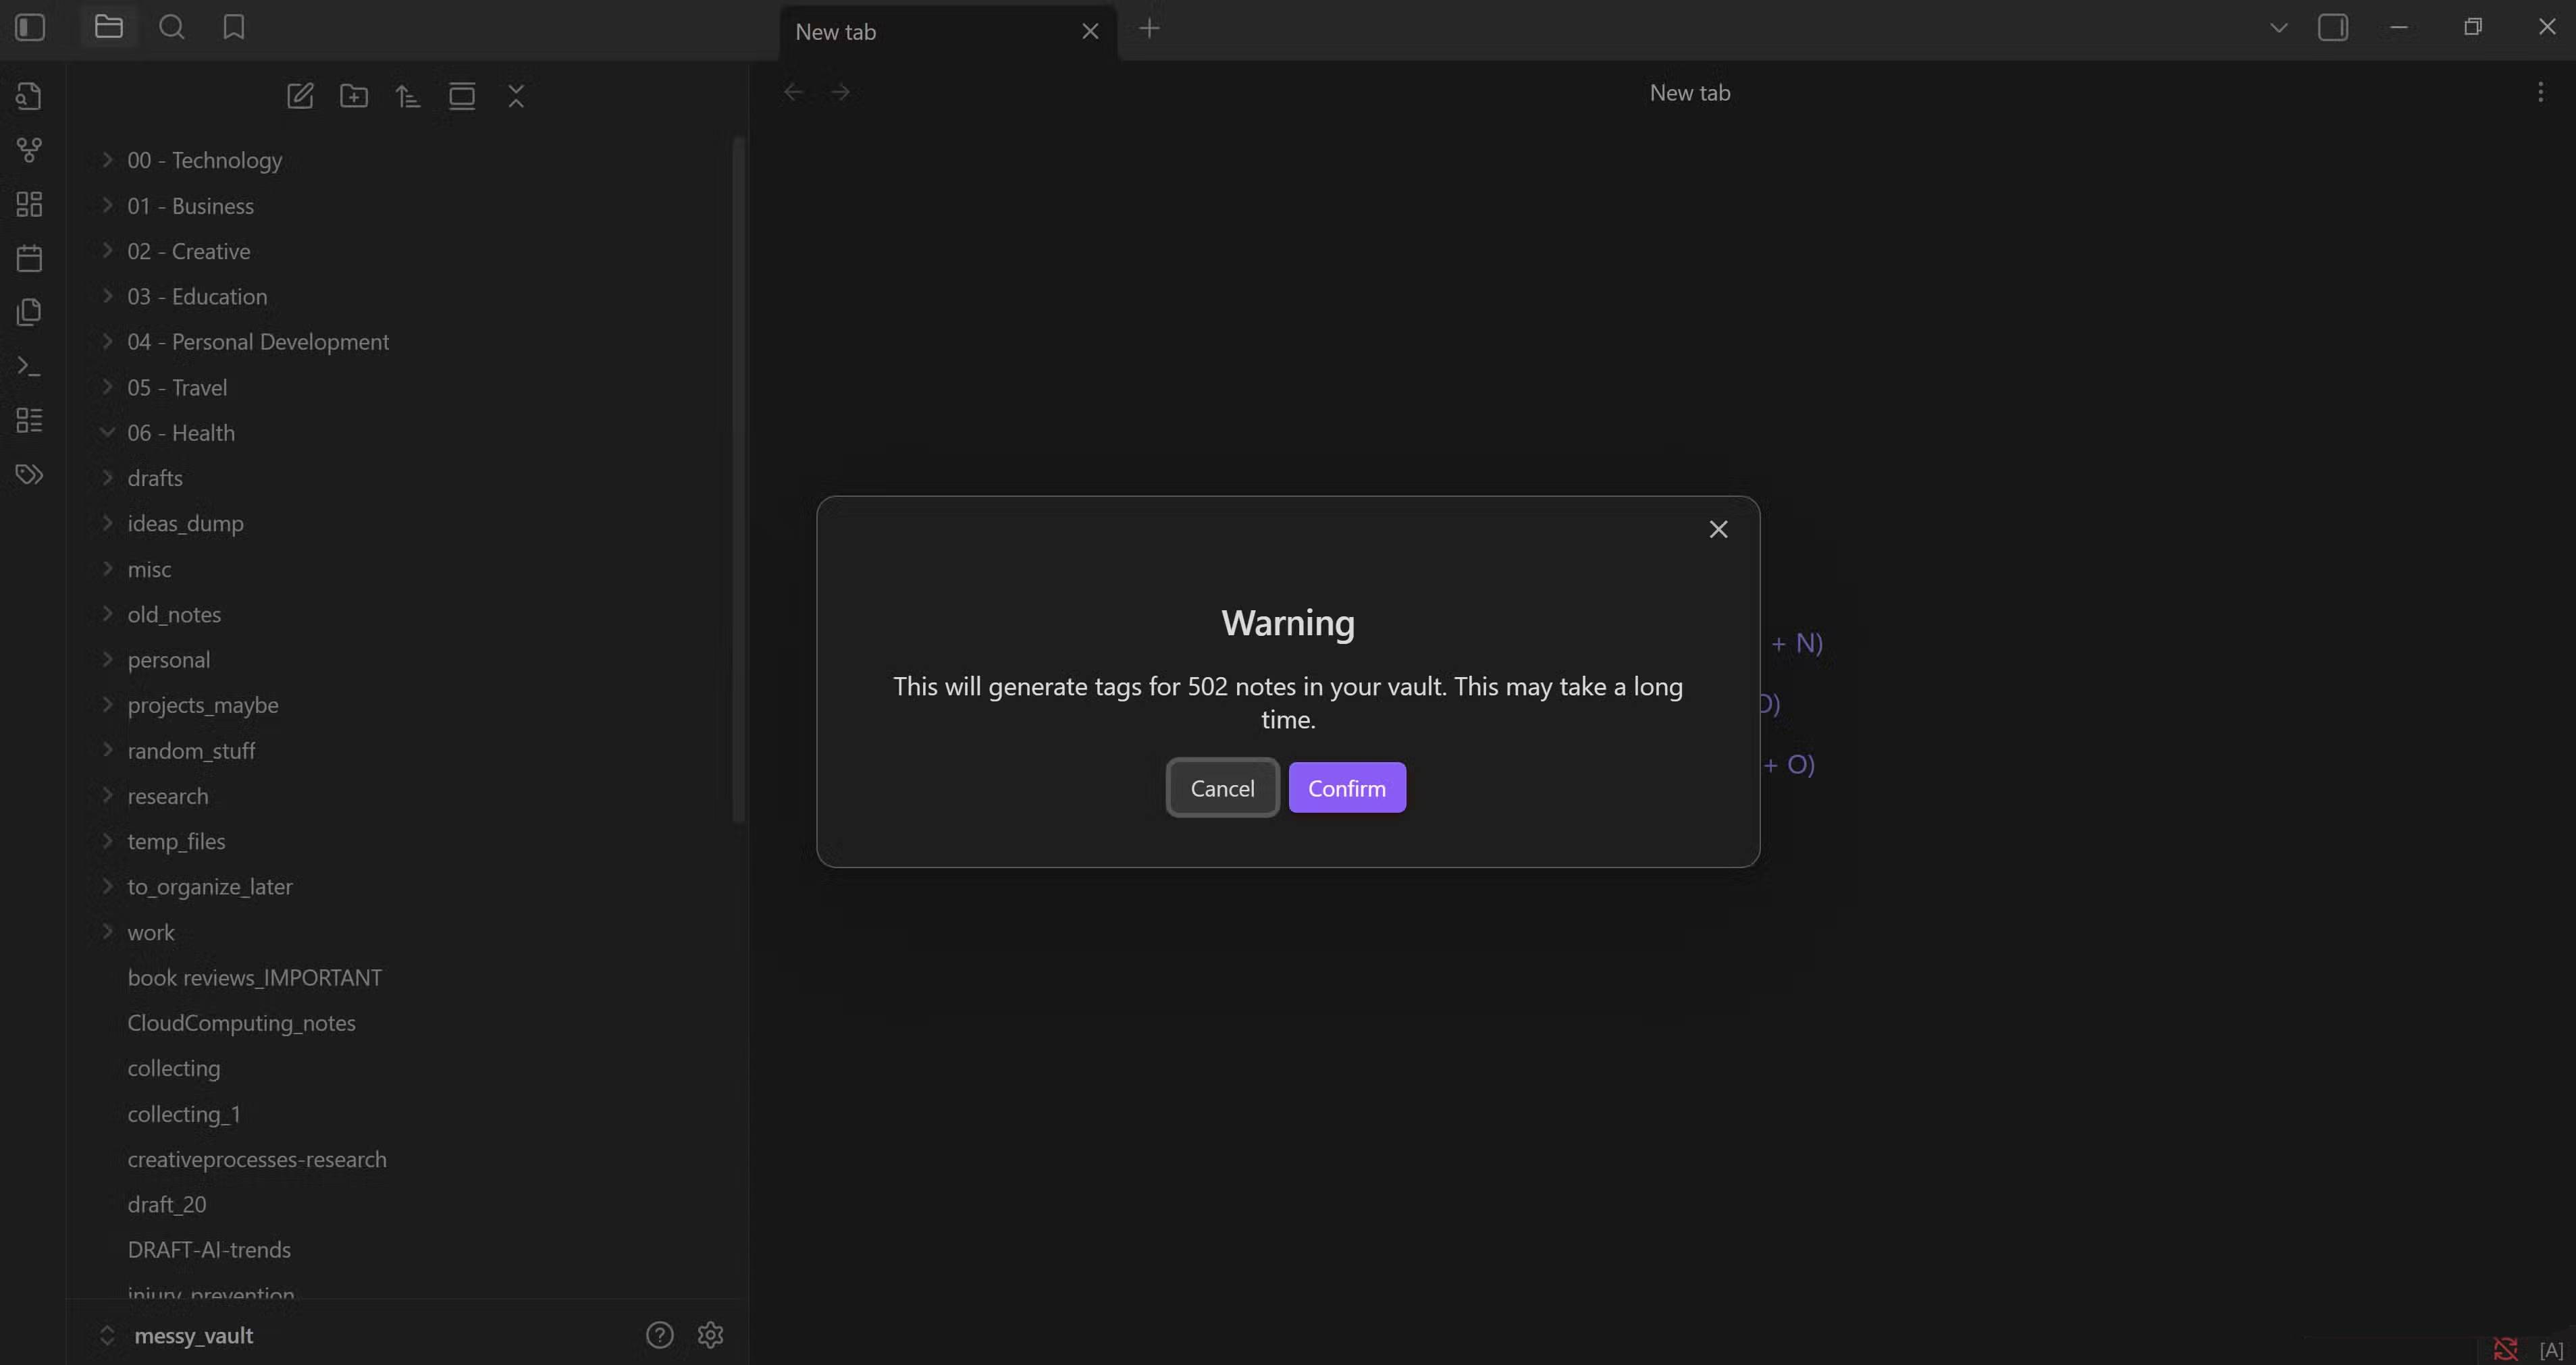
Note : Before you start organizing, make sure to back up your archive. AI tools are powerful, but they can also be unpredictable at times. Always have a backup in case something goes wrong.
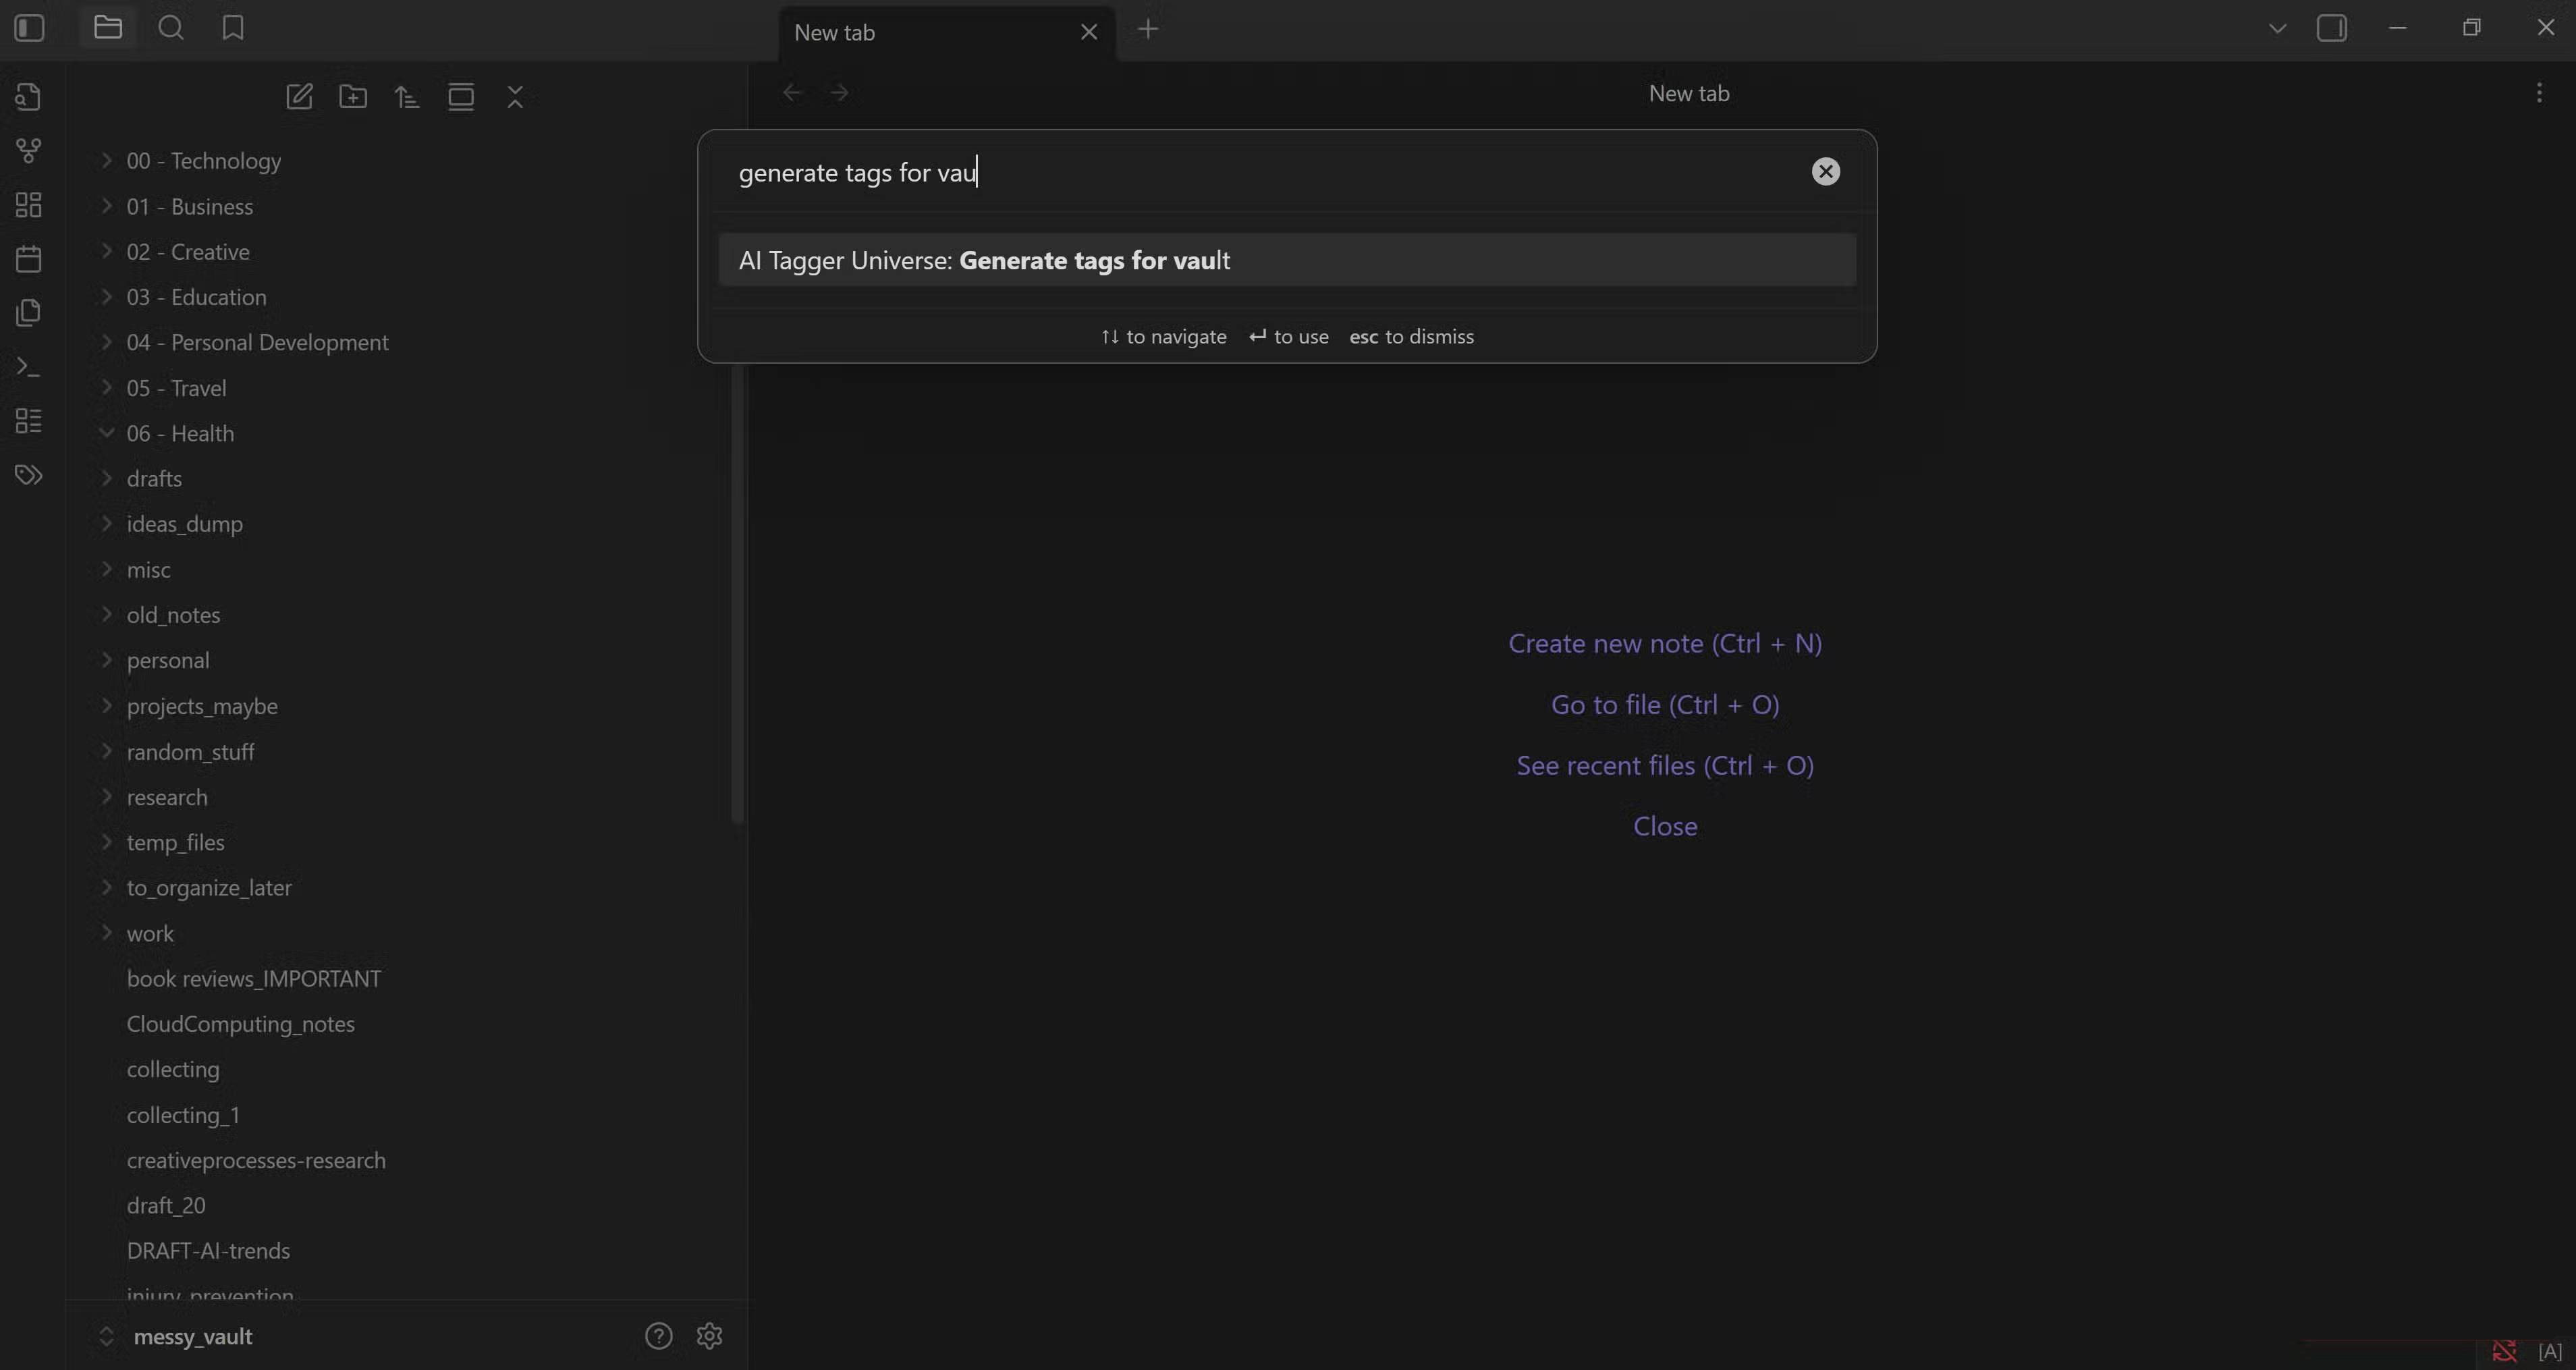
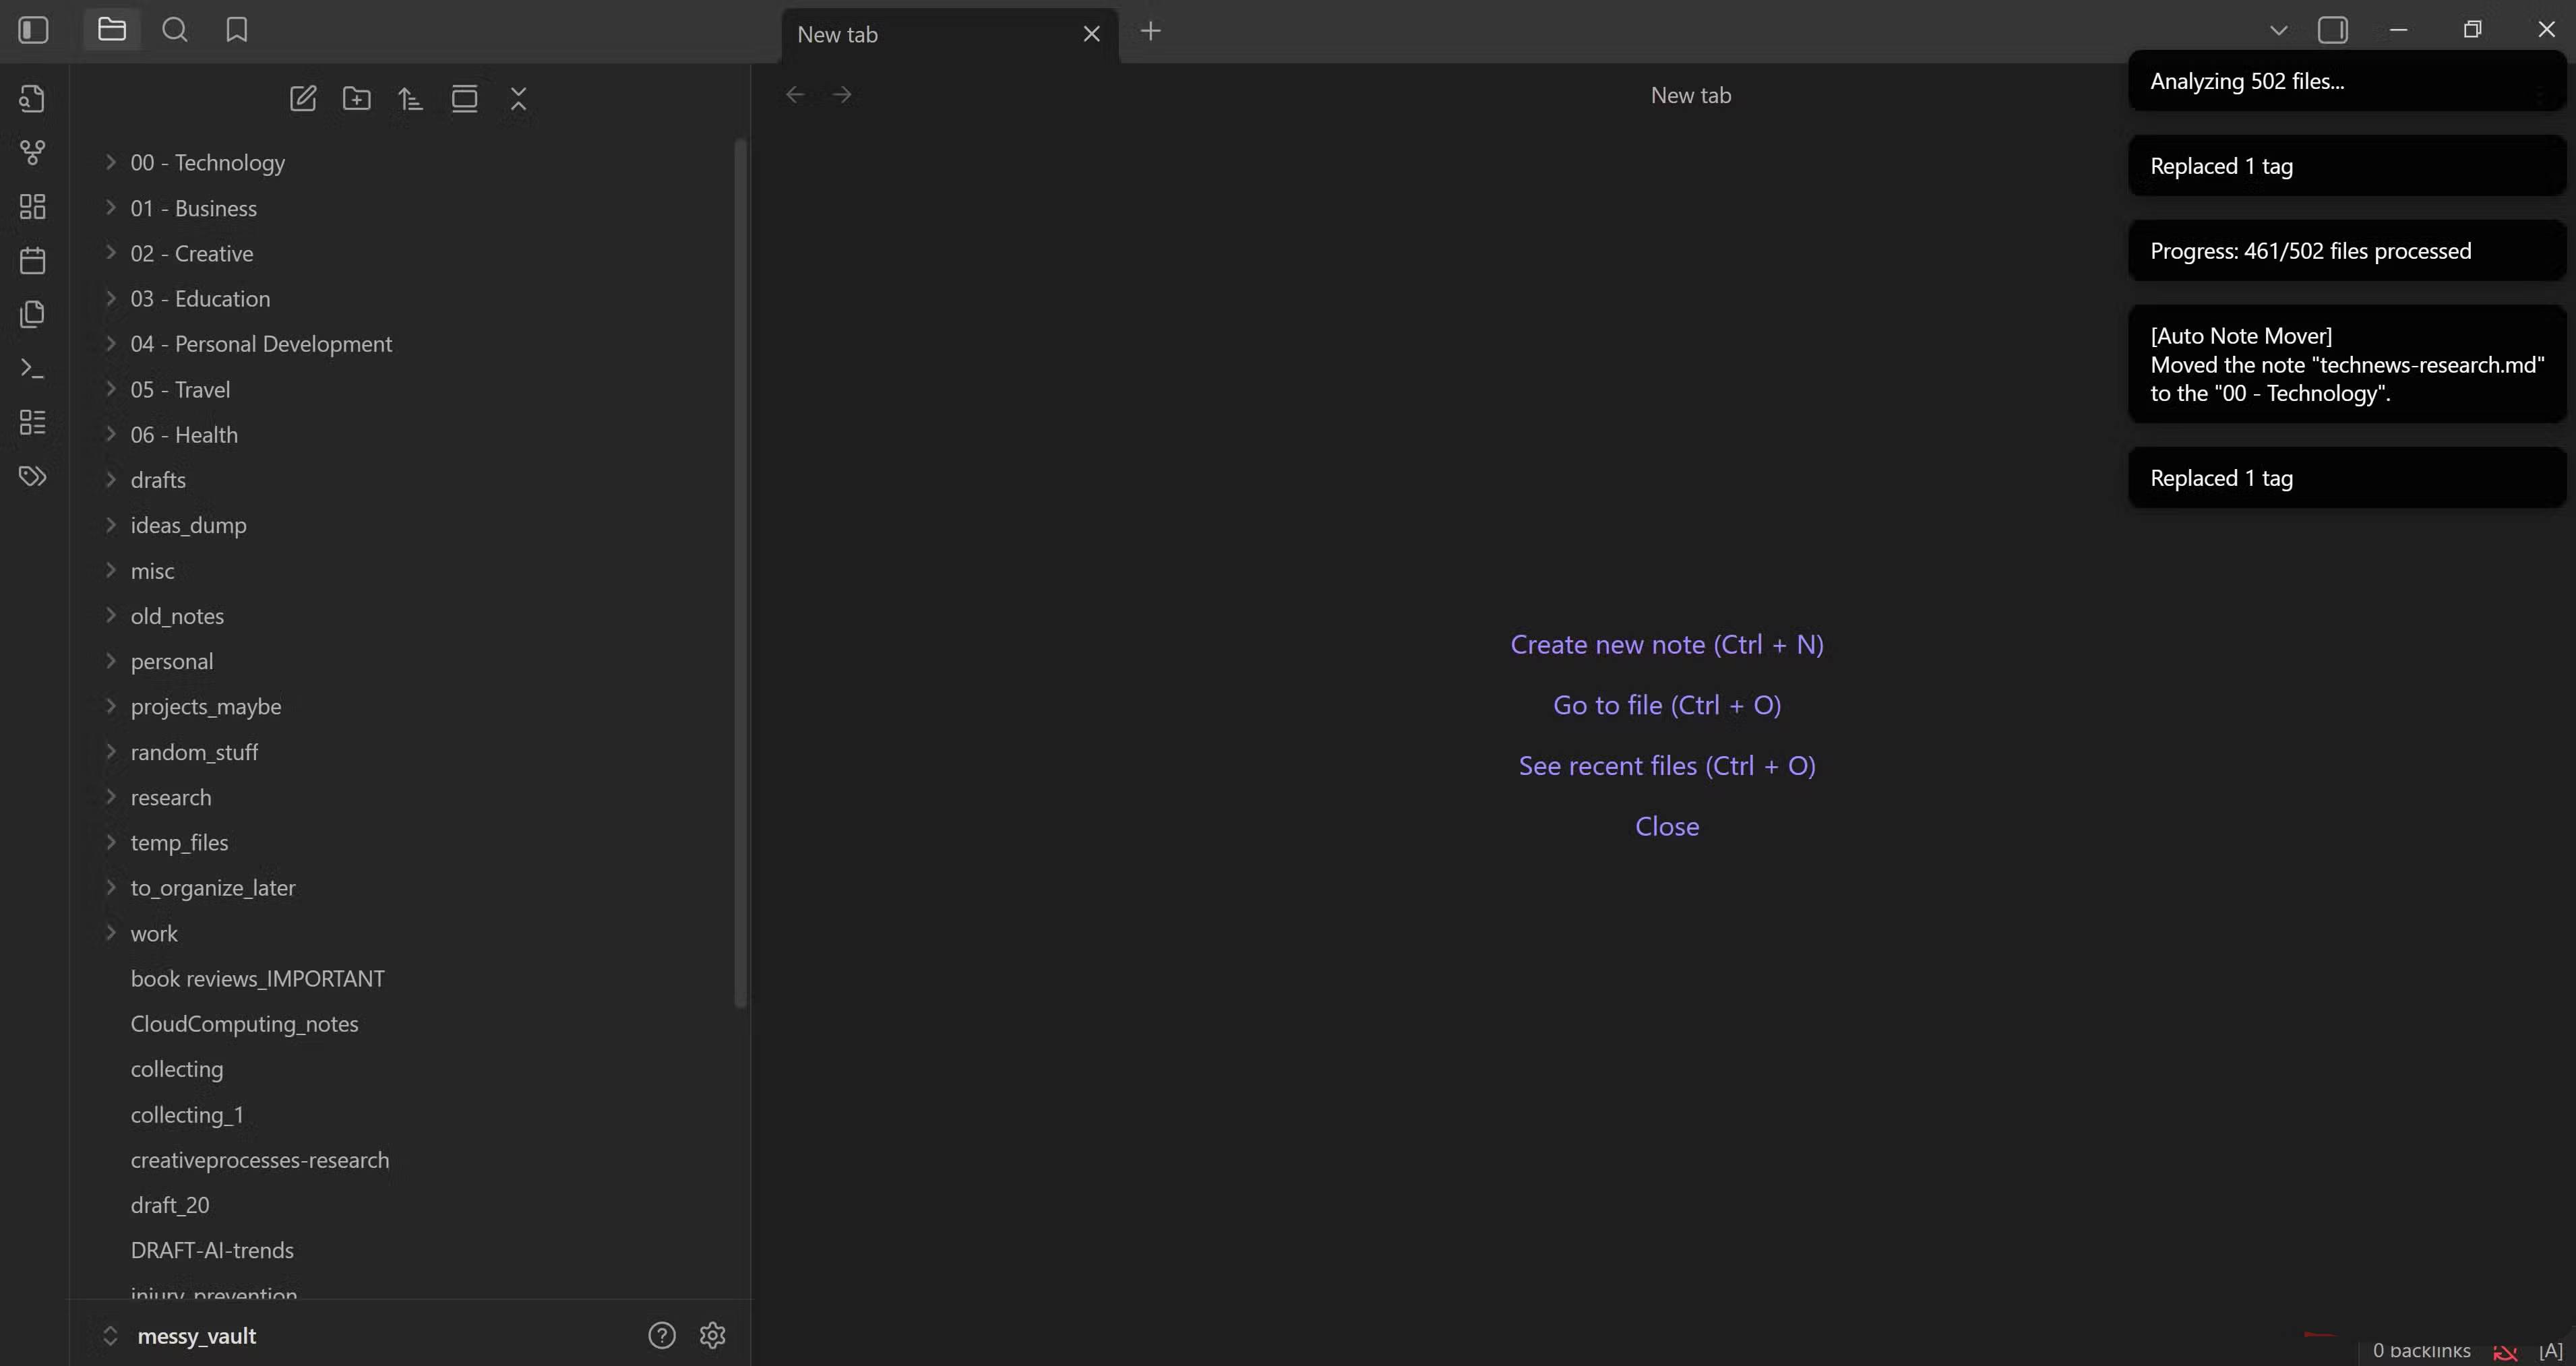
To organize your entire vault, press Ctrl + P and search for 'Generate tags for vault.' Once you run that command, the AI will automatically tag all of your notes. Depending on how many notes you have, this process can take a while, so make yourself a cup of coffee and let the AI do its thing. Once it starts, you'll get a notification as Auto Note Mover starts and starts sorting notes into their respective folders.

AI Tagger Universe isn't just limited to the entire archive. You can also use it to delete, collect, or create tags for specific folders or even individual notes as needed.
Once everything is organized, turn off AI Tagger Universe and LM Studio to free up system resources. You can keep Auto Note Mover on to automatically save new notes every time you tag them in certain folders. This way, you can focus solely on writing while the plugins keep everything in order. It's a simple, hands-off setup that keeps everything organized without any extra effort.