How to change computer name on Windows 10, 11 is extremely easy
Changing name on Windows 10 and 11 computers is a simple operation but not everyone knows. In this article, let's learn how to change the name on Windows 10 and 11 computers very easily and quickly.

1. Rename the computer in Properties
1.1 For Windows 10 version 2004 and earlier
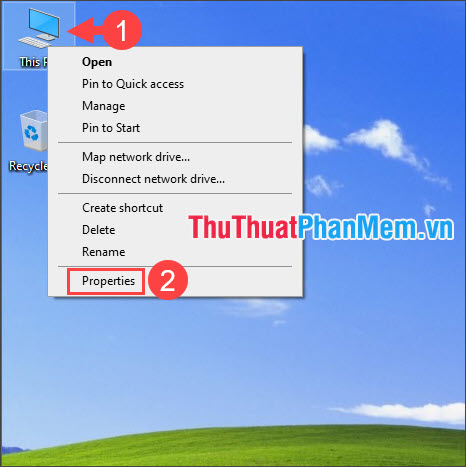
Step 1 : Right-click This PC (1) => Properties (2) .

Step 2 : Click on Change settings .

Next, click Change to change the name.

Step 3 : You give the computer a new name (1) => OK (2) .

Next, you will receive a message as shown below, click OK to continue.
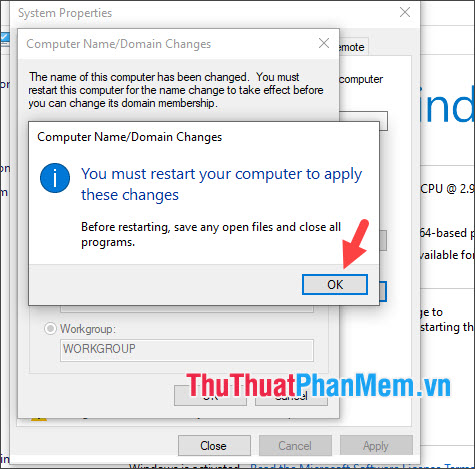
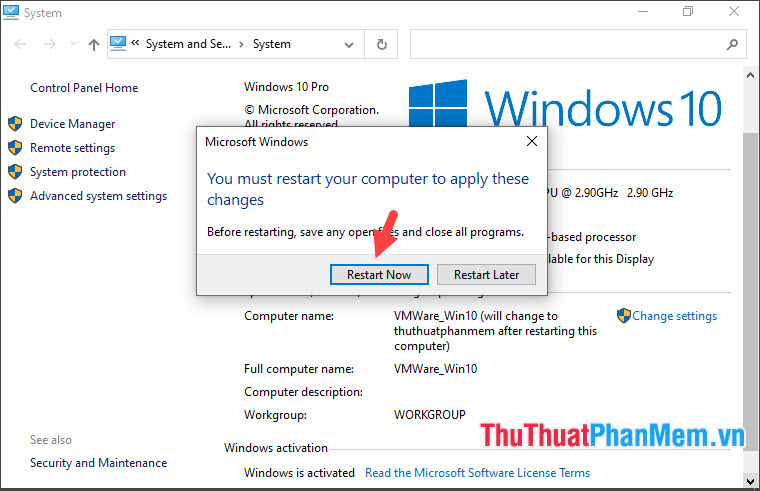
Step 4 : Select Restart Now to restart the computer. If you are working, select Restart Later and restart your computer later.
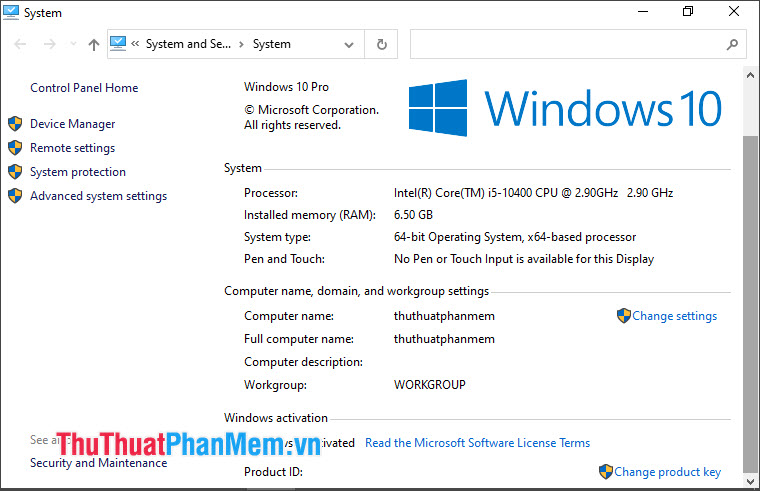
After booting, your computer has been successfully renamed as in the example below.
1.2. For Windows 10 version 2009 and later
Step 1 : Right-click This PC (1) => Properties (2) .
Step 2 : Click on Rename this PC .
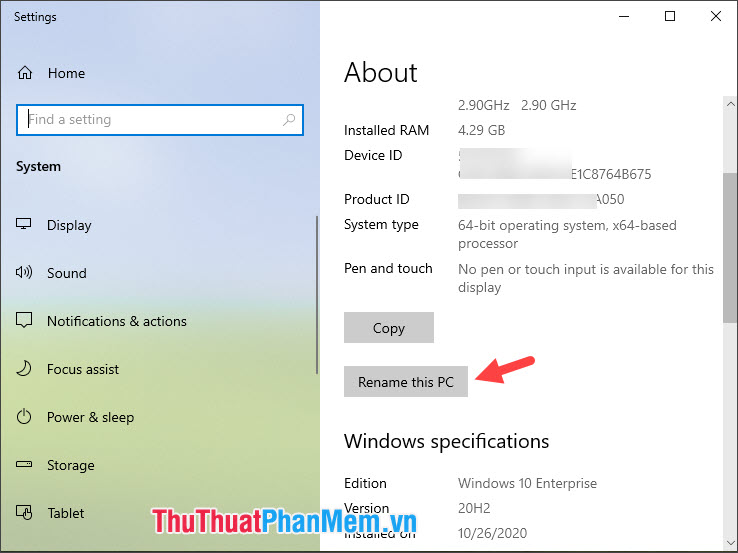
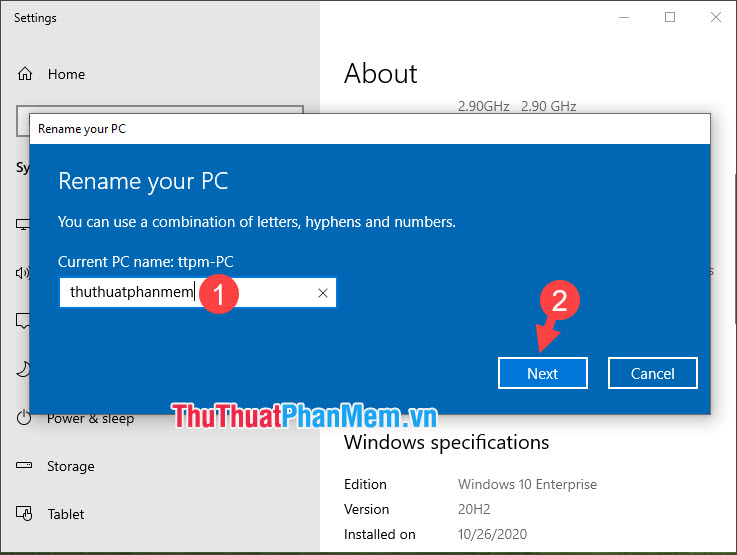
Step 3 : You set a new name (1) => Next (2) .
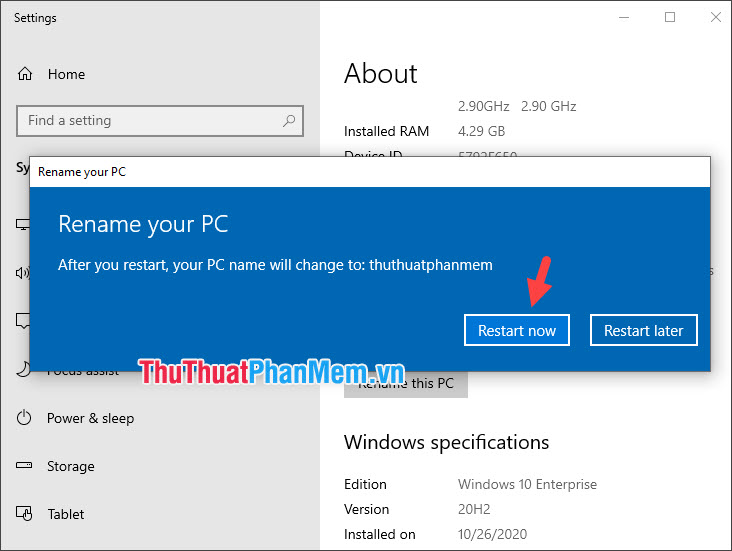
Step 4 : Select Restart now to restart the computer and apply a new name to the computer.
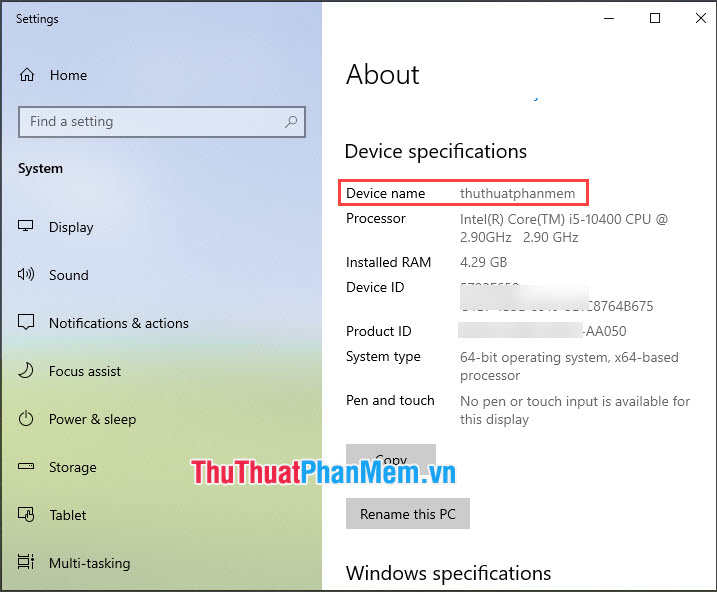
After rebooting and your computer shows up with the new name, it's a success!
1.3. For Windows 11
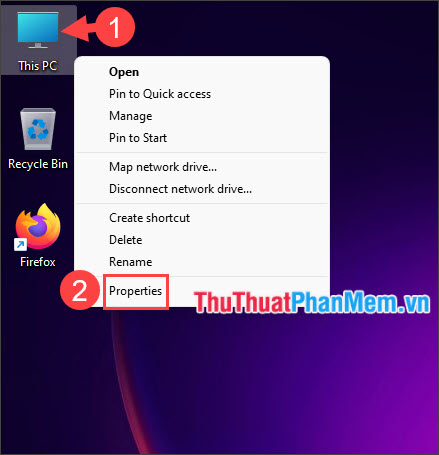
Step 1 : Right-click This PC (1) => Properties (2) .
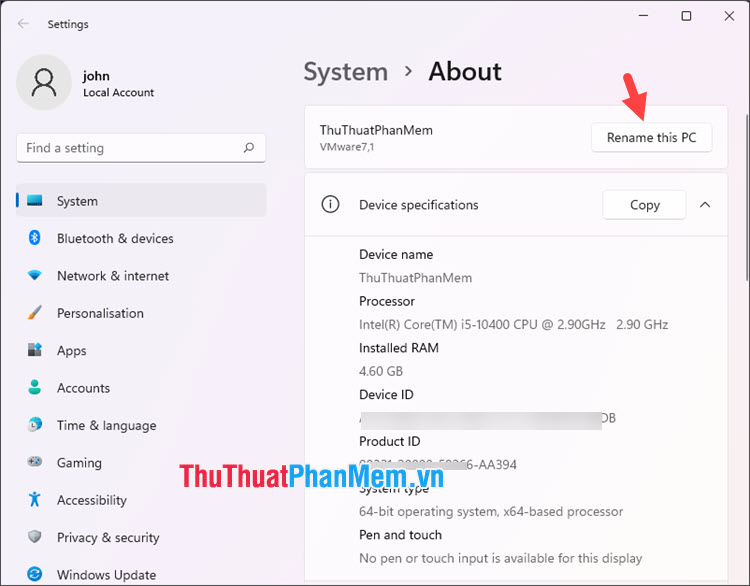
Step 2 : Click Rename this PC to change the name.
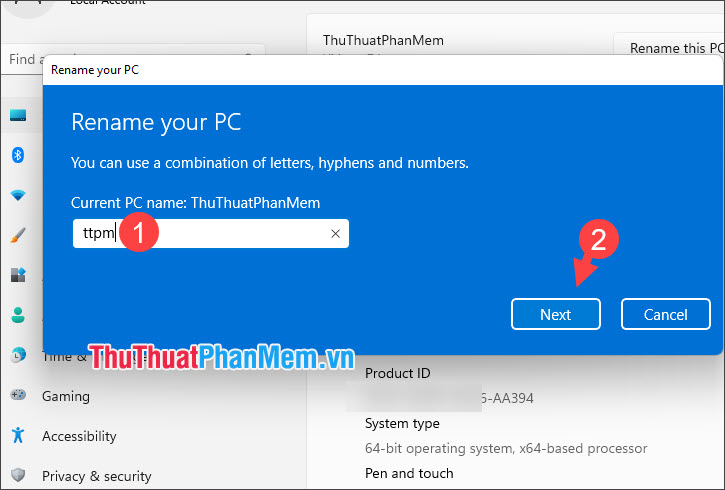
Step 3 : You give the computer a new name (1) => Next (2) .
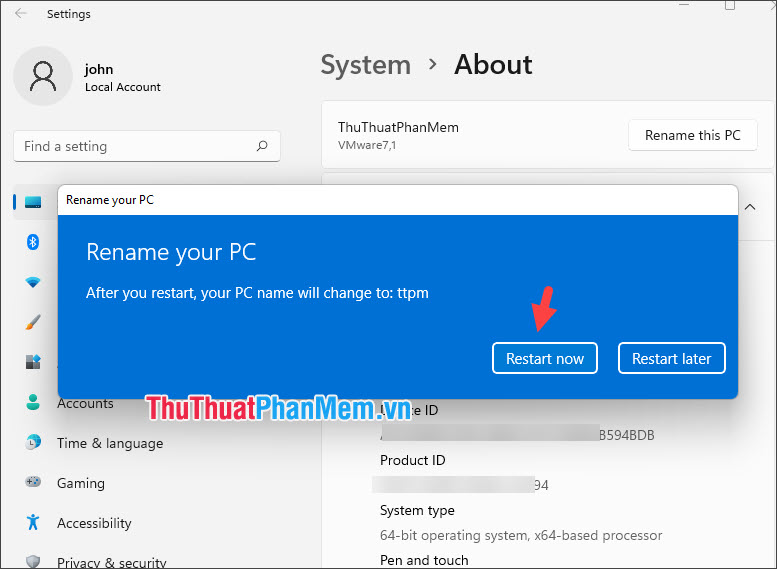
Next, click Restart now to restart the computer.
2. Rename the computer in the Registry
Step 1 : Press the Windows + R key combination to open the Run tool . Next, enter the keyword regedit (1) => OK (2) .

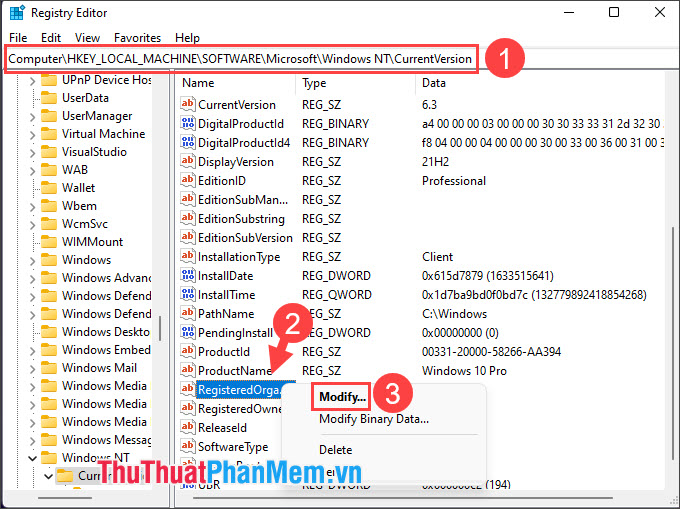
Step 2 : Access the Registry under the path HKEY_LOCAL_MACHINE/SOFTWARE/Microsoft/Windows NT/CurrentVersion (1) .
Next, right-click on Registered Organization (2) => Modify… (3) .
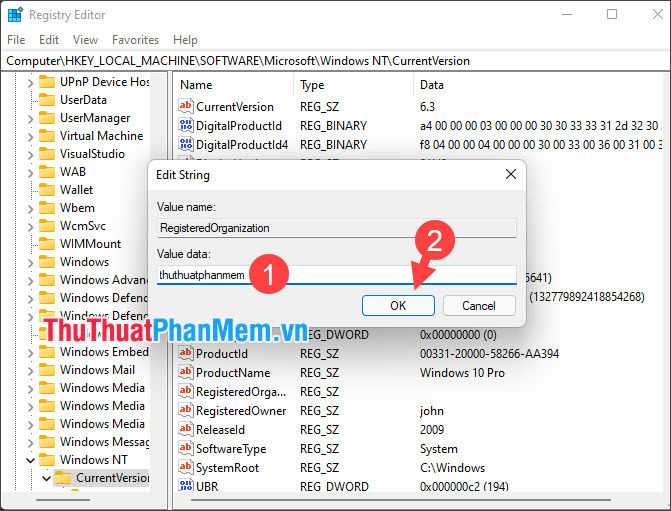
Step 3 : You put a new name in the Value data section (1) => OK (2) .
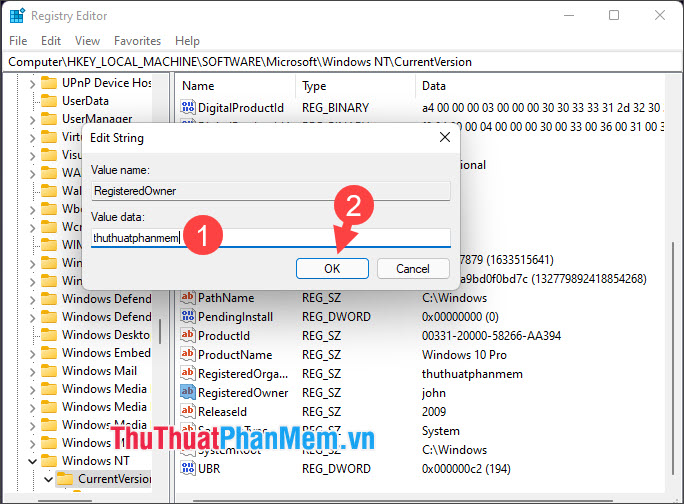
Step 4 : Do the same with the Registered Owner section and set a new name in Value data (1) => OK (2) . Then, restart your computer to apply the settings.
3. Rename the computer in Command Prompt
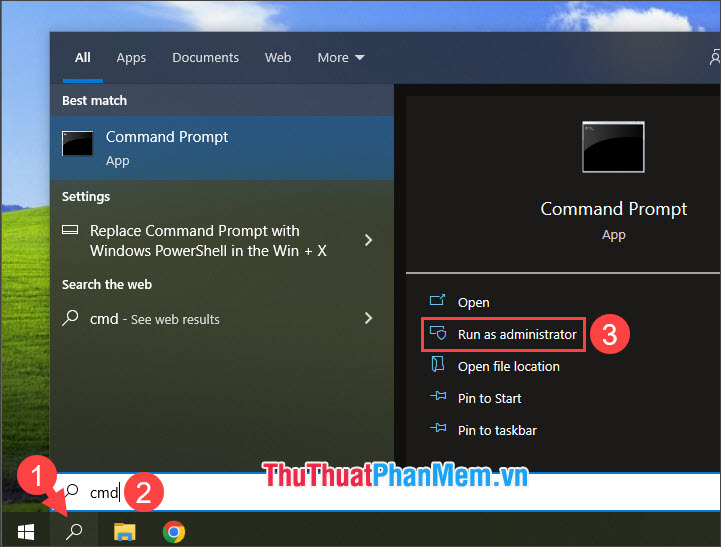
Step 1 : Open search (1) => search cmd (2) => Run as administrator (3) .
Step 2 : Enter the command with the following syntax and press Enter .
| WMIC computersystem where caption='Old name' rename New name |
In which : Old name is the current name on the computer and New name is the new name given to the computer.
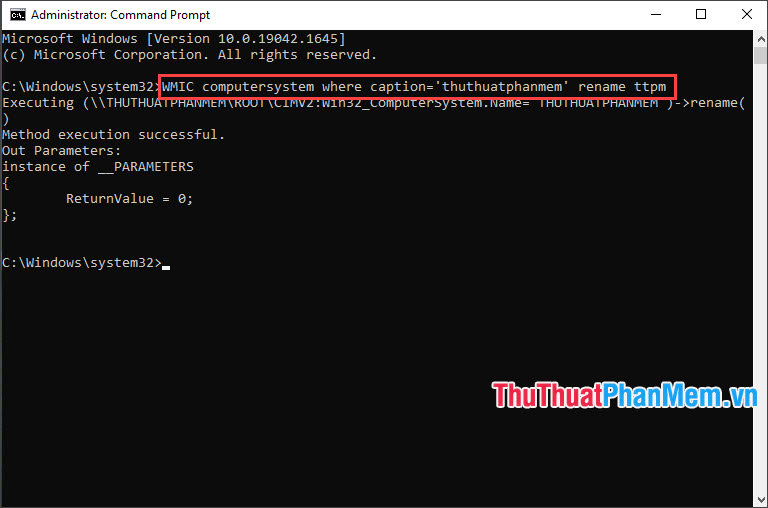
Then, restart your computer to apply the changes.
4. Rename the computer in PowerShell
Step 1 : Click on search (1) => search with the keyword powershell (2) => Run as administrator (3) .
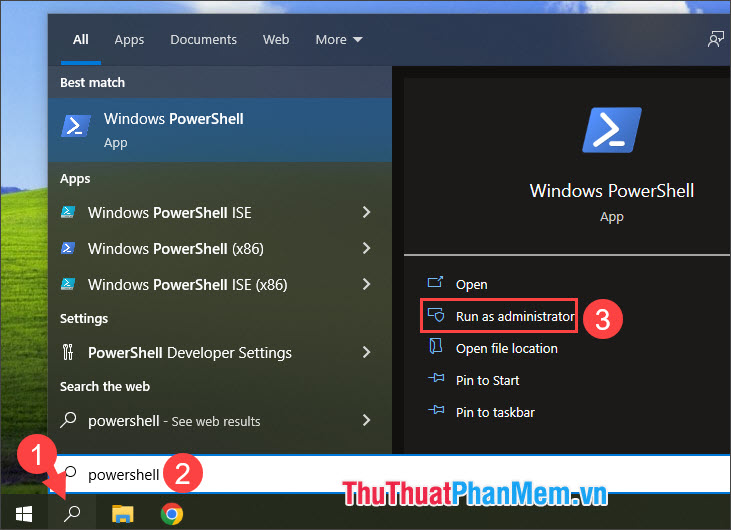
Step 2 : Enter the following command and press Enter.
| Rename-Computer -NewName "new name" |
With new name is the new name you give to the computer.
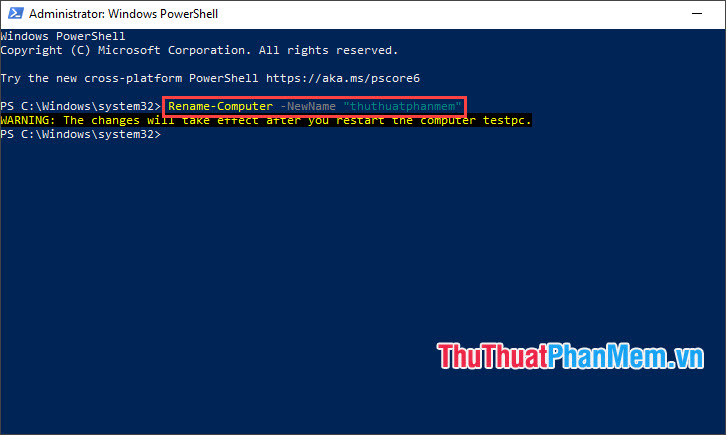
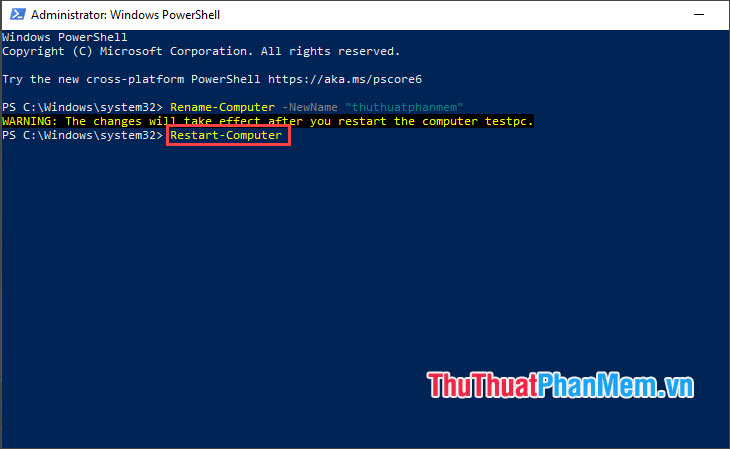
Step 2 : You can restart the computer manually or use the following command to restart the computer.
| Restart-Computer |
With the instructions in the article, you can change your computer name on Windows 10, 11 quickly and easily. Wishing you a good day!