Table of Contents
This guide explains how to adjust the Mouse Speed in Windows 10, with clear steps, practical tips, and important checks before you begin.
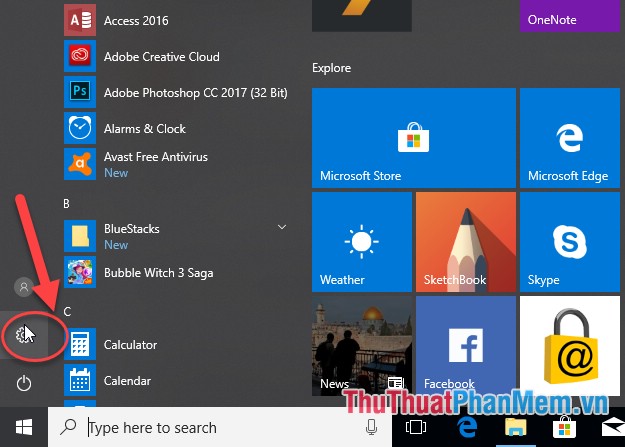
Step 1: Go to Start -> Settings:
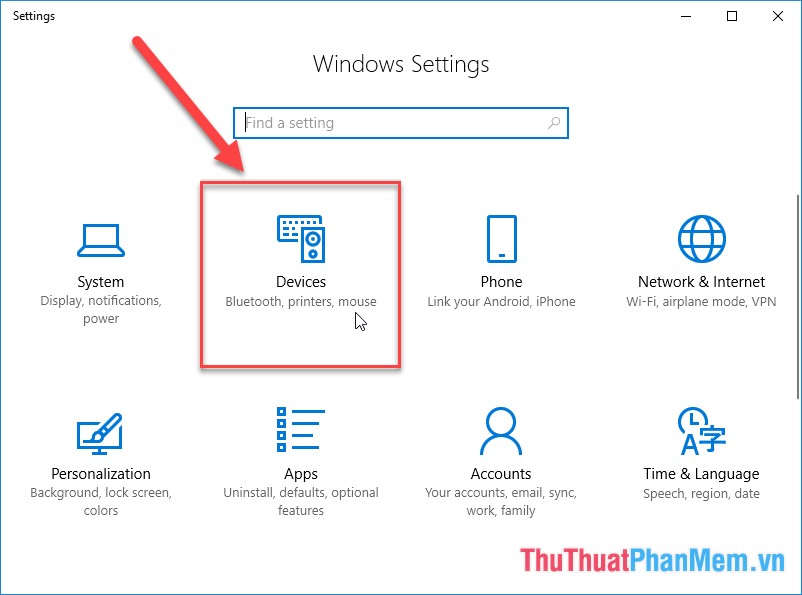
Step 2: The Settings dialog box appears, click Devices:
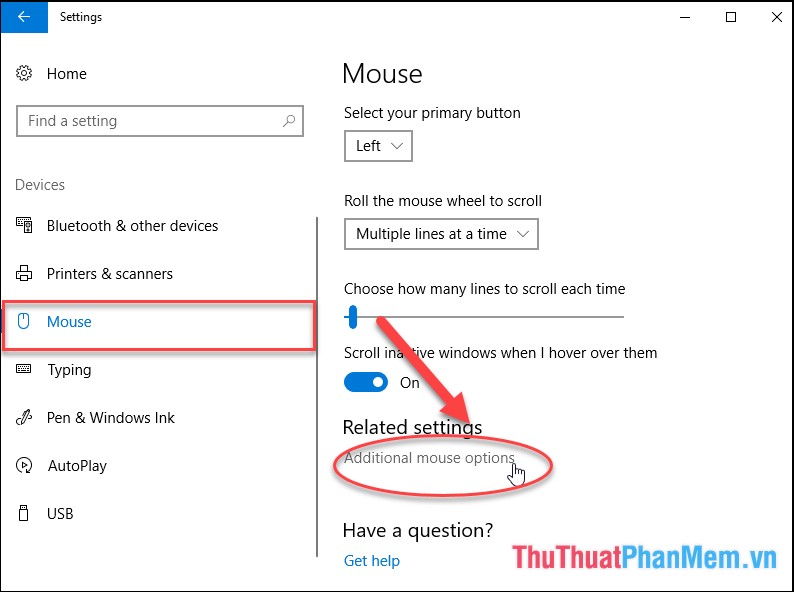
Step 3: In the Mouse section, click Additional mouse options:
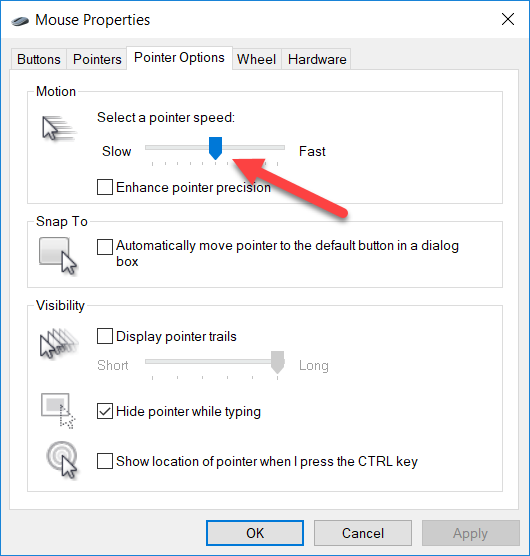
Step 4: Mouse Properties dialog box select Pointer Options, then adjust the mouse speed in the Motion section, move the control button to the right to increase the mouse speed, if you want to reduce the mouse speed, move the adjustment button to the left. After adjusting the mouse speed, click OK to finish:
So with very simple operation you have adjusted the mouse speed in Windows 10. With previous operating systems you perform the same operation. Good luck!
FAQ
What should I know about Adjust the Mouse Speed in Windows 10?
Focus on the key features, requirements, limitations, and practical use cases explained in this guide.
How do I get the best results with Adjust the Mouse Speed in Windows 10?
Follow the recommended steps, use current software or information, confirm compatibility, and review settings before major changes.
Are there any risks or limitations?
Potential limitations depend on compatibility, data quality, cost, privacy, support, and how the product or method is used.
Related Articles
 Steps to Adjust Mouse Speed on Windows 115 minutes read
 How to Adjust Mouse Speed on Windows 10, 8, and 7 Computers4 minutes read
 How to Adjust Mouse Speed on Windows 10 and 114 minutes read
 Adjust the Speed of the Mouse on the Computer Screen2 minutes read
 3 Simplest Ways to Adjust Mouse Speed: Best Options Compared6 minutes read
 How to Speed Up Mouse Drag on Windows4 minutes read
Reader Comments 0
Sign in with email or Google to join the discussion.