Table of Contents
This guide provides a clear, practical overview of steps to adjust mouse speed on Windows 11, with useful context, important details, and straightforward takeaways for everyday readers.
1. Adjust mouse speed on Windows 11 in Settings
In Windows 11's Settings, you can freely adjust the parameters on your computer quickly. Including adjusting the mouse speed on the computer.
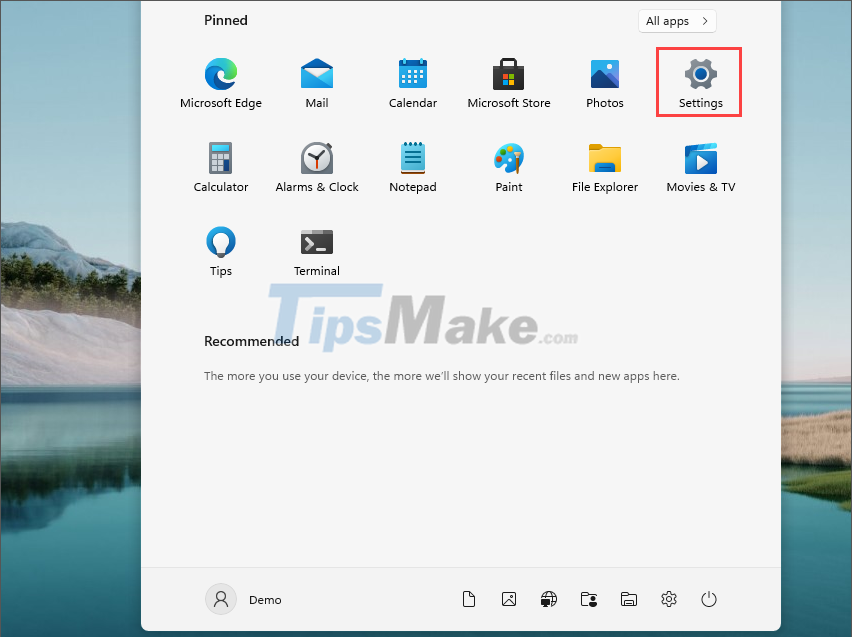
Step 1: Open the Start Menu and navigate to Settings to open settings on your computer.
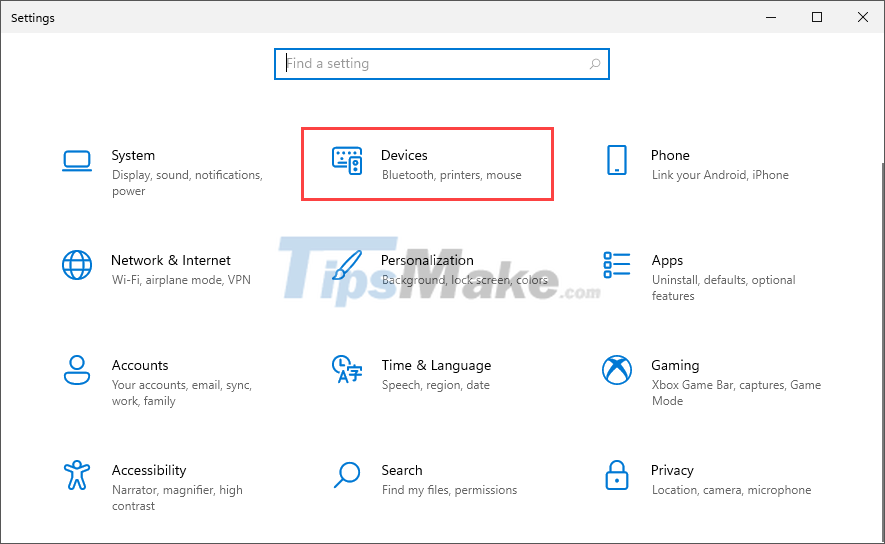
Step 2: Then, select the Devices tab to manage devices on your computer.
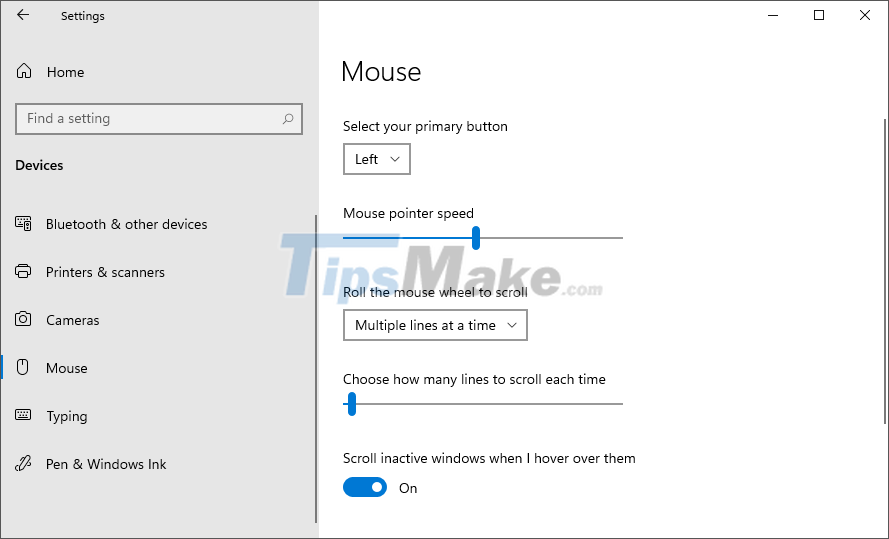
Step 3: When you need to change the mouse speed, you just need to select the Mouse tab and change the mouse speed in the Mouse Pointer Speed section.
Mouse speed in Settings will be changed immediately as you adjust them.
Control Panel is a Windows system manager and they allow you to adjust all the basic parameters on your computer.
Step 1: Open the Start Menu and enter Control Panel to open the manager on your Windows computer.

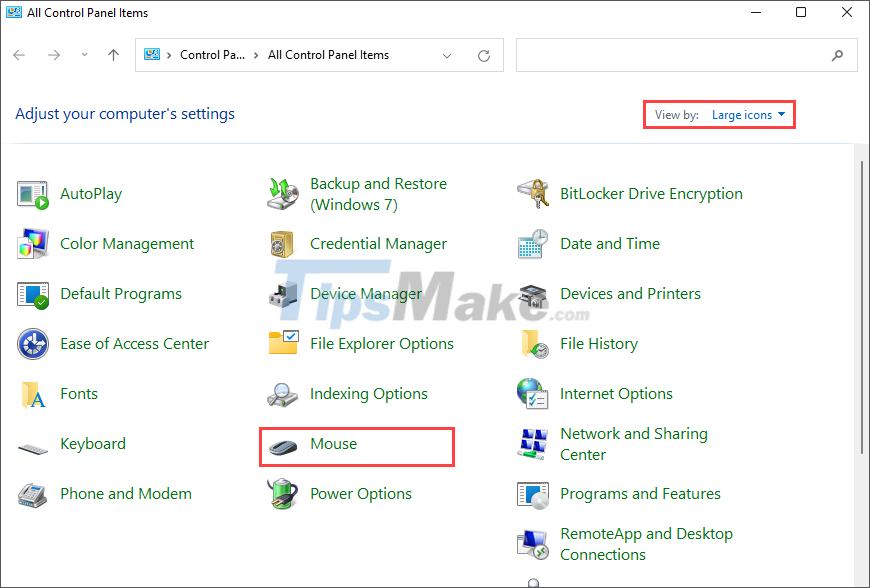
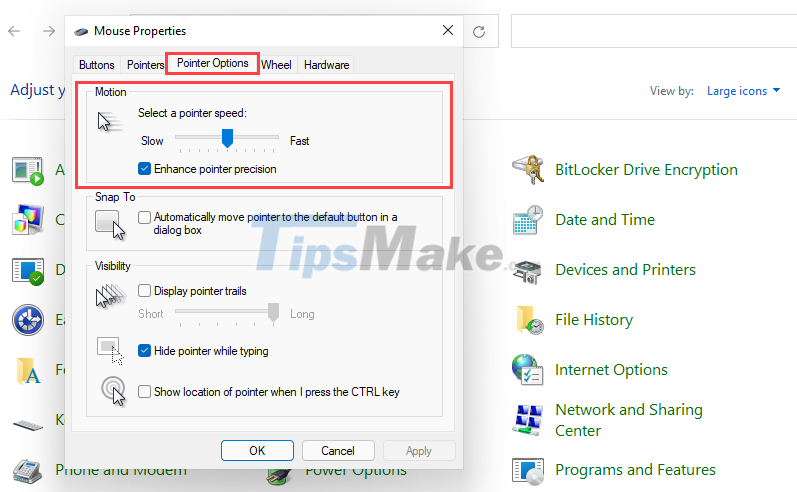
Step 2: To find the mouse settings on your computer, change the View by mode to Large icons to see more icons. You just need to select the Mouse item to open the mouse device.
Step 3: To set the mouse speed, just select Pointer Options and change the mouse speed in the Motion section.
In the mouse speed control bar, Slow will slow down the mouse and Fast will help increase the mouse speed.
If you need to adjust the mouse speed quickly on Windows 11, you can also use the search command in Search to quickly check.
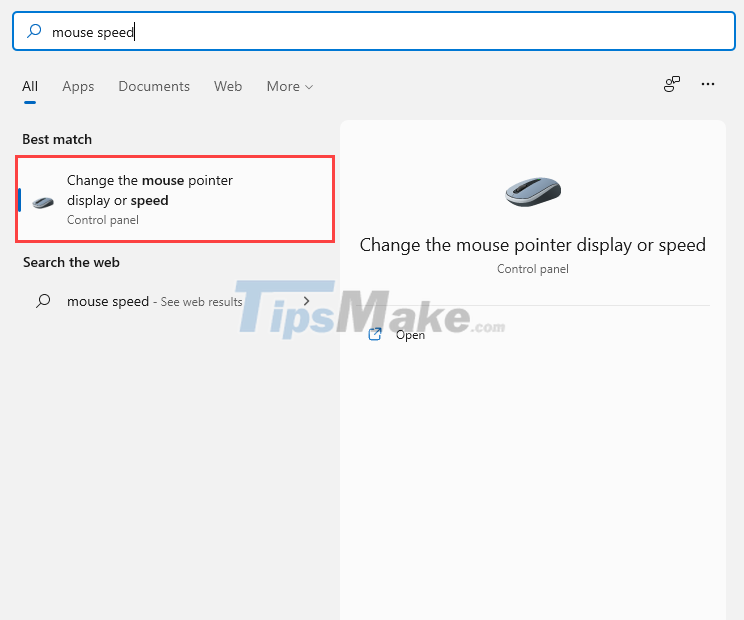
Step 1: Open the Windows search engine (magnifying glass icon) and enter Mouse Speed in the search bar. Then you just need to select Change the mouse pointer display or speed.
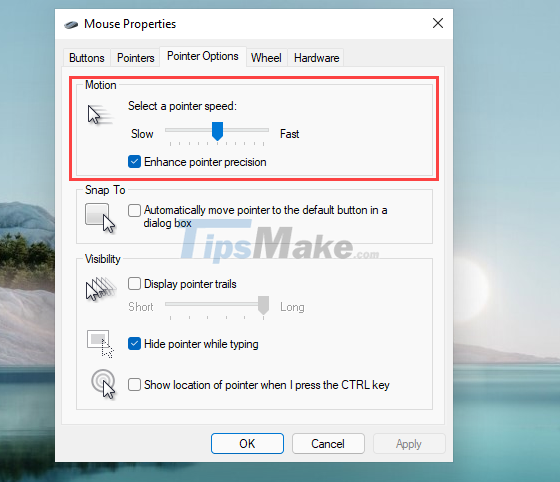
Step 2: Similar to the setting of mouse adjustment in Control Panel, you just need to change the mouse speed in the Motion section.
Registry Editor allows you to adjust parameters by directly interfering in the system and changing the value of system files.
Step 1: Open Registry Editor by typing Registry Editor in the search bar.

Step 2: In the Registry Editor window, open the folders in the following order:
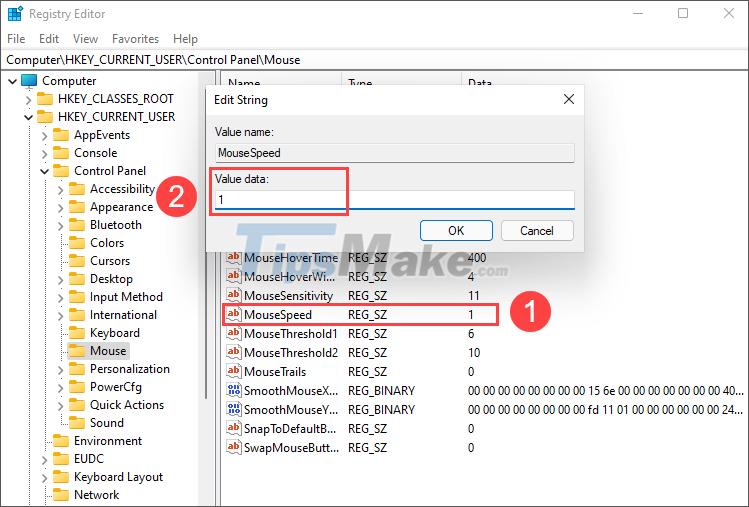
Computer => HKEY_CURRENT_USER => Control Panel => Mouse
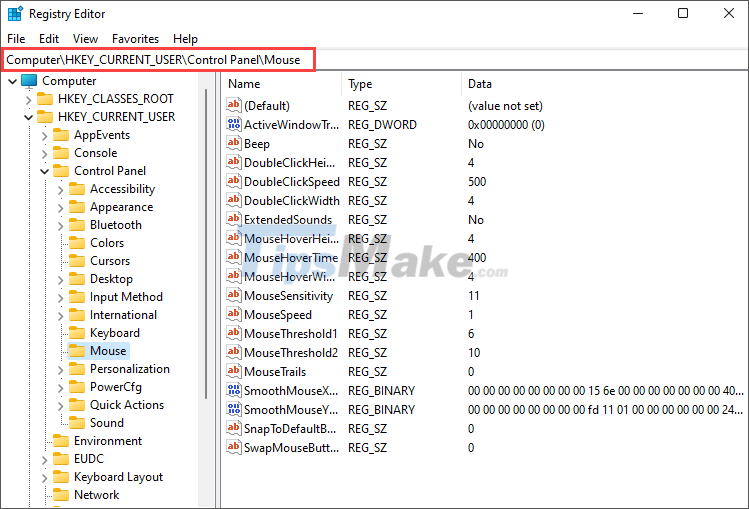
Step 3: In the Mouse folder, you just need to find the MouseSpeed file (1) and replace the mouse speed value in the Value Data section (2).
Currently, Windows 11 is supporting mouse speed values from 1 to 10 (gradually fast). You just need to enter the required speed into Value Data and click OK to finish.
In this article, Tipsmake has shown you how to adjust mouse speed on Windows 11 computers. Good luck!
Key Takeaways
Use the information above as a practical reference for steps to adjust mouse speed on Windows 11. Review each step carefully, confirm any requirements, and choose the option that best fits your situation.
FAQ
What does this guide explain about Steps to Adjust Mouse Speed on Windows 11?
It explains the main concepts, practical considerations, and useful steps related to steps to adjust mouse speed on Windows 11 without requiring advanced knowledge.
Who can benefit from learning about Steps to Adjust Mouse Speed on Windows 11?
This information is useful for readers who want a clear overview, practical guidance, and reliable steps related to steps to adjust mouse speed on Windows 11.
What should I check before applying this information?
Review the requirements, confirm that your device, software, or situation matches the instructions, and back up important data before making major changes.
Related Articles
 How to Adjust the Mouse Speed in Windows 102 minutes read
 How to Adjust Mouse Speed on Windows 10, 8, and 7 Computers4 minutes read
 How to Adjust Mouse Speed on Windows 10 and 114 minutes read
 Adjust the Speed of the Mouse on the Computer Screen2 minutes read
 3 Simplest Ways to Adjust Mouse Speed: Best Options Compared6 minutes read
 How to Speed Up Mouse Drag on Windows4 minutes read
Reader Comments 0
Sign in with email or Google to join the discussion.