Table of Contents
This practical guide walks through how to change the mouse pointer on Windows 11 with many, explains the main requirements, and highlights common issues that may appear along the way.
How to change the mouse pointer on Windows 11
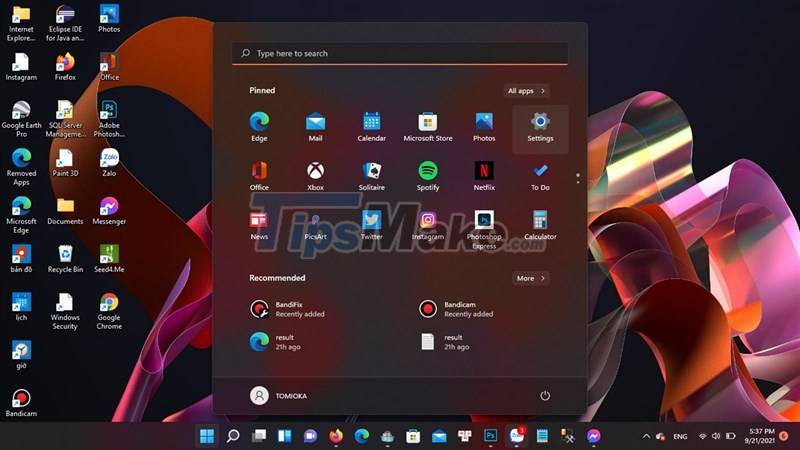
Step 1: Press the Windows + I key combination to quickly open Settings.
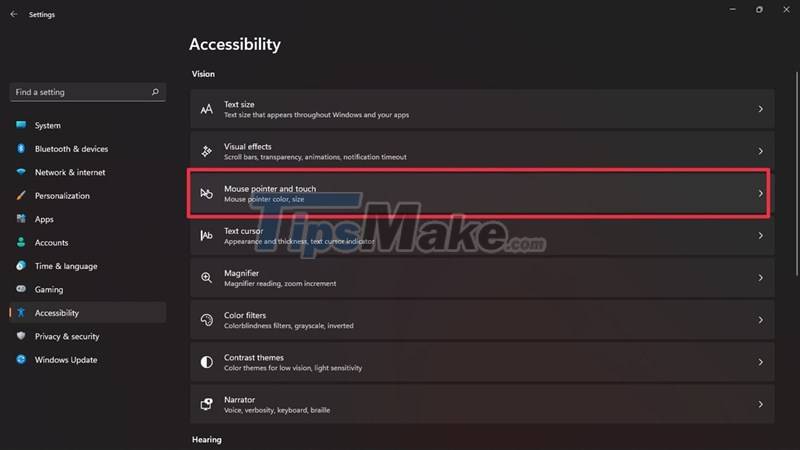
Step 2: Then select Accessibility and select Mouse pointer and touch.
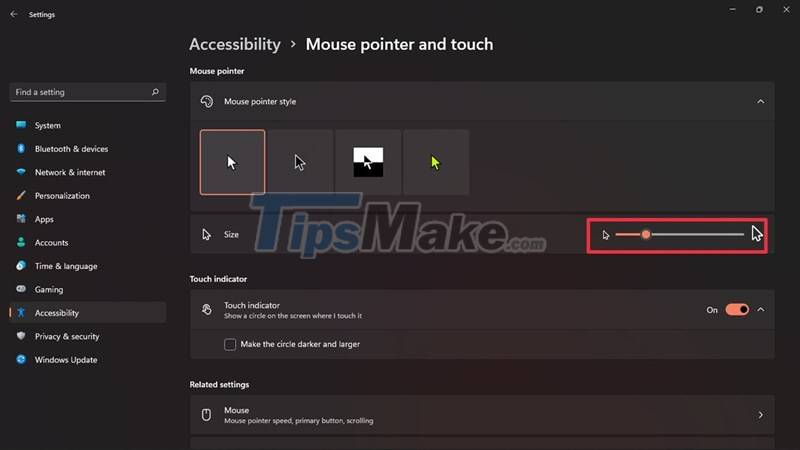
Step 3: Once you have opened Mouse pointer and touch, you will see a series of customizations such as color, size or mouse style. You can change the mouse size by moving the slider on the Size bar to enlarge or reduce the mouse pointer.
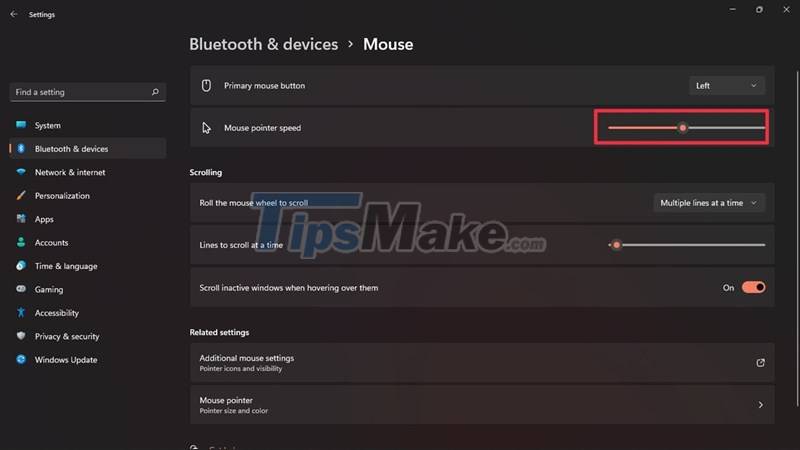
You can also adjust the mouse speed as you like by clicking on the Mouse option and dragging the mouse from left to right in increasing degrees.
So, I have finished showing you how to change the mouse pointer on Windows 11. Wish you success.
Key Takeaways
Use the information above as a practical reference for how to change the mouse pointer on Windows 11 with many. Review each step carefully, confirm any requirements, and choose the option that best fits your situation.
FAQ
What does this guide explain about Change the Mouse Pointer on Windows 11 with Many?
It explains the main concepts, practical considerations, and useful steps related to change the mouse pointer on Windows 11 with many without requiring advanced knowledge.
Who can benefit from learning about Change the Mouse Pointer on Windows 11 with Many?
This information is useful for readers who want a clear overview, practical guidance, and reliable steps related to change the mouse pointer on Windows 11 with many.
What should I check before applying this information?
Review the requirements, confirm that your device, software, or situation matches the instructions, and back up important data before making major changes.
Related Articles
 Instructions to Change Mouse Cursor on Windows 113 minutes read
 How to Change the Mouse Pointer Size and Style in Windows 114 minutes read
 How to Create a Yellow Circle Around the Mouse Cursor on Windows6 minutes read
 How to Fix the Mouse Pointer Disappearing on Windows 105 minutes read
 How to Change the Color and Size of the Mouse Pointer on Windows3 minutes read
 Instructions to Change the Interface of the Mouse Cursor on4 minutes read
Reader Comments 0
Sign in with email or Google to join the discussion.