Fix wmpnetwk.exe high memory usage on Windows 7
Note: This issue will only occur on Windows 7, together with users who haven't turned off Windows Media Sharing.
What is Wmpnetwk.exe?
This is the internal system process disabled by default in older versions of Windows. This process connects the integrated media player to the external network. While the process shouldn't consume a lot of resources, some users have also reported a staggering 70% resource consumption coming from this service.
Unless you stream music or videos over the Internet using Windows Media Player, this service is actually not necessary. Disabling wmpnetwk.exe also will not affect the system in any way.
In any case, if you notice that your system is running slower and slower, press CTRL + Shift + ESC and select the Processes tab.
If you confirm that wmpnetwk.exe is the cause of the resource allocation problem, then it's time to take the real action. If you are not using Windows Media Center, then we recommend disabling wmpnetwk.exe. However, if you use Windows Media Player from time to time for streaming, it might make more sense to apply a more sophisticated fix, which allows you to continue streaming on Windows Media Player.
Prevent wmpnetwk.exe from automatically starting (on boot)
This fix basically involves stopping the service and changing the boot type to Manual. After reboot, you will change reboot to Automatic. This will prevent wmpnetwk.exe from running on its own. Instead, it will only be accessed when needed (when you stream something in Windows Media Player). Here's what you need to do:
Press Win + R and enter services.msc.

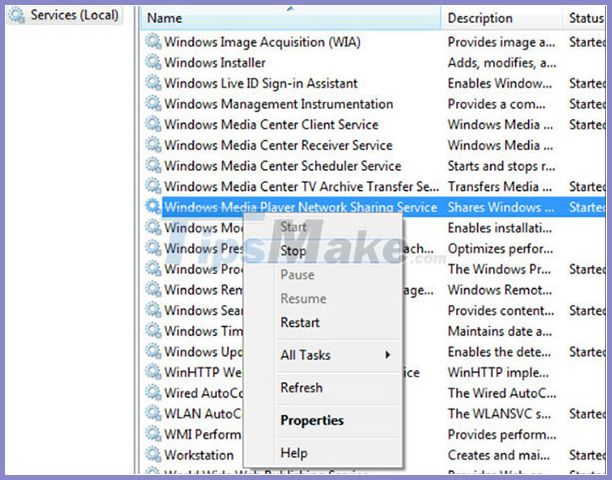
Now, scroll down and then search for Windows Media Player Network Sharing Service. When you find this option, right-click on it and hit Stop.
- It may take a while until the service stops. You will know that the progress is interrupted when the Stop entry is greyed out. When that happens, right-click on the service again and click Properties.
Once you are in the Properties window, click the General tab and access the drop-down menu near Startup type. Set it to Manual, then tap on Manual and reboot the system.
When the computer reboots, you must go back to the Properties window. Once you're there, select the General tab and then change the boot type from Manual to Automatic (not Automatic Delayed Start). Click Apply to confirm the selection.
The problem will now be really solved. Now, the wmpnetwk.exe process will also start only when Windows Media Player needs it.
Permanently turn off the wmpnetwk.exe service
If you do not use Window Media Player, then there is no reason you want the wmpnetwk.exe service to restart. In case you are doing a more drastic fix, then disabling wmpnetwk.exe indefinitely is really the best way. Let's see what you need to do:
Press Win + R, type services.msc and press Enter.
Now, scroll down and then you have to search for Windows Media Player Network Sharing Service. When you find it, right-click on it and hit Stop.
- When the Stop item is grayed out, right-click the service again and select Properties.
Click the General tab and access the drop-down menu near Startup type. Now, set it to Disabled and then click Apply.
Fix wmpnetwk.exe high memory usage
Note: You will need this service if you want to share media content or stream over the network through Windows Media Player.
First, click Start, type services.msc in Start Search and press Enter.
Now, you have to search for Windows Media Player Network Sharing Service from the list, right click on it and choose Stop.

It will take some time to stop the service. Then right-click on this service again and then select Properties.
Now, change the Startup type to Manual and then restart the computer.
When your computer reboots, go back to Properties again and change the Startup Type to Automatic.
Important Note: This issue only affects a small number of users, and is not something Microsoft is planning to address in an upcoming service pack. If you've never used Windows Media Player and are using a 3rd party player, such as VLC, you can always turn off this service to save system resources.