Table of Contents
Overview
This guide explains how to fix the Wi-Fi yellow exclamation mark in clear, practical terms. It covers the key concepts, recommended steps, common limitations, and useful checks so you can make a better-informed decision.
In the process of using computers and laptops, many of you have encountered the error of the Wi-Fi icon with a yellow exclamation mark and cannot access the Internet. If you find this article on Google's suggestions, you must be experiencing this situation and feel extremely uncomfortable, right? And you want to fix this error but do not know how to do it? So let's follow the ways to fix the Wi-Fi error with a yellow exclamation mark below from this guide below.
Reset network devices
No matter what network-related problem you are having, restarting network devices such as modems or Wi-Fi routers is the first thing that technicians advise you. And of course, if you encounter a yellow exclamation mark on your Wi-Fi, why don't you try restarting your network devices? The operation is straightforward, if your device has a power switch - turn it off. For modems and routers that do not have a power switch, unplug the device's power plug, wait 1-2 minutes, then plug it back in and check if the device can reconnect to Wi-Fi normally.

If you still cannot reconnect to the Wi-Fi network, we move on to the second method.
Reset IP
The main reason for the phenomenon of Wi-Fi with yellow exclamation mark is that the devices that provide and use the network have IP conflicts. Currently, most network devices used for individuals and households are assigned dynamic IP. Therefore, to reset the IP, you can perform the following operations:
First, open the RUN window using the Windows + R key combination > type cmd
Once the DOS window appears, type the command 'ipconfig /release' and press Enter to release the IP addresses for all connected network adapters.
After the IP release process is complete, continue typing the command 'ipconfig/renew' and press Enter to assign a new IP address to the computer.
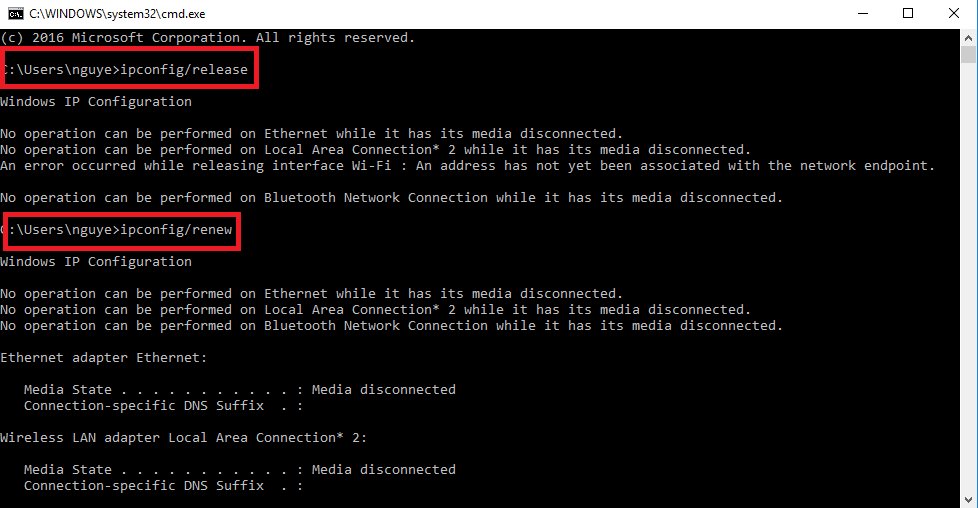
After the renew command is executed, the computer will assign a new IP address to your laptop. Now try to connect to the network again to see if you can access the Internet.
Using the Troubleshoot Problems feature
Troubleshoot Problems is a feature built into Windows that helps diagnose and automatically fix errors in the Windows operating system quickly, including sound, network, and many other errors. This is also a simple way for those who are less tech-savvy or lazy to perform complicated operations.
The operation is straightforward, you just need to right-click on the Wi-Fi icon with the yellow exclamation mark and select Troubleshoot Problems. Windows will automatically analyze the error and fix it for you.
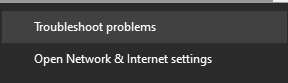
Additionally, you can also open the Troubleshoot Problems feature to fix other network problems in the following way:
- Open Settings.
- Select Update & security.
- Select Troubleshoot.
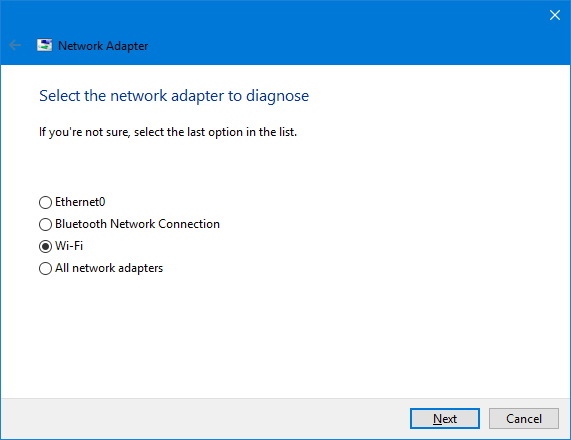
- Select Network Adapter, and click Run the troubleshooter.
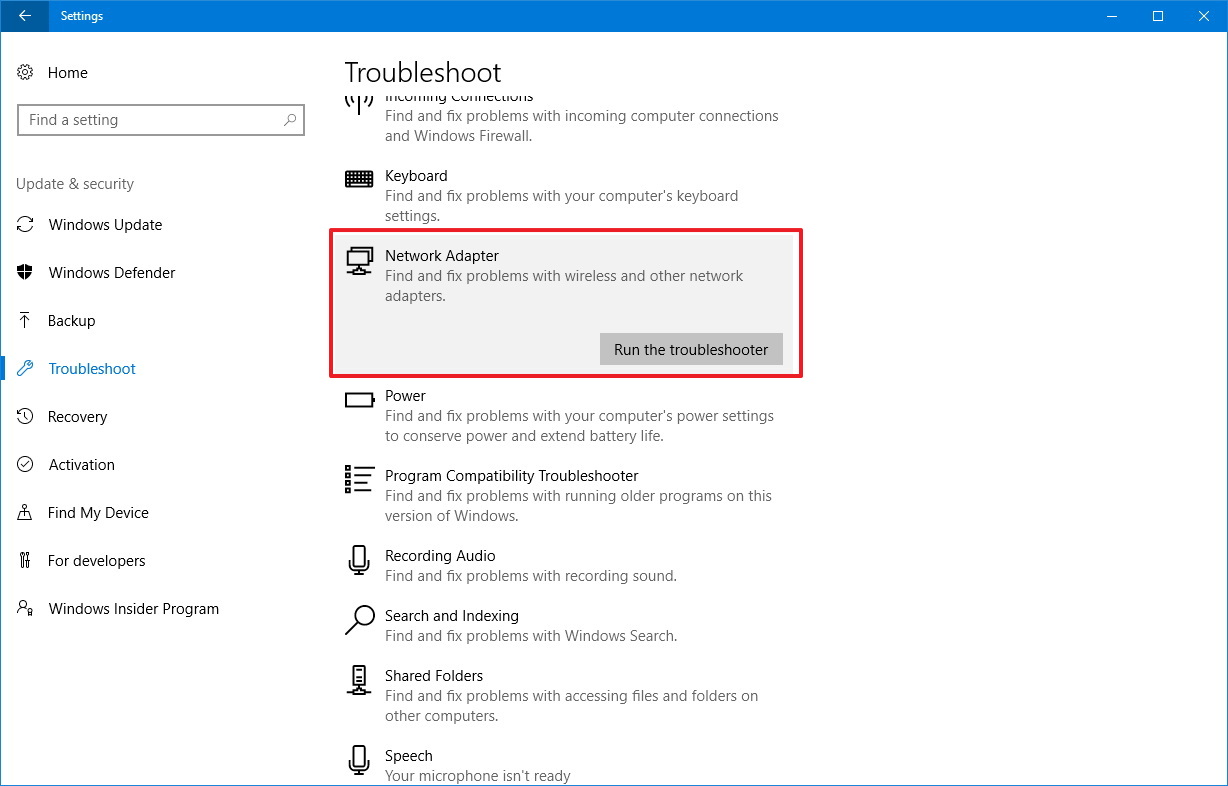
- Select the network connection you want to repair and press Next to begin.
Reinstall Wi-Fi card driver
In addition to the IP conflict problem, when the Wi-Fi card driver is faulty, your Wi-Fi icon will also be warned with a yellow exclamation mark. After performing the above methods but it is not effective, you can install, update the Wi-Fi driver and reconnect to see if it is fixed.
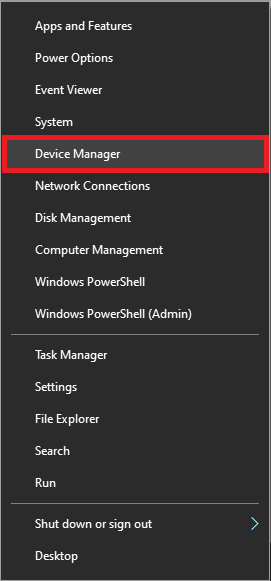
For Windows 10, right-click on the Windows icon and select Device Manager.
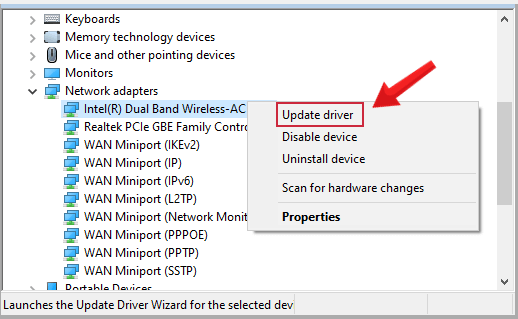
The Device Manager window appears on the screen. Here you find the option named Network adapters and expand Network adapters by clicking on the down arrow. Right-click on the adapter you are using, select the Update driver option.
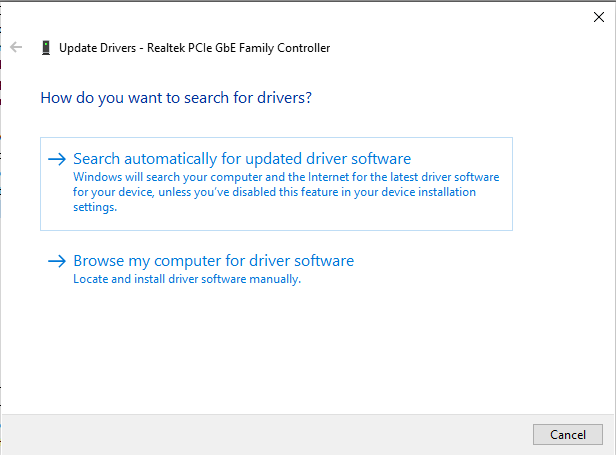
Next, select Search automatically for updated driver software and wait for the update process to complete.
Once the process is finished, close the Device manager window and restart your PC.
Above are ways to fix the yellow exclamation mark Wi-Fi error that many people often encounter. This guide wishes you success in overcoming the error. Don't forget to share this useful information with your friends.
Key Takeaways
Use the guidance above as a practical reference for fix Wi-Fi error with yellow exclamation mark. Check compatibility, follow the steps carefully, and verify important details with official documentation when software, security, accounts, health, or purchases are involved.
FAQ
How do I fix the Wi-Fi yellow exclamation mark?
Follow the steps in this guide in order, confirm each setting before continuing, and save, restart, or reconnect the device when the instructions require it.
What should I check before I begin?
Confirm the correct device, account access, software version, compatibility, and a current backup whenever the process could affect files, settings, or security.
What should I do if the process does not work?
Repeat the steps carefully, check for model or version differences, install available updates, and consult the manufacturer's official support documentation.
Related Articles
 Instructions for Fixing Wifi Error with Yellow Exclamation6 minutes read
 Instructions for Fixing Wi-Fi Errors with Yellow Exclamation5 minutes read
 The Network Was Blocked by a Yellow Exclamation Mark9 minutes read
 How to Fix Wi: Fi with Red Cross and Exclamation Mark Not Connecting to8 minutes read
 How to Fix the Yellow Exclamation Mark on Drive D6 minutes read
 How to Fix the Yellow Exclamation Mark Error on a Computer Network4 minutes read
Reader Comments 0
Sign in with email or Google to join the discussion.