Learn about 4K VideoProc video editing tool
Adding 4K video recording on smartphones means you can shoot high-quality video without spending money on expensive cameras. 4K footage is beautiful, but it consumes too much storage space. In addition, the lack of a simple video editor is the reason many people continue to shoot at 1080p quality.
VideoProc is a feature-rich video processing software, but its use is quite simple, which can help you convert, process and edit 4K videos. VideoProc allows you to digitize DVDs into any video format, even recording videos from the screen or webcam. Let's review VideoProc with TipsMake.com and the features it offers to make 4K video editing simple and effective via the following article!
VideoProc - The easiest 4K editing tool with GPU acceleration
- What makes VideoProc unique?
- 4K video editing with VideoProc
- Cut and crop
- Split and merge videos
- Anti-shake and noise reduction
- Convert videos with VideoProc
- Convert DVD with VideoProc
- Why should VideoProc be used?
- Price
- User experience
- Support codec
- Optimized file size and quality
What makes VideoProc unique?
Video editing includes a lot of pixel processing stages that need to be applied for adjustment, editing, compression, etc. In 4K, every editing application must calculate each data frame at high resolution. This increases the time it takes to dump files and load on the CPU, making RAM less usable for other applications.
VideoProc uses Hardware Acceleration Level 3 to handle the size and quality of 4K video. Using the power of GPU, VideoProc can handle 4K video faster and more efficiently. This tool also helps reduce CPU load and prevents any damage to other components when overheating.
You can continue to work when the processing takes place in the background. VideoProc has specific settings for GoPro camera to improve the quality of video footage. VideoProc also works on computers with the following minimum specifications:
- Operating system: Windows 7 or macOS 10.6 or higher.
- Intel CPU: Intel Core Sandy Bridge 2nd generation. HEVC transcoding feature requires 6th generation Intel Core Skylake.
- Nvidia: GeForce GT 630 based on Kepler and above. HEVC transcoding feature requires Maxwell GeForce GTX 960/950.
- AMD: Radeon HD 7700 series. HEVC transcoding feature requires HD 7790 or higher.
4K video editing with VideoProc
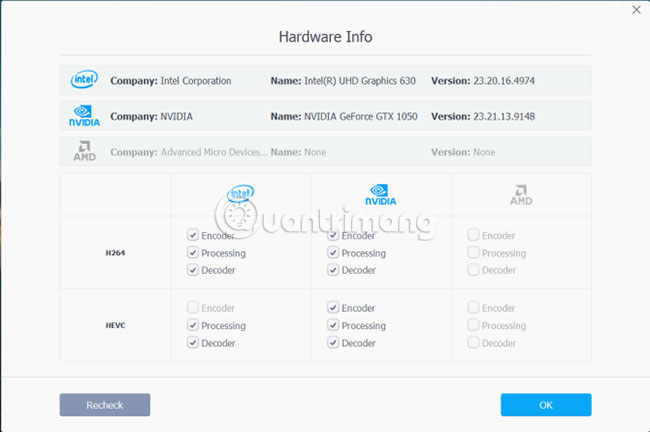
When you install the application, VideoProc will scan the system to check the support of hardware acceleration and GPU benchmarking. VideoProc will set up the profile of GPU components installed in the PC, check the encoding and encoding capabilities (responsible for providing video decoding and encoding based on fully accelerated hardware) .
To check your hardware, click the Options button near Hardware Acceleration Engine .
Cut and crop
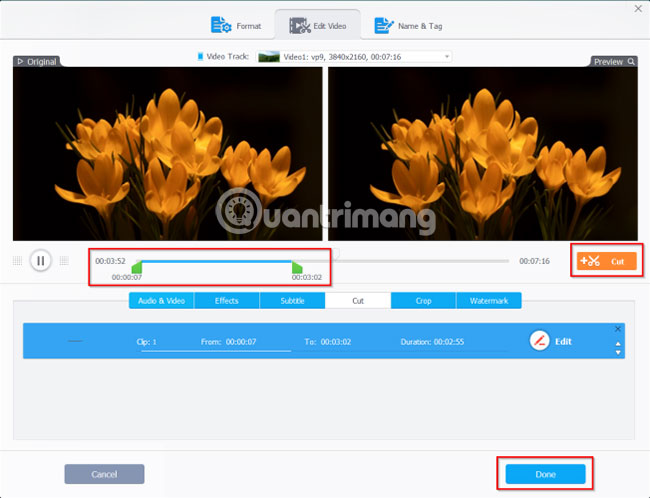
Click + Video to add one or more video files. Then, on Edit Toolbar, click Cut.

Drag the green knob on one or both ends to set the start and end time. Click the orange Cut button on the right, then select the Edit button to refine the time position. Select Done when you're happy.
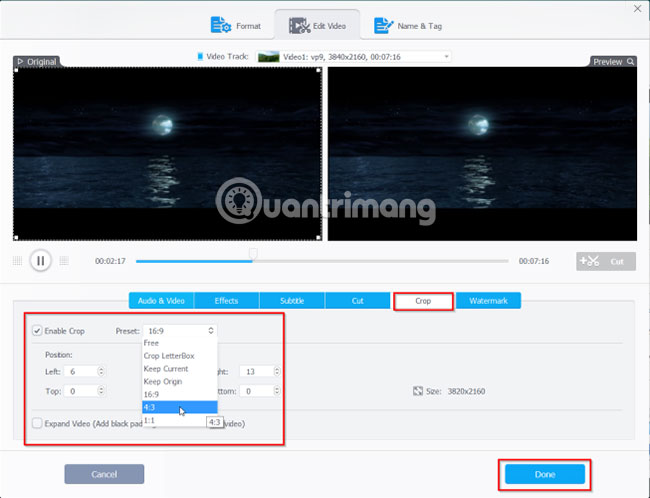
To crop videos, check the Enable crop option . Drag the dotted lines to select a new area and remove unwanted areas in the video frame. For help, select the Preset button and select an option from the drop-down menu to set the aspect ratio. Click Done to save changes.
Split and merge videos
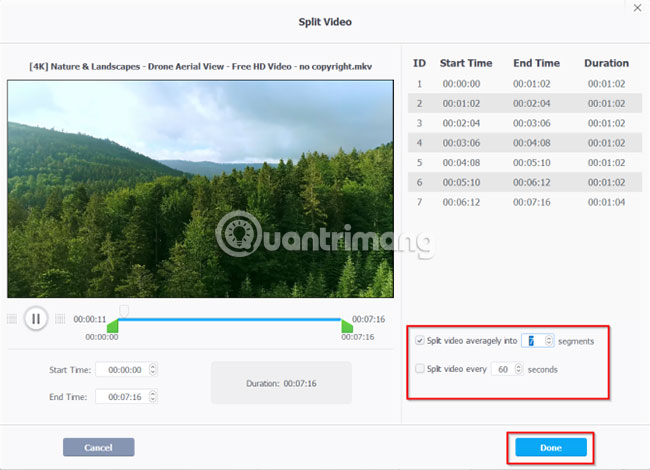
Click on Toolbox at the bottom and double-click the Split button to open the control panel.
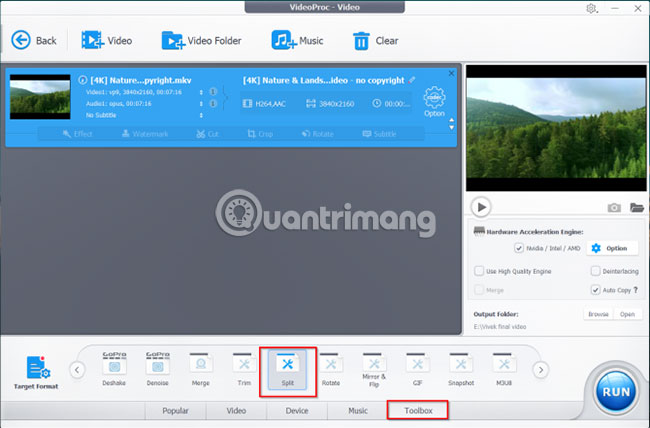
By default, VideoProc will split the video into 10 segments. If necessary, change the quantity and time for each segment, then click Done to save the changes.
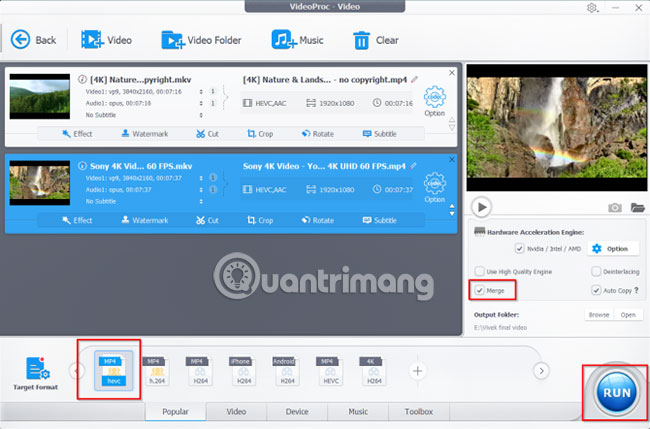
To merge videos, load all video files from the computer. Select the output format, then tick the Merge option on the main user interface. Click Run to merge all video clips into one file.
Anti-shake and noise reduction
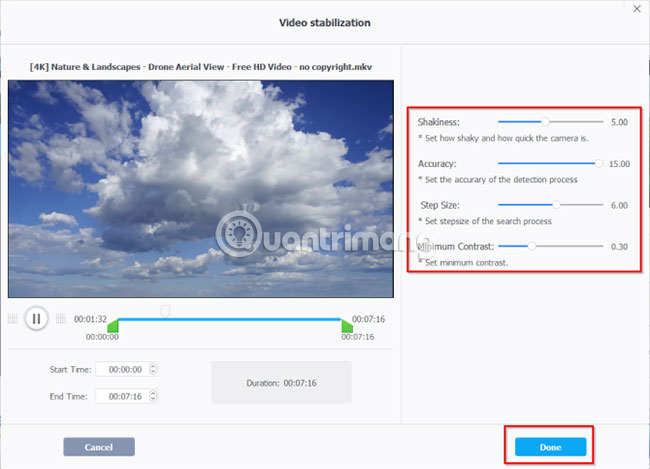
Most of the time, when using GoPro, you will record motion videos (such as sports-related videos). These videos are more likely to be jerky and shaking. But with VideoProc, you can eliminate shaking in GoPro 4K videos and similar content.
Click on the Toolbox tab and double-click the Deshake button to launch anti-shake control features when recording a video. Move the sliders to adjust vibration, accuracy, step size and minimum contrast.
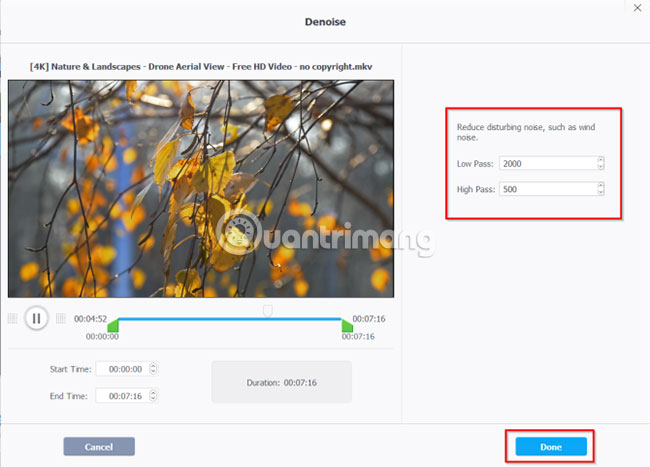
Similarly, the Denoise option allows you to remove unwanted things like wind noise to optimize audio. Click on the Toolbox tab and double-click the Denoise button to access the control features. Move the green cursor from both sides to cut the segment. Refine values in Low Pass and High Pass to reduce noise.
Convert videos with VideoProc
To start converting, import video files from PC. Then click the Video tab at the bottom of the interface. Near the Target Format option , you will see many video formats. Choose a desired output format.
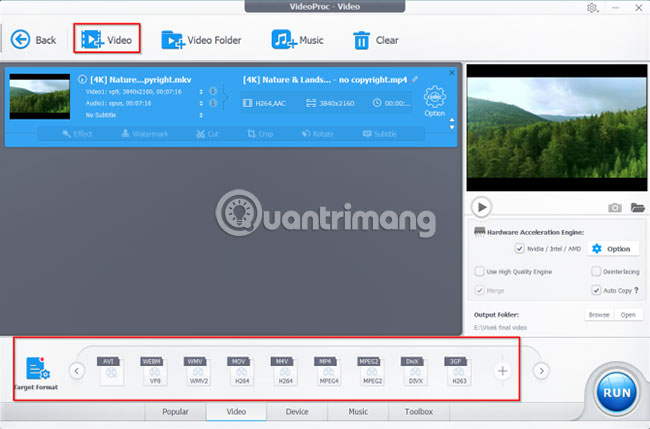
If the format you need does not appear here, click the Plus button at the bottom to launch a new profile window. Here you can customize a profile with the following options:
- General Profile: Convert video to MPEG4, H.264, HEVC, WebM, etc. In all formats, you have the option to choose quality from low to high.
- Web Video Profile : Make videos compatible with YouTube, Vimeo, Facebook and other video sharing sites.
- DVD Profile : Change the format to NTSC / PAL VOB to burn DVD later.
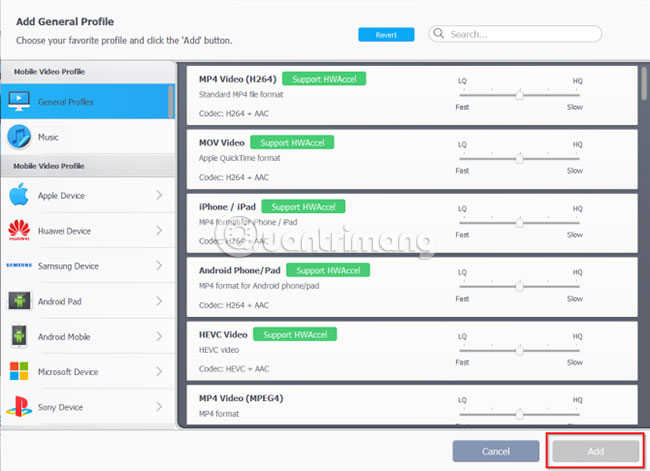
When you add a profile, click the Browse button to set a new destination message. Then select Run to start transcoding. Conversion (including DVD conversion) in VideoProc is hardware accelerated, so it can take advantage of computer graphics cards.
Convert DVD with VideoProc
VideoProc also makes it easy to convert DVD, even for discs with advanced protection features. Use VideoProc to convert DVDs of favorite TV series or rehearsed DVDs.
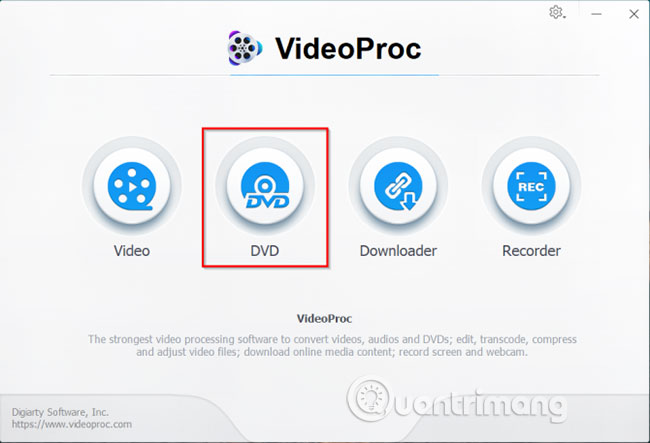
To start the conversion process, insert the DVD into the computer optical drive. Launch VideoProc and click DVD on the main interface.
Click the DVD Disc button and a window will appear asking you to select the source DVD. The DVD converter will automatically review the title and the exact order. Select or deselect the title when needed.
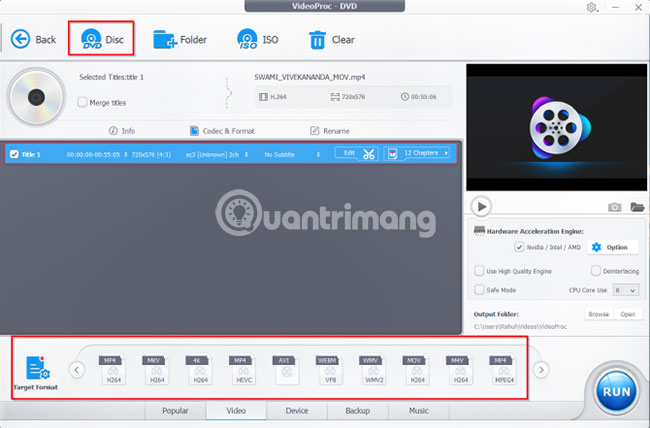
Then click the Video tab to select the preferred output format. If you don't see any format, click the Plus button in the Target Format option to launch the Profile window as discussed above. Now select the output folder and click Run.
Why should VideoProc be used?
Video production technology Ultra HD 4K really remarkable. As video technology continues to improve, there are several factors to consider. The tool you use to handle 4K video is an essential element, because it can make or break your video production and demand.
Here are some reasons VideoProc is a great choice for 4K video editor:
Price
Adobe Premiere Pro CC and Final Cut Pro X are powerful tools that meet the needs of professionals, but are very expensive. If you are new to video editing or creating videos as sub-projects, a simple and easy-to-use video editor is a better choice.
VideoProc offers an official 4K video editor for only $ 30 (VND 690,000) per year or buy a lifetime license for $ 43 (about VND 1,000,000 for a PC or a Mac). You will receive regular updates and technical support.
User experience
VideoProc has a neat and minimalist user interface. By using subdued tones and the ability to clearly distinguish between menu items, you can start without much effort. Just change the output directory and explore the options.
Unfortunately, there is no option to customize the interface color or type and font size. Some menu items are also quite difficult to discover. Some of these options only become apparent after editing a few videos. However, once you get used to the interface, this job will become much simpler.
Support codec
VideoProc offers more than a dozen export formats available. VideoProc's built-in presets make video editing simpler for people who don't have a lot of technical knowledge. The trick is to choose a codec that reduces the file size without affecting the quality.
You will find all kinds of formats including MP4, MKV, AVI, WebM, etc. Video codecs include H.264, HEVC and VP8. Audio encoding options include MP3, AAC, PCM, FLAC and OGG.
Optimized file size and quality
When limited testing with 1080p video (H.264 codec and MP4 file format) and 11GB file size, VideoProc was able to compress to 2.78GB without loss of quality. With 4K video (VP9 codec and MKV file format) with the size of 694MB, it can be compressed to 274 MB.
This experiment has been repeated with many other 4K videos. File size is significantly reduced in all cases and the quality remains the same.
4K video processing is an intensive and time-consuming process. Video editors will be able to play content and edit it seamlessly. If you're just getting started and looking for a simple 4K video editor, VideoProc will be the best choice.
VideoProc streamlines video processing with intuitive integration tools, utilizing GPU acceleration to convert faster and protect critical PC components. You can download a free trial to see if VideoProc is right for you. If you like this tool, buy a license and you can freely edit the video at any time.
Hope you are succesful.