Instructions on how to scan on Windows and Mac computers from A to Z
HACOM will guide you on how to scan on a computer in the most detailed and simple way to turn data on documents into soft files saved on the computer.
Table of Contents
Scanning is the process of transferring data on paper to soft files on a computer or phone with the help of a specialized scanner (or sometimes an application on the phone). In this article, TipsMake will guide you on how to scan on a computer in the most detailed and simple way.
Scan on computer running Windows operating system
Below are instructions on how to scan on a Windows computer, please see:
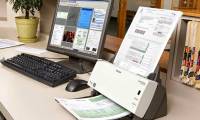
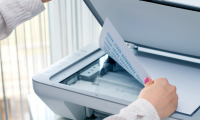
B1. Place the document face down on the glass surface of your scanner and make sure the scanner is turned on and connected to your computer.

B2. Open Start or Click the Windows icon in the bottom left corner of the screen.
B3. Type fax and scan to search

B4. Click Windows Fax and Scan at the top,
B5. Click New Scan . This option is located in the upper left of the Fax and Scan window. A new window will open.

B6. Make sure the machine you're connecting to is the correct scanner. If you don't see your scanner name at the top of the window or the wrong scanner is listed, click change. in the upper right of the window, then select your scanner name.

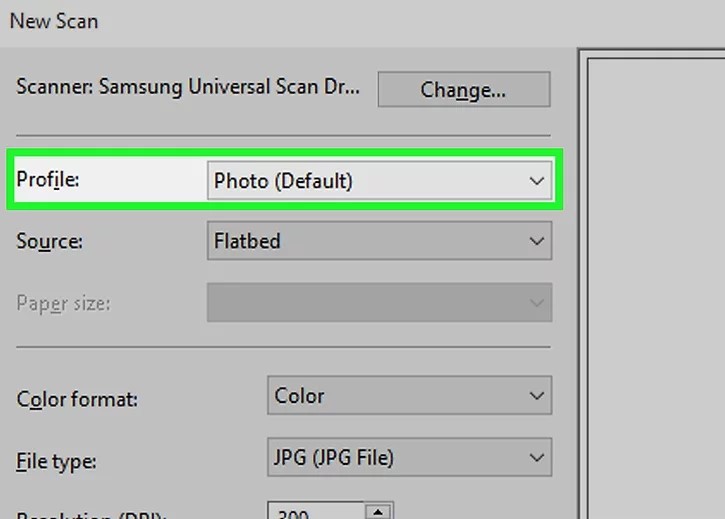
B7. Select document. Click the "Profile" drop-down box, then select the document type (e.g. Photo) in the drop-down box.
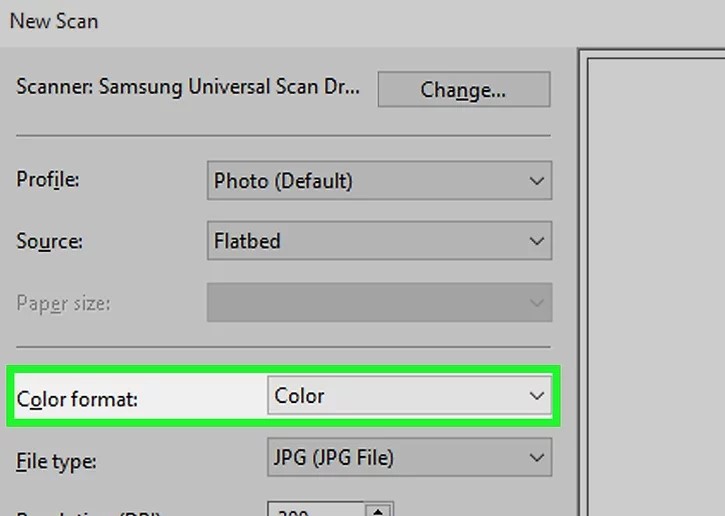
B8. Choose a color for your document. Click the " Color format " drop-down box, then choose black, white or any color you like.
B9. Select a file type. Click the " File type " drop-down box, then click the file type (e.g. PDF or JPG) that you want to use to store the scanned document on your computer.
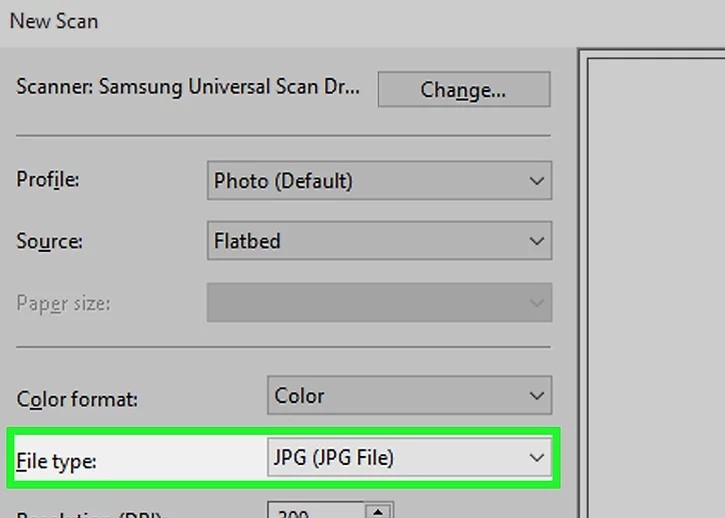
Note: When scanning any document other than a photo, it's best to choose PDF as the file format.
B10. Change any other options on the page. Depending on your scanner, you may have other options (e.g. " Resolution ") that you can modify before scanning your document.

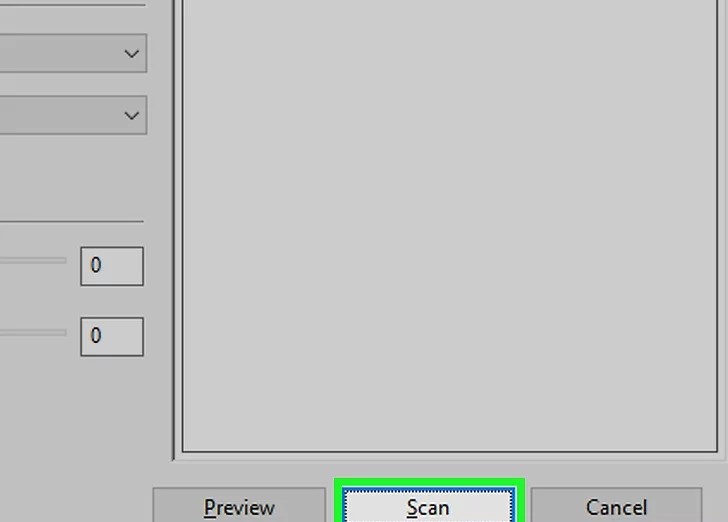
B11. Click Preview at the bottom of the window, which will now show you a preliminary scan so you know what your scanned document will look like.
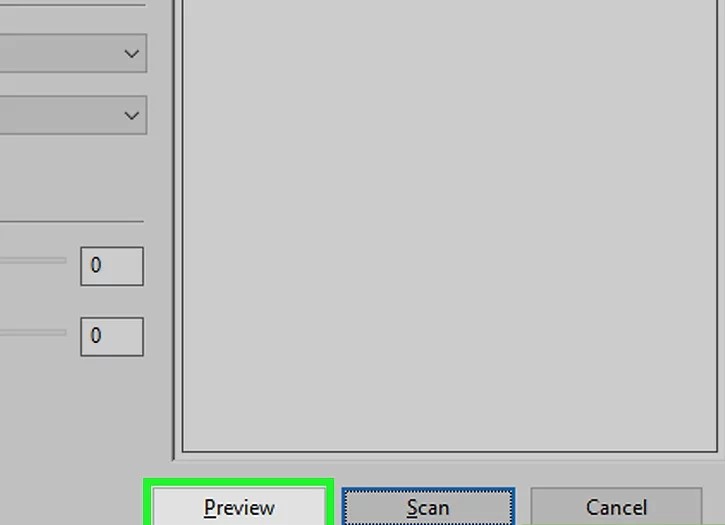
If your document appears to be crooked, uneven, or creased, you can readjust the document in your scanner and then click Preview again to see if your adjustments fix the problem.
B12. Click Scan at the bottom of the window. Your document will begin scanning on your computer.
To find scanned documents, do the following:
- Open Windows icon
- Open File Explorer
- Click Document on the left side of the window.
- Double-click the Scanned Documents folder.
Scan on computer running MAC OS
B1. Place your document face down in your scanner. You will also want to make sure your scanner is turned on and connected to your computer before continuing.
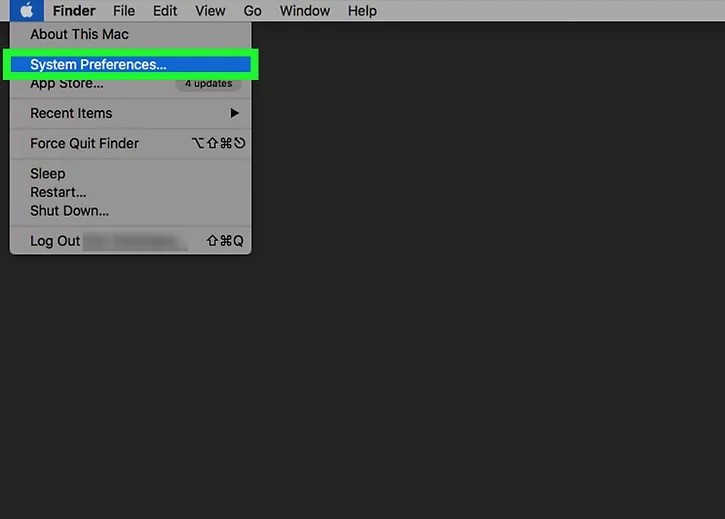
B2. Open the Apple menu . Click the Apple icon in the upper left corner of the screen and a drop-down menu will appear.

B3. Click System Preferences at the top of the drop-down menu.
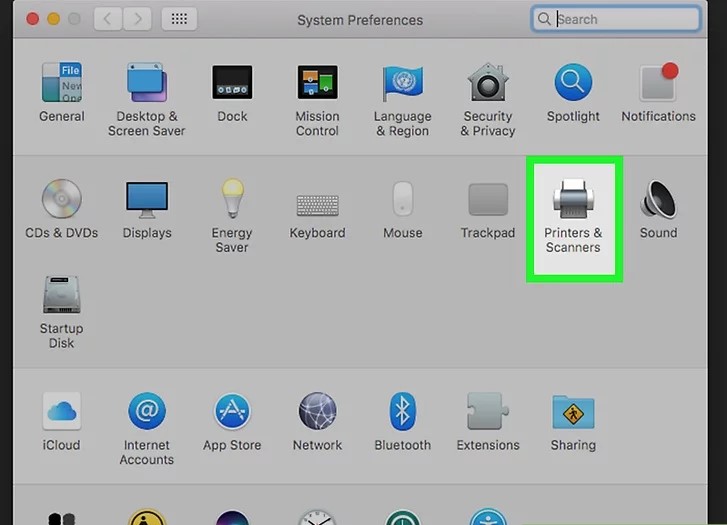
B4. Click on Printers & Scanners this printer icon is located on the right side of the System Preferences window.
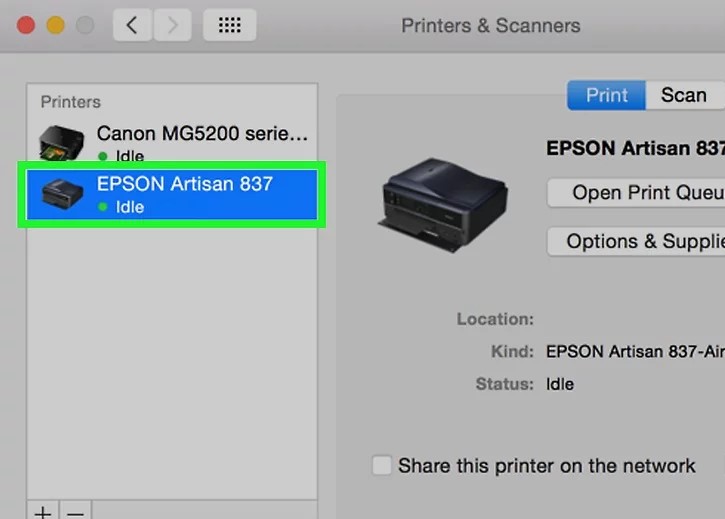
B5. Select your scanner. Click on your scanner name in the left column.
B6. Click the Scan tab at the top of the window . Click show detail at the bottom right of the window.

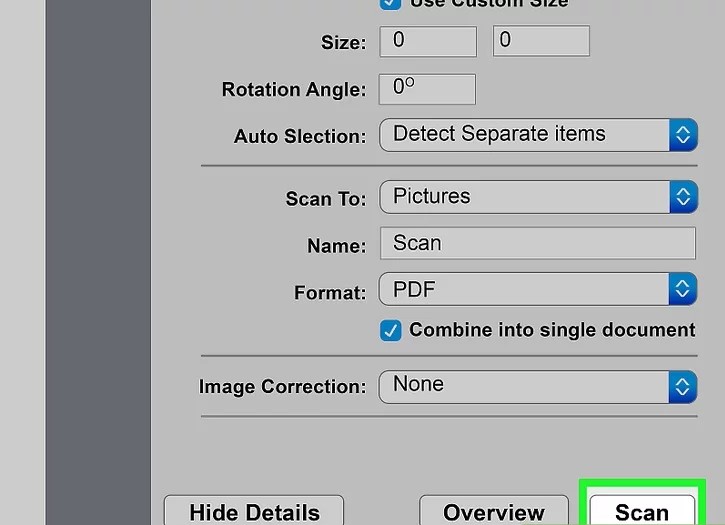
B7. Choose a file type: Click the "format" drop-down box, then select the file type (e.g. PDF or JPEG ) you want to use to save your file.
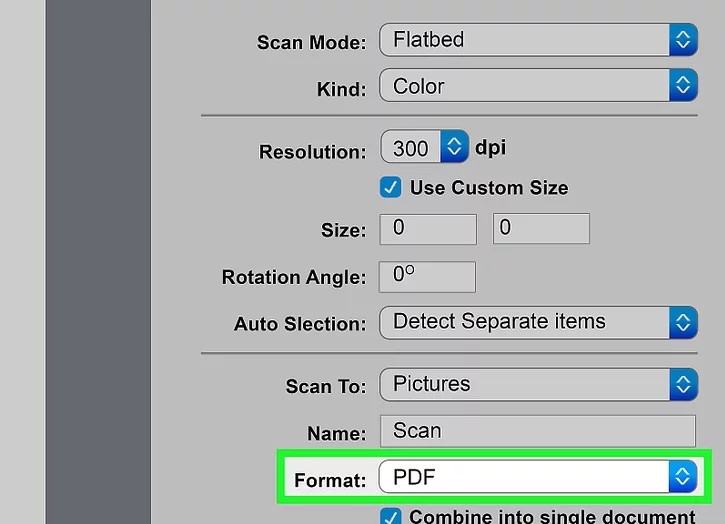
Note: When scanning anything other than a photo, it's best to choose PDF .
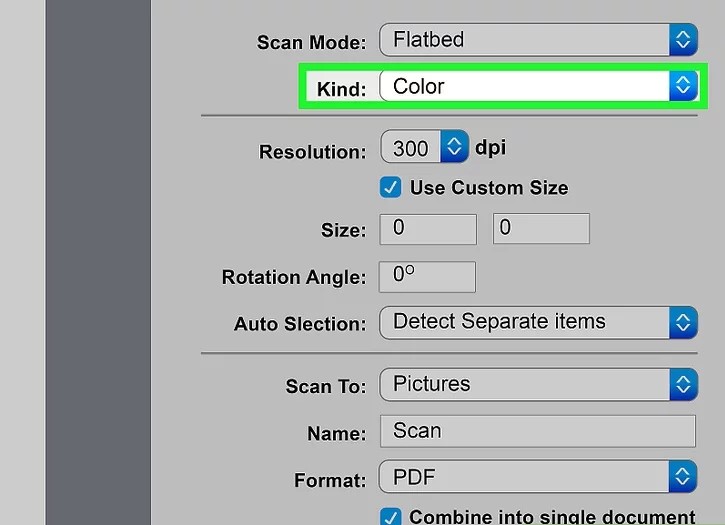
B8. To choose a color, click the "Kind" drop-down box at the top of the page, then select a color option (e.g. Black and White ).
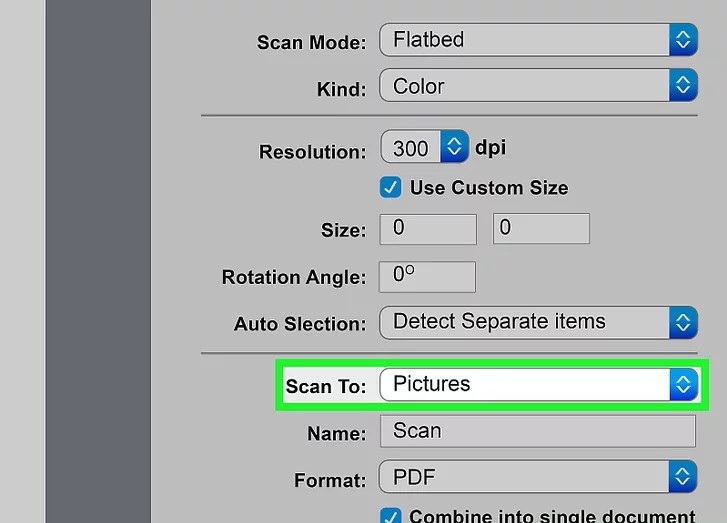
B9. Select a save location. Click the 'Save to' drop-down box, then click the folder where you want to save your scanned document (e.g. desktop).
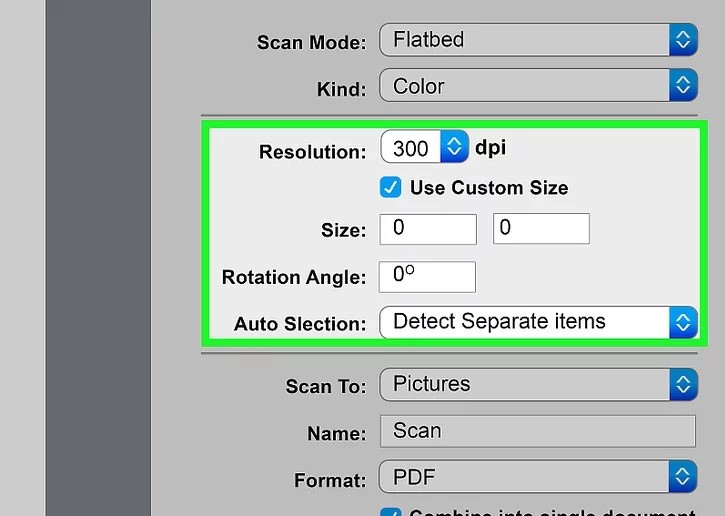
B10. Change other options on the page. Depending on the type of file you are scanning, you may want to change the "Resolution" value or the "Orientation" value here.
B11. Click the Scan button in the lower right corner of the window, and the document will be scanned immediately.
TipsMake has given detailed and specific instructions on how to scan on both Windows and MAC OS computers. Hopefully the information will be useful to you. In addition, you can refer to some of TipsMake's best-selling scanners below:
[Products:17503,28648,28854,46054]
[Products:41049,45299,40776,53359]
Was this article helpful?
Your feedback helps us improve.
Related Articles
 Instructions on how to scan QR codes on Windows 10 computers3 minutes read
 How to use Windows Defender to scan programs that do not want PUP?4 minutes read
 How to scan documents in Windows5 minutes read
 3 ways to scan Windows 10 system-wide viruses with Microsoft Defender3 minutes read
 Instructions on using PowerShell to scan for viruses on Windows2 minutes read
 Instructions for scanning documents with 3 simple steps4 minutes read
Reader Comments 0
Sign in with email or Google to join the discussion.