Instructions for connecting two monitors on the MacBook
On the MacBook there is a feature that connects Macs together, then can use 2 monitors on the same machine. In case users need to work on two different Macs, this feature will definitely help us a lot, increasing productivity and efficiency of the job.
However, before installing a monitor for the MacBook, check to see if you are using the right type of cable. Check information about the machine in MacTracker. For MacBook or MacBook Pro models produced after 2015, use a USB-C cap (Thunderbolt 3) to be compatible with VGA, DVI and HDMI monitors. In addition, we should choose the type of connection screen, so use an HDMI or DVI monitor.
In case of MacBook or MacBook Pro after 2015, use Thunderbolt cable 1, 2 or Mini DisplayPort.
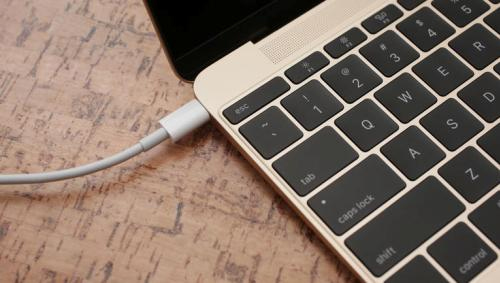
Once you've prepared the cap, follow the steps below.
Step 1:
First of all, we click on System Preferences> Displays .

In case the Mac does not receive the secondary monitor, please check the end of the connection between the two devices. If this is not possible, select the signal feed on the 2nd monitor in the Source section and adjust when there is a signal, similar to the input signal selected on the TV.
Or press and hold the Options button and select Gather Windows to let the Mac receive the secondary screen. We will then see two information panels displayed on the screen, one of the first Mac and one of the secondary monitor as shown below.

If neither table appears, the other panel will appear in the secondary screen. We click Gather Windows to switch the two displays on the current screen.
Step 2:
In the Display tab, users proceed to adjust the resolution for the screen. Should choose the sizes at the top of the list to have the best display quality.
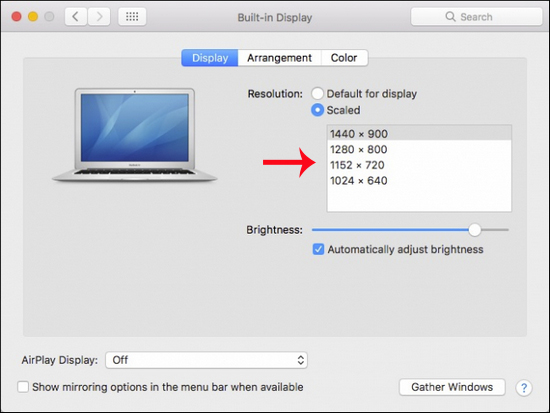
Step 3:
Click on the Arrangement tab to adjust the position of the 2 screens that appear on the device, to help determine the correct path of the mouse pointer between the two screens.
When the second screen is on the left but appears in the settings on the right, the sides of the screen will not be connected. You must hover your mouse to the right of the machine to go to the second screen to perform the task. Therefore, drag and drop operation to determine the position of the 2 screens need to be accurate. If the larger icon is the secondary screen.
To adjust the position of the menu bar on the device, drag the white dash into 1 of the 2 screen icons.
Next to the Mirror displays option below, when we select, the two screens will display the same content.
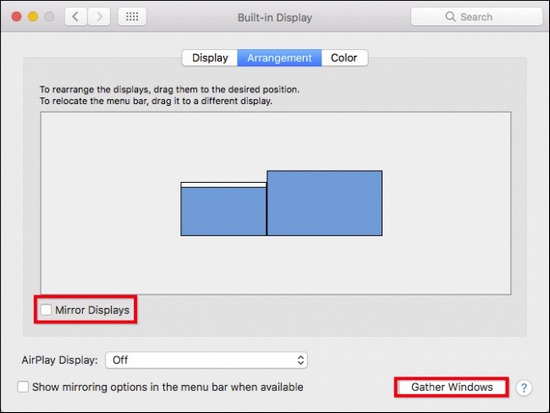
We choose the resolution for 2 screens, or let the system automatically adjust. This feature will be suitable for meetings or presentations, etc. When completed, you can also switch to 2-screen mode.
Step 4:
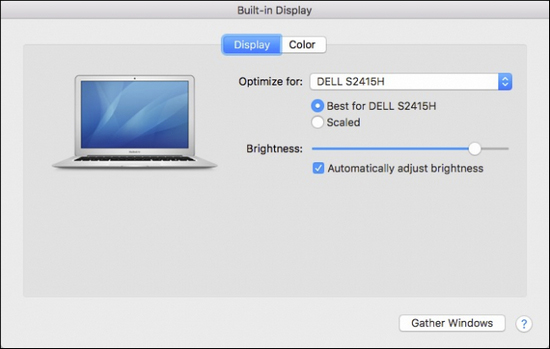
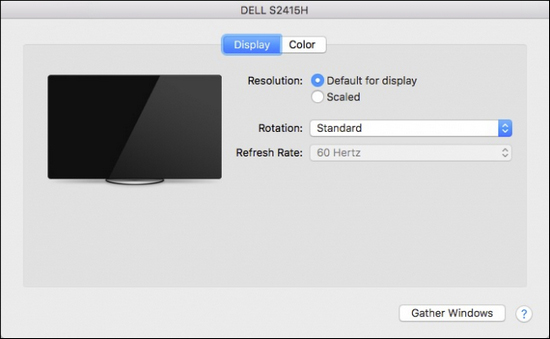
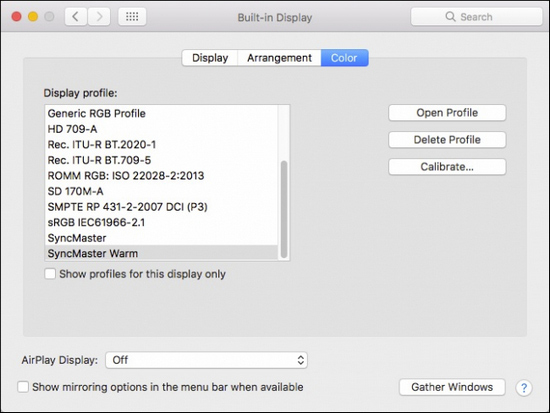
With the secondary screen, we will see the Display and Color tabs.
Display tab, we will only be able to perform screen rotation, without adjusting the brightness and also without the AirPlay option.
Color tab to change the parameters so that the colors on the screen look more real.
So you have finished setting up the secondary screen mode for Macbook already. As long as we select the right monitor and then the operating system will proceed to install the two monitors. Users will only need to adjust one of the other numbers to match the requirements of the job only.
Refer to the following articles:
- Useful tips for macOS 10.12 Sierra
- Share files and folders between Mac OS X and Windows 7
- How to use Image Capture on Mac to manage photos on iPhone / iPad
I wish you all success!