Table of Contents
This practical guide walks through how to turn on noise cancellation of airpods pro headphones, explains the main requirements, and highlights common issues that may appear along the way.
The noise cancellation feature on the AirPods Pro headphones is greatly appreciated thanks to specialized algorithms and useful designs. However, the default noise canceling feature will be off and forced to activate it manually on the phone or via the touchpad.
1. How to turn on AirPods Pro headphones noise cancellation on iPhone, iPad .
For Apple mobile devices, you will be able to enable noise cancellation through a simple setup.
Step 1: You pair your AirPods Pro with your iPhone and iPad devices.
Step 2: After successful pairing, at the lock screen you will see an Expand icon below the column and Pin. You proceed to drag the Expand icon down to see the content inside.
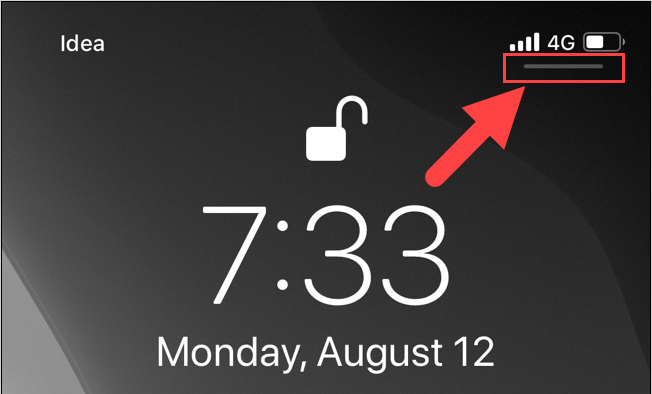
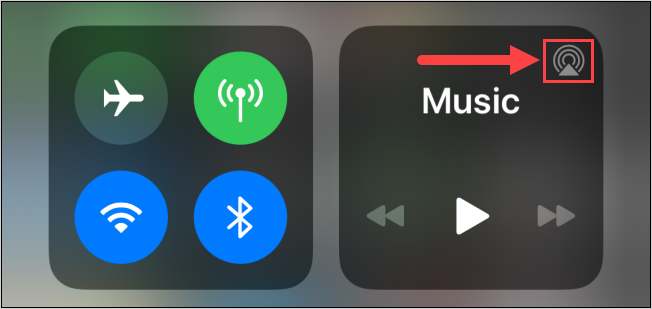
Step 3: Next, you select the AirPlay icon to open the devices that are being paired.
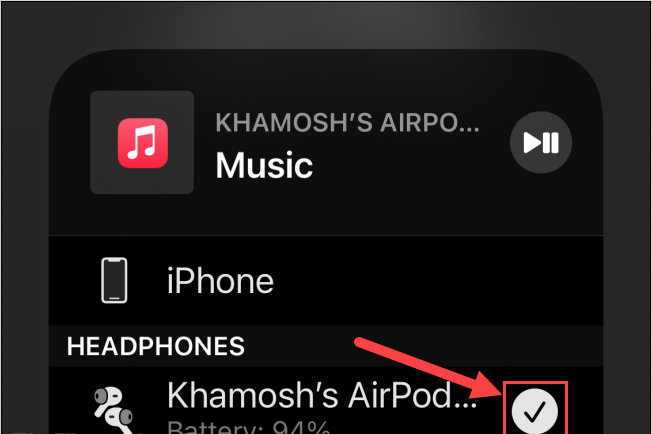
Step 4: When the window of paired devices appears, can you check to see if the AirPods Pro has been successfully paired?
Step 5: When the device is successfully paired, open the Control Center by swiping up from the bottom.
Now, press and hold on the AirPods Pro icon.
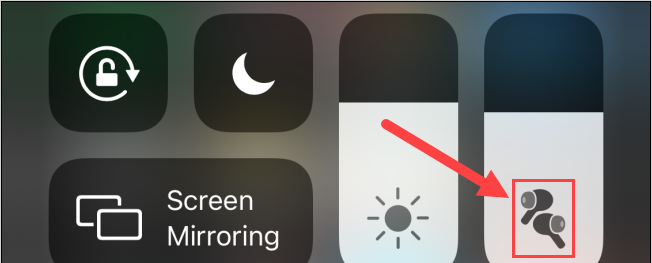
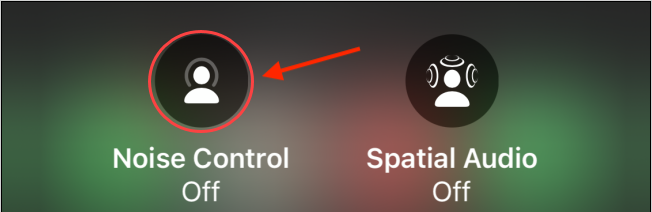
Step 6: The features of the AirPods Pro will appear, you just need to select the Noise Control item to turn them on.
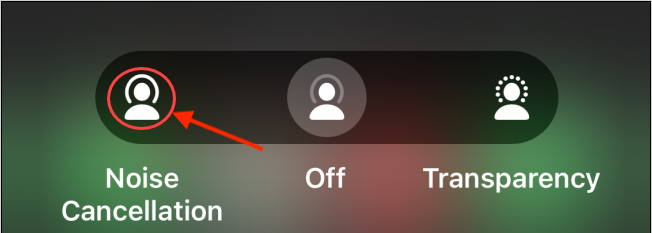
Step 7: Finally, you choose the noise cancellation mode and we prioritize using Noise Cancellation.
2. How to enable direct noise cancellation on the AirPods Pro headphones
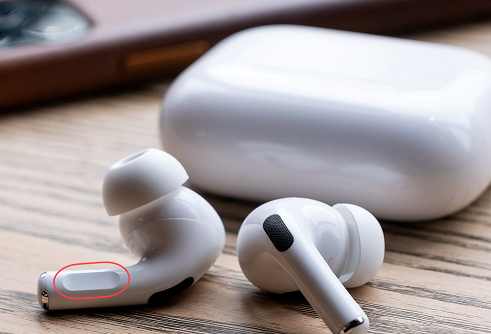
On the AirPods Pro headphones, we have touch keys to change modes quickly, and here's how to enable noise cancellation directly on the headset.
Step 1: You pair your AirPods Pro with your iPhone and iPad devices.
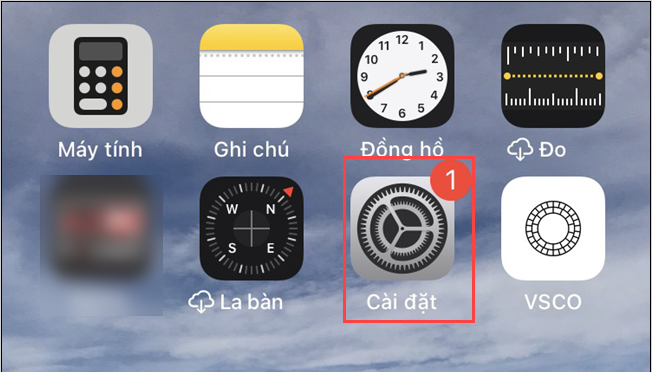
Step 2: Then, open Settings on your iPhone, iPad.
Step 3: Next, you select Bluetooth to open the list of paired devices.
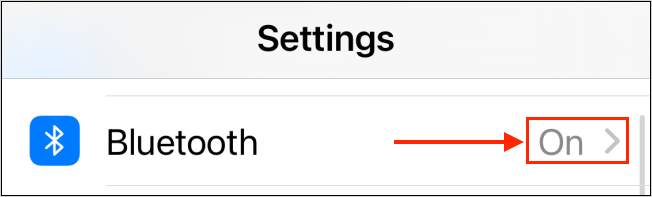
Step 4: To open the settings of the AirPods Pro headset, click the i icon.
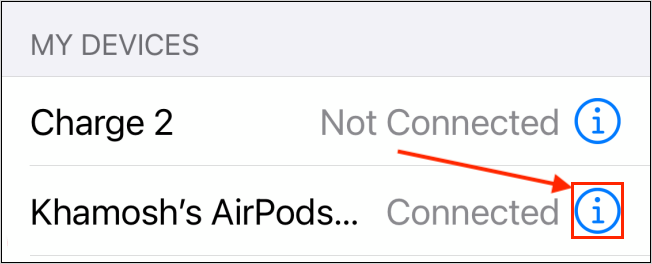
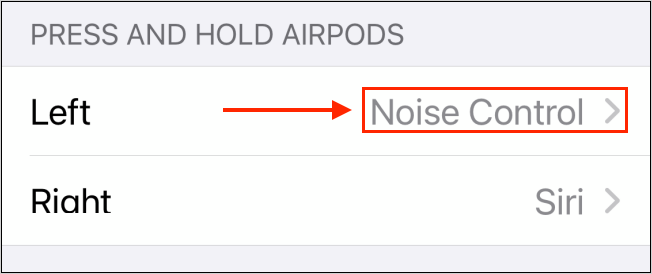
Step 5: In the setting up features for touch keys (Press and hold Airpods), you proceed to select a headset with Noise Control to set up.
Step 6: In the Noise Control section, just uncheck the Transparency item to complete. This means that when you press the touch button on the headset, the system will only switch back and forth to hold two modes: Off and Noise Cancellation (noise cancellation).
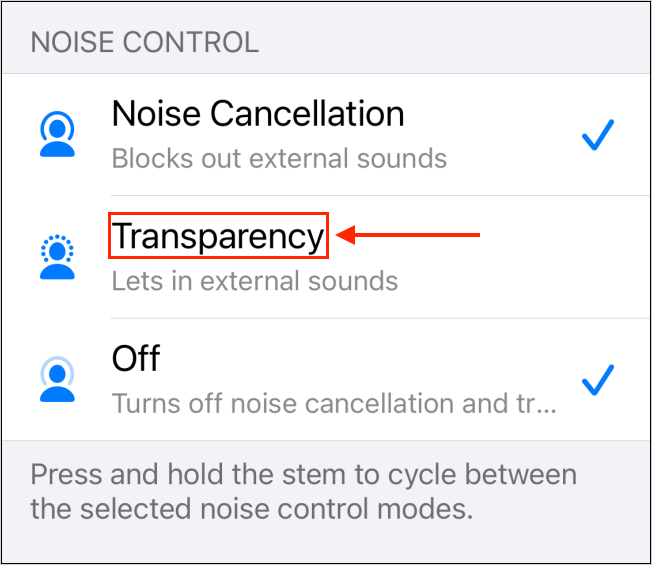
Thus, to turn on and off the noise canceling feature, you just need to press the touch button on the AirPods Pro.
In this article, TipsMake instructed you how to turn on the noise canceling feature on AirPods Pro headphones quickly. Have a nice day!
Key Takeaways
Use the information above as a practical reference for how to turn on noise cancellation of airpods pro headphones. Review each step carefully, confirm any requirements, and choose the option that best fits your situation.
FAQ
What does this guide explain about Turn on Noise Cancellation of Airpods Pro Headphones?
It explains the main concepts, practical considerations, and useful steps related to turn on noise cancellation of airpods pro headphones without requiring advanced knowledge.
Who can benefit from learning about Turn on Noise Cancellation of Airpods Pro Headphones?
This information is useful for readers who want a clear overview, practical guidance, and reliable steps related to turn on noise cancellation of airpods pro headphones.
What should I check before applying this information?
Review the requirements, confirm that your device, software, or situation matches the instructions, and back up important data before making major changes.
Related Articles
 How to Turn on Active Noise Cancellation on Airpod Pros5 minutes read
 Detailed Comparison of Airpods Pro 3 vs Airpods Pro 2: Should You: Key Facts6 minutes read
 Tips for Making the Most of Your Airpods Max Headset8 minutes read
 How to Use Active Noise Cancellation Properly7 minutes read
 What Is Active Noise Cancellation (ANC) Technology?9 minutes read
 The Most Valuable Feature on Airpods Pro Is Having Problems After4 minutes read
Reader Comments 0
Sign in with email or Google to join the discussion.