Table of Contents
Quick Overview
Noise : Get a clear, practical overview of Noise, including Why Does The Image Have A Lot Of Noise and How to Remove Noise in Photoshop in Just One Minute.
What is Noise in Photoshop?
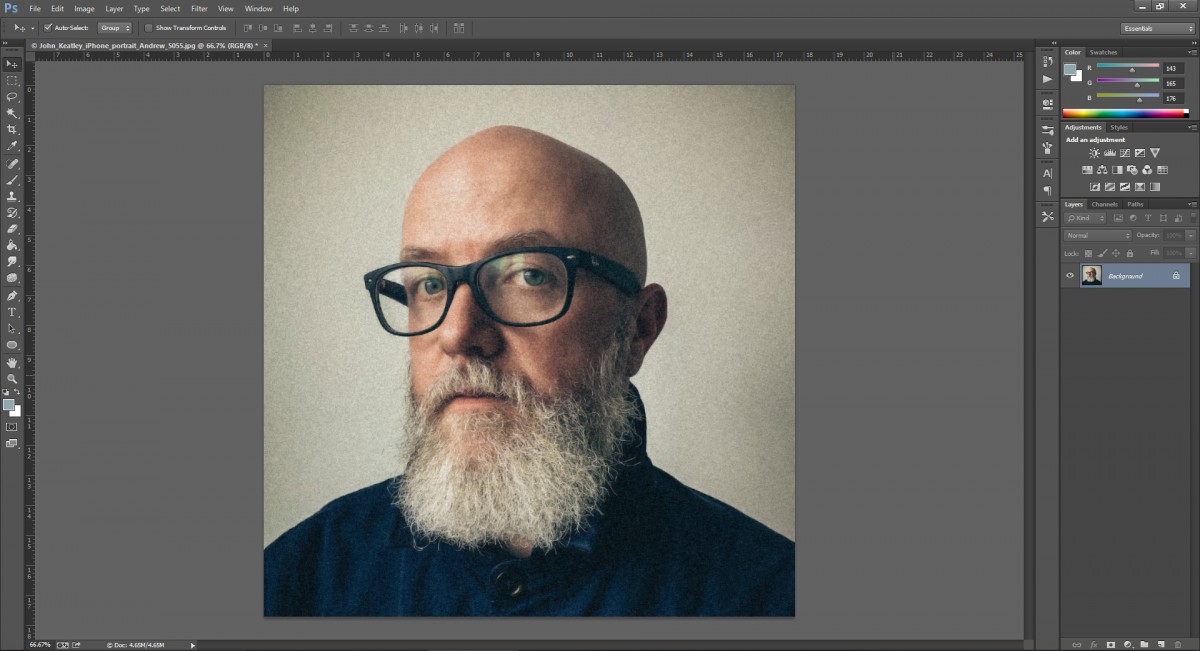
Noise is a phenomenon of poor quality photos with signs of graininess, often occurring when taking photos in adverse environmental conditions such as low light. Noise photos will reduce photo quality and cause lack of aesthetics. However, this can be easily overcome in "a few notes" thanks to noise reduction software in Photoshop.
- Chroma noise: color distortion in pixels. It is often seen in the form of blue and red dots.
- Luminance noise (monochromatic noise): quite similar to noise on film cameras (grain), is a noise phenomenon caused by black noise, white noise and gray noise (no color) like salt and pepper grains dotted on the photo.
- Random Noise: This Noise appears when the shutter speed is too fast, the ISO is high and the Noise is often randomly distributed on the image.
- Fixed Noise: This noise often appears when the ambient temperature is high and the photo capture time is slow.
- Banding Noise: This Noise often appears when the photographer increases the brightness in dark areas. At that time, Noise will appear simultaneously with stripes. Banding Noise will depend a lot on the sensor manufacturing technology of the manufacturers.
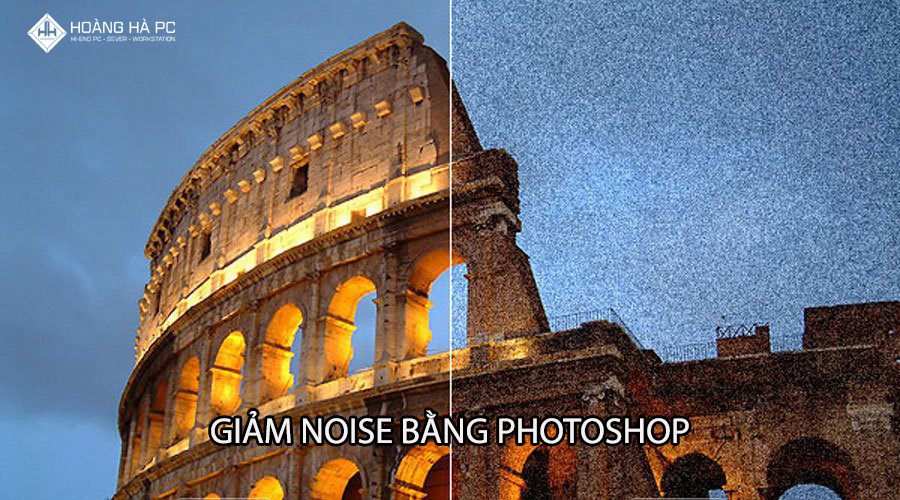
Why Does The Image Have A Lot Of Noise?
- Camera sensor technology
- ISO, exposure time too long.
In addition, the cause of Noise phenomenon can also be due to abnormal environmental temperature or because your camera device has been used for a long time.
If the ISO is adjusted low, the film or sensor will not be very sensitive to light, and the photographer will need to open the lens aperture to let more light into the sensor, or adjust the shutter speed to provide more light for a longer period of time.
On the contrary, if you abuse the ISO index too high, although you can take pictures with less light in a short time. However, when adjusting the ISO index too high, your photos will appear Noise. The higher the ISO, the more Noise is likely to appear. To remove noise with Photoshop in just a moment, let's learn the next content.
How to Remove Noise in Photoshop in Just One Minute
To be able to remove noise with photoshop in the shortest time, you can apply Among the following two methods:
Noise reduction with Lab color system
Step 1: Open Photoshop and select the image that needs noise reduction by clicking File -> Open or dragging and dropping the image into the software.
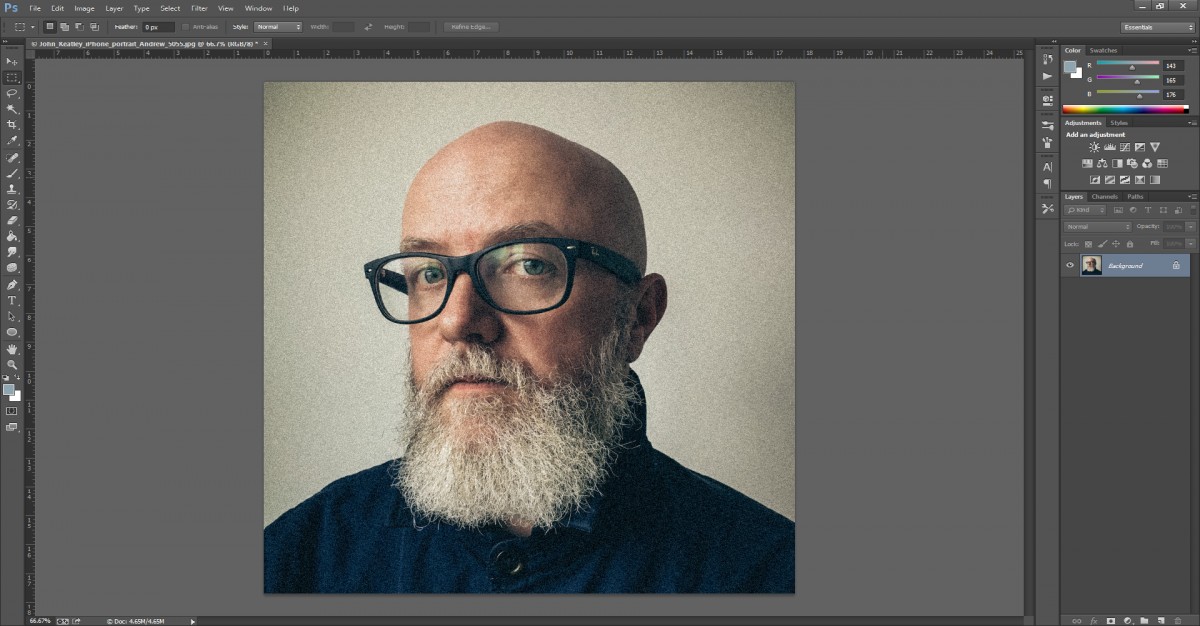
Step 2: Convert the image back to Lab Color system ( Image > Mode > Lab Color ).
Note: If you have more than one Layer, Photoshop will ask you if you want to change to Flatten image ? With this option, all layers will be merged into one background. So if you just need to reduce the Noise of the image, click on the Don't flatten option.
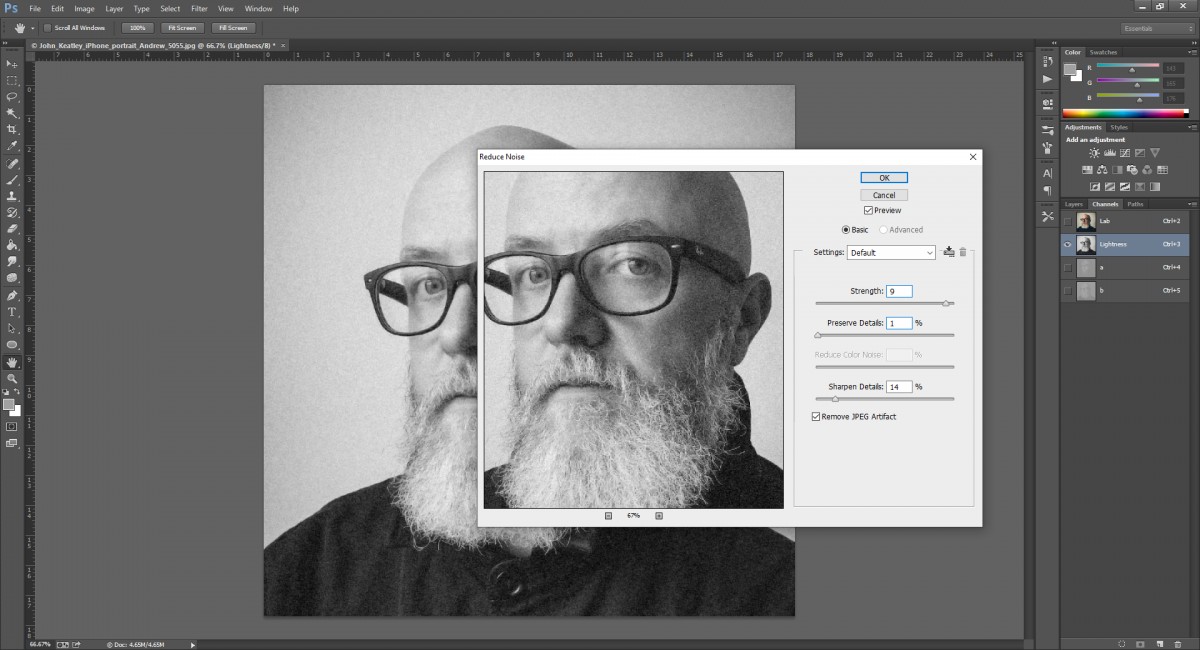
Step 3: Open the Channel tab next to the Layer tab. Then select Lightness and follow the steps below.
To make the image smoother, go to Filter > Noise > Despeckle .
At Channel Lightness, continue to select Filter > Noise > Reduce Noise then adjust the parameters (try changing different parameters to see the different effects it brings).
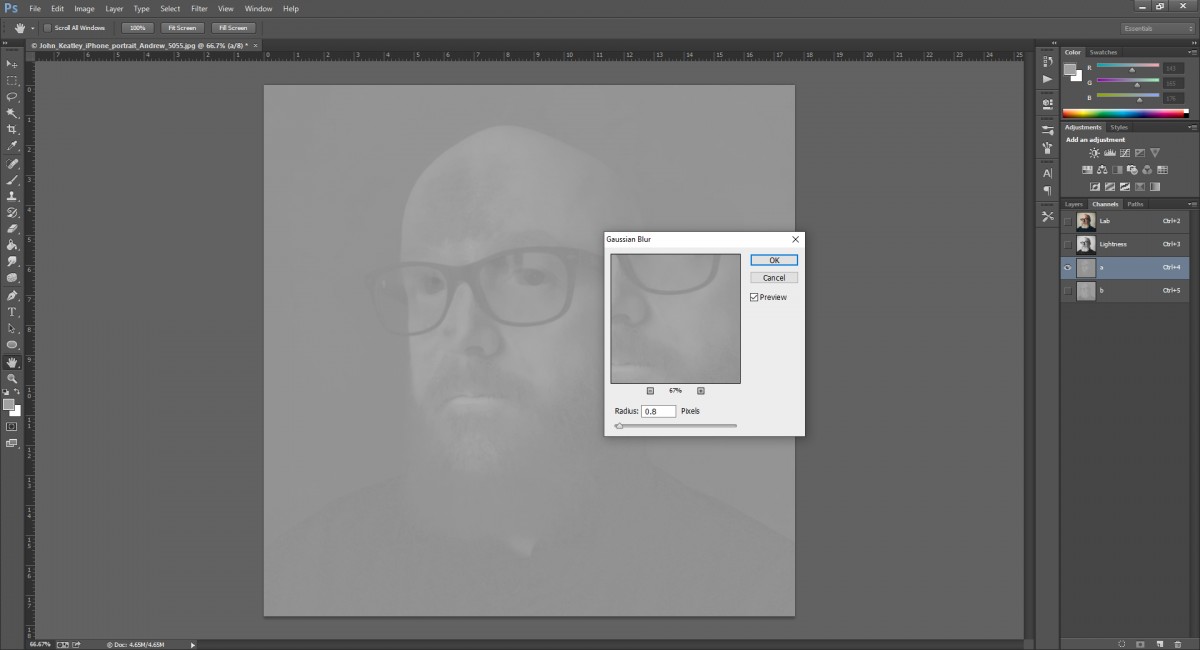
Next, go to Channel a and select Filter > Blur > Gaussian Blur . Adjust the Radius parameter to fit (usually around 0.5 - 1 pixel). Note: Don't adjust the parameter too high, your image will easily be blurred.
Step 4: Finally, return to the Layer tab. Then continue to switch to the RGB Color system and admire the results after removing Noise.
Noise reduction with Noiseware Plugin
Step 1: If you have installed the Noiseware Plugin , you should start at step 4. If you do not have the Noiseware Plugin , download it from the Home page. Then launch the *. exe file you just downloaded. Select Next and I Agree to go to the Choose install location step.
Step 2: Select Browse > go to the Photoshop installation folder. Select Next to continue.
Step 3: Select Install to install Noiseware Plugin into Photoshop.
Step 4: After successfully installing the Noiseware Plugin . Launch Photoshop and select the image that needs Noise removal to start.
Step 5: Go to Filter > Imagenomic > select the newly installed Noiseware tool.
Step 6: When the License Agreement dialog box opens. Click Accept to continue.
Step 7: In the About dialog box, select Install License and then enter the copyright information if registered. Or click OK to start the trial (15 days).
Step 8: In the main interface of the Noiseware Plugin . Click and select the Preset that suits the photo. Adjust the parameters at Noise Level and Noise Reduction to process Noise reduction. Then click OK to complete the Noise reduction process.
In addition, you can refer to the configurations below, a minimum configuration that allows you to perform photoshop smoothly.
Configuration for Designer: HHPC GAMING - INTEL CORE i3 10100 | RAM 16G | GTX 1050Ti
➤ MAINBOARD: GIGABYTE H410M-H ➤ CPU: INTEL CORE i3 10100 up to 4.3G | 4 CORE | 8 THREAD ➤ DESIGN: JONSBO CR-1000 RGB ➤ RAM: COLORFUL BATTLE AX 16GB BUS 3000 DDR4 (1x16GB) ➤ VGA: NVIDIA GTX 1050Ti 4GB GDDR5 ➤ SSD: GIGABYTE SSD 240G SATA III ➤ HDD: YOUR OPTION ACCORDING TO NEED ➤ SOURCE: COOLERMASTER PC700 700W ➤ CASE: JETEK KAMADO (NO FANS)
Although there are many other solutions that can remove noise using photoshop instead of the two methods above as well as many other tools. However, it will be too long to explain everything, will do the next article soon so you have more ways.
FAQ About Noise
What is Noise?
The higher the ISO, the more Noise is likely to appear
Why is Noise important?
In addition, you can refer to the configurations below, a minimum configuration that allows you to perform photoshop smoothly
How can you use or manage Noise effectively?
So if you just need to reduce the Noise of the image, click on the Don't flatten option
Related Articles
 Instructions on How to Remove Noise in Photoshop5 minutes read
 How to Remove Noise from Video on Android (Free)6 minutes read
 Instructions on How to Remove Noise in Video4 minutes read
 NOISE & Pixelate Filter Group1 minutes read
 6 AI Tools Help Remove Noise During audio/video Recording6 minutes read
 How to Merge Multiple Photos into One Frame in Photoshop7 minutes read
Reader Comments 0
Sign in with email or Google to join the discussion.