How to Turn an Old Laptop into a Plex Media Server
An old laptop doesn't have to sit in a drawer collecting dust. It can still serve a useful purpose as a Plex Media Server. But does Plex run better on Windows or Linux, and which should you use for your Plex server?.
An old laptop doesn't have to sit in a drawer collecting dust. It can still serve a useful purpose as a Plex Media Server. But does Plex run better on Windows or Linux, and which should you use for your Plex server?
Tip : A word of advice before you proceed. If your media files are scattered all over the place, it might be a good idea to do a little homework and prepare them in advance. You can do this at any time, but it's easier to do it before you start the setup wizard. This article will cover some of the basics, but you can find comprehensive instructions on the Plex Media support pages .
- The Best Devices to Make a Plex Media Server
Install Plex Media Server on Windows and Linux
Plex Media Server is an incredibly versatile service. It can act as a hub for your streaming services, stream movies and shows, and allow you to access your own media from any location. For this project, let's keep things simple from the start and just set it up as a home media server. The Plex Media Server setup process is nearly identical for both operating systems. Plex Media Server doesn't install a fancy GUI application. It uses a browser interface to set up your server, so other than downloading and installing, the steps are the same.

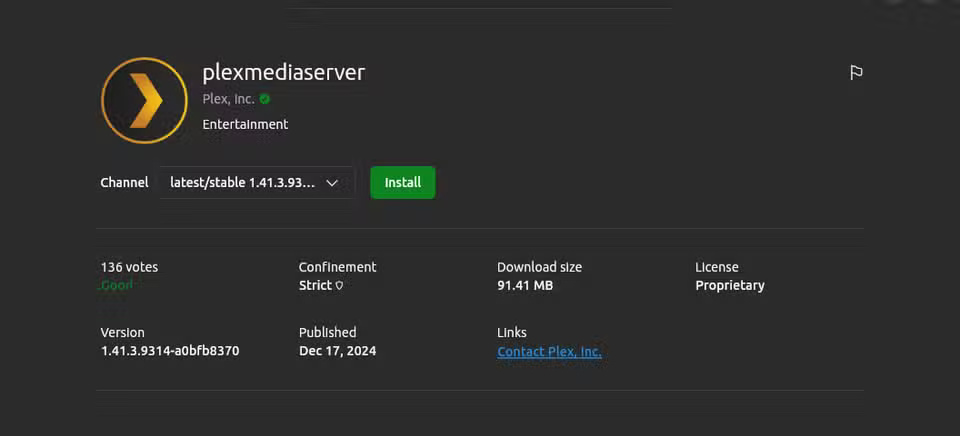
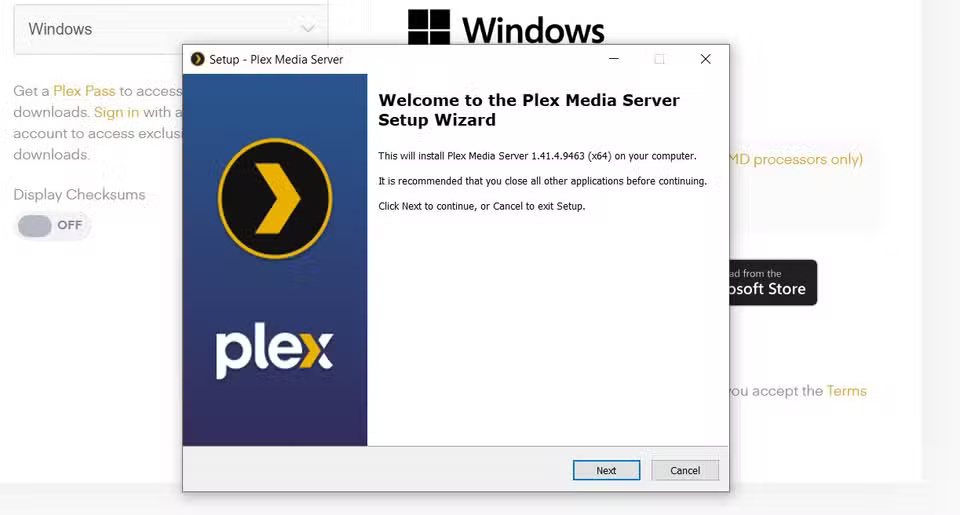
Download the Plex app for Windows. There's a Linux version in the Ubuntu App Center (though it's also available on the Plex website along with other media server installation options). Installing Ubuntu is simple and only takes a few seconds, and installing Windows is no problem either.
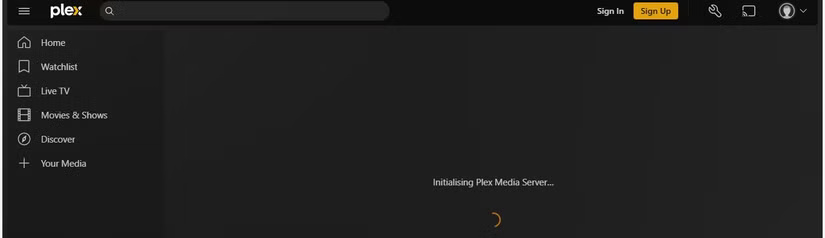
From this point on, the setup steps apply to both operating systems. Once the Plex Media Server application is installed, Plex will open in a browser window to allow you to continue the setup process.
If this doesn't happen automatically, you'll need to intervene a little:
- Windows users need to find the Plex Media icon in the Windows system tray and right-click on it. Plex Media Server will now open in your default browser.
- Ubuntu users can find a similar process by selecting the Show Apps option in the Ubuntu Dock (sidebar) and launching the application. This will launch Plex in your chosen browser.
Assuming everything went as planned, you should now see the following screen:

There's just one thing to note here: The wording is a bit vague, specifically saying 'Plex Media Server wants to sign in to your Plex account.' At this point, most new users won't have an account. It does say 'By signing up or continuing' below, but that could be clearer. Either way, you can use a different email for each setup so you can set up two servers, and the process only takes a few seconds. You'll need to reply to the activation email to complete the registration process.
After setting up the account, the next step is to set up the media server on both laptops.
Preparing to Set Up Plex Media Server on Windows and Linux
Once you have your account set up, the next step is to create your server and set up your media library. Without organizing your media files from the start, your library will quickly become disorganized. To avoid this and get started setting up your server, here's what you should do:
- Use a clear folder structure : Organize your media into separate folders (e.g. Movies, TV Shows, Music, Photos) to make Plex's scanning process smoother.
- Follow naming conventions : Name files properly (e.g. MovieTitle (Year).ext for movies, ShowTitle/Season 01/ShowTitle S01E01.ext for TV shows). Plex recommends that you do so.
- Remove duplicate and unwanted files : Clean up duplicate or unnecessary files to avoid clutter and speed up Plex's library indexing process.
If this sounds like overkill, don't worry; you can change, add, or remove libraries at any time. Regardless of how organized your media files are, the Plex setup wizard will walk you through setting up your Plex Media server and library. There are also plenty of apps that can help you organize your Plex library.
Setting Up Plex Media Server on Windows and Linux
The first step is to name your server. You can name it anything you like, but it's best to give it something memorable. Use different names for your Windows and Linux servers to help differentiate them. But if you're just setting up one server, you can pick a cool, memorable name.
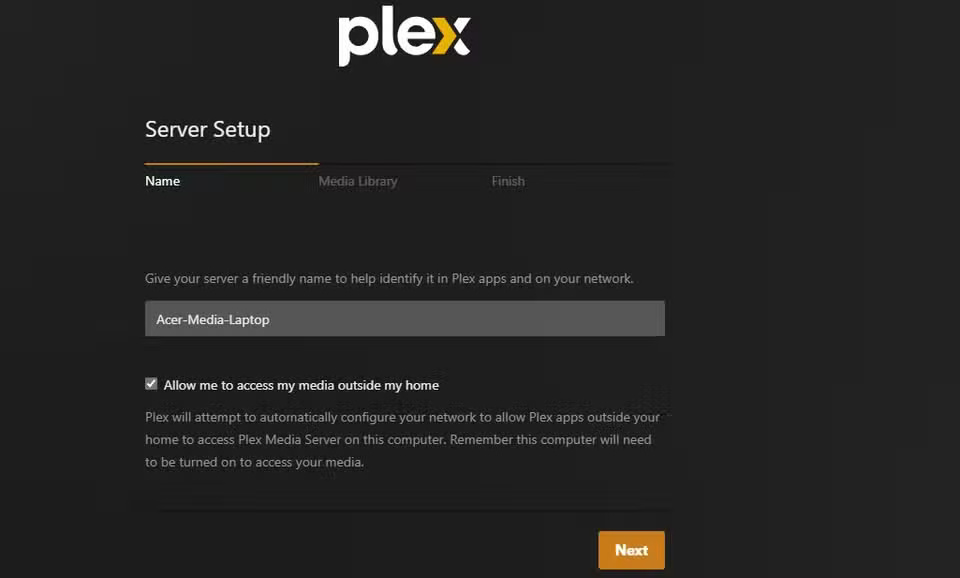
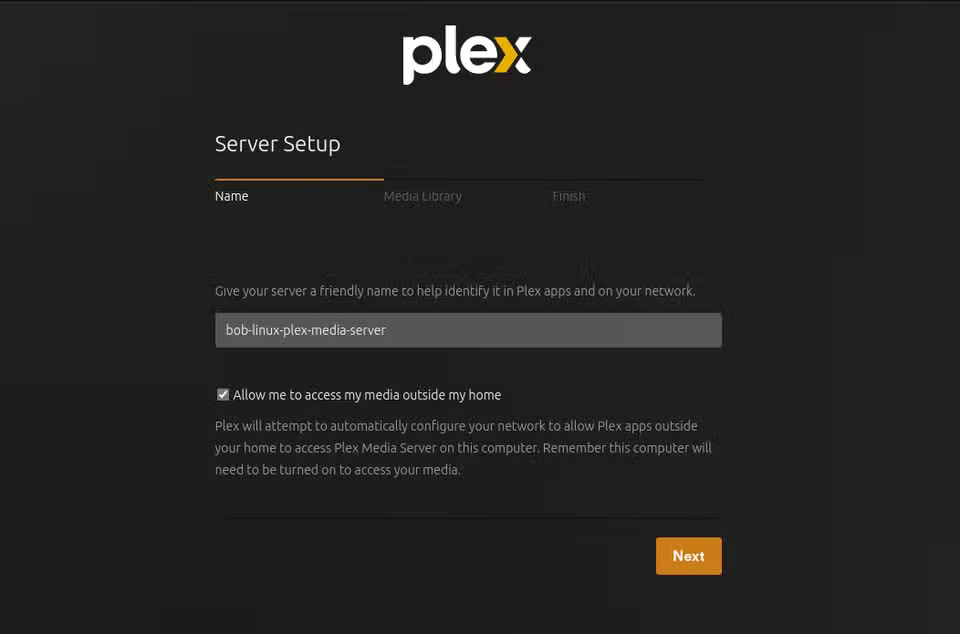
By choosing descriptive names for each server, it is possible to avoid confusing one server with another. This may be more important when you are running multiple servers, but it is always a good practice.
Finally, before moving on to library settings, choose the option to share your watch history.
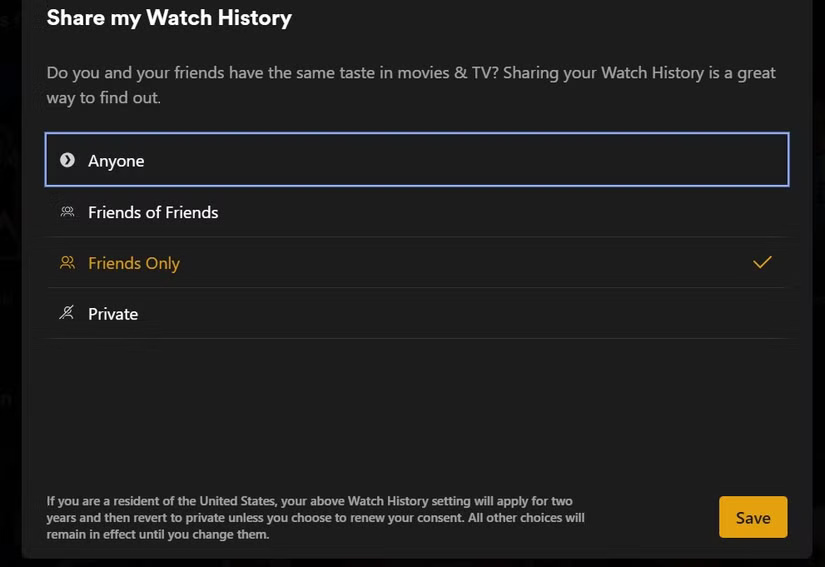
The choice here is a matter of preference. However, if you have any doubts or concerns and want to make sure your Plex server is secure, then private is the right choice. You can change this option at any time in the settings. It's basically just another activation process and is mandatory.
Set up Plex media library
Now you can start setting up your media library. The Plex library setup process will automatically start with the Plex Media Setup Wizard. However, if it doesn't work or you want to make changes later, follow the steps below:
- Click on the account icon located at the top right of the page and select Account Settings .
- On the left side of the page, scroll through the settings until you see Manage .
- Click Libraries .
- Select Add Library to add a new library or hover over an existing library and select Edit Library to change an existing library.
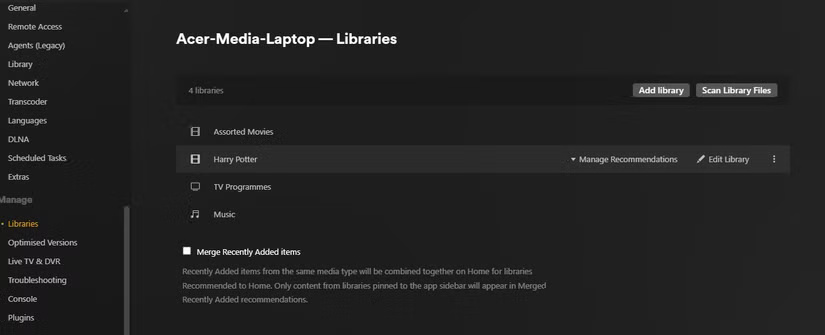
The image below shows the Manage Library screen on a Windows server.
Whether you use the wizard or the Add Library option , the following screens are identical on Linux and Windows. This is where you can start setting up your library. In this case, I won't add too much at this point to avoid getting bogged down in the details. If you're not sure, you can change the settings later in the project.
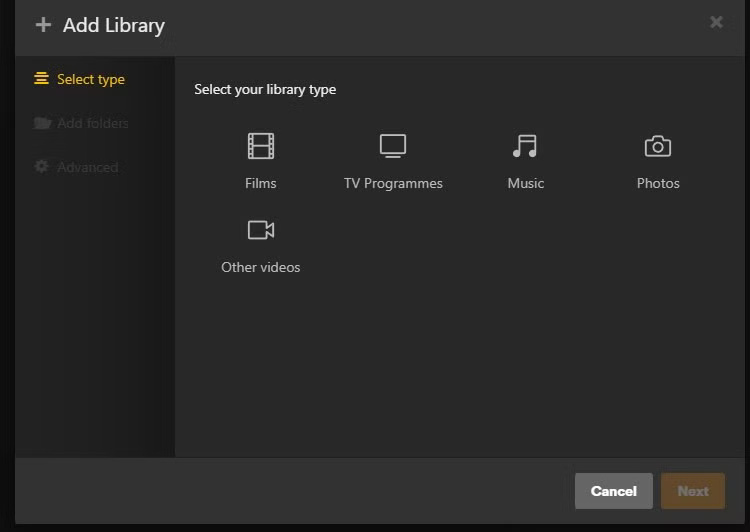
The first screen gives you the option to select your library type. The options are self-explanatory and cover all the usual suspects (movies, TV shows, etc.).
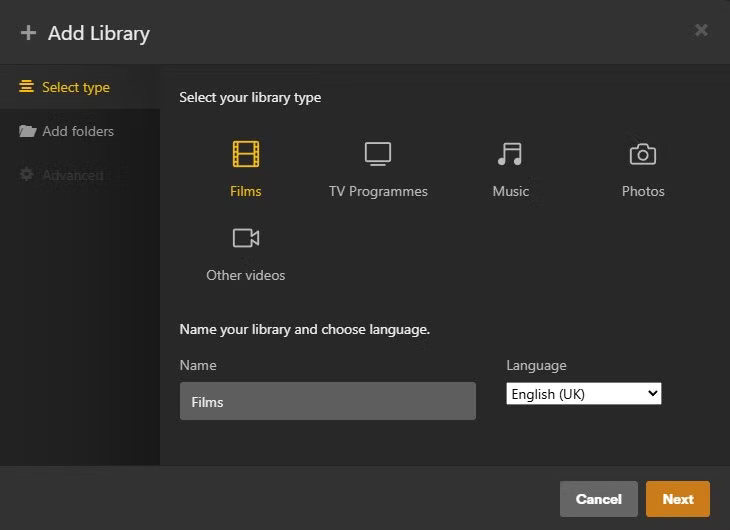
After selecting your library type, the next screen allows you to name that library.
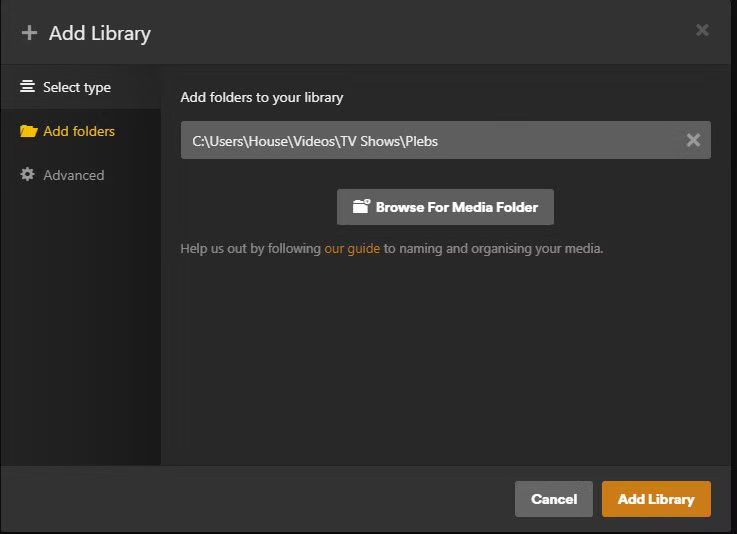
Then all you have to do is select the Add folders option , point to the desired folder, and click Add Library . You can repeat this option if needed.
And that's all there is to it! Now, it's time to test and see if there are any obvious differences between Plex Media Server on Windows and Linux.